Ldap phpldapadmin.conf
rpm -ql openldap
vim /etc/httpd/conf.d/phpldapadmin.conf
Alias /phpldapadmin /usr/share/phpldapadmin/htdocsAlias /ldapadmin /usr/share/phpldapadmin/htdocs<Directory /usr/share/phpldapadmin/htdocs><IfModule mod_authz_core.c># Apache 2.4Require local</IfModule><IfModule !mod_authz_core.c># Apache 2.2Order Deny,Allow#Allow from 192.168.0.0/16#Deny from all#Allow from 127.0.0.1Allow from allAllow from ::1</IfModule></Directory>
openLdap(linux 版本)安装及总结
转载
[涛小涛](https://me.csdn.net/liuying1802028915)发布于2018-09-28 12:52:44阅读数 3283[收藏]()<br />[展开]()<br />这段时间需要做一个openLdap的需求,前期简单学习了一下Ldap以及openLdap,下面是安装openLdap的过程<br />首先我是按照前辈留下的博文进行安装的,参考如下:<br />[https://www.cnblogs.com/linuxws/p/9084455.html](https://www.cnblogs.com/linuxws/p/9084455.html)<br />https://blog.csdn.net/computer1024/article/details/78172785<br />感谢这两位前辈,但是在安装过程中也遇到了一些坑,这里做一个记录.<br />前期踩过的坑:<br />刚开始我是使用centos 7.5 64位进行安装的,前面安装都没有问题,但是最后安装完phpldapadmin服务后,访问不了,经过多次尝试,都没有成功,后来索性换了系统,我才用了 centos 6.5 64位<br /> <br />一.环境准备<br />1. 腾讯云环境 centos6.5 64位<br />2. 关闭防火墙<br />博文中用的是这个命令:
systemctl stop firewalld.service systemctl disable firewalld.service 但是如果是centos 7以下的系统 systemctl 命令不好使了,所以使用下面的命令
servcie iptables stop ``--临时关闭防火墙
| chkconfig iptables ``off --永久关闭防火墙
|
| —- |
二.OPENLDAP服务搭建
1、安装LDAP服务器和客户端,migrationtools工具包
yum install -y openldap-servers openldap-clients migrationtools
2、设置openldap管理员密码
1. slappasswd2.3. 然后根据提示输入密码:4. New password: 1234565. Re-enter new password: 1234566.7. 会返回加密的密码字符串,保存好这个字符串8. {SSHA}f13zZnx/b4LQ/ErM+Rf9VSVEJqIE7yHM9.10. ---------------------11.12. 本文来自 Justin_Chia 的CSDN 博客 ,全文地址请点击:https://blog.csdn.net/computer1024/article/details/78172785?utm_source=copy
3、更改openldap配置
查看安装了哪些文件(如果熟悉目录结构可以略过)
1. rpm -ql openldap2. rpm -ql openldap-servers
修改配置
博文中是这句:
vim /etc/openldap/slapd.d/cn\=config\/olcDatabase\={2}hdb.ldif
但是我执行的时候发现这个一个空的文件,说明路径应该有问题, vim 命令找不到该文件就会自动创建该文件(这是踩得第一个坑)
然后我是一级目录一级目录的进入的
1. [root@VM_60_154_centos /]# cd /etc/openldap/slapd.d/2. [root@VM_60_154_centos slapd.d]# ll3. total 84. drwxr-x--- 3 ldap ldap 4096 Sep 28 10:46 cn=config5. -rw-r----- 1 ldap ldap 1281 Sep 28 10:41 cn=config.ldif6. [root@VM_60_154_centos slapd.d]# cd cn\=config7. [root@VM_60_154_centos cn=config]# ll8. total 849. drwxr-x--- 2 ldap ldap 4096 Sep 28 10:49 cn=schema10. -rw-r----- 1 ldap ldap 59398 Sep 28 10:41 cn=schema.ldif11. -rw-r----- 1 ldap ldap 663 Sep 28 10:41 olcDatabase={0}config.ldif12. -rw-r----- 1 ldap ldap 596 Sep 28 10:41 olcDatabase={-1}frontend.ldif13. -rw-r----- 1 ldap ldap 692 Sep 28 10:46 olcDatabase={1}monitor.ldif14. -rw-r----- 1 ldap ldap 1338 Sep 28 10:45 olcDatabase={2}bdb.ldif15. [root@VM_60_154_centos cn=config]# vim olcDatabase={2}bdb.ldif
这样就能避免是空文件的问题,接下来
1. 找到olcSuffix,修改为你的dc,如:2. dc=mypaas,dc=com3.4. 下一行olcRootDN, 修改为你的用户名,如:5. cn=Manager,dc=mypaas,dc=com6.7. 在文件末尾添加一行,设置刚才的密码:8. olcRootPW: {SSHA}f13zZnx/b4LQ/ErM+Rf9VSVEJqIE7yHM9.10. ---------------------11.12. 本文来自 Justin_Chia 的CSDN 博客 ,全文地址请点击:https://blog.csdn.net/computer1024/article/details/78172785?utm_source=copy
4、更改监控认证配置
1. vim /etc/openldap/slapd.d/cn\=config\/olcDatabase\={1}monitor.ldif2.3. 修改 olcAccess 中的dn.base=”cn=xxxxxxx”这行为刚才设置的用户名,如:4. dn.base=”cn=Manager,dc=mypaas,dc=com”5.6. ---------------------7.8. 本文来自 Justin_Chia 的CSDN 博客 ,全文地址请点击:https://blog.csdn.net/computer1024/article/details/78172785?utm_source=copy
这一条按照博文中的直接修改就可以了
5、设置DB Cache
1. cp /usr/share/openldap-servers/DB_CONFIG.example /var/lib/ldap/DB_CONFIG2. chown -R ldap:ldap /var/lib/ldap/
6、测试配置文件
1. slaptest -u2. 末尾出现configfile testing successed 说明成功了
这里也没有出现问题,出现 configfile testing successed 说明成功了
7、启动OpenLDAP和开机启动
博文中是这样的命令:
1. systemctl start slapd.service2. systemctl enable slapd.service
因为是centos6.5 系统 systemctl 命令用不了 修改为如下:
1. service slapd status 查看slapd 的状态2. service slapd start 开启slapd 服务3. service slapd enable 设置 slapd 服务开机自启动 这条命令应该有问题,但是对于我的安装没有多大影响,所以没有再查,感兴趣的可以自己查查
8、导入模板
ls /etc/openldap/schema/*.ldif | xargs -I {} sudo ldapadd -Y EXTERNAL -H ldapi:/// -f {}
这里导入模板也没有问题,执行完这句命令后,执行结果为:
1. 导入模板:2.3. [root@VM_60_154_centos cn=config]# ls /etc/openldap/schema/*.ldif | xargs -I {} sudo ldapadd -Y EXTERNAL -H ldapi:/// -f {}4. SASL/EXTERNAL authentication started5. SASL username: gidNumber=0+uidNumber=0,cn=peercred,cn=external,cn=auth6. SASL SSF: 07. adding new entry "cn=collective,cn=schema,cn=config"8.9. SASL/EXTERNAL authentication started10. SASL username: gidNumber=0+uidNumber=0,cn=peercred,cn=external,cn=auth11. SASL SSF: 012. adding new entry "cn=corba,cn=schema,cn=config"13.14. SASL/EXTERNAL authentication started15. SASL username: gidNumber=0+uidNumber=0,cn=peercred,cn=external,cn=auth16. SASL SSF: 017. adding new entry "cn=core,cn=schema,cn=config"18. ldap_add: Other (e.g., implementation specific) error (80)19. additional info: olcAttributeTypes: Duplicate attributeType: "2.5.4.2"20.21. SASL/EXTERNAL authentication started22. SASL username: gidNumber=0+uidNumber=0,cn=peercred,cn=external,cn=auth23. SASL SSF: 024. adding new entry "cn=cosine,cn=schema,cn=config"25.26. SASL/EXTERNAL authentication started27. SASL username: gidNumber=0+uidNumber=0,cn=peercred,cn=external,cn=auth28. SASL SSF: 029. adding new entry "cn=duaconf,cn=schema,cn=config"30.31. SASL/EXTERNAL authentication started32. SASL username: gidNumber=0+uidNumber=0,cn=peercred,cn=external,cn=auth33. SASL SSF: 034. adding new entry "cn=dyngroup,cn=schema,cn=config"35.36. SASL/EXTERNAL authentication started37. SASL username: gidNumber=0+uidNumber=0,cn=peercred,cn=external,cn=auth38. SASL SSF: 039. adding new entry "cn=inetorgperson,cn=schema,cn=config"40.41. SASL/EXTERNAL authentication started42. SASL username: gidNumber=0+uidNumber=0,cn=peercred,cn=external,cn=auth43. SASL SSF: 044. adding new entry "cn=java,cn=schema,cn=config"45.46. SASL/EXTERNAL authentication started47. SASL username: gidNumber=0+uidNumber=0,cn=peercred,cn=external,cn=auth48. SASL SSF: 049. adding new entry "cn=misc,cn=schema,cn=config"50.51. SASL/EXTERNAL authentication started52. SASL username: gidNumber=0+uidNumber=0,cn=peercred,cn=external,cn=auth53. SASL SSF: 054. adding new entry "cn=nis,cn=schema,cn=config"55.56. SASL/EXTERNAL authentication started57. SASL username: gidNumber=0+uidNumber=0,cn=peercred,cn=external,cn=auth58. SASL SSF: 059. adding new entry "cn=openldap,cn=schema,cn=config"60.61. SASL/EXTERNAL authentication started62. SASL username: gidNumber=0+uidNumber=0,cn=peercred,cn=external,cn=auth63. SASL SSF: 064. adding new entry "cn=pmi,cn=schema,cn=config"65.66. SASL/EXTERNAL authentication started67. SASL username: gidNumber=0+uidNumber=0,cn=peercred,cn=external,cn=auth68. SASL SSF: 069. adding new entry "cn=ppolicy,cn=schema,cn=config"
三、安装Web管理服务
1、 安装httpd服务器
yum install httpd -y
按照以上命令进行 Yum安装,没有遇到问题 看到complete 即成功
2、修改配置文件httpd.conf
博文中是这样:
1. vim /etc/httpd/conf/httpd.conf2. 找到AllowOverride一行,修改none为all3. 如果想修改端口号,修改Listen 80一行
我的文件具体如下:
1. <Directory />2. Options FollowSymLinks3. AllowOverride none4. </Directory>5.6. 将以上 none 改为 all7.8. <Directory />9. Options FollowSymLinks10. AllowOverride all11. </Directory>
修改端口,按照上面博文中的即可
3、启动服务,测试页面
博文中的命令如下:
1. systemctl start httpd.service2. systemctl enable httpd.service3.4. curl http://127.0.0.1/
同样,因为是centos 6.5 要换成如下命令
1. service httpd status 查看状态2. service httpd start 开启服务3. service httpd enable 设置开机自启动,这句命令可能有问题,因为对我没有影响,我就没管4.5.6. curl http://127.0.0.1/ 看一下通不通
4、安装phpldapadmin
博文中如下:
1. yum install phpldapadmin2.3. (如果找不到软件包,重新设置一下yum源)4. yum localinstall http://rpms.famillecollet.com/enterprise/remi-release-7.rpm
我直接执行 yum install phpldapadmin 需要询问的时候 y 即可
5、修改配置文件
按照博文中的进行修改没有毛病
先找到该文件
vim /etc/phpldapadmin/config.php
找到如下语句并取消下面几行的注释:(要仔细哦)
1. $servers->setValue(‘server’,’host’,’127.0.0.1’);2. $servers->setValue(‘server’,’port’,389);3. $servers->setValue(‘server’,’base’,array(‘dc=mypaas,dc=com’)); # array里加上openldap配置文件中设置的olcSuffix4. $servers->setValue(‘login’,’auth_type’,’session’);5. $servers->setValue(‘login’,’attr’,’dn’);
把这一行注释掉
#$servers->setValue(‘login’,’attr’,’uid’);
6、修改访问配置文件,允许任意ip访问
这里我直接贴我的吧
找到该配置文件:
vim /etc/httpd/conf.d/phpldapadmin.conf
我的文件如下:
1. <Directory /usr/share/phpldapadmin/htdocs>2. <IfModule mod_authz_core.c>3. # Apache 2.44. Require local5. Require ip 192.168.56. </IfModule>7. <IfModule !mod_authz_core.c>8. # Apache 2.29. Order Deny,Allow10. # Deny from all11. # Allow from 127.0.0.112. Allow from all13. Allow from ::114. </IfModule>15. </Directory>
192.168.5 是我的ip网段
7、创建基础目录
在/etc/openldap目录下添加base.ldif文件
cd /etc/openldap/
vim base.ldif
1. dn: dc=mypaas,dc=com2. o: ldap3. objectclass: dcObject4. objectclass: organization5. dc: mypaas
1. 创建1个管理员账号
先到根目录下:
cd /
vim test.ldif
1. dn: dc=mypaas,dc=com2. objectclass: dcObject3. objectclass: organization4. o: SYS.Inc5. dc: mypaas6.7. dn: cn=Manager,dc=mypaas,dc=com8. objectclass: organizationalRole9. cn: Manager
增加:
ldapadd -x -D "cn=Manager,dc=mypaas,dc=com" -W -f test.ldif
验证
ldapsearch -x -b 'dc=mypaas,dc=com' '(objectClass=*)'
2. 创建1个具有部门属性的员工
vim test2.ldif
1. dn: ou=it,dc=mypaas,dc=com2. ou: it3. objectClass: organizationalUnit4.5. dn: cn=test1,ou=it,dc=mypaas,dc=com6. ou: it7. cn: test18. sn: t19. objectClass: inetOrgPerson10. objectClass: organizationalPerson
这里其实是先创建1个部门”it”,再在”it”部门创建了1个员工,实际上是两条命令。
插入数据库
ldapadd -x -D "cn=Manager,dc=mypaas,dc=com" -W -f test2.ldif
验证
ldapsearch -x -b 'dc=mypaas,dc=com' '(objectClass=*)'
8、重启httpd服务
service httpd restart
9、访问web管理端
1. 访问 http://ip/phpldapadmin2. 我的ip是 139.199.30.176 端口也没改过 还是803. 所以是:http://139.199.30.176/phpldapadmin4. 登陆用户名:cn=Manager,dc=mypaas,dc=com
之前用centos 7.5 64位安装的时候 访问 http://139.199.30.176/phpldapadmin 有问题 说我没有权限,那个截图我忘截了,换成centos6.4 可以了 勉强先这样吧
访问 http://139.199.30.176/phpldapadmin 后
用户名:cn=Manager,dc=mypaas,dc=com
密码:123456 (之前第二步中的第二小步设置的)
登陆成功后: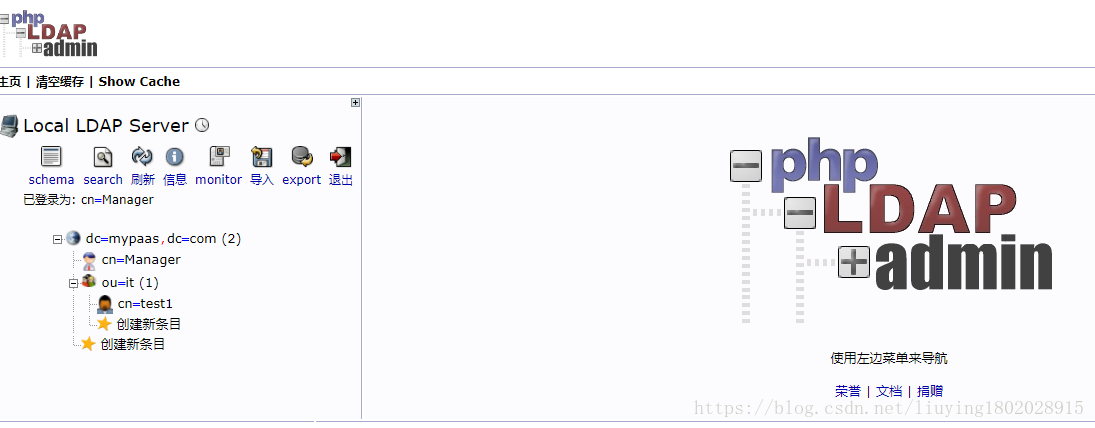
记录先做到这里,方便自己,也方便他人,如果有什么问题,可以多多交流
不积跬步,无以至千里
不积小流,无以成江海

若有收获,就点个赞吧
0 人点赞
