h 函数
前面我们讲解过使用 diff 算法,VNode和VDOM的改变。Vue在生成真实的DOM之前,会将我们的节点转换成VNode,而VNode组合在一起形成一颗树结构,就是虚拟DOM(VDOM);
事实上,我们之前编写的 template 中的HTML 最终也是使用渲染函数生成对应的 VNode;那么,如果想充分的利用 JavaScript 的编程能力,我们可以自己来编写渲染函数,生成对应的VNode;
render()函数中返回一个 h()函数,**h()**函数就是一个用于创建 vnode 的函数,其实更准备的命名是 createVNode() 函数,但是为了简便在 Vue中将之简化为 h() 函数。
h()函数它接受三个参数:
- tag
- props
- children
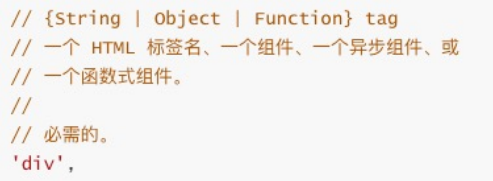
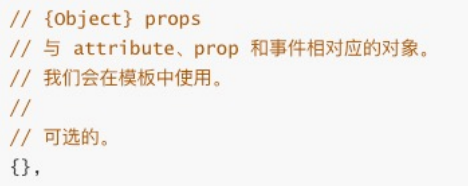
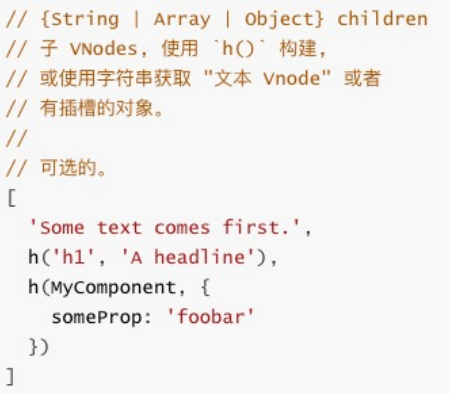
如果没有 props,那么通常可以将 children 作为第二个参数传入;未避免产生歧义,可以将 null 作为第二个参数传入,将 children 作为第三个参数传入。
<!-- 不需要 template,直接渲染出 <h2 class="title">Hello Render</h2> -->
<script>
  import { h } from 'vue';

  export default {
    render() {
      return h("h2", {class: "title"}, "Hello Render")
    }
  }
</script>
h 函数的基本使用
h 函数在 render 函数中,h 函数可以在两个地方使用:
- options api 中 render 函数选项
setup 函数选项中(setup本身需要是一个函数类型,函数再返回h函数创建的VNode);
<script>
import { h } from 'vue';

export default {
  data() {
    return {
      counter: 0
    }
  },
  render() {
    return h("div", {class: "app"}, [
      h("h2", null, `当前计数: ${this.counter}`), // render 中有 this 可以访问 data
      h("button", {
        onClick: () => this.counter++
      }, "+1"),
      h("button", {
        onClick: () => this.counter--
      }, "-1"),
    ])
  }
}
</script>
render 函数可以在 setup 函数外以 render 选项使用,也能在 setup 函数中使用。
<script>
import { ref, h } from 'vue';

export default {
  setup() {
    const counter = ref(0);

    return () => {
      return h("div", {class: "app"}, [
        h("h2", null, `当前计数: ${counter.value}`),
        h("button", {
          onClick: () => counter.value++
        }, "+1"),
        h("button", {
          onClick: () => counter.value--
        }, "-1"),
      ])
    }
  }
}
</script>
h 函数中插槽的使用
<script>
import { h } from 'vue';
import HelloWorld from './HelloWorld.vue';

export default {
  render() {
    //
    return h("div", null, [
      // 子元素为组件,插槽为组件的子元素
      h(HelloWorld, null, {
        // 指定默认插槽,渲染插入插槽的 dom 元素
        default: props => h("span", null, `app传入到HelloWorld中的内容: ${props.name}`)
      })
    ])
  }
}
</script>
<script> import { h } from "vue"; export default { render() { return h("div", null, [ h("h2", null, "Hello World"), // 设置插槽默认值 this.$slots.default ? this.$slots.default({name: "coderwhy"}): h("span", null, "我是HelloWorld的插槽默认值") ]) } } </script>jsx
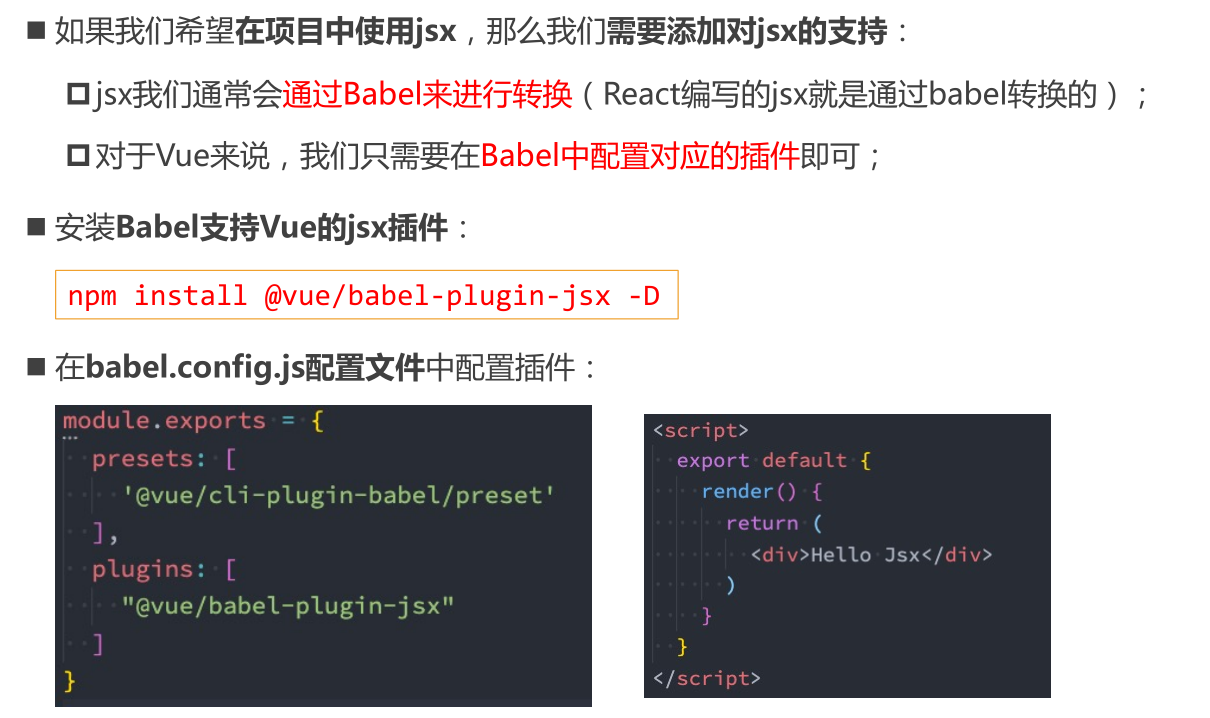
render 函数可以直接返会模板元素,比 h 函数写起来方便高效。但 babel 最终还是将 jsx 转成 h 函数的形式来创建 VNode 对象。<script> export default { data() { return { counter: 0 } }, render() { const increment = () => this.counter++; const decrement = () => this.counter--; return ( <div> <h2>当前计数: {this.counter}</h2> <button onClick={increment}>+1</button> <button onClick={decrement}>-1</button> </div> ) } } </script>自定义指令
 ```html
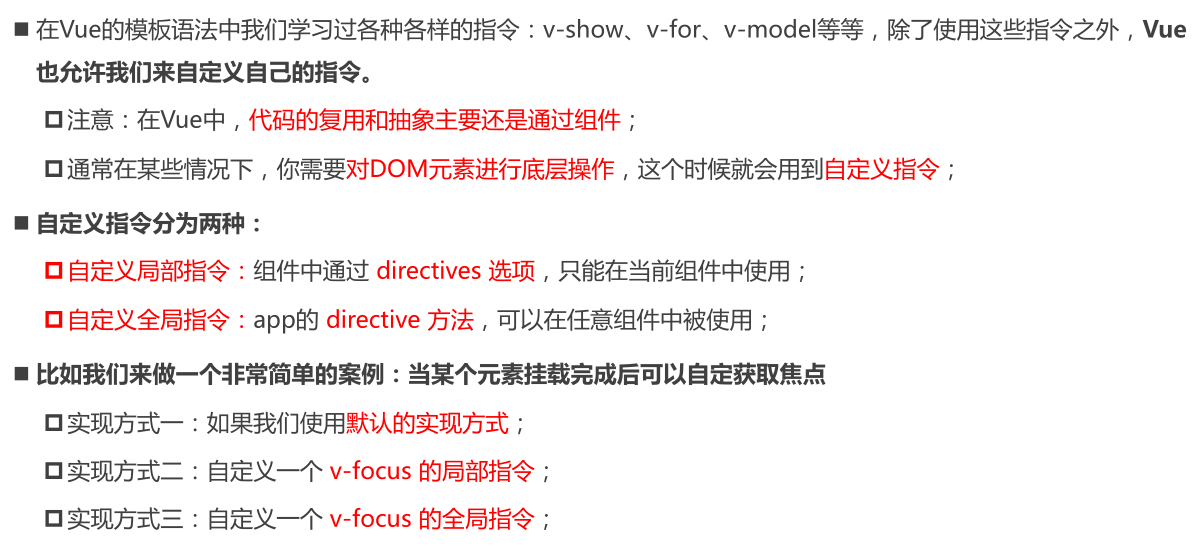
一个组件中如果存在多个输入框,为了让输入框获取焦点就需要每个输入框都要来一遍上述代码,很不方便。所以对于 dom 的底层重复操作可以设置自定义指令来加快效率。<br />自定义一个 v-focus 的局部指令

- 我们只需要在组件选项中使用 `directives` 即可;
- 它是一个对象,在对象中编写我们自定义指令的名称(注意:这里不需要加v-);自定义指令有一个生命周期,是在组件挂载后调用的 mounted,我们可以在其中完成操作;
```html
<template>
  <div>
    <input type="text" v-focus>
  </div>
</template>

<script>
  export default {
    directives: {
      // 定义局部指令 v-focus
      focus: {
        // el参数为指令绑定的 dom 元素
        mounted(el) {
          el.focus()
        },
      }
    }

  }
</script>
更多的情况下是利用app.directive()方法定义全局的指令,提高自定义指令应用面。
import { createApp } from 'vue'
import App from './App.vue'

const app = createApp(App)

app.directive('focus', {
  mounted(el) {
    el.focus()
  }
})

app.mount('#app')
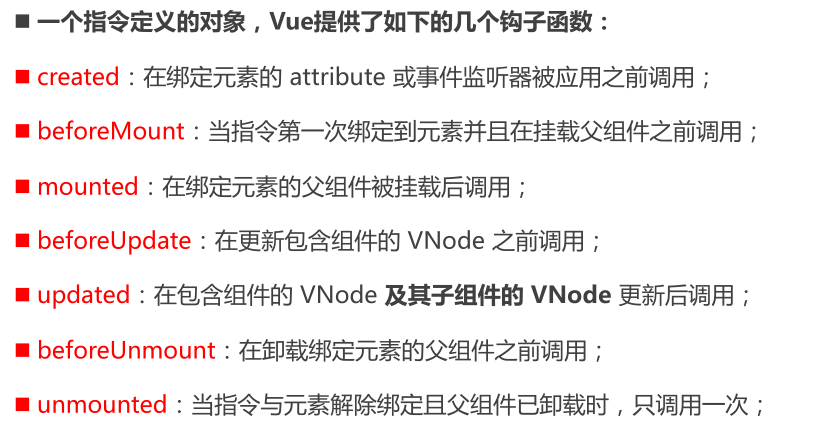
自定义指令的生命周期
自定义指令的参数和修饰符
我们可以在指令上定义参数和修饰符,比如:
message 就是指令 v-hhh 的参数;传入指令的值为 666;指令修饰符为 aaa 和 bbb。
注意指令不是调用链的关系,是指同时发挥作用。
<div v-hhh:message.aaa.bbb="'666'"></div>周期函数中其实有 4 个参数,其中 bindings 可以用来获取参数和修饰符。
el:指令绑定的 dom 元素
- bindings:一个对象,保存了指令参数和修饰符
- VNode:当前虚拟节点
- preVNode:上一个虚拟节点
```html
hhh

- bingings.arg 是参数
- bingings.modifiers 是一个对象,指令修饰符是否发挥作用通过布尔值来控制,就和v-bind 绑定多个 class 发挥作用一样
- bingdings.value 就是传递给指令的值
<a name="sSTUT"></a>
## 自定义指令案例:时间戳的显示需求
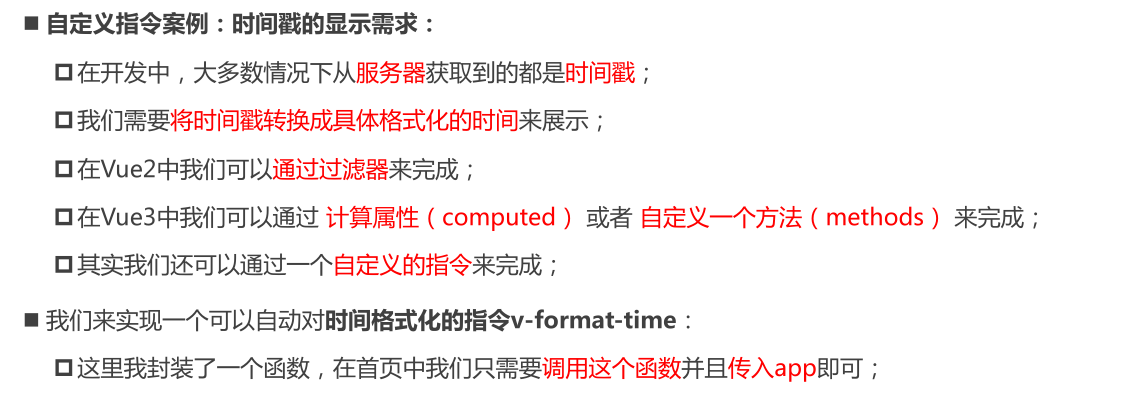<br />为了更好的管理自定义指令,可以将他们封装成一个模块。新建一个 directives 文件夹,设置文件 index.js 作为对外出口,在里面对自定义指令进行批量按需注册,这样对于 main.js 只需要导入注册自定义指令的函数就行,屏蔽了细节,具体注册什么指令在 index.js 中进行。自定义指令的具体实现则在一个个独立的 js 文件中。<br />这样方式很像 Java 中,调用者——接口——接口实现 的方式。
```javascript
import { createApp } from 'vue'
import App from './App.vue'
import registerDirectives from './directives'
const app = createApp(App);
// main.js 只需要使用暴露出的指令注册函数就行
registerDirectives(app);
app.mount('#app');
import registerFormatTime from './format-time';
// 自定义指令 1 号
// 自定义指令 2 号
export default function registerDirectives(app) {
  registerFormatTime(app);
  // 1 号注册
  // 2 号暂不注册
}
import dayjs from 'dayjs';

export default function(app) {
  app.directive("format-time", {
    // 在组件创建之前,一般对数据进行初始化处理,比如指令参数初始化处理
    created(el, bindings) {
      // 指令参数是否指定时间戳格式化的方式,给 bindings 动态添加属性的方式
      bindings.formatString = "YYYY-MM-DD HH:mm:ss";
      if (bindings.value) {
        bindings.formatString = bindings.value;
      }
    },
    mounted(el, bindings) {
      // 获取元素文本内容
      const textContent = el.textContent;
      // 文本内容为字符串,转成数字
      let timestamp = parseInt(textContent);
      // 时间戳可能以 ms 或 s 为单位,就有 13 位或者 10 位
      if (textContent.length === 10) {
        timestamp = timestamp * 1000
      }
      // 利用 day.js 进行格式化
      el.textContent = dayjs(timestamp).format(bindings.formatString);
    }
  })
}
Teleport
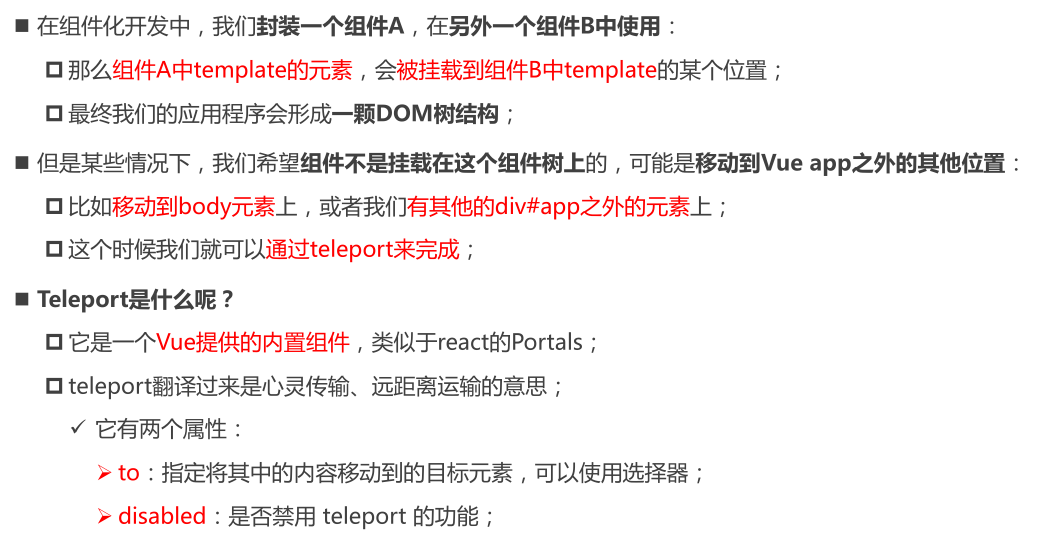
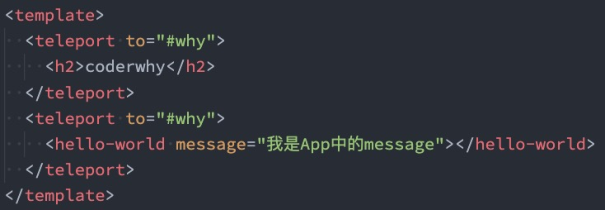
我们现在编写的组件都会渲染到根组件,然后一起插入到div #app中,而 teleport可以让我们自定义元素或者组件的渲染位置。
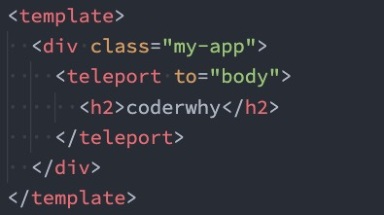
- 自定义普通元素渲染位置:

- 自定义组件渲染位置:

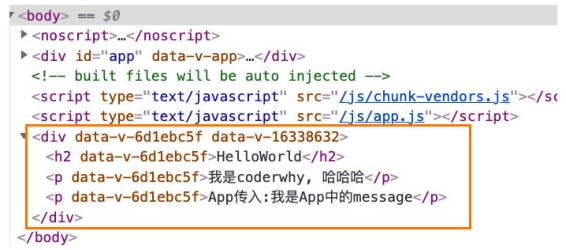
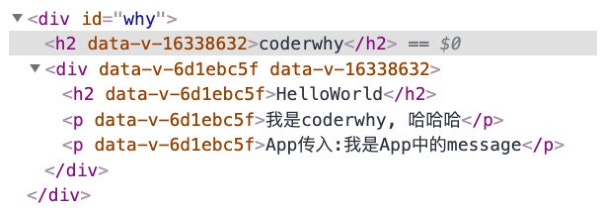
- 如果我们将多个teleport应用到同一个目标上(to的值相同),那么这些目标会进行合并:
Vue 插件
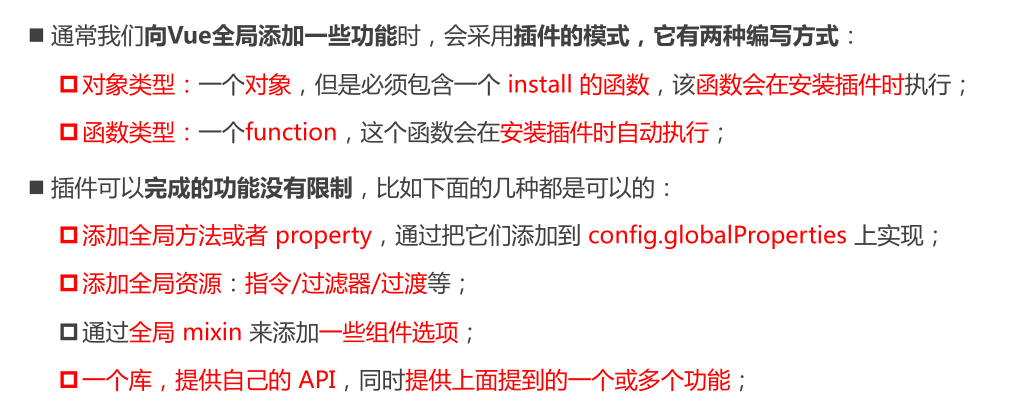
插件的编写方式
对象类型的写法
export default {
  install(app) {
    // 定义全局属性,golbalProperties 是个对象,这里是动态添加属性
    // 一般全局属性都以 $ 开头,我们也遵循这个标准
    app.config.globalProperties.$name = "zs"
  }
}
import { createApp } from 'vue'
import App from './App.vue'

import pluginObject from './plugins/plugins_object'

const app = createApp(App);

// 使用插件:它其实执行的是 install(app)
app.use(pluginObject);

app.mount('#app');
<template>
  <div>
    <button @click="changeName">change</button>
  </div>
</template>

<script>
  // 导入获取当前组件实例的方法
  import { getCurrentInstance } from "vue";
  export default {
    // options api 中可以直接使用 this 访问全局属性
    methods: {
      changeName() {
        this.$name = 'ls'
        // console.log(this.$name); // ls
      }
    },
    // composition api 中访问全局属性要麻烦一点
    setup() {
      const instance = getCurrentInstance();
      // 通过当前实例,获取app 上下文的配置,再从中获取全局属性
      console.log(instance.appContext.config.globalProperties.$name); // zs
    }
  }
</script>
函数类型的写法
export default function(app) {
  console.log(app);
}

// main.js 导入该模块后,app.use(),实际执行的是这个 function(app)
