介绍
KubeSphere 除了可以在云上安装,还可以在裸机上安装。由于在裸机上没有虚拟层,基础设施的开销大大降低,从而可以给部署的应用提供更多的计算和存储资源,硬件效率得到提高。以下示例介绍如何在裸机上安装 KubeSphere。
准备工作
- 您需要了解如何在多节点集群中安装 KubeSphere。有关详情,请参见多节点安装。
- 您的环境中需要有足够的服务器和网络冗余。
- 如果搭建生产环境,建议您提前准备持久化存储并创建 StorageClass。如果搭建开发测试环境,您可以直接使用集成的 OpenEBS 配置 LocalPV 存储服务。
准备 Linux 主机
本教程使用 3 台物理机,硬件配置为 DELL 620 Intel (R) Xeon (R) CPU E5-2640 v2 @ 2.00GHz (32G memory)。在这 3 台物理机上将安装 CentOS Linux release 7.6.1810 (Core) 操作系统,用于 KubeSphere 最小化安装。安装 CentOS
请提前下载并安装CentOS 镜像。请确保根目录已至少分配 200 GB 空间用于存储 Docker 镜像(如果 KubeSphere 仅用于测试,您可以跳过这一步)。
有关系统要求的更多信息,请参见系统要求。
三台主机的角色分配如下,供参考。
| 主机 IP 地址 | 主机名 | 角色 |
|---|---|---|
| 192.168.60.152 | master1 | master1, etcd |
| 192.168.60.153 | worker1 | worker |
| 192.168.60.154 | worker2 | worker |
设置网卡
- 清空网卡配置。
ifdown em1
ifdown em2
rm -rf /etc/sysconfig/network-scripts/ifcfg-em1
2.创建 bond 网卡。 ```bash nmcli con add type bond con-name bond0 ifname bond0 mode 802.3ad ip4 192.168.1.181/24 gw4 192.168.1.254rm -rf /etc/sysconfig/network-scripts/ifcfg-em2
3.设置 bond 模式。```bashnmcli con mod id bond0 bond.options mode=802.3ad,miimon=100,lacp_rate=fast,xmit_hash_policy=layer2+3
4.将物理网卡绑定至 bond。
nmcli con add type bond-slave ifname em1 con-name em1 master bond0
nmcli con add type bond-slave ifname em2 con-name em2 master bond0
5.修改网卡模式。
vi /etc/sysconfig/network-scripts/ifcfg-bond0BOOTPROTO=static
6.重启 Network Manager。
systemctl restart NetworkManager
nmcli con # Display NIC information
7.修改主机名和 DNS。
hostnamectl set-hostname worker-1
vim /etc/resolv.conf
设置时间
- 开启时间同步。
yum install -y chrony
systemctl enable chronyd
systemctl start chronyd
2.设置时区。timedatectl set-ntp true
3.检查 ntp-server 是否可用。timedatectl set-timezone Asia/Shanghai
chronyc activity -v
设置防火墙
执行以下命令停止并禁用 firewalld 服务:iptables -F
systemctl status firewalld
systemctl stop firewalld
systemctl disable firewalld
更新系统包和依赖项
执行以下命令更新系统包并安装依赖项:yum update
yum install openssl openssl-devel
yum install socat
yum install epel-release
yum install conntrack-tools安装docker环境
```bash sudo yum remove docker* sudo yum install -y yum-utils
配置docker的yum地址
sudo yum-config-manager \ —add-repo \ http://mirrors.aliyun.com/docker-ce/linux/centos/docker-ce.repo
安装指定版本
sudo yum install -y docker-ce-20.10.7 docker-ce-cli-20.10.7 containerd.io-1.4.6
启动&开机启动docker
systemctl enable docker —now
docker加速配置
sudo mkdir -p /etc/docker sudo tee /etc/docker/daemon.json <<-‘EOF’ { “registry-mirrors”: [“https://82m9ar63.mirror.aliyuncs.com“], “exec-opts”: [“native.cgroupdriver=systemd”], “log-driver”: “json-file”, “log-opts”: { “max-size”: “100m” }, “storage-driver”: “overlay2” } EOF sudo systemctl daemon-reload sudo systemctl restart docker
<a name="Tm21p"></a>
##
<a name="kl3su"></a>
## 下载 KubeKey
[KubeKey](https://github.com/kubesphere/kubekey) 是新一代 Kubernetes 和 KubeSphere 安装器,可帮助您以简单、快速、灵活的方式安装 Kubernetes 和 KubeSphere。<br />请按照以下步骤下载 KubeKey。<br />先执行以下命令以确保您从正确的区域下载 KubeKey:
```bash
export KKZONE=cn
curl -sfL https://get-kk.kubesphere.io | VERSION=v1.2.0 sh -
为 kk 文件添加可执行权限。
chmod +x kk
创建多节点集群
您可用使用 KubeKey 同时安装 Kubernetes 和 KubeSphere,通过自定义配置文件中的参数创建多节点集群。
创建安装有 KubeSphere 的 Kubernetes 集群(例如使用 —with-kubesphere v3.2.0):
./kk create config --with-kubernetes v1.21.5 --with-kubesphere v3.2.0
系统将创建默认的 config-sample.yaml 文件。您可以根据您的环境修改此文件。
vi config-sample.yaml
apiVersion: kubekey.kubesphere.io/v1alpha1
kind: Cluster
metadata:
  name: config-sample
spec:
  hosts:
  - {name: master1, address: 192.168.60.152, internalAddress: 192.168.60.152, user: root, password: P@ssw0rd}
  - {name: worker1, address: 192.168.60.153, internalAddress: 192.168.60.153, user: root, password: P@ssw0rd}
  - {name: worker2, address: 192.168.60.154, internalAddress: 192.168.60.154, user: root, password: P@ssw0rd}
  roleGroups:
    etcd:
    - master1
    master:
    - master1
    worker:
    - worker1
    - worker2
  controlPlaneEndpoint:
    domain: lb.kubesphere.local
    address: ""
    port: 6443
执行以下命令使用自定义的配置文件创建集群:
./kk create cluster -f config-sample.yaml
+---------+------+------+---------+----------+-------+-------+-----------+---------+------------+-------------+------------------+--------------+
| name    | sudo | curl | openssl | ebtables | socat | ipset | conntrack | docker  | nfs client | ceph client | glusterfs client | time         |
+---------+------+------+---------+----------+-------+-------+-----------+---------+------------+-------------+------------------+--------------+
| worker2 | y    | y    | y       | y        |       | y     | y         | 20.10.7 |            |             |                  | CST 15:48:21 |
| worker1 | y    | y    | y       | y        |       | y     | y         | 20.10.7 |            |             |                  | CST 15:48:21 |
| master  | y    | y    | y       | y        |       | y     | y         | 20.10.7 |            |             |                  | CST 15:48:21 |
+---------+------+------+---------+----------+-------+-------+-----------+---------+------------+-------------+------------------+--------------+
验证安装
安装结束后,您可以执行以下命令查看安装日志:
kubectl logs -n kubesphere-system $(kubectl get pod -n kubesphere-system -l app=ks-install -o jsonpath='{.items[0].metadata.name}') -f
如果返回欢迎日志,则安装成功。
**************************************************
#####################################################
###              Welcome to KubeSphere!           ###
#####################################################
Console: http://192.168.60.152:30880
Account: admin
Password: P@88w0rd
NOTES:
  1. After you log into the console, please check the
     monitoring status of service components in
     the "Cluster Management". If any service is not
     ready, please wait patiently until all components
     are up and running.
  2. Please change the default password after login.
#####################################################
https://kubesphere.io             20xx-xx-xx xx:xx:xx
#####################################################
登录控制台
您可以使用默认的帐户和密码 admin/P@88w0rd 登录 KubeSphere 控制台并开始使用 KubeSphere。请在登录后修改默认密码。
启用可插拔组件(可选)
以上示例演示了默认的最小化安装流程。如需启用 KubeSphere 的其他组件,请参考启用可插拔组件。
优化系统
更新系统。
yum update
添加所需的内核引导参数。
sudo /sbin/grubby --update-kernel=ALL --args='cgroup_enable=memory cgroup.memory=nokmem swapaccount=1'
启用 overlay2 内核模块。
echo "overlay2" | sudo tee -a /etc/modules-load.d/overlay.conf
刷新动态生成的 grub2 配置。
sudo grub2-set-default 0
调整内核参数并使修改生效
cat <<EOF | sudo tee -a /etc/sysctl.conf
vm.max_map_count = 262144
fs.may_detach_mounts = 1
net.ipv4.ip_forward = 1
vm.swappiness=1
kernel.pid_max =1000000
fs.inotify.max_user_instances=524288
EOF
sudo sysctl -p
调整系统限制。
vim /etc/security/limits.conf
*                soft    nofile         1024000
*                hard    nofile         1024000
*                soft    memlock        unlimited
*                hard    memlock        unlimited
root             soft    nofile         1024000
root             hard    nofile         1024000
root             soft    memlock        unlimited
删除旧的限制配置。
sudo rm /etc/security/limits.d/20-nproc.conf
重启系统。
reboot
分析一下
主要下载的东西
路径:
/root/kubekey/v1.21.5/amd64
这个路径有这些文件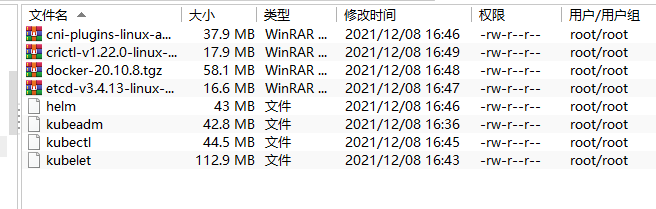
最后go语言简本kubekey又放到了这个路径下
/tmp/kubekey
不过只有5个文件,所有的节点都是,无关主从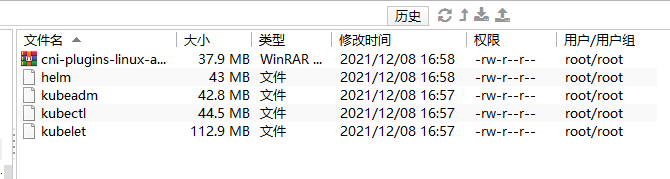
若是不能够发送可能是DNS设置错误
解决
kubectl -n kube-system scale deployment coredns --replicas=0 && kubectl -n kube-system scale deployment coredns --replicas=1

若有收获,就点个赞吧
0 人点赞
