Spring Boot

1 SpringBoot简介
回顾Spring
Spring是一个开源框架,2003 年兴起的一个轻量级的Java 开发框架,作者:Rod Johnson 。
Spring是为了解决企业级应用开发的复杂性而创建的,简化开发。
Spring
为了降低Java开发的复杂性,Spring采用了以下4种关键策略:
1、基于POJO的轻量级和最小侵入性(非入侵式)编程,所有东西都是bean;
2、通过IOC,依赖注入(DI)和面向接口实现松耦合;
3、基于切面(AOP)和惯例进行声明式编程;
4、通过切面和模版减少样式代码,RedisTemplate,xxxTemplate;
什么是SpringBoot
在Javaweb时,最开始是用Servlet结合Tomcat,跑出一个Hello World程序!是要经历特别多的步骤,后来到了后来
就用了框架Struts,再后来是SpringMVC,到了现在的SpringBoot,过一两年又会有其他web框架出现;
SpringBoot,就是一个javaweb的开发框架,和SpringMVC类似,对比其他javaweb框架的好处,官方说是简化开
发,约定大于配置, 能迅速的开发web应用,几行代码开发一个http接口。
Spring Boot 以约定大于配置的核心思想,默认帮我们进行了很多设置,多数 Spring Boot 应用只需要很少的 Spring
配置。同时它集成了大量常用的第三方库配置(例如 Redis、MongoDB、Jpa、RabbitMQ、Quartz 等等),Spring
Boot 应用中这些第三方库几乎可以零配置的开箱即用。
简单来说就是SpringBoot其实不是什么新的框架,它默认配置了很多框架的使用方式,就像maven整合了所有的jar
包,spring boot整合了所有的框架 。Spring Boot 出生名门,从一开始就站在一个比较高的起点,又经过这几年的
发展,生态足够完善,Spring Boot 已经当之无愧成为 Java 领域最热门的技术。
Spring Boot的主要优点:
- 为所有Spring开发者更快的入门
- 开箱即用,提供各种默认配置来简化项目配置
- 内嵌式容器简化Web项目
- 没有冗余代码生成和XML配置的要求
2 第一个SpringBoot程序
2.1 Hello SpringBoot
Hello,World
环境准备:
- jdk 1.8
- Maven 3.8.1
- SpringBoot 2.x 最新版
开发工具:
- IDEA
创建基础项目说明
Spring官方提供了非常方便的工具让我们快速构建应用。
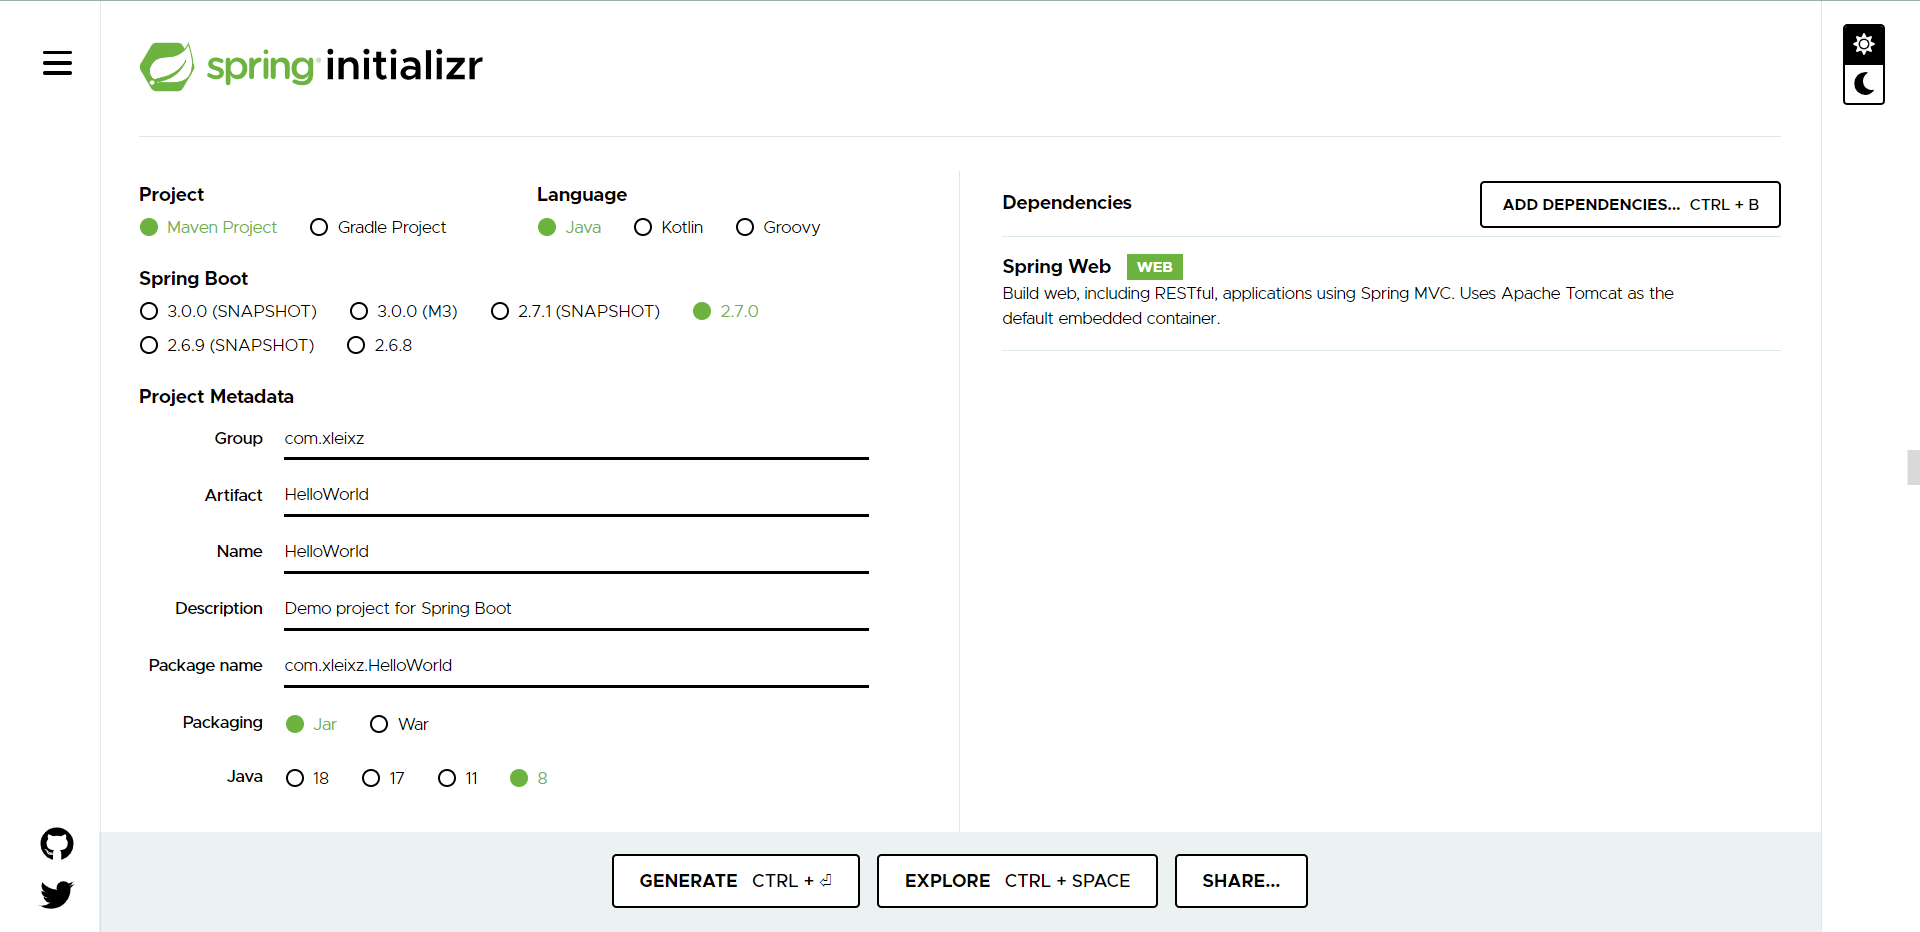
创建方式一:使用Spring Initializr 的 Web页面创建项目
2、填写项目信息
3、点击Generate Project按钮生成项目;下载此项目
4、解压项目包,并用IDEA以Maven项目导入,一路下一步即可,直到项目导入完毕。
5、如果是第一次使用,可能速度会比较慢,包比较多、需要耐心等待一切就绪。
创建方式二:直接在IDEA中创建项目
1、创建一个新项目
2、选择spring initalizr, 可以看到默认就是去官网的快速构建工具那里实现
3、填写项目信息
4、选择初始化的组件(初学勾选 Web 即可)
5、填写项目路径
6、等待项目构建成功
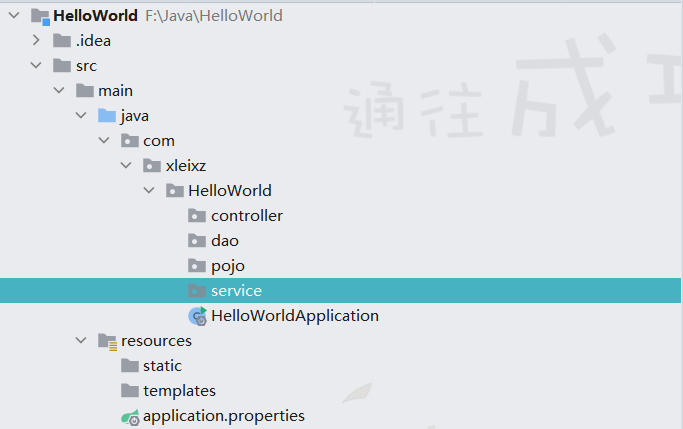
项目结构分析:
通过上面步骤完成了基础项目的创建。就会自动生成以下文件。
1、程序的主启动类HelloWorldApplication,他是程序的主入口,不能删也不能改!!!
2、一个 application.properties 配置文件,他是SpringBoot的核心配置文件
3、一个 单元测试类HelloWorldApplicationTests
4、一个 pom.xml

分析一下pom.xml
<!-- 父依赖 --><parent><groupId>org.springframework.boot</groupId><artifactId>spring-boot-starter-parent</artifactId><version>2.7.0</version><relativePath/> <!-- lookup parent from repository --></parent><dependencies><!-- web场景启动器, web依赖: Tomcat, DispatcherServlet, xml....... -->--><dependency><groupId>org.springframework.boot</groupId><artifactId>spring-boot-starter-web</artifactId></dependency><!-- springboot单元测试 --><dependency><groupId>org.springframework.boot</groupId><artifactId>spring-boot-starter-test</artifactId><scope>test</scope><!-- 剔除依赖 --><exclusions><exclusion><groupId>org.junit.vintage</groupId><artifactId>junit-vintage-engine</artifactId></exclusion></exclusions></dependency></dependencies><build><plugins><!-- 打包插件 --><plugin><groupId>org.springframework.boot</groupId><artifactId>spring-boot-maven-plugin</artifactId></plugin></plugins></build>
编写一个Http接口
1、在主程序的同级目录下,新建一个controller包,一定要在主程序同级目录下,否则识别不到
2、在包中新建一个HelloController类,用于调用业务,接收前端参数
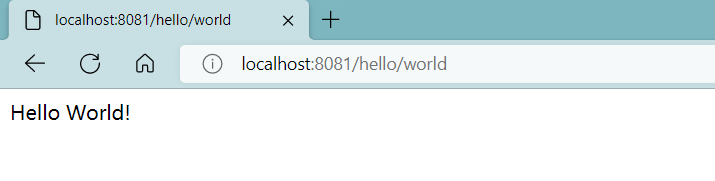
//本身就是一个Spring组件@RestControllerpublic class HelloController {//用于调用业务,接收前端参数@RequestMapping("/hello")public String hello() {return "Hello World!";}}
3、编写完毕后,从主程序启动项目HelloWorldApplication,浏览器发起请求,看页面返回;控制台输出了 Tomcat 访问的端口号!

将项目打成jar包
 点击Maven的
Lifecycle下的package
如果打包成功,则会在target目录下生成一个 jar 包,就可以在任何地方运行了!
如果遇到错误,可以配置打包时跳过项目运行测试用例。
<!--在工作中,很多情况下我们打包是不想执行测试用例的可能是测试用例不完事,或是测试用例会影响数据库数据跳过测试用例执--><plugin><groupId>org.apache.maven.plugins</groupId><artifactId>maven-surefire-plugin</artifactId><configuration><!--跳过项目运行测试用例--><skipTests>true</skipTests></configuration></plugin>
所以SpringBoot的核心原理是:自动装配
2.2 修改端口号
在resources目录下的application.properties添加:
#更改项目端口号server.port=8081
2.3 修改Banner
在项目下的 resources 目录下新建一个banner.txt 即可。
图案可以到:banner图案 这个网站生成,然后拷贝到文件中即可!
3 自动装配运行原理(初期理解)
3.1 分析【pom.xml】
spring-boot-dependencies:核心依赖在父工程中,所有导入依赖时不需要写版本号,有版本仓库!
启动器
<dependency><groupId>org.springframework.boot</groupId><artifactId>spring-boot-starter</artifactId></dependency>
这就是SpringBoot的启动场景;
比如spring-boot-starter-web,他会自动导入web环境所有的依赖;
SpringBoot会将所有的功能场景,都一个一个变成启动器
需要使用什么功能,就只需要对应的启动器就可以了starter
3.2 分析主程序
分析【SpringBootStudyApplication.java】主程序
@SpringBootApplicationpublic class SpringBootStudyApplication {public static void main(String[] args) {SpringApplication.run(SpringBootStudyApplication.class, args);}}
@SpringBootApplication:标注这个类是一个SpringBoot的应用;
SpringApplication.run(SpringBootStudyApplication.class, args);:将SpringBoot应用启动;
注解
@SpringBootConfiguration:SpringBoot的配置
@Configuration:Spring配置类
@Component:也是一个Spring的组件
@EnableAutoConfiguration:自动配置
@AutoConfigurationPackage:自动配置包
@Import(AutoConfigurationPackage.Registrar.class)导入自动配置包注册
@Import(AutoConfigurationSelector.class)自动配置导入选择
结论:
SpringBoot在启动的时候从类路径下的
META-INF/spring.factories中获取EnableAutoConfiguration指定的值将这些值作为自动配置类导入容器 , 自动配置类就生效 , 帮我们进行自动配置工作;
整个J2EE的整体解决方案和自动配置都在
springboot-autoconfigure的jar包中;它会给容器中导入非常多的自动配置类 (xxxAutoConfiguration), 就是给容器中导入这个场景需要的所有组
件 , 并配置好这些组件 ;有了自动配置类 , 免去了我们手动编写配置注入功能组件等的工作;
3.3 主启动类运行原理
SpringBootStudyApplication类
@SpringBootApplicationpublic class SpringBootStudyApplication {public static void main(String[] args) {SpringApplication.run(SpringBootStudyApplication.class, args);}}
他不仅运行了一个main方法,而且还开启了一个服务!
SpringApplication.run分析
分析该方法主要分两部分,一部分是SpringApplication的实例化,二是run方法的执行;
这个类主要做了以下四件事情:
1、推断应用的类型是普通的项目还是Web项目
2、查找并加载所有可用初始化器 , 设置到initializers属性中
3、找出所有的应用程序监听器,设置到listeners属性中
4、推断并设置main方法的定义类,找到运行的主类
查看构造器:
public SpringApplication(ResourceLoader resourceLoader, Class... primarySources) {// ......this.webApplicationType = WebApplicationType.deduceFromClasspath();this.setInitializers(this.getSpringFactoriesInstances();this.setListeners(this.getSpringFactoriesInstances(ApplicationListener.class));this.mainApplicationClass = this.deduceMainApplicationClass();}
run方法
流程分析:

4 yaml配置注入
4.1 yaml简介
配置文件
SpringBoot使用一个全局的配置文件 , 配置文件名称是固定的,官网建议使用yml配置文件。
application.properties
- 语法结构 :key=value
application.yml
- 语法结构 :key:空格 value
配置文件的作用 :修改SpringBoot自动配置的默认值,因为SpringBoot在底层都给自动配置好了;
比如可以在配置文件properties中修改Tomcat 默认启动的端口号!
server.port=8081
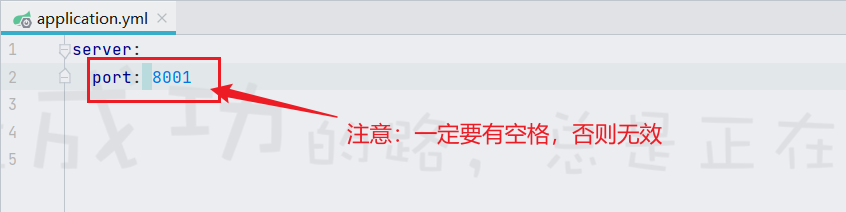
而在application.yml配置文件中,修改Tomcat默认启动的端口号!
server:port: 8001
yaml简介
YAML是 “YAML Ain’t a Markup Language” (YAML不是一种标记语言)的递归缩写。在开发的这种语言时,YAML 的
意思其实是:”Yet Another Markup Language”(仍是一种标记语言)
这种语言以数据作为中心,而不是以标记语言为重点!
以前的配置文件,大多数都是使用xml来配置;比如一个简单的端口配置,对比下yaml和xml
传统xml配置:
<server><port>8081<port></server>
yaml配置:
server:prot: 8080
4.2 yaml基本语法
说明:语法要求严格!
1、空格不能省略
2、以缩进来控制层级关系,只要是左边对齐的一列数据都是同一个层级的。
3、属性和值的大小写都是十分敏感的。
基本语法
字面量:普通的值 [ 数字,布尔值,字符串 ]
字面量直接写在后面,字符串默认不用加上双引号或者单引号;
注意:
"" 双引号,不会转义字符串里面的特殊字符 , 特殊字符会作为本身想表示的意思;
比如 :name: "kuang \n shen" 输出 :kuang 换行 shen
'' 单引号,会转义特殊字符 , 特殊字符最终会变成和普通字符一样输出
比如 :name: ‘kuang \n shen’ 输出 :kuang \n shen
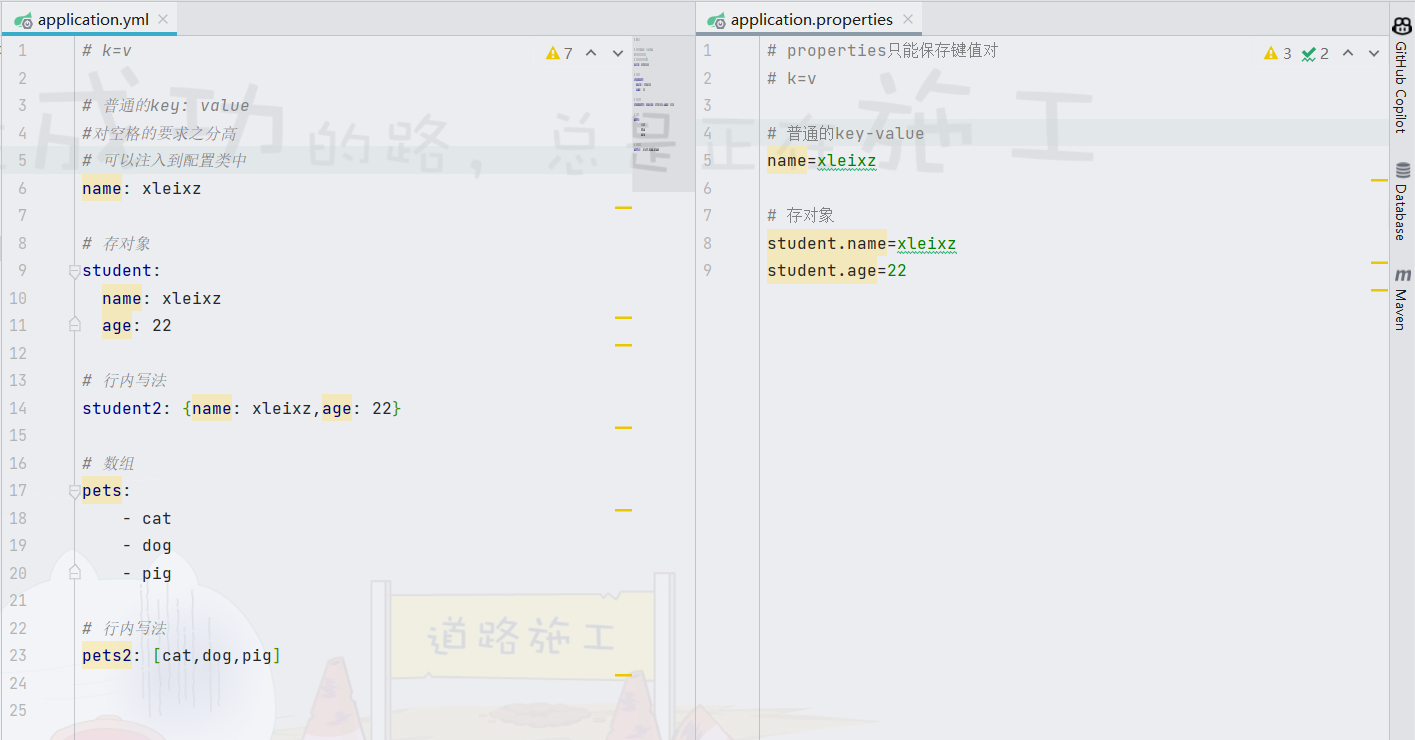
存对象
name: xleixz

student:
  name: xleixz
  age: 22

# 行内写法
student2: {name: xleixz,age: 22}
数组
pets:
    - cat
    - dog
    - pig

# 行内写法
pets2: [cat,dog,pig]
4.3 yaml注入配置文件
yaml可以直接给实体类赋值
1、准备一个实体类【Dog.java】
//注册bean  等价于 <bean id="dog" class="com.xleixz.pojo.Dog"/>
@Component
public class Dog {

    private String name;
    private int age;

    public Dog() {
    }

    public Dog(String name, int age) {
        this.name = name;
        this.age = age;
    }

    public String getName() {
        return name;
    }

    public void setName(String name) {
        this.name = name;
    }

    public int getAge() {
        return age;
    }

    public void setAge(int age) {
        this.age = age;
    }

    @Override
    public String toString() {
        return "Dog{" +
                "name='" + name + '\'' +
                ", age=" + age +
                '}';
    }
}
2、使用原本的@value注解绑定值
@Component //注册bean
public class Dog {
    @Value("旺柴")
    private String name;
    @Value("2")
    private Integer age;
}
3、在SpringBoot的测试类下注入狗狗输出一下
@SpringBootTest
class DemoApplicationTests {

    @Autowired //将狗狗自动注入进来
    Dog dog;

    @Test
    public void contextLoads() {
        System.out.println(dog); //打印看下狗狗对象
    }

}
4、结果

但是凭借@value注解一直设置值显然是不可取的,如果属性较多,则会变得繁琐
解决:通过yaml配置文件注入
1、准备一个实体类【Person.java】
@Component
@ConfigurationProperties(prefix = "person")
public class Person {
    private String name;
    private int age;
    private Boolean happy;
    private Date brithday;
    private Map<String, Object> maps;
    private List<Object> lists;
    private Dog dog;

    //有参、无参、getter、setter、toString
}
2、通过yaml配置文件的方式注入到类中
person:
  name: xleixz
  age: 22
  happy: false
  brithday: 2022/01/01
  maps: { k1: v1,k2: v2 }
  lists: [1,2,3]
  dog:
    name: 旺柴
    age: 2
3、使用@ConfigurationProperties(prefix="person")注解将配置文件中配置的属性映射到组件中,将配置文件中的person下面的所有属性一一对应

/*
@ConfigurationProperties作用:
将配置文件中配置的每一个属性的值,映射到这个组件中;
告诉SpringBoot将本类中的所有属性和配置文件中相关的配置进行绑定
参数 prefix = “person” : 将配置文件中的person下面的所有属性一一对应
*/
@Component //注册bean
@ConfigurationProperties(prefix = "person")
public class Person {
    private String name;
    private Integer age;
    private Boolean happy;
    private Date birth;
    private Map<String,Object> maps;
    private List<Object> lists;
    private Dog dog;
}
4、IDEA 提示,SpringBoot配置注解处理器没有找到,导入一个pom依赖即可解决!

<!-- 导入配置文件处理器,配置文件进行绑定就会有提示,需要重启 -->
<dependency>
  <groupId>org.springframework.boot</groupId>
  <artifactId>spring-boot-configuration-processor</artifactId>
  <optional>true</optional>
</dependency>
5、测试一下
@SpringBootTest
class DemoApplicationTests {

    @Autowired
    Person person; //将person自动注入进来

    @Test
    public void contextLoads() {
        System.out.println(person); //打印person信息
    }

}

yaml配置文件占位符
配置文件还可以编写占位符生成随机数
person:
    name: xleixz${random.uuid} # 随机uuid
    age: ${random.int}  # 随机int
    happy: false
    birth: 2022/01/01
    maps: {k1: v1,k2: v2}
    lists:
      - code
      - girl
      - music
    dog:
      name: ${person.hello:other}_旺财
      age: 1
4.4 回顾不推荐的旧方法properties
上面采用的yaml方法都是最简单的方式,开发中最常用的;也是springboot所推荐的!配置文件除了yml还有我之
前常用的properties。
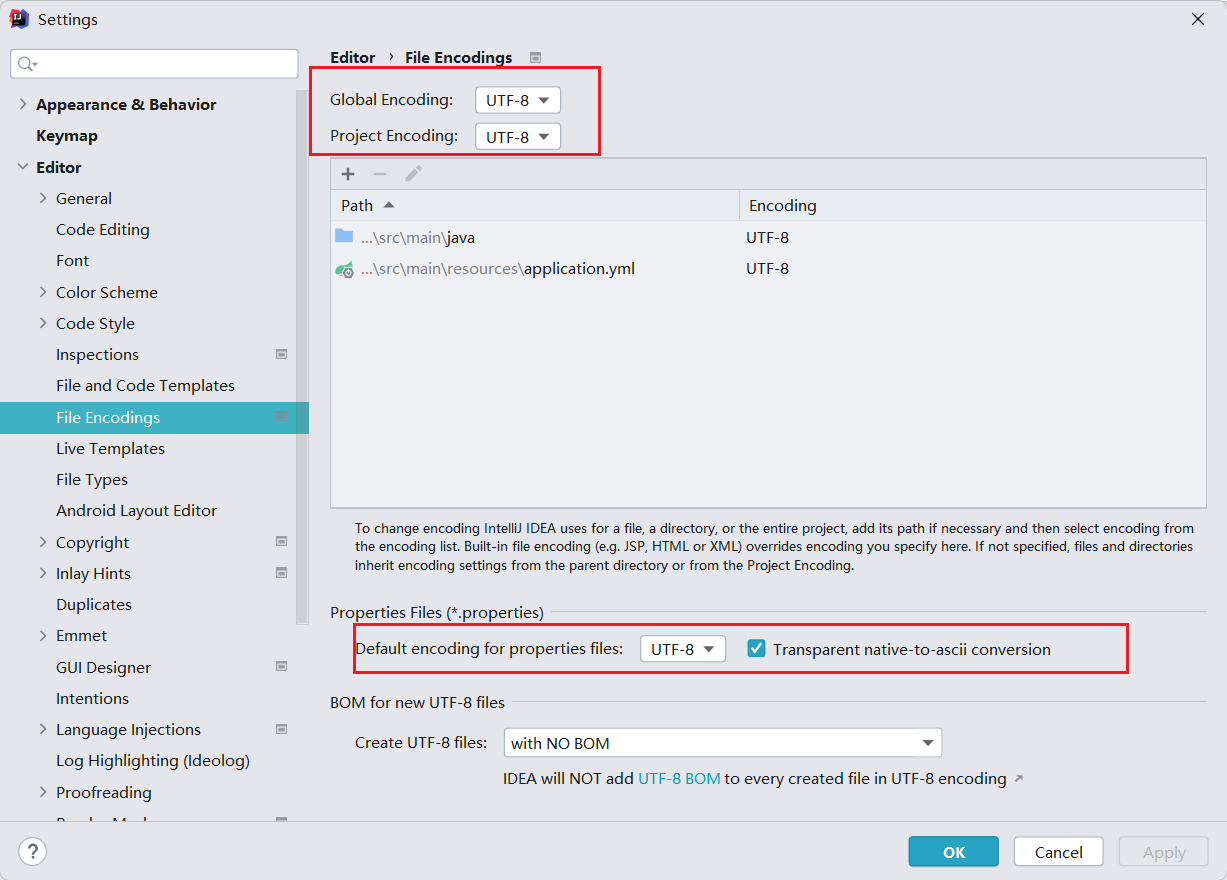
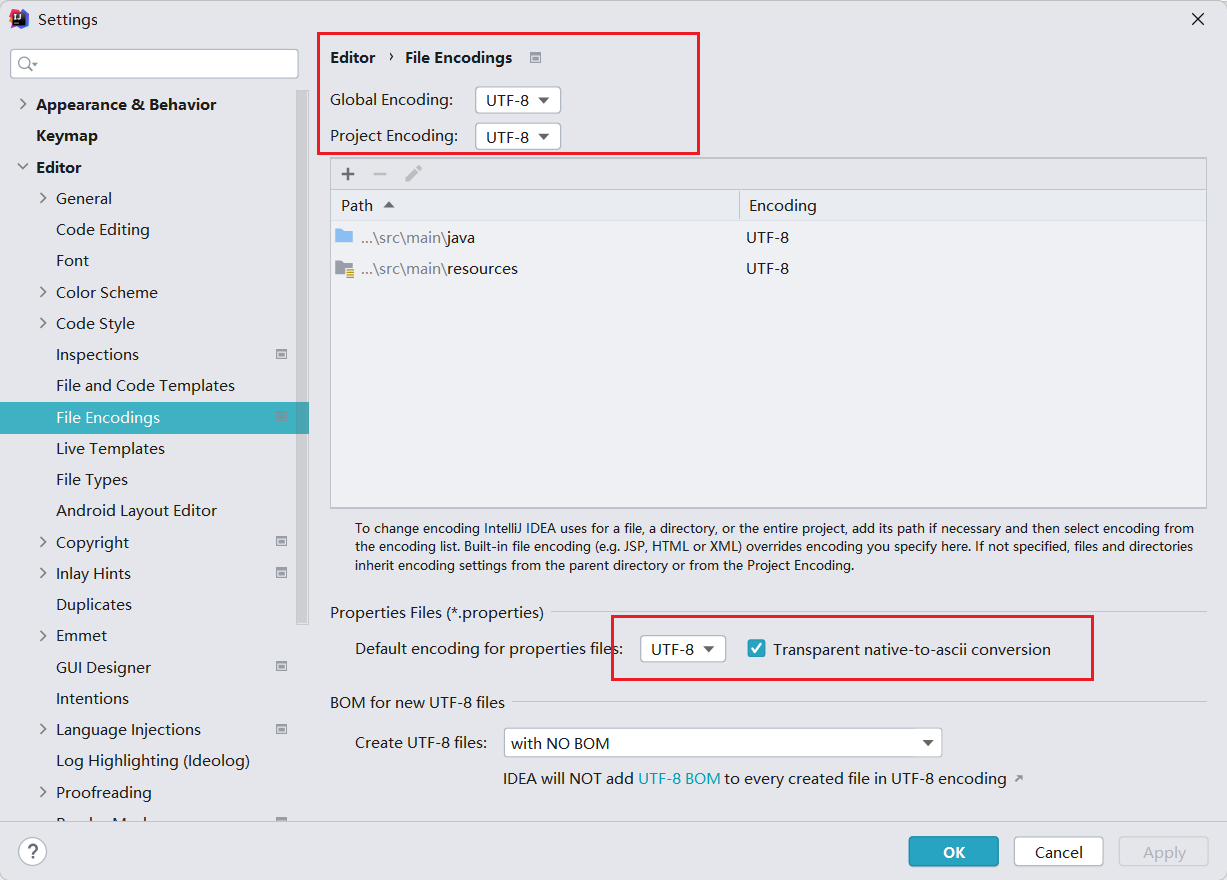
注意:在IDEA中编写properties配置文件时,会遇到编码格式问题,要改成UTF-8
解决:settings—>FileEncodings 中配置
- 新建一个实体类【User.java】
@Component //注册bean
public class User {
 private String name;
 private int age;
 private String sex;
}
- 编辑配置文件【user.properties】
user1.name=kuangshen
user1.age=18
user1.sex=男
- 在User类上使用@Value来进行注入!
@Component //注册bean
@PropertySource(value = "classpath:user.properties")
public class User {
 //直接使用@value
 @Value("${user.name}") //从配置文件中取值
 private String name;
 @Value("#{9*2}")  // #{SPEL} Spring表达式
 private int age;
 @Value("男")  // 字面量
 private String sex;
}
Springboot测试 ```java @SpringBootTest class DemoApplicationTests {
@Autowired User user;
@Test public void contextLoads() {
System.out.println(user);}
}
5.
结果
<br />
> **结论**
**配置yml**和**配置properties**都可以获取到值 , **强烈推荐yml**;
如果在某个业务中,只需要获取配置文件中的某个值,可以使用一下 `@value`;
如果说专门编写了一个JavaBean来和配置文件进行一一映射,就直接`@configurationProperties`【**最佳方案**】!
---
<a name="17d869f9"></a>
# 5 JSR303数据校验及多环境配置与切换
<a name="be95a9e0"></a>
## 5.1 JSR303数据校验
SPringBoot可以通过`@Validated`注解来设置格式;**使用数据校验,可以保证数据的正确性。**
1.
在pom中导入依赖
```xml
<dependency>
<groupId>org.springframework.boot</groupId>
<artifactId>spring-boot-starter-validation</artifactId>
</dependency>
- 在实体类中添加注解,以邮箱格式为例
@Email```java @Component @ConfigurationProperties(prefix = “person”)
//数据校验 @Validated public class Person {
@Email(message = "邮箱格式不正确")
private String name;
private int age;
private Boolean happy;
private Date brithday;
private Map<String, Object> maps;
private List<Object> lists;
private Dog dog;

//有参构造、无参构造、getter、setter、toString
}
3.
yaml配置文件中设置的值不为邮箱格式时
```yaml
person:
  name: xleixz
在测试类中测试 ```java @SpringBootTest class SpringBoot02ConfigApplicationTests {
@Autowired private Person person;
@Test void contextLoads() {
System.out.println(person);}
}
5.
启动测试,提示:
<br />
> **常见的参数**
```markdown
@NotNull(message="名字不能为空")
private String userName;
@Max(value=120,message="年龄最大不能查过120")
private int age;
@Email(message="邮箱格式错误")
private String email;
空检查
@Null 验证对象是否为null
@NotNull 验证对象是否不为null, 无法查检长度为0的字符串
@NotBlank 检查约束字符串是不是Null还有被Trim的长度是否大于0,只对字符串,且会去掉前后空格.
@NotEmpty 检查约束元素是否为NULL或者是EMPTY.
Booelan检查
@AssertTrue 验证 Boolean 对象是否为 true
@AssertFalse 验证 Boolean 对象是否为 false
长度检查
@Size(min=, max=) 验证对象(Array,Collection,Map,String)长度是否在给定的范围之内
@Length(min=, max=) string is between min and max included.
日期检查
@Past 验证 Date 和 Calendar 对象是否在当前时间之前
@Future 验证 Date 和 Calendar 对象是否在当前时间之后
@Pattern 验证 String 对象是否符合正则表达式的规则
.......等等
除此以外,还可以自定义一些数据校验规则
5.2 多环境配置与切换
多环境配置
yaml配置文件的位置可放于以下四个位置:

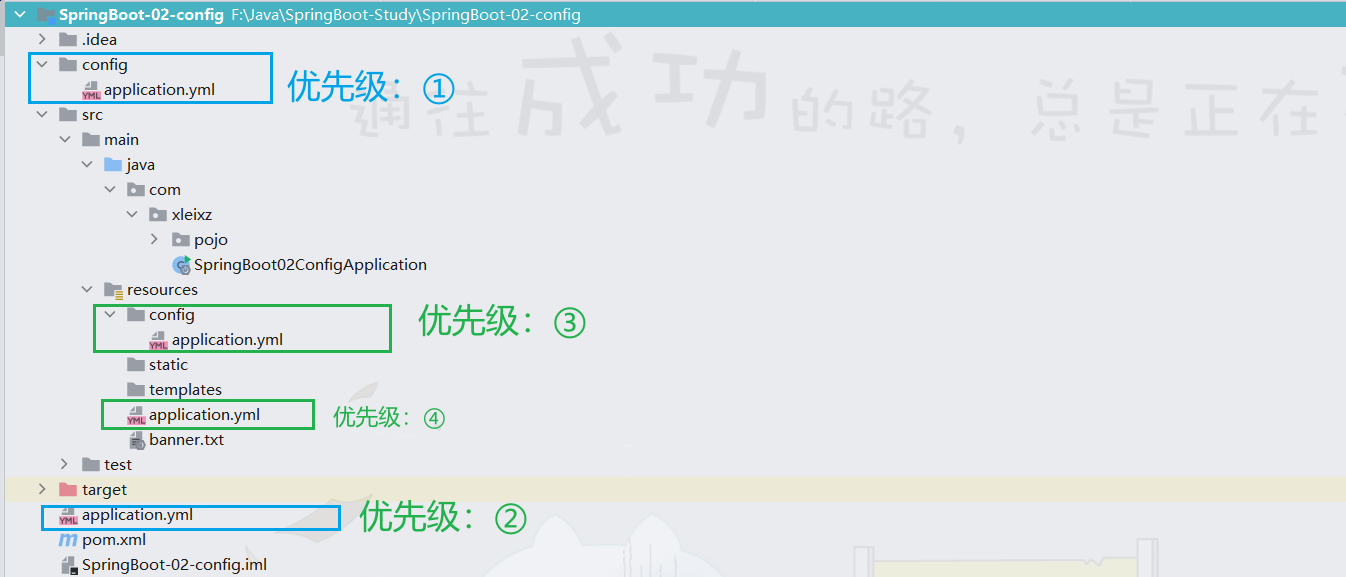
多环境切换
方式一:通过优先级覆盖的方式来切换。
方式二:yaml配置文件和properties配置文件手动选择。
- properties配置文件手动切换方式,太繁琐【不推荐】
#SpringBoot的多环境配置,可以选择激活某个环境。
spring.profiles.active=dev

server: port: 8083 spring: profiles: dev #配置环境的名称
server: port: 8084 spring: profiles: prod #配置环境的名称
**注意:如果yml和properties同时都配置了端口,并且没有激活其他环境 , 默认会使用properties配置文件的!**
---
<a name="ea93bd04"></a>
# 6 自动装配运行原理(终期理解)
(非原创)
> 配置文件到底能写什么?怎么写?
SpringBoot官方文档中有大量的配置,我们无法全部记住

以**HttpEncodingAutoConfiguration(Http编码自动配置)**为例解释自动配置原理;
```java
//表示这是一个配置类,和以前编写的配置文件一样,也可以给容器中添加组件;
@Configuration
//启动指定类的ConfigurationProperties功能;
//进入这个HttpProperties查看,将配置文件中对应的值和HttpProperties绑定起来;
//并把HttpProperties加入到ioc容器中
@EnableConfigurationProperties({HttpProperties.class})
//Spring底层@Conditional注解
//根据不同的条件判断,如果满足指定的条件,整个配置类里面的配置就会生效;
//这里的意思就是判断当前应用是否是web应用,如果是,当前配置类生效
@ConditionalOnWebApplication(
type = Type.SERVLET
)
//判断当前项目有没有这个类CharacterEncodingFilter;SpringMVC中进行乱码解决的过滤器;
@ConditionalOnClass({CharacterEncodingFilter.class})
//判断配置文件中是否存在某个配置:spring.http.encoding.enabled;
//如果不存在,判断也是成立的
//即使我们配置文件中不配置pring.http.encoding.enabled=true,也是默认生效的;
@ConditionalOnProperty(
prefix = "spring.http.encoding",
value = {"enabled"},
matchIfMissing = true
)
public class HttpEncodingAutoConfiguration {
//他已经和SpringBoot的配置文件映射了
private final Encoding properties;
//只有一个有参构造器的情况下,参数的值就会从容器中拿
public HttpEncodingAutoConfiguration(HttpProperties properties) {
this.properties = properties.getEncoding();
}
//给容器中添加一个组件,这个组件的某些值需要从properties中获取
@Bean
@ConditionalOnMissingBean //判断容器没有这个组件?
public CharacterEncodingFilter characterEncodingFilter() {
CharacterEncodingFilter filter = new OrderedCharacterEncodingFilter();
filter.setEncoding(this.properties.getCharset().name());
filter.setForceRequestEncoding(this.properties.shouldForce(org.springframework.boot.autoconfigure.http.HttpProperties.Encoding.Type.REQUEST));
filter.setForceResponseEncoding(this.properties.shouldForce(org.springframework.boot.autoconfigure.http.HttpProperties.Encoding.Type.RESPONSE));
return filter;
}
//。。。。。。。
}
一句话总结 :根据当前不同的条件判断,决定这个配置类是否生效!
- 一但这个配置类生效;这个配置类就会给容器中添加各种组件;
- 这些组件的属性是从对应的properties类中获取的,这些类里面的每一个属性又是和配置文件绑定的;
- 所有在配置文件中能配置的属性都是在xxxxProperties类中封装着;
- 配置文件能配置什么就可以参照某个功能对应的这个属性类
//从配置文件中获取指定的值和bean的属性进行绑定
@ConfigurationProperties(prefix = "spring.http")
public class HttpProperties {
    // .....
}
去配置文件里面试试前缀,看提示!
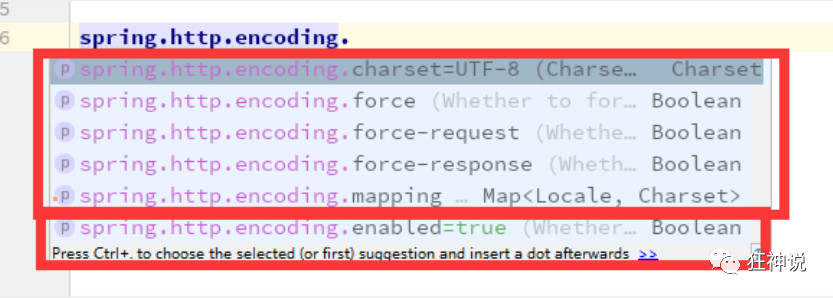
这就是自动装配的原理!
精髓
1、SpringBoot启动会加载大量的自动配置类
2、我们看我们需要的功能有没有在SpringBoot默认写好的自动配置类当中;
3、我们再来看这个自动配置类中到底配置了哪些组件;(只要我们要用的组件存在在其中,我们就不需要再手动
配置了)
4、给容器中自动配置类添加组件的时候,会从properties类中获取某些属性。我们只需要在配置文件中指定这些属
性的值即可;
xxxxAutoConfigurartion:自动配置类;给容器中添加组件
xxxxProperties:封装配置文件中相关属性;
了解:@Conditional
了解完自动装配的原理后,我们来关注一个细节问题,自动配置类必须在一定的条件下才能生效;
@Conditional派生注解(Spring注解版原生的@Conditional作用)
作用:必须是@Conditional指定的条件成立,才给容器中添加组件,配置配里面的所有内容才生效;

那么多的自动配置类,必须在一定的条件下才能生效;也就是说,我们加载了这么多的配置类,但不是所有的都
生效了。
我们怎么知道哪些自动配置类生效?
我们可以通过启用 debug=true属性;来让控制台打印自动配置报告,这样我们就可以很方便的知道哪些自动配置
类生效;
#开启springboot的调试类
debug=true
Positive matches:(自动配置类启用的:正匹配)
Negative matches:(没有启动,没有匹配成功的自动配置类:负匹配)
Unconditional classes: (没有条件的类)
7 SpringBoot Web开发
要解决的问题
- 静态资源的导入,html、css、jsp……
- 首页
- jsp,模板引擎Thymeleaf
- 装配拓展SpringMVC
- 增删改查
- 拦截器
- 国际化
7.1 静态资源导入
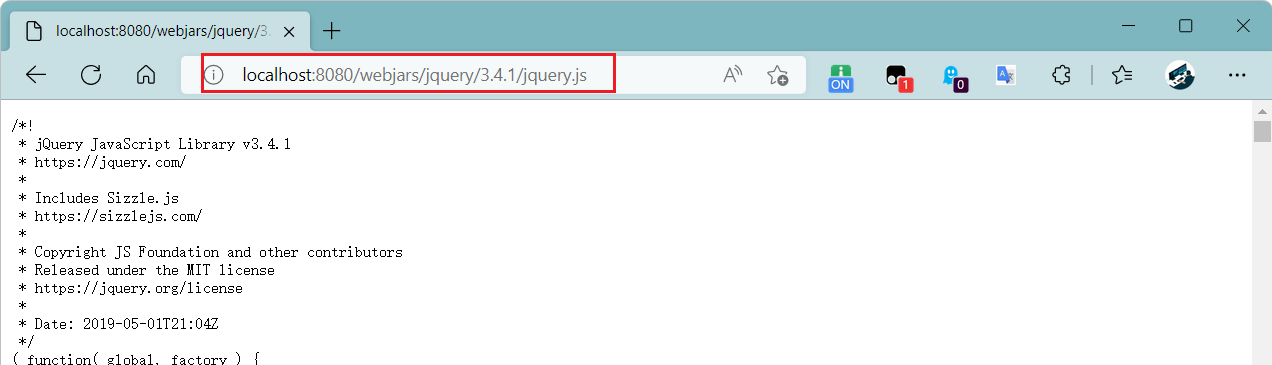
方式一:通过查看SpringBoot底层源码发现,当导入jQuery依赖jar包后,可以通过访问
/webjars目录下的所有文件;映射地址:localhost:8080/webjars/

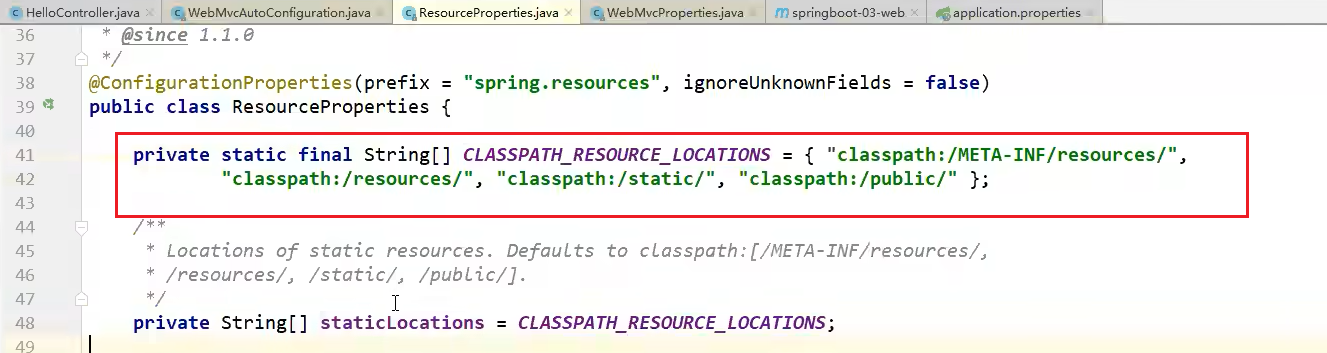
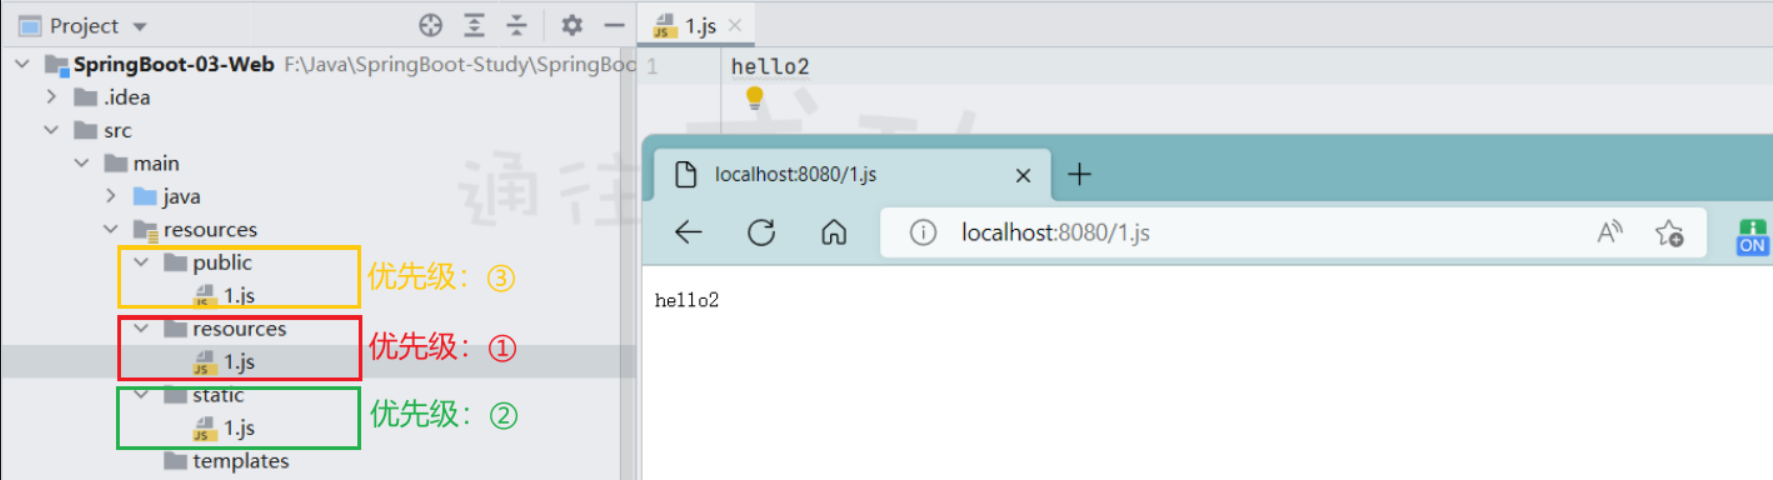
方式二:从底层源码看出,在classpath下的四个目录也可以导出静态资源,他们的优先级如下:
映射地址:localhost:8080/
优先级:
resources>static(默认) >public默认的静态资源使用
static
7.2 首页与图标的定制
首页
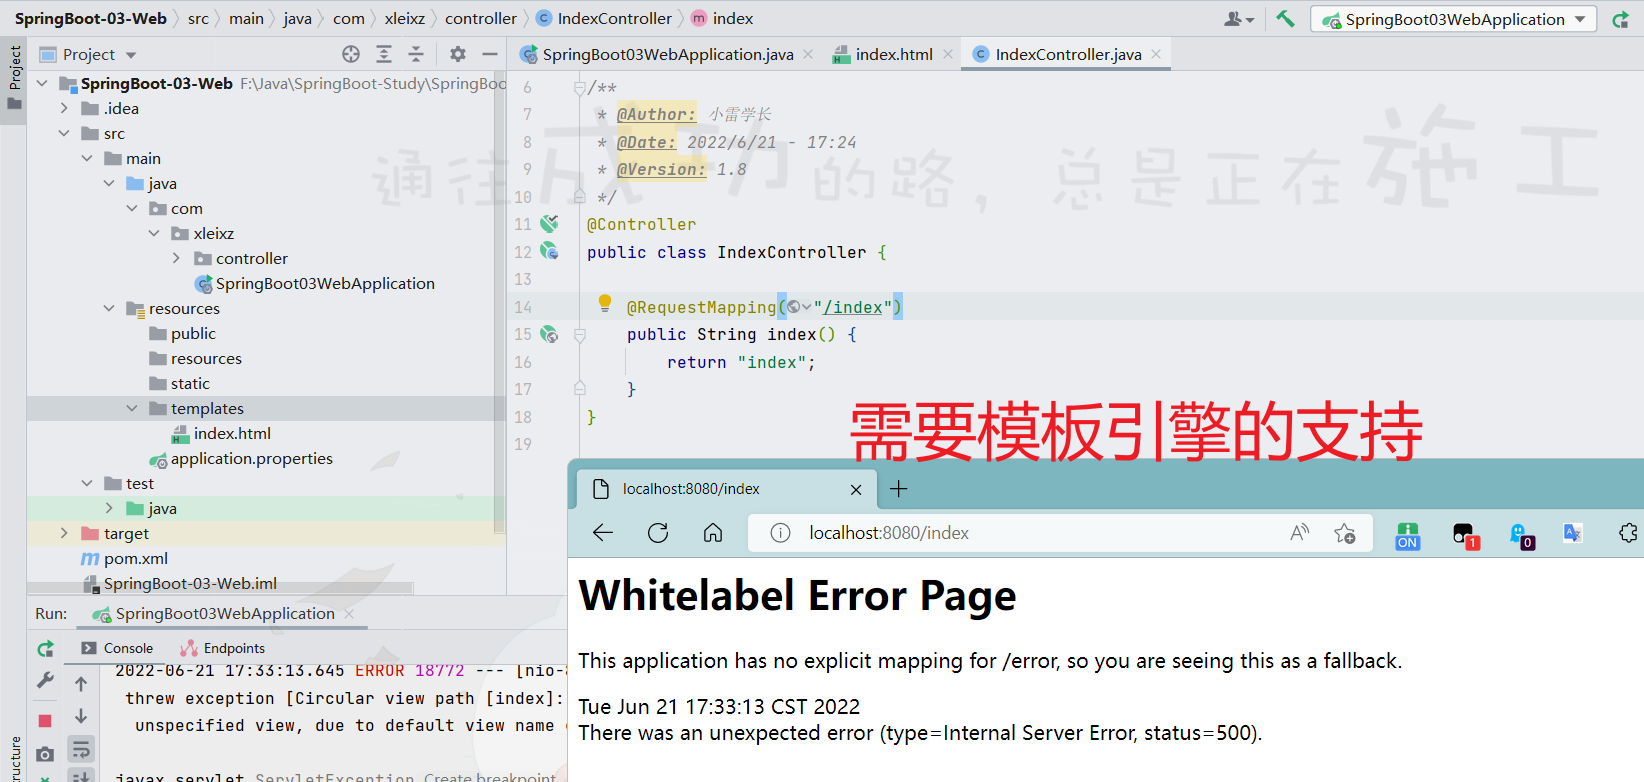
启动服务后,访问localhost:8080会默认访问首页index.html
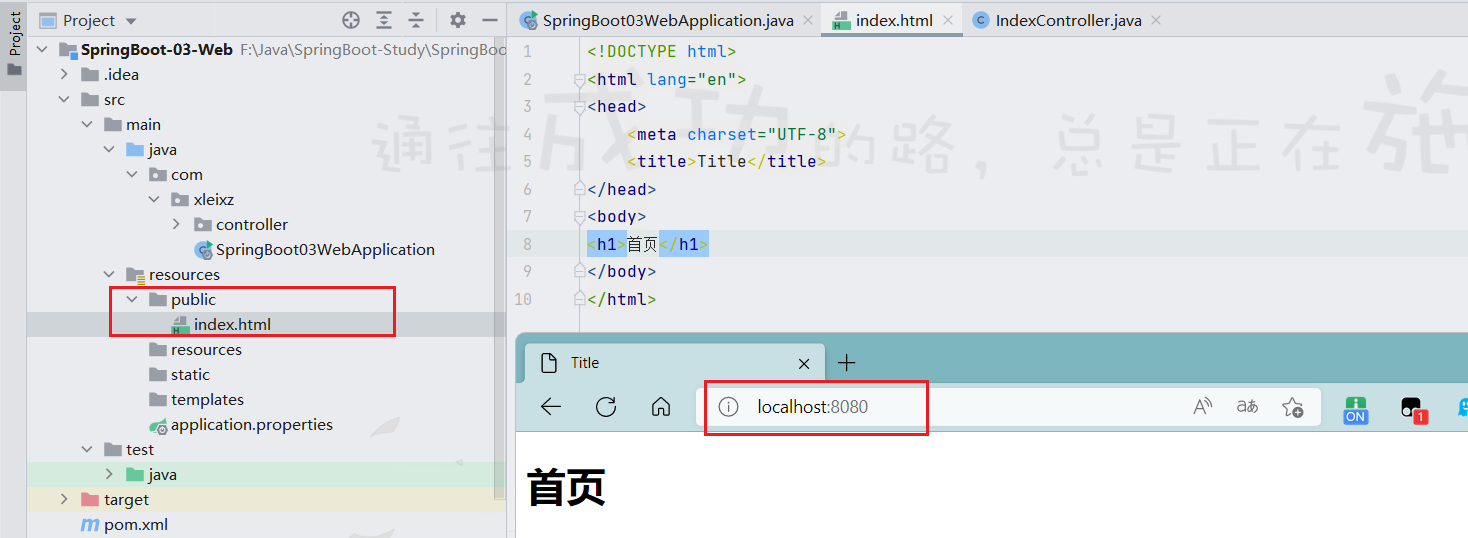
而要注意的是,放在templates目录下的页面,只能通过controller来跳转!相当于在MVC中的WEB-INF目录!!
图标
新版本已取消,如需使用可以降级版本使用!
在classpath/public目录下添加favicon.ico文件即可设置图标

7.3 Thymeleaf模板引擎
以前开发是把查出一些数据转发到JSP页面以后,可以通过JSP轻松实现数据的显示以及数据交互等。JSP支持很非
常强大的功能,包括能写Java代码,但是SpringBoot项目首先是以jar的方式,而不是war,其次SpringBoot使用的是嵌入式Tomcat,所以现在默认不支持JSP。
SpringBoot推荐你可以来使用模板引擎:
模板引擎,我们其实大家听到很多,其实jsp就是一个模板引擎,还有用的比较多的freemarker,包括SpringBoot给
我们推荐的Thymeleaf,模板引擎有非常多,但再多的模板引擎,他们的思想都是一样的,什么样一个思想呢我们
来看一下这张图:
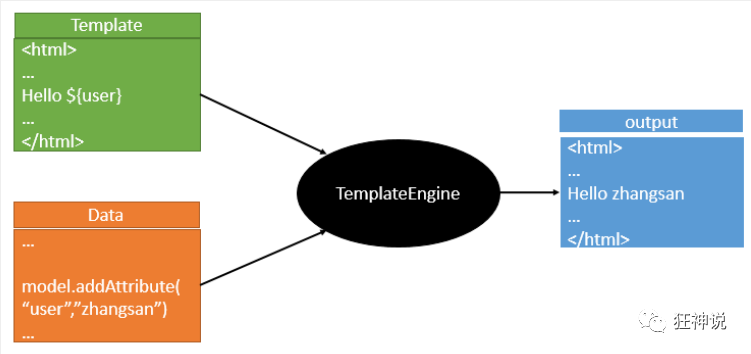
模板引擎的作用就是写一个页面模板,比如有些值呢,是动态的,我们写一些表达式。而这些值,从哪来呢,就是
我们在后台封装一些数据。然后把这个模板和这个数据交给我们模板引擎,模板引擎按照我们这个数据帮你把这表
达式解析、填充到我们指定的位置,然后把这个数据最终生成一个我们想要的内容给我们写出去,这就是我们这个
模板引擎,不管是jsp还是其他模板引擎,都是这个思想。只不过呢,就是说不同模板引擎之间,他们可能这个语
法有点不一样。其他的我就不介绍了,我主要来介绍一下SpringBoot给我们推荐的Thymeleaf模板引擎,这模板引
擎呢,是一个高级语言的模板引擎,他的这个语法更简单。而且呢,功能更强大。
引入Thymeleaf
Thymeleaf 官网:https://www.thymeleaf.org/
Thymeleaf 在Github 的主页:https://github.com/thymeleaf/thymeleaf
Spring官方文档:找到对应的版本
https://docs.spring.io/spring-boot/docs/2.2.5.RELEASE/reference/htmlsingle/#using-boot-starter
找到对应的pom依赖:可以适当点进源码看下本来的包!
<!--thymeleaf-->
<dependency>
    <groupId>org.springframework.boot</groupId>
    <artifactId>spring-boot-starter-thymeleaf</artifactId>
</dependency>
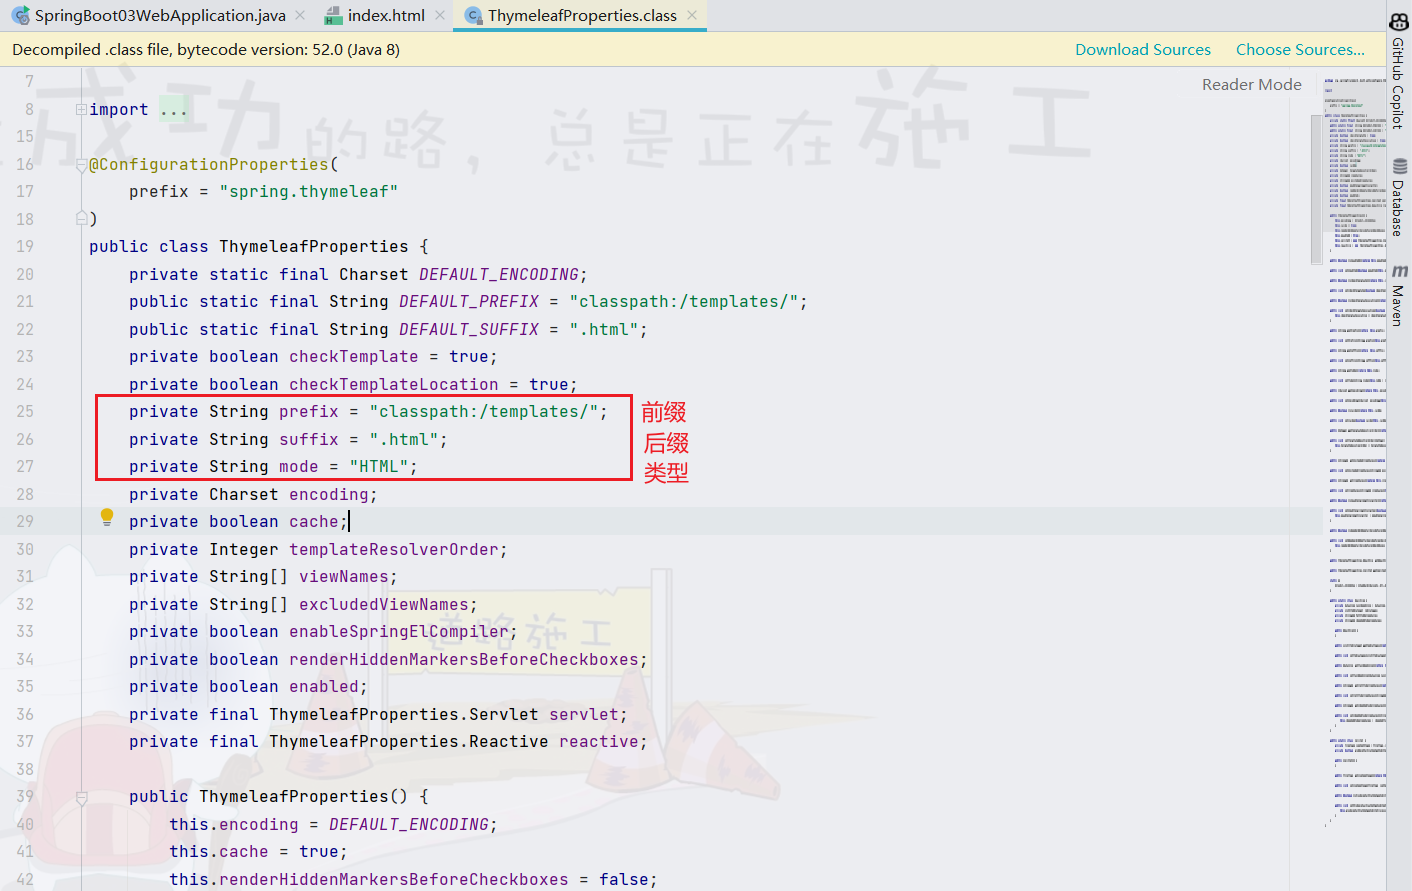
查看底层源码ThymeleafProperties.class,发现跟SpringMVC的视图解析器类似,由前缀和后缀组合而成。
通过controller类跳转,成功!
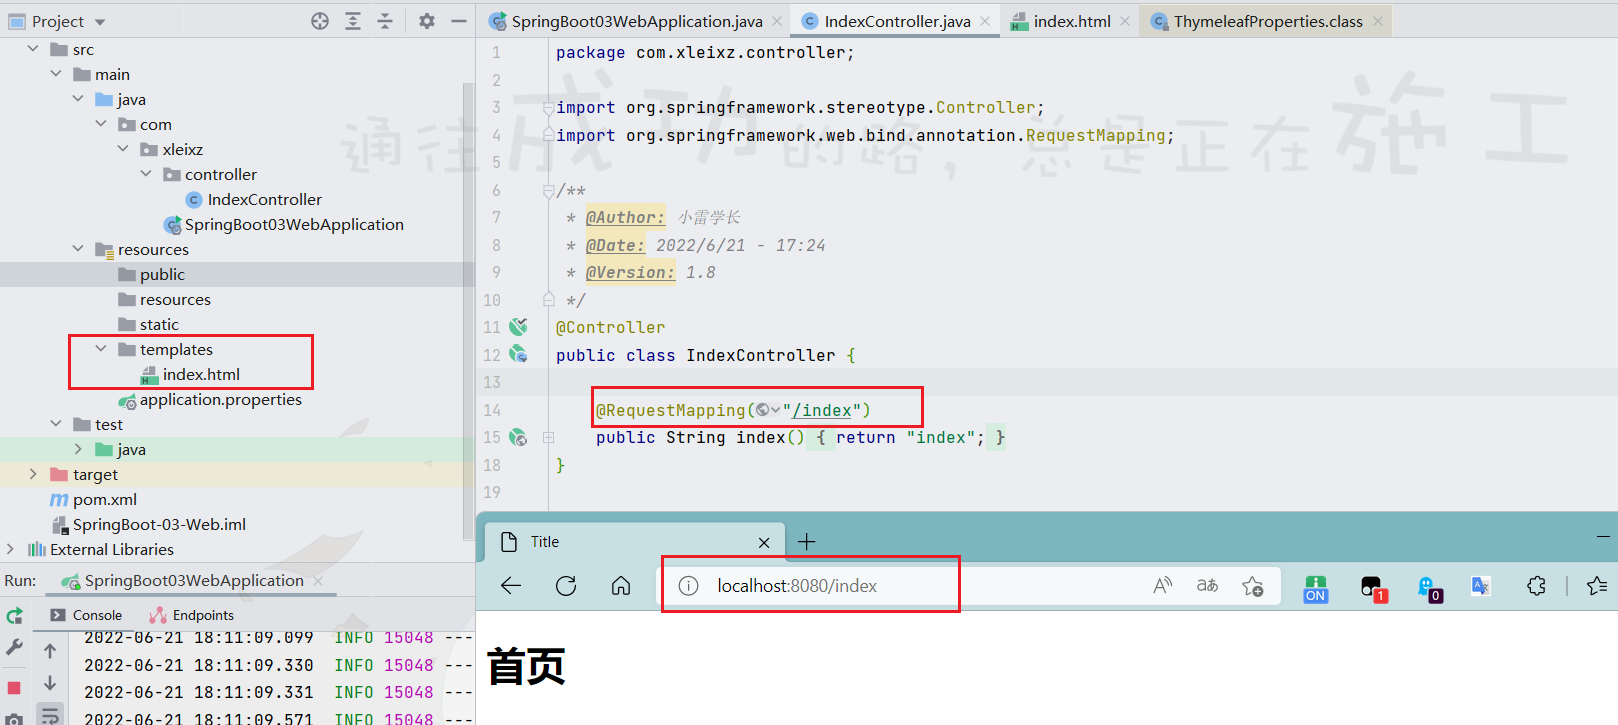
结论:要使用Thymeleaf,只需要导入对应的依赖,其次将html页面放入templates目录下即可!
7.4 Thymeleaf语法
Thymeleaf 官网:https://www.thymeleaf.org/
需要查出一些数据,在页面中展示
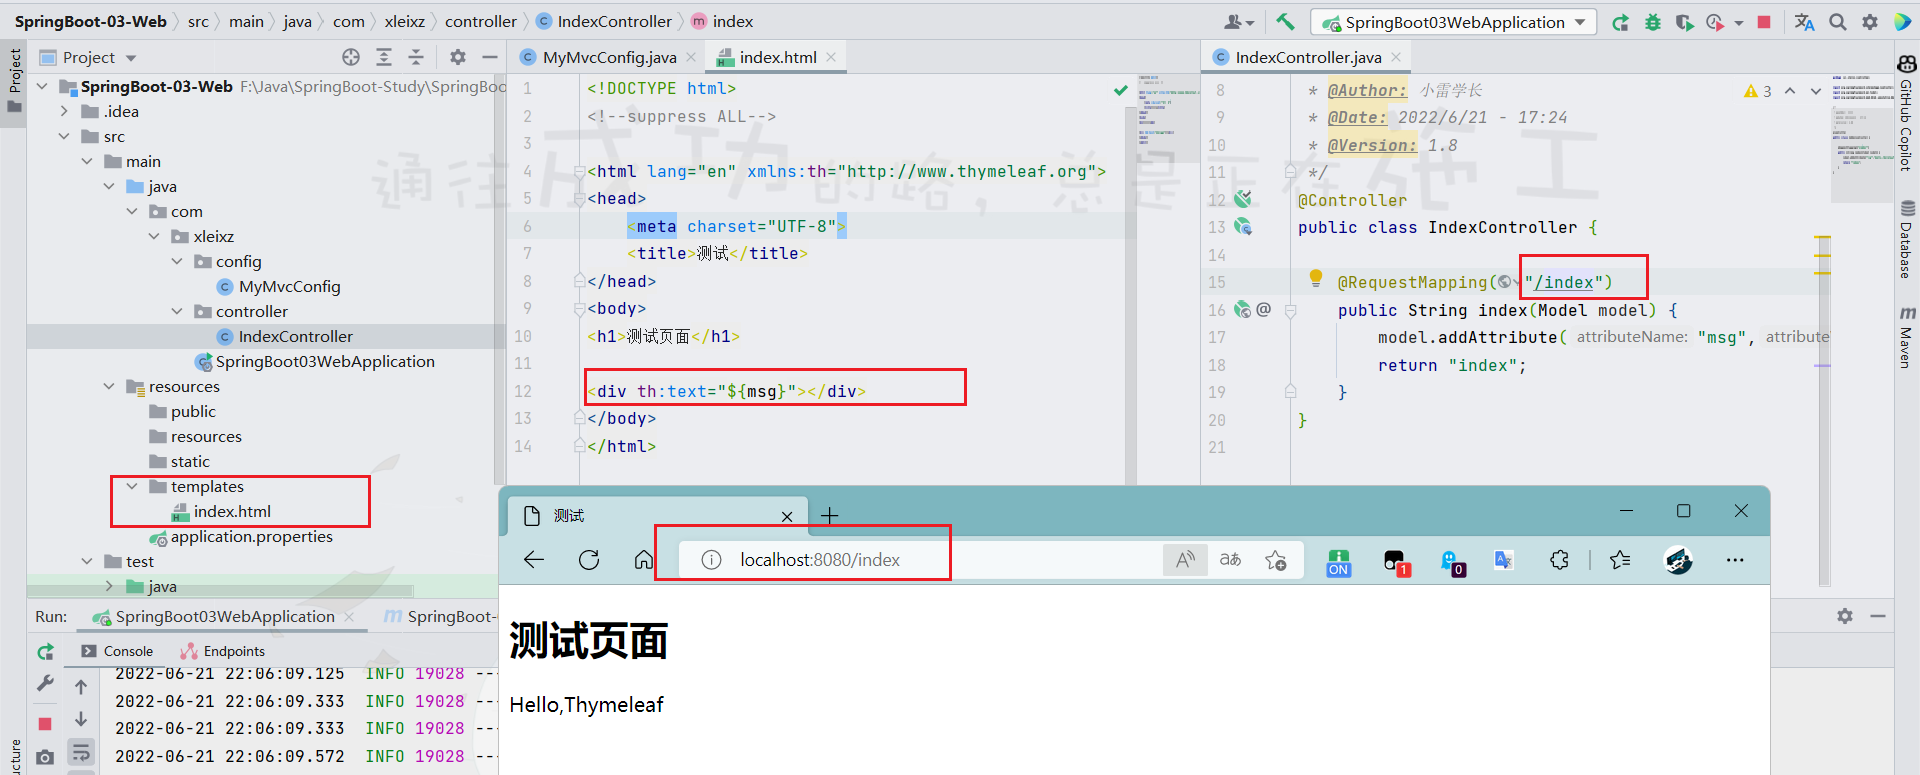
1、修改测试请求,增加数据传输;
@Controller
public class IndexController {

    @RequestMapping("/index")
    public String index(Model model) {
        model.addAttribute("msg","Hello,Thymeleaf");
        return "index";
    }
}
2、要使用thymeleaf,需要在html文件中导入命名空间的约束,方便提示。
<html lang="en" xmlns:th="http://www.thymeleaf.org">
3、编写前端页面
<!DOCTYPE html>
<html lang="en" xmlns:th="http://www.thymeleaf.org">
<head>
    <meta charset="UTF-8">
    <title>测试</title>
</head>
<body>
<h1>测试页面</h1>

<div th:text="${msg}"></div>
</body>
</html>
1、我们可以使用任意的 th:attr 来替换Html中原生属性的值!

2、能写哪些表达式呢?
Simple expressions:(表达式语法)
Variable Expressions: ${...}:获取变量值;OGNL;
    1)、获取对象的属性、调用方法
    2)、使用内置的基本对象:#18
         #ctx : the context object.
         #vars: the context variables.
         #locale : the context locale.
         #request : (only in Web Contexts) the HttpServletRequest object.
         #response : (only in Web Contexts) the HttpServletResponse object.
         #session : (only in Web Contexts) the HttpSession object.
         #servletContext : (only in Web Contexts) the ServletContext object.

    3)、内置的一些工具对象:
      #execInfo : information about the template being processed.
      #uris : methods for escaping parts of URLs/URIs
      #conversions : methods for executing the configured conversion service (if any).
      #dates : methods for java.util.Date objects: formatting, component extraction, etc.
      #calendars : analogous to #dates , but for java.util.Calendar objects.
      #numbers : methods for formatting numeric objects.
      #strings : methods for String objects: contains, startsWith, prepending/appending, etc.
      #objects : methods for objects in general.
      #bools : methods for boolean evaluation.
      #arrays : methods for arrays.
      #lists : methods for lists.
      #sets : methods for sets.
      #maps : methods for maps.
      #aggregates : methods for creating aggregates on arrays or collections.
==================================================================================

  Selection Variable Expressions: *{...}:选择表达式:和${}在功能上是一样;
  Message Expressions: #{...}:获取国际化内容
  Link URL Expressions: @{...}:定义URL;
  Fragment Expressions: ~{...}:片段引用表达式

Literals(字面量)
      Text literals: 'one text' , 'Another one!' ,…
      Number literals: 0 , 34 , 3.0 , 12.3 ,…
      Boolean literals: true , false
      Null literal: null
      Literal tokens: one , sometext , main ,…

Text operations:(文本操作)
    String concatenation: +
    Literal substitutions: |The name is ${name}|

Arithmetic operations:(数学运算)
    Binary operators: + , - , * , / , %
    Minus sign (unary operator): -

Boolean operations:(布尔运算)
    Binary operators: and , or
    Boolean negation (unary operator): ! , not

Comparisons and equality:(比较运算)
    Comparators: > , < , >= , <= ( gt , lt , ge , le )
    Equality operators: == , != ( eq , ne )

Conditional operators:条件运算(三元运算符)
    If-then: (if) ? (then)
    If-then-else: (if) ? (then) : (else)
    Default: (value) ?: (defaultvalue)

Special tokens:
    No-Operation: _
测试一下
1、 编写一个Controller,放一些数据
@RequestMapping("/t2")
public String test2(Map<String,Object> map){
    //存入数据
    map.put("msg","<h1>Hello</h1>");
    map.put("users", Arrays.asList("xleixz","xleixz"));
    //classpath:/templates/test.html
    return "test";
}
2、测试页面取出数据
<!DOCTYPE html>
<html lang="en" xmlns:th="http://www.thymeleaf.org">
<head>
    <meta charset="UTF-8">
    <title>测试</title>
</head>
<body>
<h1>测试页面</h1>

<div th:text="${msg}"></div>
<!--不转义-->
<div th:utext="${msg}"></div>

<!--遍历数据-->
<!--th:each每次遍历都会生成当前这个标签:官网#9-->
<h4 th:each="user :${users}" th:text="${user}"></h4>

<h4>
    <!--行内写法:官网#12-->
    <span th:each="user:${users}">[[${user}]]</span>
</h4>

</body>
</html>
3、启动测试即可
7.5 接管SpringMVC,实现MVC自动配置
全面接管即:SpringBoot对SpringMVC的自动配置不需要了,所有都是我们自己去配置!只需在我们的配置类中要
加一个@EnableWebMvc。
我们看下如果我们全面接管了SpringMVC了,我们之前SpringBoot给我们配置的静态资源映射一定会无效。
另外当项目中涉及大量的页面跳转,我们可以实现WebMvcConfigurer接口,使用addViewControllers方法实现无业务逻辑跳转,从而减少控制器代码的编写。
addViewControllers方法可以实现将一个请求直接映射为视图,不需要编写控制器来实现,从而简化了页面跳转。
@Configuration声明其为一个配置类,实现WebMvcConfigurer接口重写Mvc配置
@EnableWebMvc注解加上后,发现原本的一些默认配置并没有生效,即该注解加上后将会使用本类的配置为mvc配置,完全覆盖默认配置。所以没有特殊要求尽量不要加上该注解
//全面拓展SpringMVC
@Configuration
public class MyMvcConfig implements WebMvcConfigurer {


    @Override
    public void addViewControllers(ViewControllerRegistry registry) {
        registry.addViewController("/").setViewName("index");
        registry.addViewController("/index.html").setViewName("index");
        registry.addViewController("/main.html").setViewName("dashboard");
    }
}
7.6 报错问题
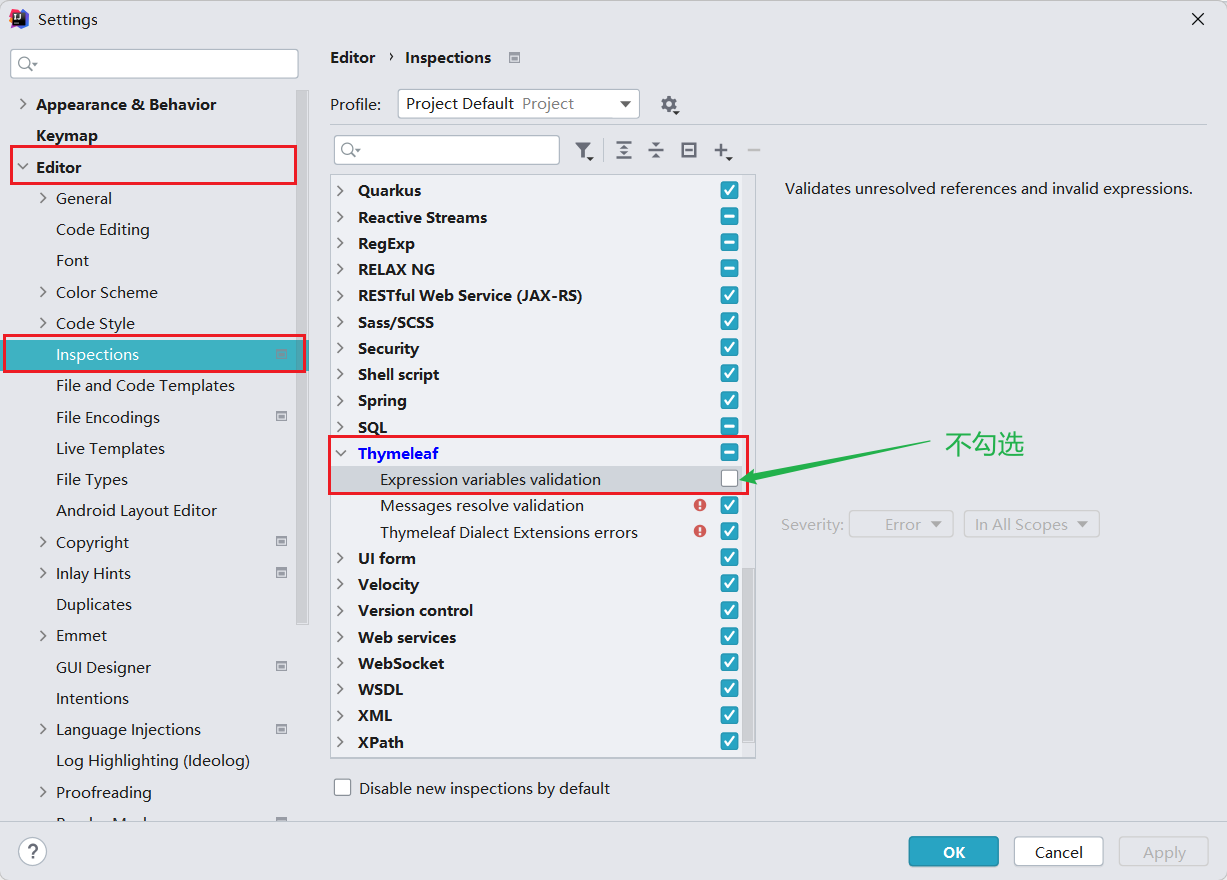
Thymeleaf 表达式报红波浪线
修改IDEA设置:把设置里面的 Editor->Inspections->Thymeleaf->Expression variables validation后面的勾去掉
8 员工管理系统
8.1 准备工作
- 准备数据库 ```mysql Create DATABASE company;
use company;
create table employee(id INTEGER primary key auto_increment, lastName varchar(255) not null, email varchar(255) not null, gender INTEGER not null, birth varchar(255) not null );
INSERT into employee(lastName,email,gender,birth) values(“张三”,”zhangsan@163.com”,1,”2000-01-08”), (“李四”,”lisi@163.com”,1,”1998-01-19”), (“张华”,”zhanghua@163.com”,1,”2000-10-25”), (“吴磊”,”wulei@163.com”,1,”2001-02-21”), (“高强”,”gaoqiang@163.com”,1,”1999-11-02”);
```mysql
use company;

create table department(id INTEGER primary key auto_increment,
                                            departmentName varchar(255) not null
                                            );

INSERT into department(departmentName)
                                values("陈露"),
                                            ("张颖"),
                                            ("吴国华"),
                                            ("三毛"),
                                            ("朱翠莲");
实体类
public class Department {

 private Integer id;
 private String departmentName;

//getter、setter、有参、无参、toString
}
public class Employee {

    private Integer id;
    private String lastName;
    private String email;
    private Integer gender;//0: 女  1: 男

    private Department department;
    private String birth;

    public Employee() {
    }
        //getter、setter、有参、无参、toString
}
重写视图解析器,不需要controller【/config/MyMvcConfig】
//全面拓展SpringMVC
@Configuration
public class MyMvcConfig implements WebMvcConfigurer {

 @Override
 public void addViewControllers(ViewControllerRegistry registry) {
     registry.addViewController("/").setViewName("index");
     registry.addViewController("/index.html").setViewName("index");
 }
}
8.2 页面配置
页面配置:注意所有的静态资源都需要使用Thymeleaf接管,链接用@{/}"
首页【index.html】
<!DOCTYPE html>
<html lang="en" xmlns:th="http://www.thymeleaf.org">
    <head>
        <meta http-equiv="Content-Type" content="text/html; charset=UTF-8">
        <meta name="viewport" content="width=device-width, initial-scale=1, shrink-to-fit=no">
        <meta name="description" content="">
        <meta name="author" content="">
        <title>Signin Template for Bootstrap</title>
        <!-- Bootstrap core CSS -->
        <link th:href="@{/css/bootstrap.min.css}" rel="stylesheet">
        <!-- Custom styles for this template -->
        <link th:href="@{/css/signin.css}" rel="stylesheet">
    </head>

    <body class="text-center">
        <form class="form-signin" th:action="@{/user/login}" method="post">
            <img class="mb-4" th:src="@{/img/bootstrap-solid.svg}" alt="" width="72" height="72">
            <h1 class="h3 mb-3 font-weight-normal" th:text="#{login.tip}">Please sign in</h1>
            <p style="color: red" th:text="${msg}"></p>
            <input type="text" class="form-control" name="username" th:placeholder="#{login.username}" required="" autofocus="">
            <input type="password" class="form-control" name="password" th:placeholder="#{login.password}" required="">
            <div class="checkbox mb-3">
                <label>
          <input type="checkbox" value="remember-me" > [[#{login.remember}]]
        </label>
            </div>
            <button class="btn btn-lg btn-primary btn-block" type="submit">[[#{login.btn}]]</button>
            <p class="mt-5 mb-3 text-muted">© 2017-2018</p>
            <a class="btn btn-sm" th:href="@{/index.html(l='zh_cn')}">中文</a>
            <a class="btn btn-sm" th:href="@{/index.html(l='en_US')}">English</a>
        </form>

    </body>

</html>
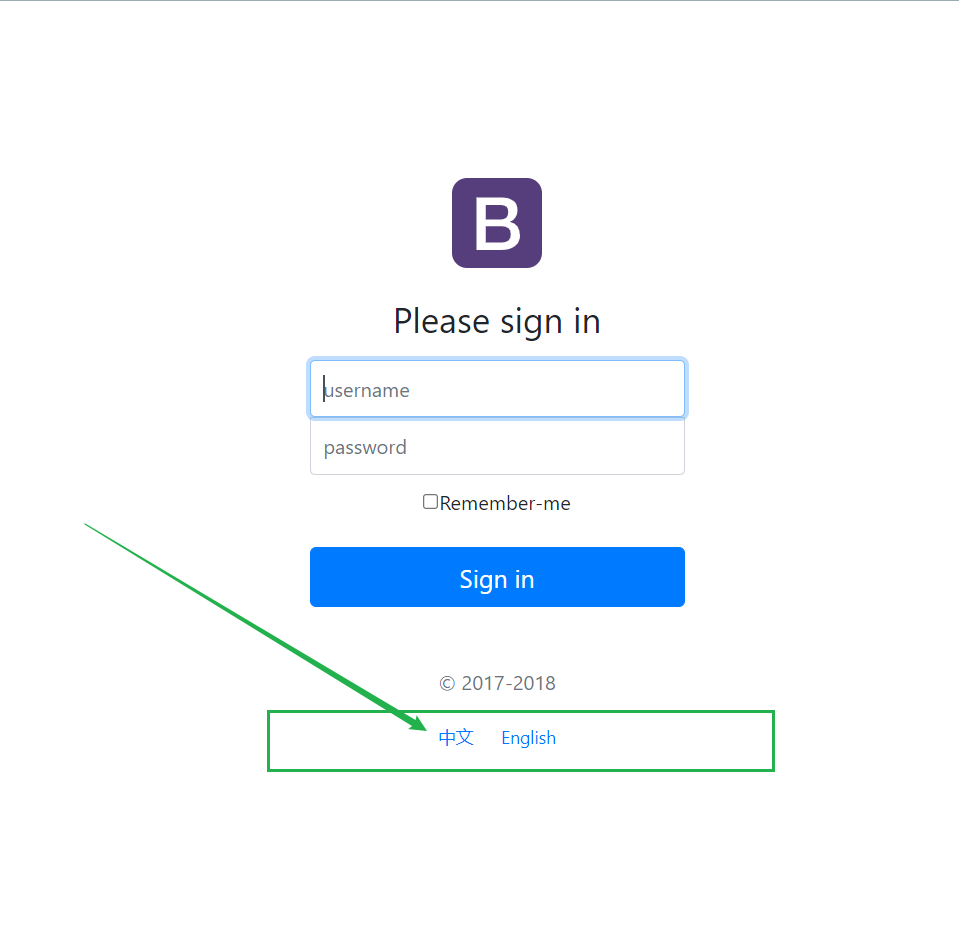
8.3 页面国际化
所谓的页面国际化就是在网页上实现中英文切换。
确保IDEA的编码全是UTF-8
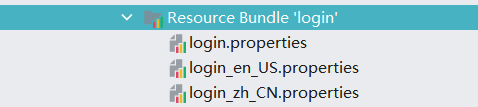
在resources目录下新建一个目录【i18n】(国际化),在【i18n】目录下创建login.properties和login_zh_CN.properties配置文件,可自动合并为一个目录
使用可视化编辑配置文件,配置文件会自动生成


到【application.properties】文件中配置
# 配置文件的真实位置
spring.messages.basename=i18n.login

- 修改每一个位置
<h1 class="h3 mb-3 font-weight-normal" th:text="#{login.tip}">Please sign in</h1>
- 看一下效果
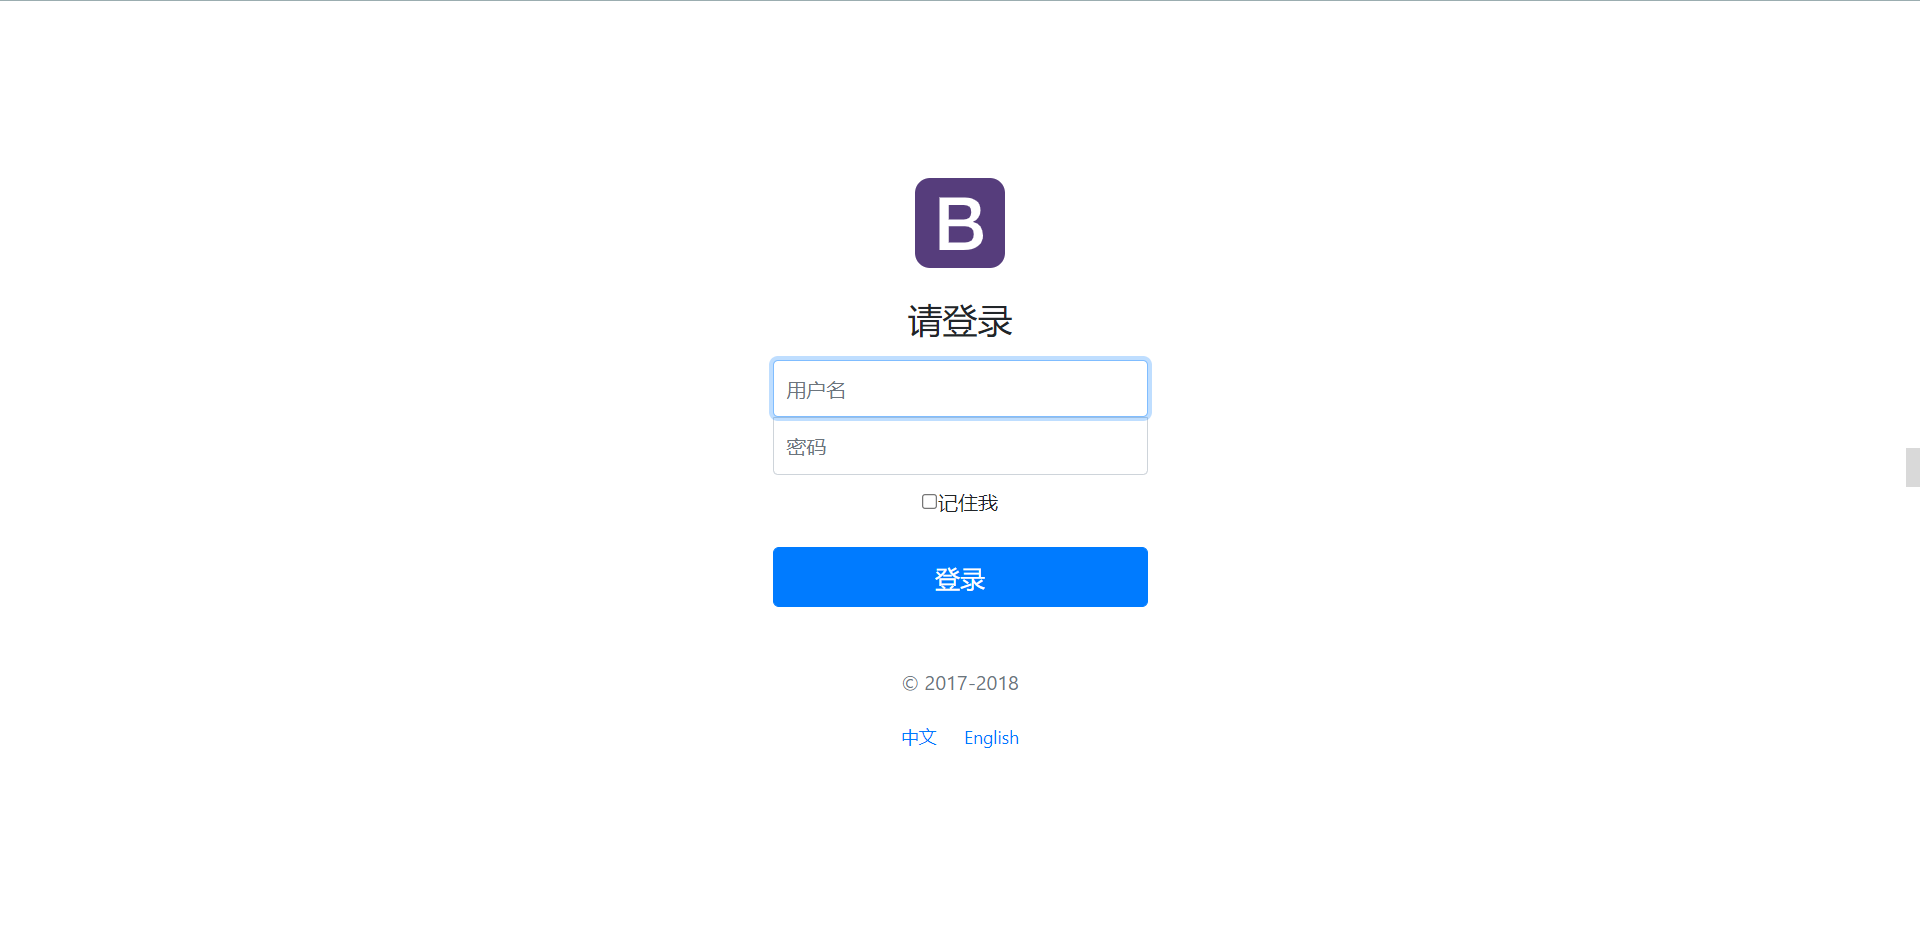
配置根据按钮自动切换中文英文!
配置国际化解析
在Spring中有一个国际化的Locale (区域信息对象);里面有一个叫做LocaleResolver (获取区域信息对象)的解
析器!SpringBoot默认配置:
@Bean
@ConditionalOnMissingBean
@ConditionalOnProperty(prefix = "spring.mvc", name = "locale")
public LocaleResolver localeResolver() {
       // 容器中没有就自己配,有的话就用用户配置的
       if (this.mvcProperties.getLocaleResolver() == WebMvcProperties.LocaleResolver.FIXED) {
           return new FixedLocaleResolver(this.mvcProperties.getLocale());
       }
       // 接收头国际化分解
       AcceptHeaderLocaleResolver localeResolver = new AcceptHeaderLocaleResolver();
       localeResolver.setDefaultLocale(this.mvcProperties.getLocale());
       return localeResolver;
}
AcceptHeaderLocaleResolver 这个类中有一个方法
public Locale resolveLocale(HttpServletRequest request) {
    Locale defaultLocale = this.getDefaultLocale();
    // 默认的就是根据请求头带来的区域信息获取Locale进行国际化
    if (defaultLocale != null && request.getHeader("Accept-Language") == null) {
        return defaultLocale;
    } else {
        Locale requestLocale = request.getLocale();
        List<Locale> supportedLocales = this.getSupportedLocales();
        if (!supportedLocales.isEmpty() && !supportedLocales.contains(requestLocale)) {
            Locale supportedLocale = this.findSupportedLocale(request, supportedLocales);
            if (supportedLocale != null) {
                return supportedLocale;
            } else {
                return defaultLocale != null ? defaultLocale : requestLocale;
            }
        } else {
            return requestLocale;
        }
    }
}
点击链接让我们的国际化资源生效,就需要让我们自己的Locale生效!写一个自己的LocaleResolver,可以在链接
上携带区域信息!
修改一下前端页面的跳转连接:
<!-- 这里传入参数不需要使用 ?使用 (key=value)-->
<a class="btn btn-sm" th:href="@{/index.html(l='zh_CN')}">中文</a>
<a class="btn btn-sm" th:href="@{/index.html(l='en_US')}">English</a>
写一个处理的组件类!
//可以在链接上携带区域信息
public class MyLocaleResolver implements LocaleResolver {

    //解析请求
    @Override
    public Locale resolveLocale(HttpServletRequest request) {

        String language = request.getParameter("l");
        Locale locale = Locale.getDefault(); // 如果没有获取到就使用系统默认的
        //如果请求链接不为空
        if (!StringUtils.isEmpty(language)){
            //分割请求参数
            String[] split = language.split("_");
            //国家,地区
            locale = new Locale(split[0],split[1]);
        }
        return locale;
    }

    @Override
    public void setLocale(HttpServletRequest httpServletRequest, HttpServletResponse httpServletResponse, Locale locale) {

    }
}
为了让区域化信息能够生效,需要再配置一下这个组件!在MvcConofig下添加bean;
   @Bean
   public LocaleResolver localeResolver(){
       return new MyLocaleResolver();
   }
启动测试:
8.4 登录功能实现
1、首先将action请求不写死
<form class="form-signin" th:action="@{/user/login}" method="post">
2、在controller控制类里写请求方法
@Controller
public class LoginController {

    @RequestMapping("/user/login")
    public String login(@RequestParam("username") String username, @RequestParam("password") String password, Model model) {
        //如果用户名不为空,且密码为123456
        if (!StringUtils.isEmpty(username)&&"123456".equals(password)){
            //登录成功
            return "dashboard.html";
        }else {
            //登录失败
            model.addAttribute("msg","用户名或者密码错误!");
            return "index";
        }
    }
}
3、在前端页面写用户名或密码错误提示(使用Thymeleaf语法)
 <!--如果msg的值为空,则不显示提示-->
    <p style="color: red" th:text="${msg}" th:if="${not #strings.isEmpty(msg)}"></p>
 4、测试发现,地址栏显示用户名和密码,不安全
方式一:通过修改请求方式,改为post请求即可!
@PostMapping("/user/login")
方式二:通过addViewControllers方法实现将请求直接映射为视图!
1、在config目录下的【MyMvcConfig.java】添加
//全面拓展SpringMVC
@Configuration
public class MyMvcConfig implements WebMvcConfigurer {
    @Override
    public void addViewControllers(ViewControllerRegistry registry) {
           registry.addViewController("/main.html").setViewName("dashboard");
    }
}
2、修改controller类中为重定向请求
return "redirect:/main.html";
@Controller
public class LoginController {

    @RequestMapping("/user/login")
    public String login(@RequestParam("username") String username, @RequestParam("password") String password, Model model) {
        //如果用户名不为空,且密码为123456
        if (!StringUtils.isEmpty(username)&&"123456".equals(password)){
            //登录成功
            return "redirect:/main.html";
        }else {
            //登录失败
            model.addAttribute("msg","用户名或者密码错误!");
            return "index";
        }
    }
}

8.5 登录拦截器
问题:不登录用户名和密码也可以登录!
解决:添加拦截器
1、在config目录下新建一个类【LoginHandlerInterceptor.java】实现HandlerInterceptor类,就是一个拦截器
public class LoginHandlerInterceptor implements HandlerInterceptor {
    @Override
    public boolean preHandle(HttpServletRequest request, HttpServletResponse response, Object handler) throws Exception {

        //登录成功之后,应该有用户的session
        Object loginUser = request.getSession().getAttribute("loginUser");

        //没有登录
        if (loginUser==null){
            request.setAttribute("msg","没有权限,请先登录!");
            request.getRequestDispatcher("/index.html").forward(request,response);
            return false;
        }else{
            return true;
        }

    }

}
2、在controller类里绑定session,将username绑定到session中,为了给拦截器判断
session.setAttribute("loginUser",username);
@Controller
public class LoginController {

    @RequestMapping("/user/login")
    public String login(@RequestParam("username") String username,
                        @RequestParam("password") String password,
                        Model model,
                        HttpSession session) {
        //如果用户名不为空,且密码为123456
        if (!StringUtils.isEmpty(username) && "123456".equals(password)) {
            //登录成功
            session.setAttribute("loginUser",username);
            return "redirect:/main.html";
        } else {
            //登录失败
            model.addAttribute("msg", "用户名或者密码错误!");
            return "index";
        }
    }
}
3、在config目录下的【MyMvcConfig.java】重写拦截器方法【addInterceptors】
//拦截器
    @Override
    public void addInterceptors(InterceptorRegistry registry) {
        registry.addInterceptor(new LoginHandlerInterceptor())
                .addPathPatterns("/**")
                .excludePathPatterns("/index.html", "/", "/user/login","/css/*","/js/**","/img/**");
}
4、启动测试,成功!
8.6 展示员工列表
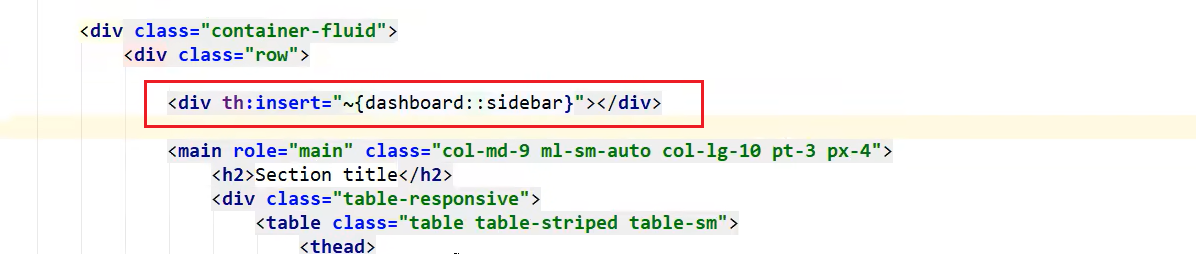
用Thymeleaf语法抽取侧边栏
当多个页面跳转时,顶部与侧边栏不需要改变时,可以通过组件将需要复用的部分抽取出来,单独放到一个页面,使用Thymeleaf语法抽取th:fragment=""

然后在需要使用的页面插入即可th:insert="~{::}"
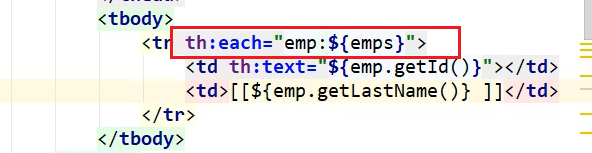
使用Thymeleaf模板引擎遍历数据
语法:
<tr th:each="emp:${emps}">
    <td th:text="${emp.getId()}"></td>
</tr>
:前的emp是为取的名字,:后的${emps}是从后端model.addAttribute("msg","数据")传来的
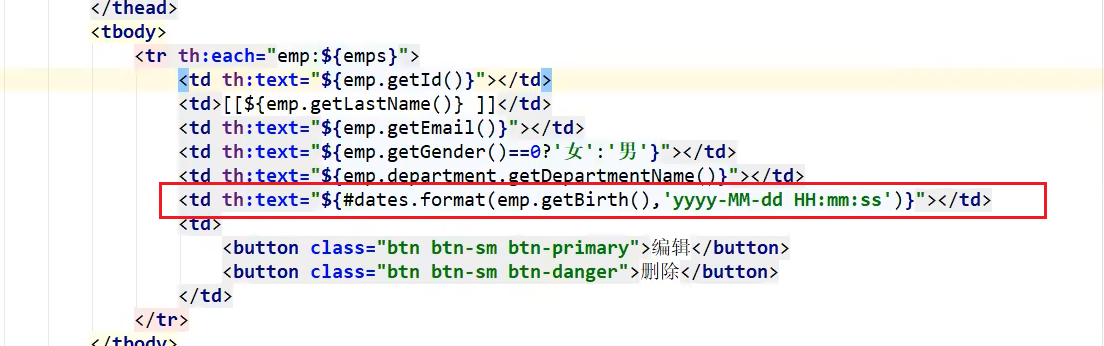
Thymeleaf的三元判断
pojo中定义的性别表示方式为0为女,1为男,则可以使用Thymeleaf的三元表达式来优化显示
<td th:text="${emp.getGender()==0?'女':'男'}"></td>

Thymeleaf时间的表示
<td th:text="${#dates.format(emp.getBirth(),'yyyy-MM-dd HH:mm:ss')}"></td>
8.7 添加员工实现
首先准备添加员工信息的页面,其次编写controller类实现跳转,将遍历出的信息绑定到model,通过转发到页面显示。

<option th:each="dept:${departments}" th:text="${dept.getDepartmantName()}" th:value="${dept.getId()}"></option>
th:each:遍历departments集合,并且命名为dept
th:text:option的值,pojo实体类中的get方法,text只负责显示,给用户选择
th:value:value负责赋值,传递到后端

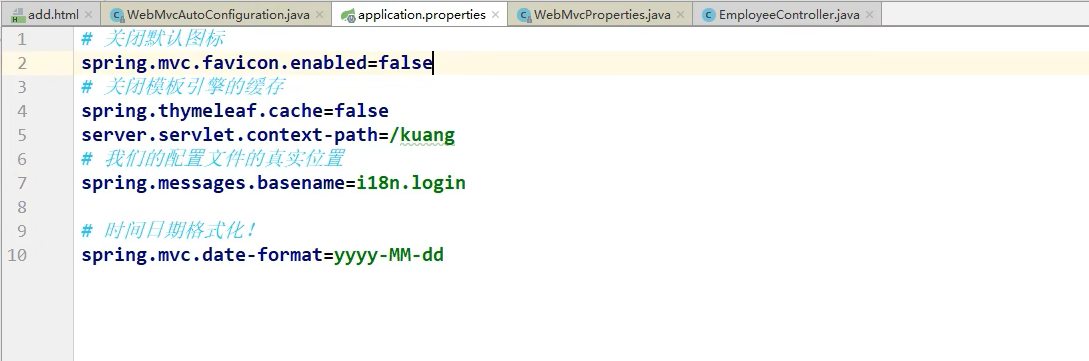
时间日期格式化
因为默认的日期格式是yy/MM/dd,如果前端输入的格式如果为2019-01-01,则可以通过在application.properties中
配置时间日期格式化。
spring.mvc.date-format=yyyy-MM-dd
8.8 404 和 500页面
SpringBoot提供了404和505页面,只需要把html命名为404或500,即可作为默认的400和500页面。
8.9 注销
在controller类中,设置移除session即可。
session.invalidate();

8.10 开发总结
后台模板:
- X-admin:X-admin - 经典前端网站后台管理模板框架 (xuebingsi.com)
- Layui:Layui - 经典开源模块化前端 UI 框架 (itze.cn)
- Bootstrap:Bootstrap网站模板Bootstrap网站模板免费下载模板之家 (cssmoban.com)
- Semantic UI:Semantic UI (semantic-ui.com)网站模板,图标logo
9 Spring Data
9.1 Spring Data简介
对于数据访问层,无论是 SQL(关系型数据库) 还是 NOSQL(非关系型数据库),Spring Boot 底层都是采用 Spring
Data 的方式进行统一处理。
Spring Boot 底层都是采用 Spring Data 的方式进行统一处理各种数据库,Spring Data 也是 Spring 中与 Spring
Boot、Spring Cloud 等齐名的知名项目。
Sping Data 官网:https://spring.io/projects/spring-data
数据库相关的启动器 :可以参考官方文档:
https://docs.spring.io/spring-boot/docs/2.2.5.RELEASE/reference/htmlsingle/#using-boot-starter
9.2 Spring Boot整合JDBC
9.2.1 SPringBoot默认数据源
1、新建Spring Boot项目,引入相应的模块!
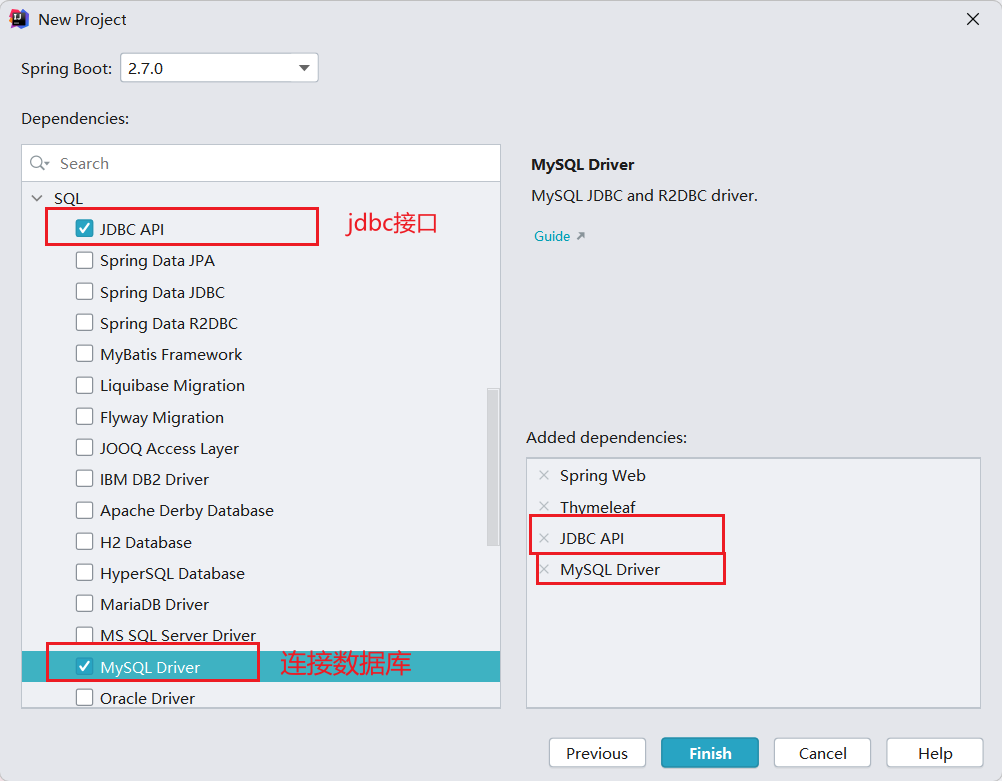
2、查看pom时会发现已自动导入驱动jar包
<dependency>
    <groupId>org.springframework.boot</groupId>
    <artifactId>spring-boot-starter-jdbc</artifactId>
</dependency>
<dependency>
    <groupId>mysql</groupId>
    <artifactId>mysql-connector-java</artifactId>
    <scope>runtime</scope>
</dependency>
3、编写yml配置文件连接数据库(mysql 8.0+ 要配时区)
spring:
  datasource:
    username: root
    password: 123456
    url: jdbc:mysql://localhost:3306/mybatis?useUnicode=true&characterEncoding=utf-8&serverTimezone=UTC
    driver-class-name: com.mysql.cj.jdbc.Driver
4、配置完后,直接就可以在SpringBoot提供的测试类进行测试了
@SpringBootTest
class SpringBoot04DataApplicationTests {

    @Autowired
    DataSource dataSource;

    @Test
    void contextLoads() throws SQLException {

        //查看默认数据源  class com.zaxxer.hikari.HikariDataSource
        System.out.println(dataSource.getClass());

        //获得数据库连接
        Connection connection = dataSource.getConnection();
        System.out.println(connection);
        //关闭连接
        connection.close();
    }
}
测试发现它默认给的配置的数据源为 : class com.zaxxer.hikari.HikariDataSource , 没有手动配置

根据全局搜索,找到数据源的所有自动配置都在 :DataSourceAutoConfiguration文件
@Import(
    {Hikari.class, Tomcat.class, Dbcp2.class, Generic.class, DataSourceJmxConfiguration.class}
)
protected static class PooledDataSourceConfiguration {
    protected PooledDataSourceConfiguration() {
    }
}
可以看出 Spring Boot 2.2.5 默认使用HikariDataSource 数据源,而以前版本,如 Spring Boot 1.5 默认使用
org.apache.tomcat.jdbc.poll.DataSource作为数据源。
HikariDataSource 号称 Java WEB 当前速度最快的数据源,相比于传统的 C3P0 、DBCP、Tomcat jdbc 等连接池更加优秀。
可以使用 spring.datasource.type 指定自定义的数据源类型,值为 要使用的连接池实现的完全限定名。
到这里就可以做CRUD操作了。
9.2.2 JdbcTemplate模板
如果遇到xxxx Template,那些就是SpringBoot已经配置好的模板bean,开箱即用。
阅读底层源码总结:
JdbcTemplate主要提供以下几类方法:
execute方法:可以用于执行任何SQL语句,一般用于执行DDL语句;
update方法及batchUpdate方法:update方法用于执行新增、修改、删除等语句;batchUpdate方法用于执行批
处理相关语句;query方法及queryForXXX方法:用于执行查询相关语句;
call方法:用于执行存储过程、函数相关语句。
测试一下:
@RestController
public class JDBCController {

    /**
     * Spring Boot 默认提供了数据源,默认提供了 org.springframework.jdbc.core.JdbcTemplate
     * JdbcTemplate 中会自己注入数据源,用于简化 JDBC操作
     * 还能避免一些常见的错误,使用起来也不用再自己来关闭数据库连接
     */
    @Autowired
    JdbcTemplate jdbcTemplate;

    //查询employee表中所有数据
    //没有实体类,数据库中的东西可以用Map获取
    //List 中的1个 Map 对应数据库的 1行数据
    //Map 中的 key 对应数据库的字段名,value 对应数据库的字段值
    @GetMapping("/list")
    public List<Map<String, Object>> userList() {
        String sql = "select * from user";
        List<Map<String, Object>> maps = jdbcTemplate.queryForList(sql);
        return maps;
    }

    //新增一个用户
    @GetMapping("/add")
    public String addUser() {
        //插入语句,注意时间问题
        String sql = "insert into user(id, name,pwd)values (10,'小黄','123456')";
        jdbcTemplate.update(sql);
        //查询
        return "addOk";
    }

    //修改用户信息
    @GetMapping("/update/{id}")
    public String updateUser(@PathVariable("id") int id) {
        //插入语句
        String sql = "update user set name=?,pwd=? where id=" + id;
        //数据
        Object[] objects = new Object[2];
        objects[0] = "测试员2";
        objects[1] = "1233321";
        jdbcTemplate.update(sql, objects);
        //查询
        return "updateOk";
    }

    //删除用户
    //不使用RestFul风格传id
    @GetMapping("/delete")
    public String delUser(int id) {
        //插入语句
        String sql = "delete from user where id=?";
        jdbcTemplate.update(sql, id);
        //查询
        return "deleteOk";
    }
}
到此,CURD的基本操作,使用 JDBC 就搞定了。
9.3 Spring Boot集成Druid数据源
9.3.1 Druid简介
Druid是阿里巴巴开源平台上一个数据库连接池实现,结合了C3P0、DBCP、PROXOOL等DB池的优点,同时加入了日志监控。
Druid开源很好的监控DB池连接和SQL执行情况,天生就是针对监控而生的DB连接池。
SpringBoot 2.0 以上默认使用Hikari(黑卡瑞)数据源,Hikari与Druid(德鲁伊,发音:纠瑞德)都是当前JavaWeb上最优秀的数据源。
Github地址:https://github.com/alibaba/druid/

9.3.2 配置数据源
1、添加上 Druid 数据源依赖;
<!-- https://mvnrepository.com/artifact/com.alibaba/druid -->
<dependency>
    <groupId>com.alibaba</groupId>
    <artifactId>druid</artifactId>
    <version>1.2.8</version>
</dependency>
2、切换数据源;Spring Boot 2.0 以上默认使用 com.zaxxer.hikari.HikariDataSource 数据源,但可以通过 spring.datasource.type 指定数据源;
spring:
  datasource:
    username: root
    password: 123456
    url: jdbc:mysql://localhost:3306/mybatis?useUnicode=true&characterEncoding=utf-8&serverTimezone=UTC
    driver-class-name: com.mysql.cj.jdbc.Driver
    type: com.alibaba.druid.pool.DruidDataSource
3、数据源切换之后,在测试类中注入 DataSource,然后获取到它,测试输出看一下;

4、切换成功就可以设置数据源连接初始化大小、最大连接数、等待时间、最小连接数 等设置项;
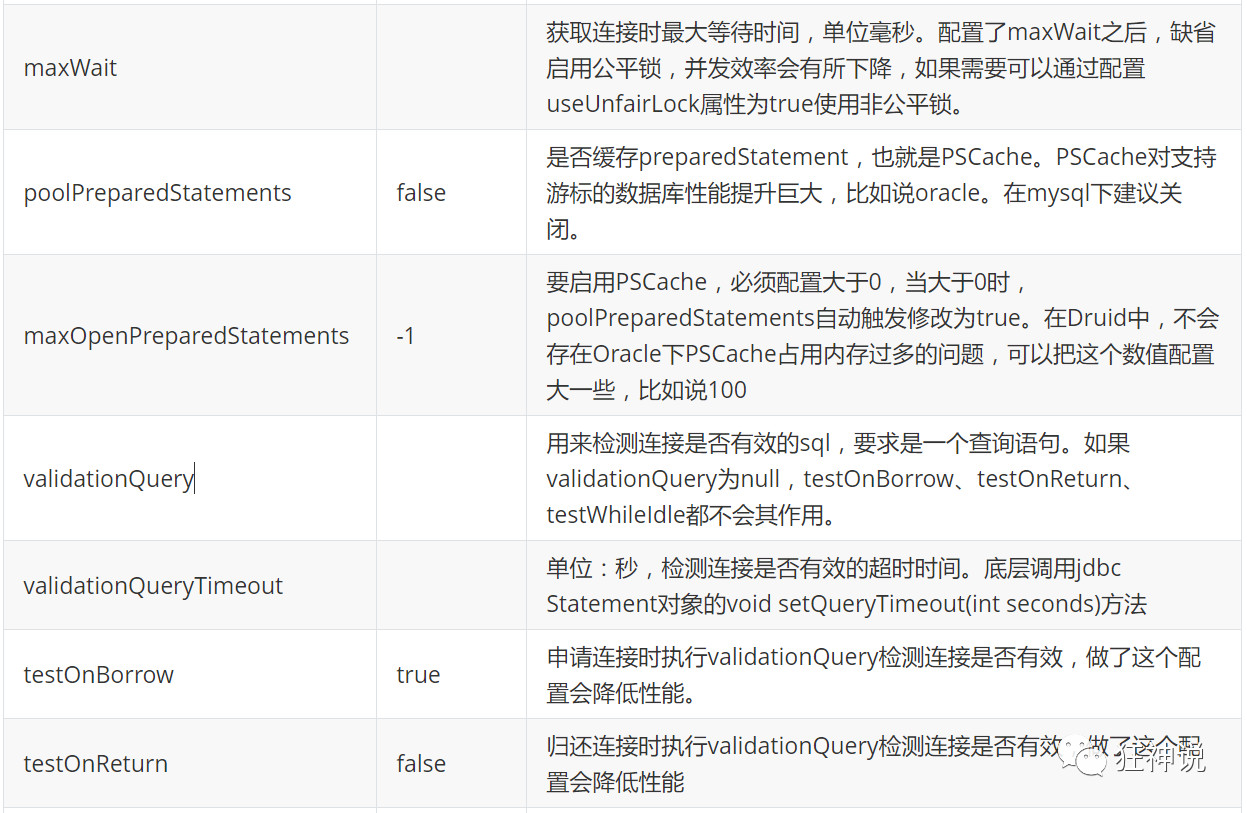
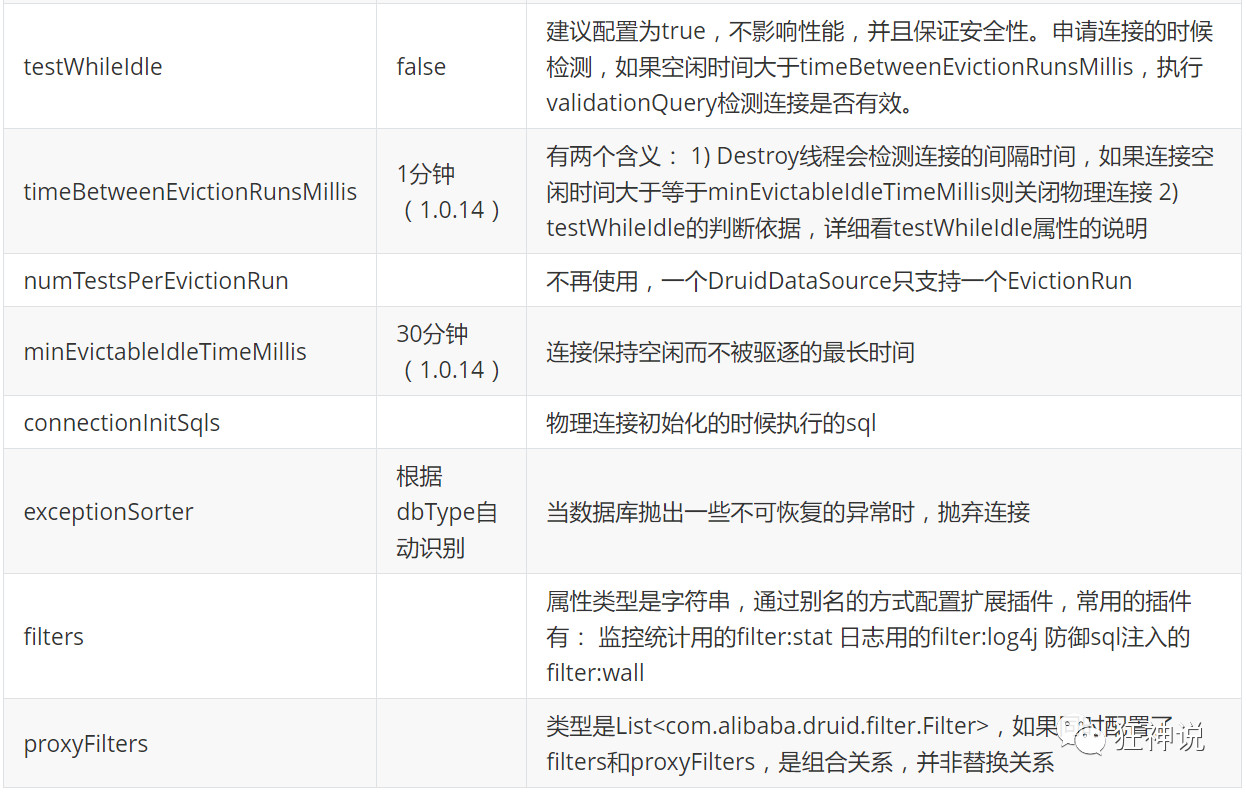
配置监控统计拦截的filters,stat:监控统计、log4j:日志记录、wall:防御sql注入
如果允许时报错 java.lang.ClassNotFoundException: org.apache.log4j.Priority
则导入 log4j 依赖即可,Maven 地址:https://mvnrepository.com/artifact/log4j/log4j
spring:
  datasource:
    username: root
    password: 123456
    url: jdbc:mysql://localhost:3306/mybatis?useUnicode=true&characterEncoding=utf-8&serverTimezone=UTC
    driver-class-name: com.mysql.cj.jdbc.Driver
    type: com.alibaba.druid.pool.DruidDataSource

    #Spring Boot 默认是不注入这些属性值的,需要自己绑定
    #druid 数据源专有配置
    initialSize: 5
    minIdle: 5
    maxActive: 20
    maxWait: 60000
    timeBetweenEvictionRunsMillis: 60000
    minEvictableIdleTimeMillis: 300000
    validationQuery: SELECT 1 FROM DUAL
    testWhileIdle: true
    testOnBorrow: false
    testOnReturn: false
    poolPreparedStatements: true

    #配置监控统计拦截的filters,stat:监控统计、log4j:日志记录、wall:防御sql注入
    #如果允许时报错  java.lang.ClassNotFoundException: org.apache.log4j.Priority
    #则导入 log4j 依赖即可,Maven 地址:https://mvnrepository.com/artifact/log4j/log4j
    filters: stat,wall,log4j
    maxPoolPreparedStatementPerConnectionSize: 20
    useGlobalDataSourceStat: true
    connectionProperties: druid.stat.mergeSql=true;druid.stat.slowSqlMillis=500
5、导入Log4j 的依赖
<!-- https://mvnrepository.com/artifact/log4j/log4j -->
<dependency>
    <groupId>log4j</groupId>
    <artifactId>log4j</artifactId>
    <version>1.2.12</version>
</dependency>
6、现在需要程序员自己为 DruidDataSource 绑定全局配置文件中的参数,再添加到容器中,而不再使用 Spring Boot 的自动生成了;我们需要 自己添加 DruidDataSource 组件到容器中,并绑定属性;这个config对应的是原来的bean.xml,将application.yml配置文件与config配置绑定
@Configuration
public class DruidConfig {

    /*
       将自定义的 Druid数据源添加到容器中,不再让 Spring Boot 自动创建
       绑定全局配置文件中的 druid 数据源属性到 com.alibaba.druid.pool.DruidDataSource从而让它们生效
       @ConfigurationProperties(prefix = "spring.datasource"):作用就是将 全局配置文件中
       前缀为 spring.datasource的属性值注入到 com.alibaba.druid.pool.DruidDataSource 的同名参数中
     */
    @ConfigurationProperties(prefix = "spring.datasource")
    @Bean
    public DataSource druidDataSource() {
        return new DruidDataSource();
    }
}
7、测试类中测试一下;
@SpringBootTest
class SpringBoot04DataApplicationTests {
@Autowired
DataSource dataSource;
@Test
void contextLoads() throws SQLException {
//查看默认数据源 class com.zaxxer.hikari.HikariDataSource
System.out.println(dataSource.getClass());
//获得数据库连接
Connection connection = dataSource.getConnection();
System.out.println(connection);
DruidDataSource druidDataSource = (DruidDataSource) dataSource;
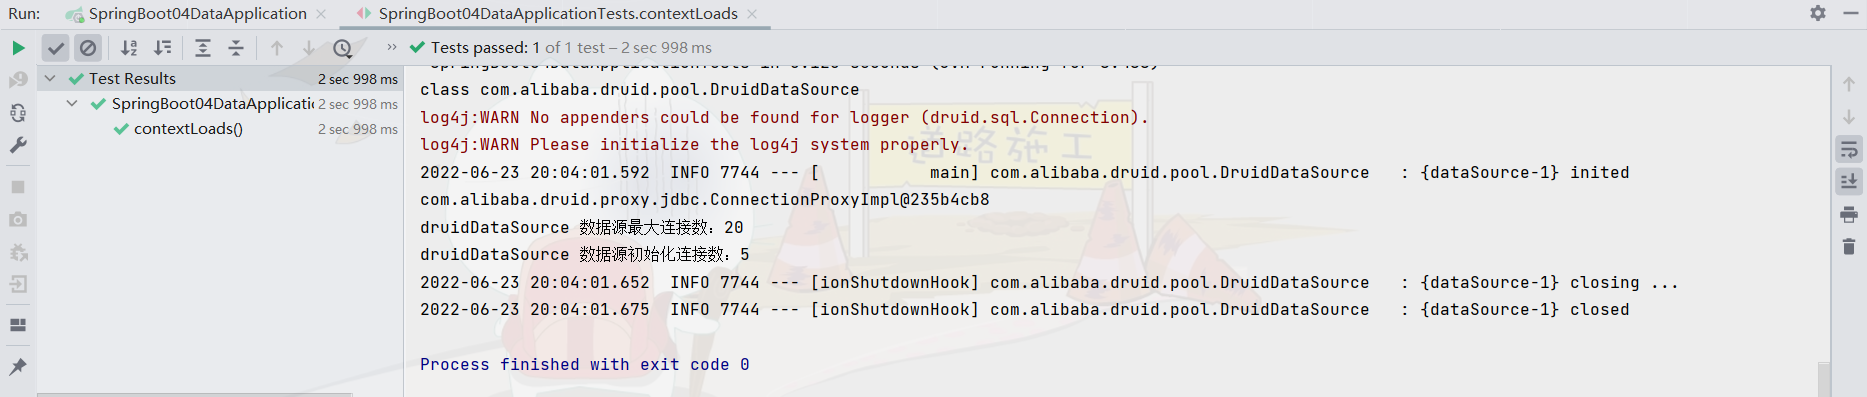
System.out.println("druidDataSource 数据源最大连接数:" + druidDataSource.getMaxActive());
System.out.println("druidDataSource 数据源初始化连接数:" + druidDataSource.getInitialSize());
//关闭连接
connection.close();
}
}
输出结果 :可见配置参数已经生效!
9.3.3 配置Druid数据源监控
Druid 数据源具有监控的功能,并提供了一个 web 界面方便用户查看,类似安装 路由器时,提供了一个默认的 web 页面。
所以第一步需要设置 Druid 的后台管理页面,比如登录账号、密码 等;配置后台管理;
@Configuration
public class DruidConfig {

    /*
       将自定义的 Druid数据源添加到容器中,不再让 Spring Boot 自动创建
       绑定全局配置文件中的 druid 数据源属性到 com.alibaba.druid.pool.DruidDataSource从而让它们生效
       @ConfigurationProperties(prefix = "spring.datasource"):作用就是将 全局配置文件中
       前缀为 spring.datasource的属性值注入到 com.alibaba.druid.pool.DruidDataSource 的同名参数中
     */
    @ConfigurationProperties(prefix = "spring.datasource")
    @Bean
    public DataSource druidDataSource() {
        return new DruidDataSource();
    }

    //配置 Druid 监控管理后台的Servlet;
    //内置 Servlet 容器时没有web.xml文件,所以使用 Spring Boot 的注册 Servlet 方式
    @Bean
    public ServletRegistrationBean statViewServlet() {
        ServletRegistrationBean bean = new ServletRegistrationBean(new StatViewServlet(), "/druid/*");

        // 这些参数可以在 com.alibaba.druid.support.http.StatViewServlet
        // 的父类 com.alibaba.druid.support.http.ResourceServlet 中找到
        Map<String, String> initParams = new HashMap<>();
        initParams.put("loginUsername", "admin"); //后台管理界面的登录账号
        initParams.put("loginPassword", "123456"); //后台管理界面的登录密码

        //后台允许谁可以访问
        //initParams.put("allow", "localhost"):表示只有本机可以访问
        //initParams.put("allow", ""):为空或者为null时,表示允许所有访问
        initParams.put("allow", "");
        //deny:Druid 后台拒绝谁访问
        //initParams.put("xleixz", "192.168.1.20");表示禁止此ip访问

        //设置初始化参数
        bean.setInitParameters(initParams);
        return bean;
    }
}
配置完毕后,我们可以选择访问 :http://localhost:8080/druid
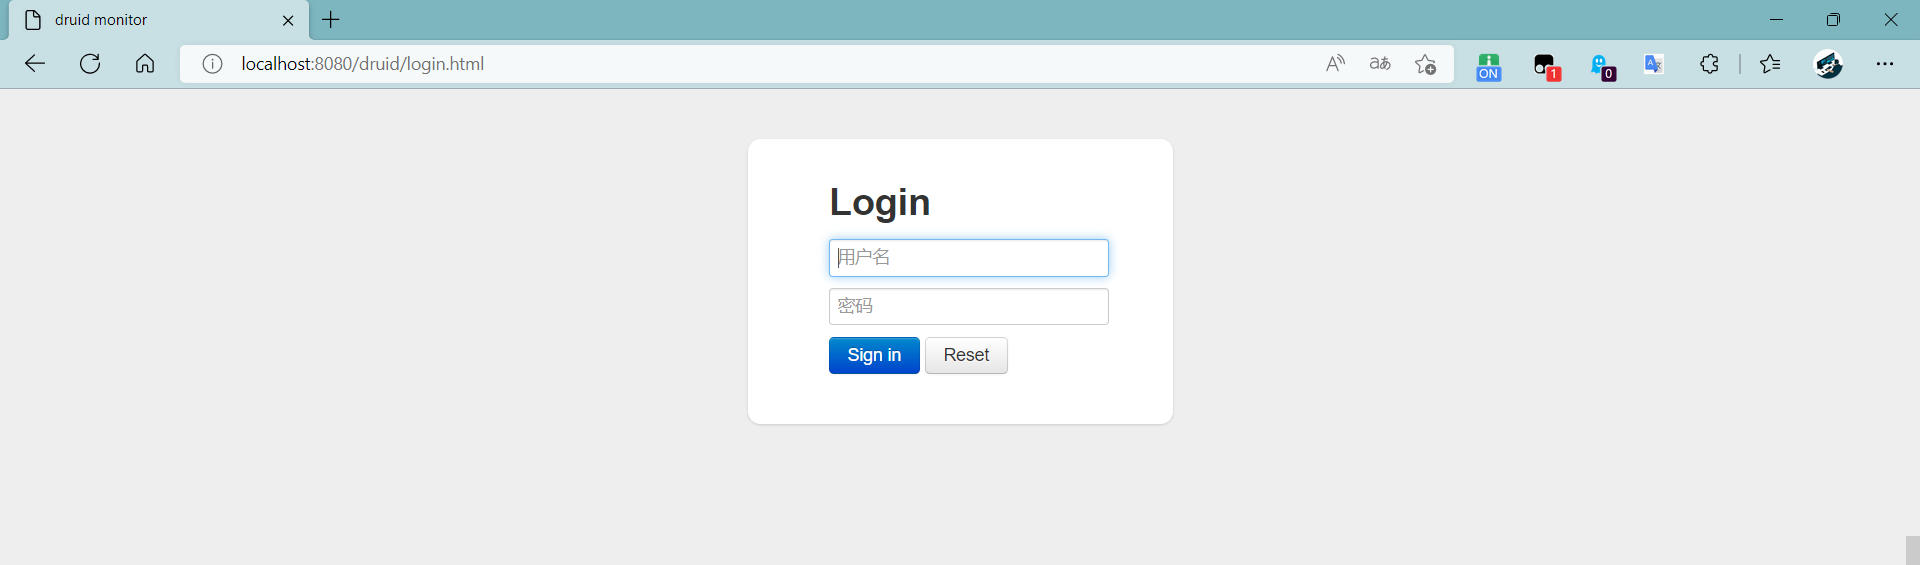
输入设置的用户名和密码admin 123456进入
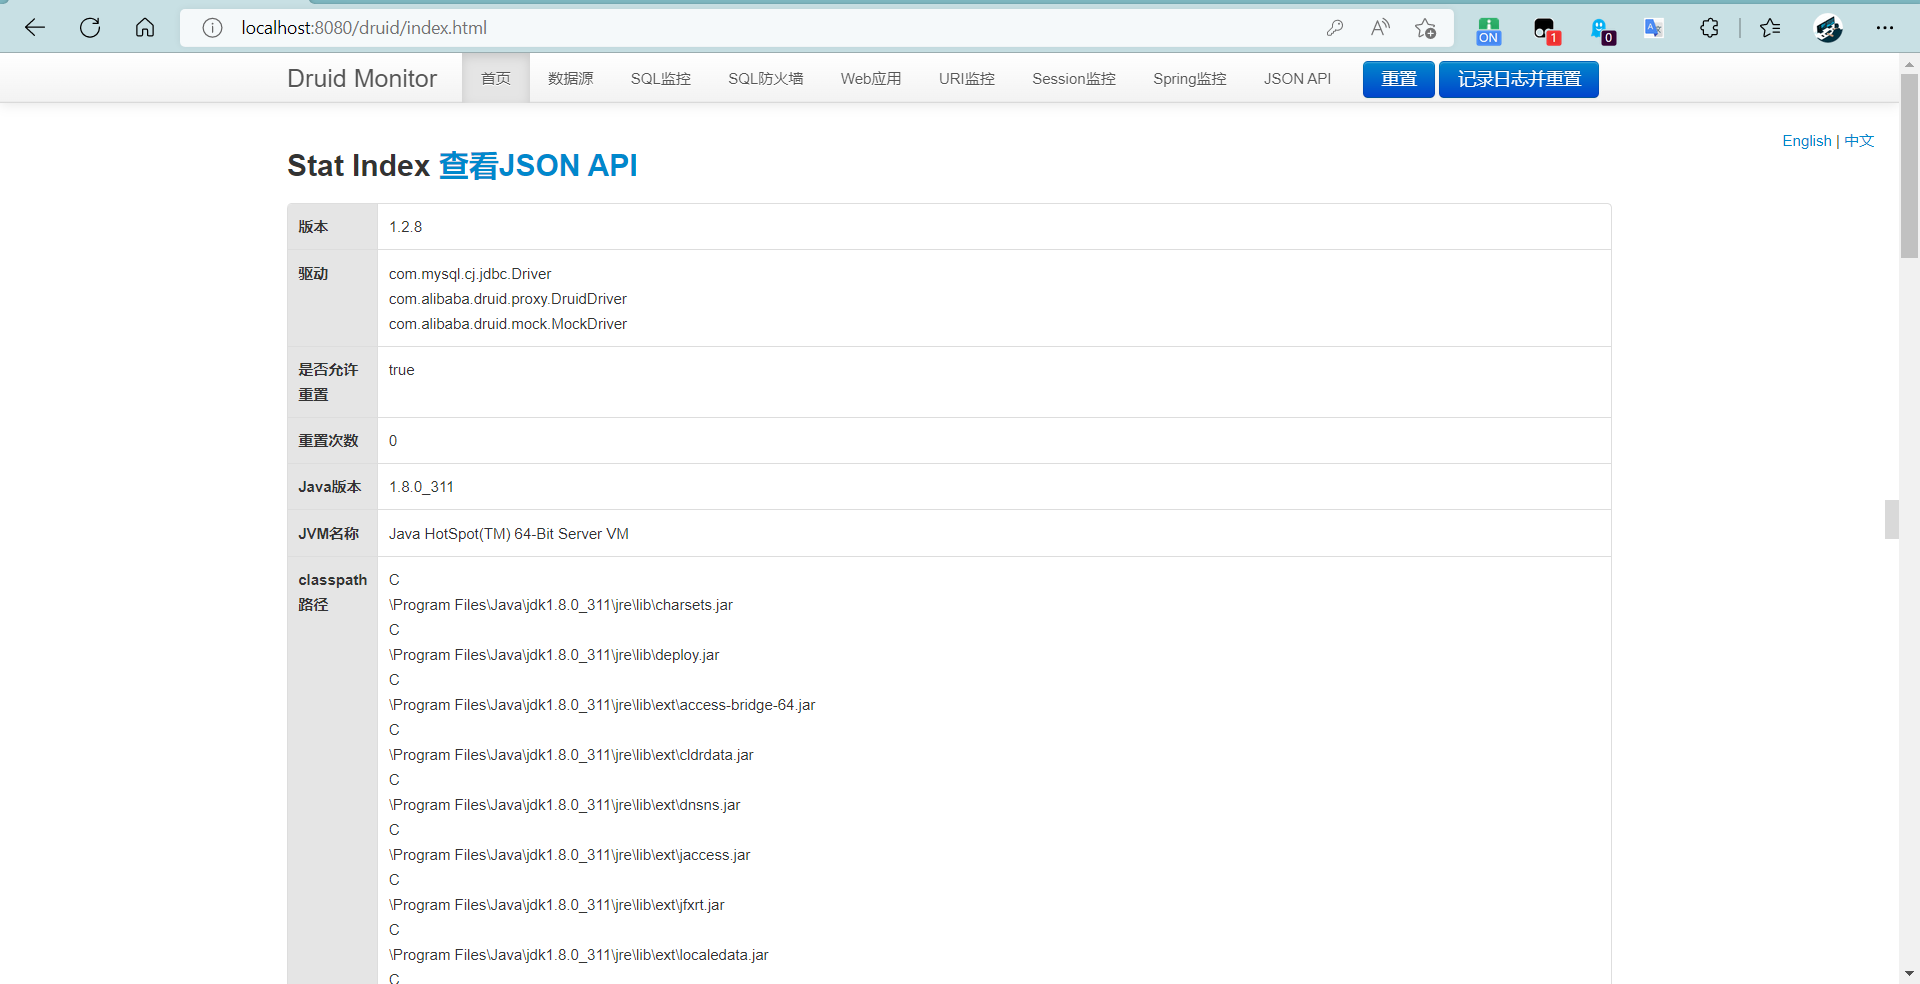
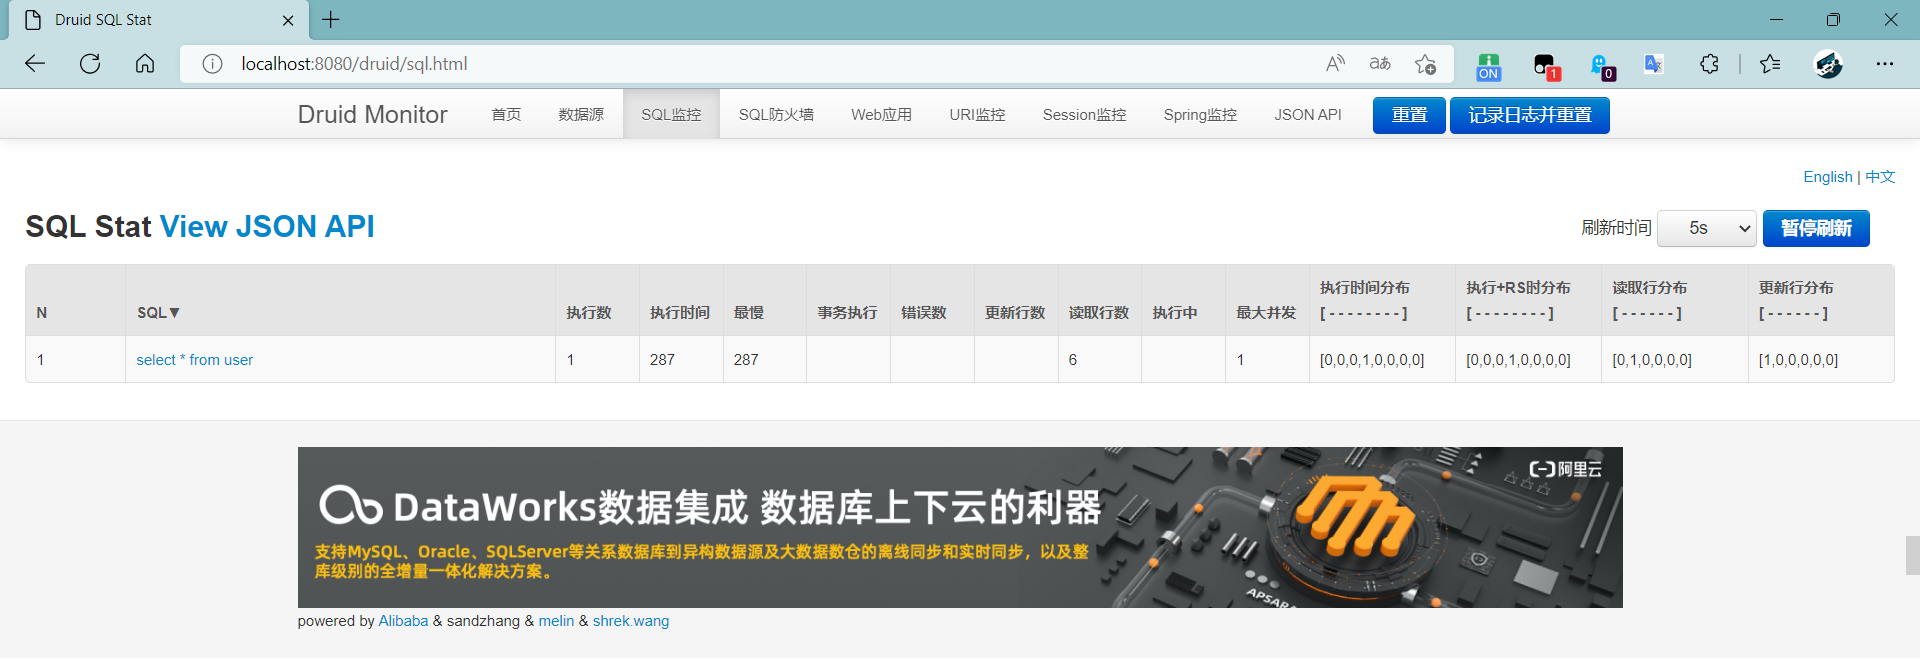
它能监控SQL的任何操作;
9.3.4 配置 Druid web 监控 filter 过滤器(了解)
//配置 Druid 监控 之  web 监控的 filter
//WebStatFilter:用于配置Web和Druid数据源之间的管理关联监控统计
@Bean
public FilterRegistrationBean webStatFilter() {
    FilterRegistrationBean bean = new FilterRegistrationBean();
    bean.setFilter(new WebStatFilter());

    //exclusions:设置哪些请求进行过滤排除掉,从而不进行统计
    Map<String, String> initParams = new HashMap<>();
    initParams.put("exclusions", "*.js,*.css,/druid/*,/jdbc/*");
    bean.setInitParameters(initParams);

    //"/*" 表示过滤所有请求
    bean.setUrlPatterns(Arrays.asList("/*"));
    return bean;
}
在工作中,按需求进行配置即可,主要用作监控!
9.4 Spring Boot整合Mybatis
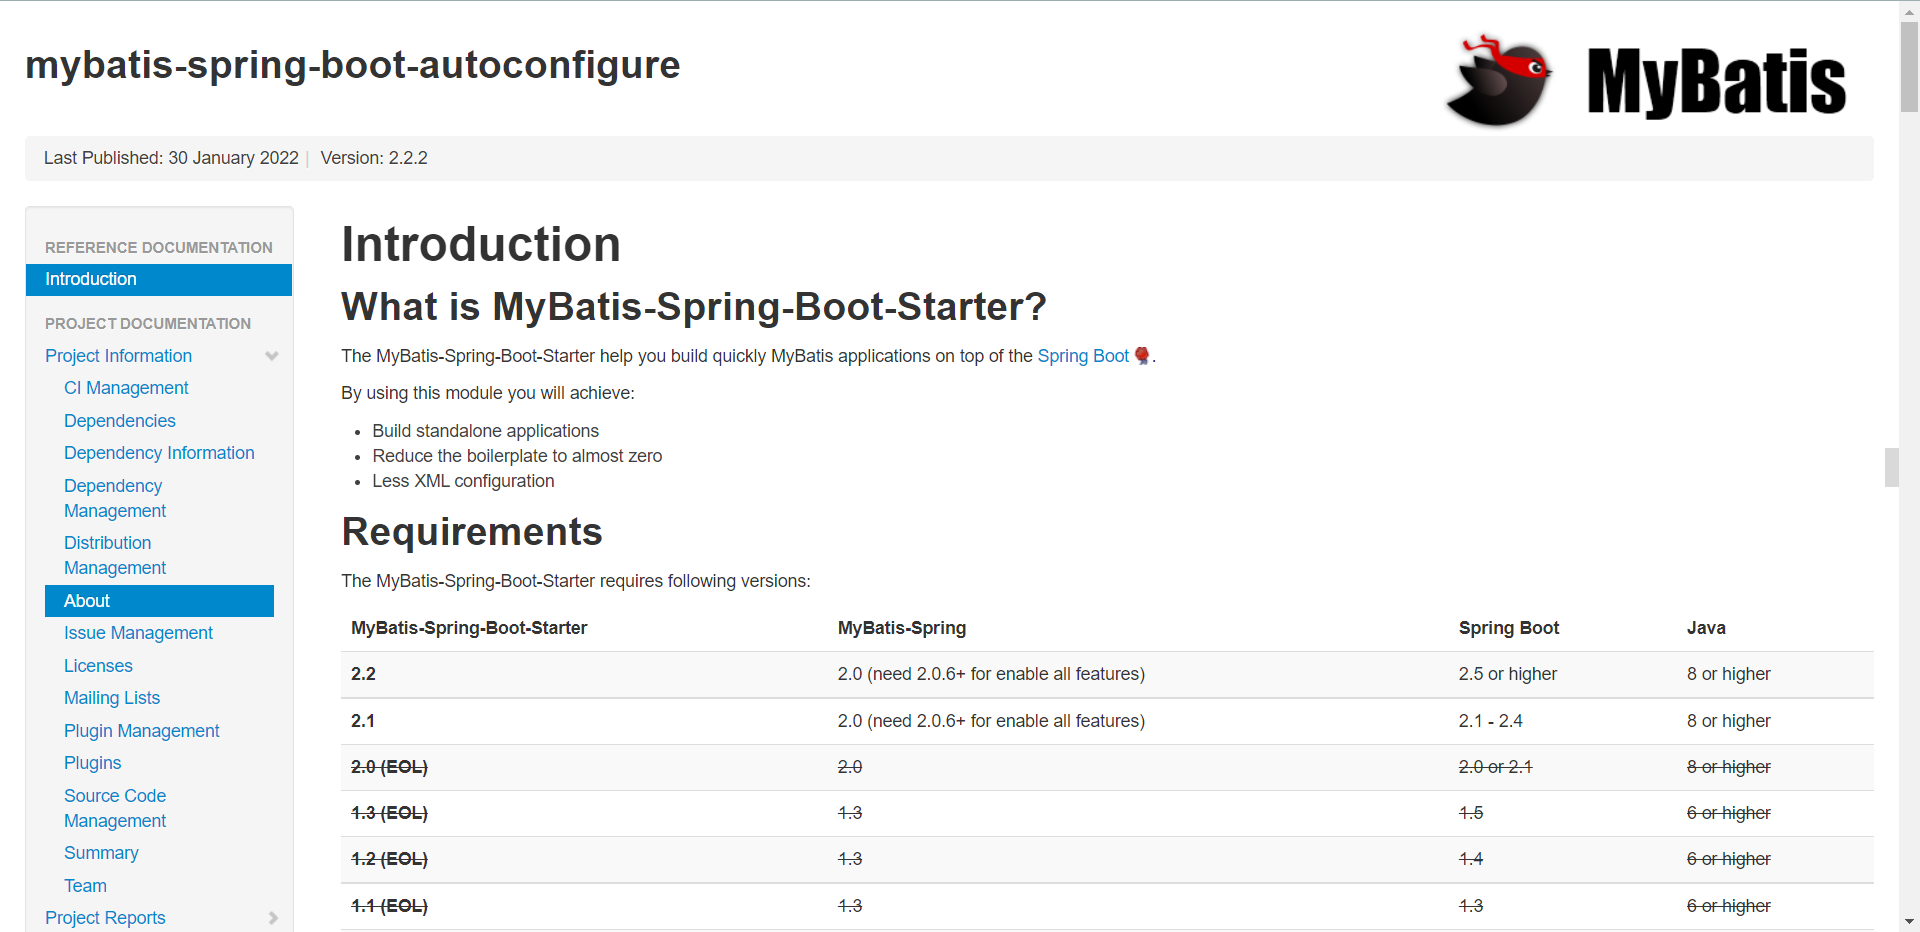
官方文档:http://mybatis.org/spring-boot-starter/mybatis-spring-boot-autoconfigure/
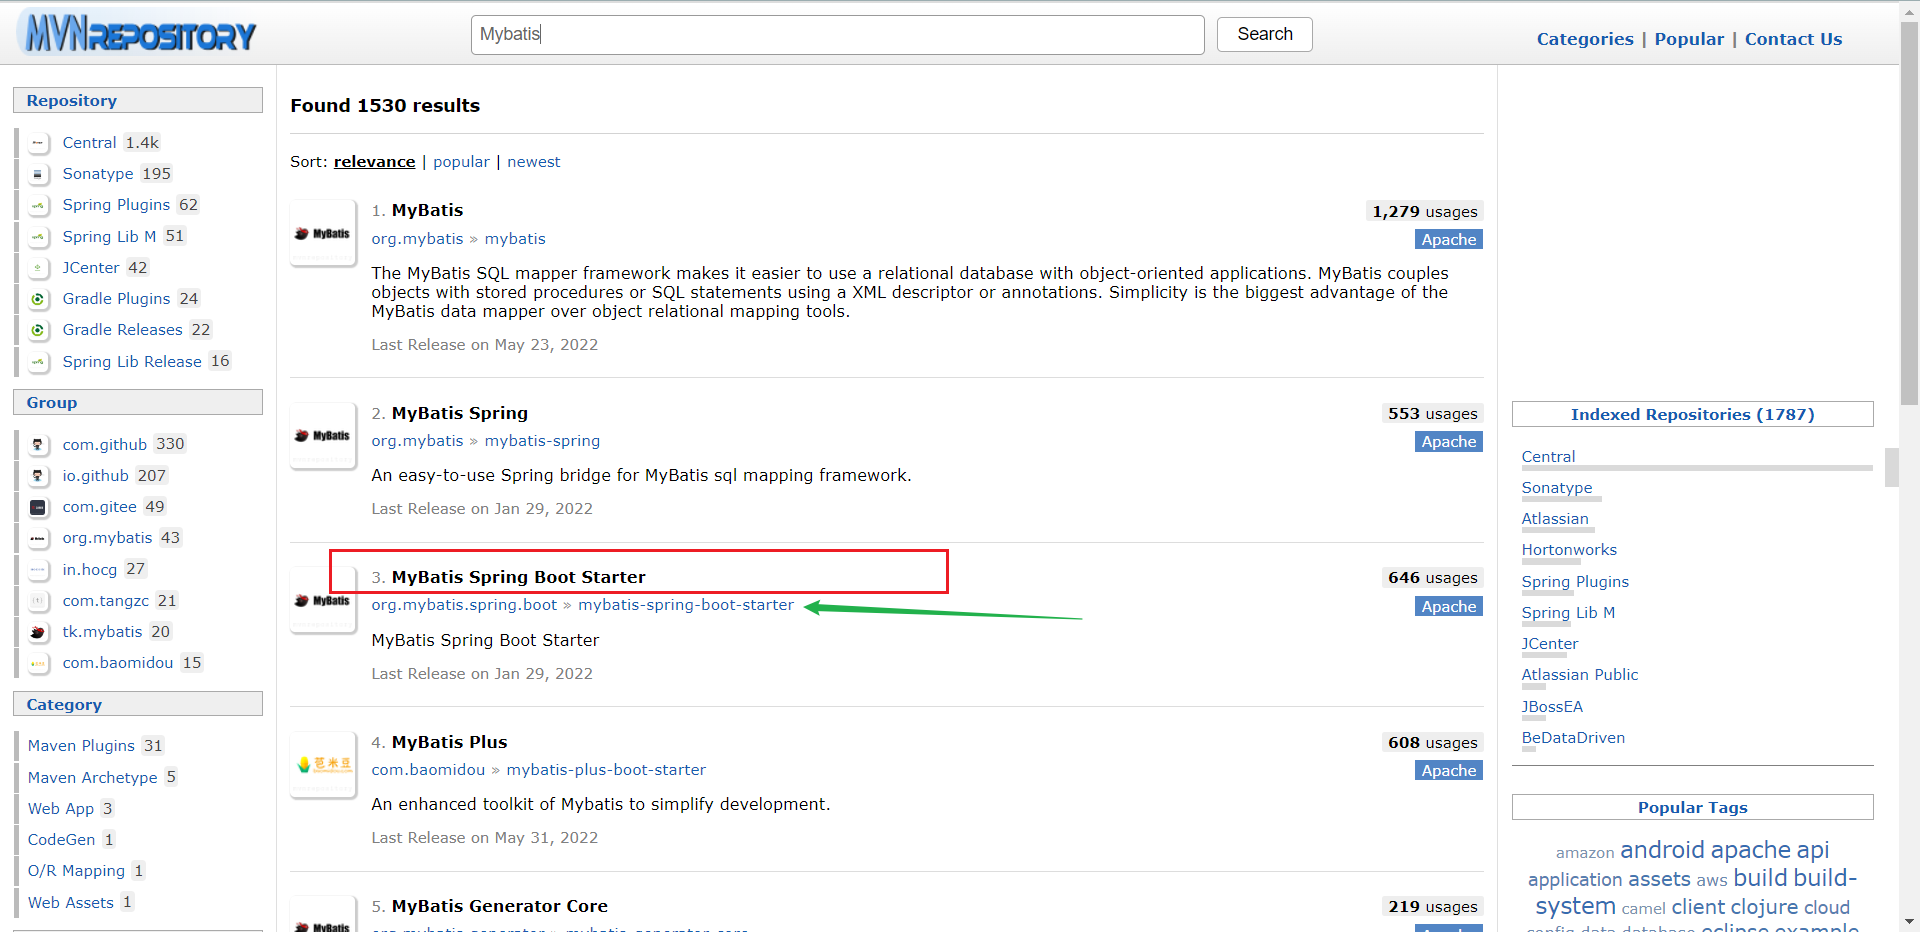
Maven仓库地址:https://mvnrepository.com/artifact/org.mybatis.spring.boot/mybatis-spring-boot-starter/2.1.1
| ** |
|---|
1、导入 MyBatis 所需要的依赖
<!-- https://mvnrepository.com/artifact/org.mybatis.spring.boot/mybatis-spring-boot-starter -->
<dependency>
    <groupId>org.mybatis.spring.boot</groupId>
    <artifactId>mybatis-spring-boot-starter</artifactId>
    <version>2.1.3</version>
</dependency>
2、配置数据库连接信息【application.yml】
spring:
  datasource:
    username: root
    password: 123456
    url: jdbc:mysql://localhost:3306/mybatis?useUnicode=true&characterEncoding=utf-8&serverTimezone=UTC
    driver-class-name: com.mysql.cj.jdbc.Driver
3、测试数据库是否连接成功!
4、创建pojo实体类【User.java】
@Data
@AllArgsConstructor
@NoArgsConstructor
public class User {

    private int id;
    private String name;
    private String pwd;
}
5、创建mapper目录以及对应的 Mapper 接口【UserMapper.java】
//@Mapper注解: 表示这是一个Mybatis的Mapper类, 也可以在Application类中使用@MapperScan("")扫描的方式
@Mapper
//dao层,可以使用万能的@Component,也可以使用分层的@Repository
//等价于 <bean id="UserMapper" class="com.xleixz.mapper.UserMapper"/>
@Repository
public interface UserMapper {

    List<User> queryUserList();

    User queryUserById(int id);

    int addUser(User user);

    int updateUser(User user);

    int deleteUser(int id);
}
6、在application.yml配置文件中,整合Mybatis,起别名,绑定Mapper.xml映射文件
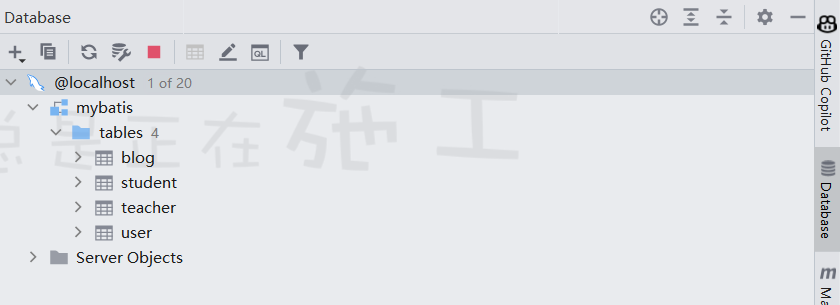
# 整合Mybatis
mybatis:
type-aliases-package: com.xleixz.pojo
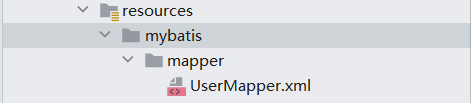
mapper-locations: classpath:mybatis/mapper/*.xml
7、在resources目录下创建对应的Mapper映射文件
<?xml version="1.0" encoding="UTF-8" ?>
<!DOCTYPE mapper
        PUBLIC "-//mybatis.org//DTD Mapper 3.0//EN"
        "http://mybatis.org/dtd/mybatis-3-mapper.dtd">

<mapper namespace="com.xleixz.mapper.UserMapper">

    <!--开启缓存-->
    <cache/>

    <select id="queryUserList" resultType="user">
        select *
        from user;
    </select>

    <select id="queryUserById" resultType="user" parameterType="int">
        select *
        from user
        where id = #{id};
    </select>

</mapper>
9、service业务层,业务实现接口和业务实现类,时刻记住:service业务层调dao/mapper层,controller控制层调service业务层
public interface UserService {

    List<User> queryUserList();

    User queryUserById(int id);

    int addUser(User user);

    int updateUser(User user);

    int deleteUser(int id);
}
@Service
public class UserServiceImpl implements UserService {

    @Autowired
    private UserMapper userMapper;

    @Override
    public List<User> queryUserList() {
        return userMapper.queryUserList();
    }

    @Override
    public User queryUserById(int id) {
        return userMapper.queryUserById(id);
    }

    @Override
    public int addUser(User user) {
        return userMapper.addUser(user);
    }

    @Override
    public int updateUser(User user) {
        return userMapper.updateUser(user);
    }

    @Override
    public int deleteUser(int id) {
        return userMapper.deleteUser(id);
    }
}
10、maven配置资源过滤问题
<resources>
    <resource>
        <directory>src/main/java</directory>
        <includes>
            <include>**/*.xml</include>
        </includes>
        <filtering>true</filtering>
    </resource>
</resources>
| 整合完毕 |
|---|
11 SpringSecurity
再Web开发中,安全是第一位!虽然过滤器,拦截器等都可以实现,但是利用框架使用更方便,简单。
安全属于非功能性需求;
如果在应用开发的后期才考虑安全的问题,就可能陷入一个两难的境地:一方面,应用存在严重的安全漏洞,无法满足用户的要求,并可能造成用户的隐私数据被攻击者窃取;另一方面,应用的基本架构已经确定,要修复安全漏洞,可能需要对系统的架构做出比较重大的调整,因而需要更多的开发时间,影响应用的发布进程。
建议在开发初期就把安全的因素考虑进来。
市面上知名的安全框架:shiro、SpringSecurity;他们除了类不一样,名字不一样,其他都类似;
主要功能:认证和授权,例如VIP1用户和VIP2用户,为了限制登录,原来是设置拦截器,现在只需要设置授权即可。
Spring 是一个非常流行和成功的 Java 应用开发框架。Spring Security 基于 Spring 框架,提供了一套 Web 应用安全性的完整解决方案。一般来说,Web 应用的安全性包括用户认证(Authentication)和用户授权(Authorization)两个部分。用户认证指的是验证某个用户是否为系统中的合法主体,也就是说用户能否访问该系统。用户认证一般要求用户提供用户名和密码。系统通过校验用户名和密码来完成认证过程。用户授权指的是验证某个用户是否有权限执行某个操作。在一个系统中,不同用户所具有的权限是不同的。比如对一个文件来说,有的用户只能进行读取,而有的用户可以进行修改。一般来说,系统会为不同的用户分配不同的角色,而每个角色则对应一系列的权限。
Spring Security 是针对Spring项目的安全框架,也是Spring Boot底层安全模块默认的技术选型,他可以实现强大的Web安全控制,对于安全控制,仅需要引入 spring-boot-starter-security 模块,进行少量的配置,即可实现强大的安全管理!
记住几个类:
- WebSecurityConfigurerAdapter:自定义Security策略
- AuthenticationManagerBuilder:自定义认证策略
- @EnableWebSecurity:开启WebSecurity模式
Spring Security的两个主要目标是 “认证” 和 “授权”(访问控制)。
“认证”(Authentication)
身份验证是关于验证您的凭据,如用户名/用户ID和密码,以验证您的身份。
身份验证通常通过用户名和密码完成,有时与身份验证因素结合使用。
“授权” (Authorization)
授权发生在系统成功验证您的身份后,最终会授予您访问资源(如信息,文件,数据库,资金,位置,几乎任何内容)的完全权限。
这个概念是通用的,而不是只在Spring Security 中存在。
11.1 认证和授权
目前,我们的测试环境,是谁都可以访问的,我们使用 Spring Security 增加上认证和授权的功能
1、引入 Spring Security 模块
<dependency>
   <groupId>org.springframework.boot</groupId>
   <artifactId>spring-boot-starter-security</artifactId>
</dependency>
2、编写 Spring Security 配置类
参考官网:https://spring.io/projects/spring-security
查看项目中的版本,找到对应的帮助文档:
https://docs.spring.io/spring-security/site/docs/5.3.0.RELEASE/reference/html5 #servlet-applications 8.16.4
3、编写基础配置类
import org.springframework.security.config.annotation.web.builders.HttpSecurity;
import org.springframework.security.config.annotation.web.configuration.EnableWebSecurity;
import org.springframework.security.config.annotation.web.configuration.WebSecurityConfigurerAdapter;

@EnableWebSecurity // 开启WebSecurity模式
public class SecurityConfig extends WebSecurityConfigurerAdapter {

   @Override
   protected void configure(HttpSecurity http) throws Exception {

  }
}
4、在编写的基础类中定制请求的授权规则
@Override
protected void configure(HttpSecurity http) throws Exception {
   // 定制请求的授权规则
   // 首页所有人可以访问
   http.authorizeRequests().antMatchers("/").permitAll()
  .antMatchers("/level1/**").hasRole("vip1")
  .antMatchers("/level2/**").hasRole("vip2")
  .antMatchers("/level3/**").hasRole("vip3");
}
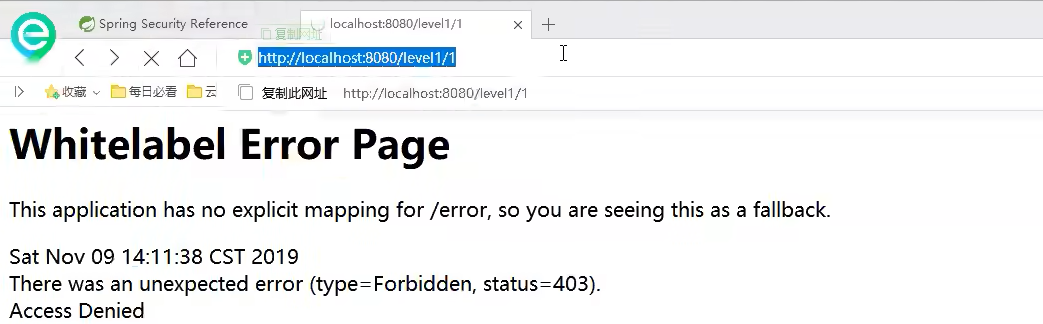
5、测试一下:发现除了首页都进不去了!因为我们目前没有登录的角色,因为请求需要登录的角色拥有对应的权限才可以!
6、在configure()方法中加入以下配置,开启自动配置的登录功能!
// 开启自动配置的登录功能
// /login 请求来到登录页
// /login?error 重定向到这里表示登录失败
http.formLogin();
7、测试一下:发现,没有权限的时候,会跳转到登录的页面!

8、查看刚才登录页的注释信息;
我们可以定义认证规则,重写configure(AuthenticationManagerBuilder auth)方法
//定义认证规则
@Override
protected void configure(AuthenticationManagerBuilder auth) throws Exception {

   //在内存中定义,也可以在jdbc中去拿....
   auth.inMemoryAuthentication()
          .withUser("kuangshen").password("123456").roles("vip2","vip3")
          .and()
          .withUser("root").password("123456").roles("vip1","vip2","vip3")
          .and()
          .withUser("guest").password("123456").roles("vip1","vip2");
}
9、测试,我们可以使用这些账号登录进行测试!发现会报错!
There is no PasswordEncoder mapped for the id “null”
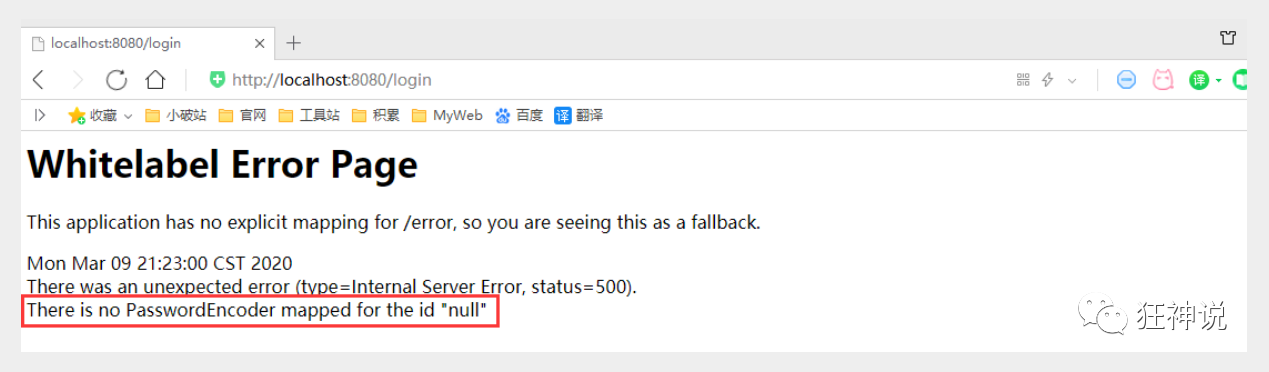
10、原因,我们要将前端传过来的密码进行某种方式加密,否则就无法登录,修改代码
//定义认证规则
@Override
protected void configure(AuthenticationManagerBuilder auth) throws Exception {
   //在内存中定义,也可以在jdbc中去拿....
   //Spring security 5.0中新增了多种加密方式,也改变了密码的格式。
   //要想我们的项目还能够正常登陆,需要修改一下configure中的代码。我们要将前端传过来的密码进行某种方式加密
   //spring security 官方推荐的是使用bcrypt加密方式。

   auth.inMemoryAuthentication().passwordEncoder(new BCryptPasswordEncoder())
          .withUser("kuangshen").password(new BCryptPasswordEncoder().encode("123456")).roles("vip2","vip3")
          .and()
          .withUser("root").password(new BCryptPasswordEncoder().encode("123456")).roles("vip1","vip2","vip3")
          .and()
          .withUser("guest").password(new BCryptPasswordEncoder().encode("123456")).roles("vip1","vip2");
}
11、测试,发现,登录成功,并且每个角色只能访问自己认证下的规则!搞定
认证和授权模板
package com.xleixz.config;

import org.springframework.security.config.annotation.authentication.builders.AuthenticationManagerBuilder;
import org.springframework.security.config.annotation.web.builders.HttpSecurity;
import org.springframework.security.config.annotation.web.configuration.EnableWebSecurity;
import org.springframework.security.config.annotation.web.configuration.WebSecurityConfigurerAdapter;
import org.springframework.security.crypto.bcrypt.BCryptPasswordEncoder;

@EnableWebSecurity // 开启WebSecurity模式
public class SecurityConfig extends WebSecurityConfigurerAdapter {

    @Override
    protected void configure(HttpSecurity http) throws Exception {
        // 定制请求的授权规则
        // 首页所有人可以访问
        http.authorizeRequests().antMatchers("/").permitAll()
                .antMatchers("/level1/**").hasRole("vip1")
                .antMatchers("/level2/**").hasRole("vip2")
                .antMatchers("/level3/**").hasRole("vip3");

        // 开启自动配置的登录功能
        // /login 请求来到登录页
        // /login?error 重定向到这里表示登录失败
        http.formLogin();
    }

    //定义认证规则
    @Override
    protected void configure(AuthenticationManagerBuilder auth) throws Exception {
        //在内存中定义,也可以在jdbc中去拿....
        //Spring security 5.0中新增了多种加密方式,也改变了密码的格式。
        //要想我们的项目还能够正常登陆,需要修改一下configure中的代码。我们要将前端传过来的密码进行某种方式加密
        //spring security 官方推荐的是使用bcrypt加密方式。

        auth.inMemoryAuthentication().passwordEncoder(new BCryptPasswordEncoder())
                .withUser("xleixz").password(new BCryptPasswordEncoder().encode("123456")).roles("vip2", "vip3")
                .and()
                .withUser("root").password(new BCryptPasswordEncoder().encode("123456")).roles("vip1", "vip2", "vip3")
                .and()
                .withUser("guest").password(new BCryptPasswordEncoder().encode("123456")).roles("vip1", "vip2");
    }
}
11.2 权限控制和注销
1、开启自动配置的注销的功能
//定制请求的授权规则
@Override
protected void configure(HttpSecurity http) throws Exception {
   //....
   //开启自动配置的注销的功能
      // /logout 注销请求
   http.logout();
}
2、我们在前端,增加一个注销的按钮,index.html 导航栏中
<a class="item" th:href="@{/logout}">
   <i class="address card icon"></i> 注销
</a>
3、我们可以去测试一下,登录成功后点击注销,发现注销完毕会跳转到登录页面!
4、但是,我们想让他注销成功后,依旧可以跳转到首页,该怎么处理呢?
// .logoutSuccessUrl("/"); 注销成功来到首页
http.logout().logoutSuccessUrl("/");
5、测试,注销完毕后,发现跳转到首页OK
6、添加2个需求:
需求一:用户没有登录的时候,导航栏上只显示登录按钮,用户登录之后,导航栏可以显示登录的用户信息及注销按钮!
需求二:比如小雷这个用户,它只有 vip2,vip3功能,那么登录则只显示这两个功能,而vip1的功能菜单不显示!
需要结合thymeleaf中的一些功能sec:authorize=”isAuthenticated()”:是否认证登录!来显示不同的页面
Maven依赖:
<!-- https://mvnrepository.com/artifact/org.thymeleaf.extras/thymeleaf-extras-springsecurity4 -->
<dependency>
   <groupId>org.thymeleaf.extras</groupId>
   <artifactId>thymeleaf-extras-springsecurity5</artifactId>
   <version>3.0.4.RELEASE</version>
</dependency>
7、修改我们的 前端页面
导入命名空间
xmlns:sec="http://www.thymeleaf.org/thymeleaf-extras-springsecurity5"
修改导航栏,增加认证判断
<!--登录注销-->
<div class="right menu">

   <!--如果未登录-->
   <div sec:authorize="!isAuthenticated()">
       <a class="item" th:href="@{/login}">
           <i class="address card icon"></i> 登录
       </a>
   </div>

   <!--如果已登录-->
   <div sec:authorize="isAuthenticated()">
       <a class="item">
           <i class="address card icon"></i>
          用户名:<span sec:authentication="principal.username"></span>
          角色:<span sec:authentication="principal.authorities"></span>
       </a>
   </div>

   <div sec:authorize="isAuthenticated()">
       <a class="item" th:href="@{/logout}">
           <i class="address card icon"></i> 注销
       </a>
   </div>
</div>
8、重启测试,我们可以登录试试看,登录成功后确实,显示了我们想要的页面;
9、如果注销404了,就是因为它默认防止csrf跨站请求伪造,因为会产生安全问题,我们可以将请求改为post表单提交,或者在spring security中关闭csrf功能;我们试试:在 配置中增加 http.csrf().disable();
http.csrf().disable();//关闭csrf功能:跨站请求伪造,默认只能通过post方式提交logout请求
http.logout().logoutSuccessUrl("/");
10、继续将下面的角色功能块认证完成!
菜单根据用户的角色动态的实现
<div sec:authorize="hasRole('vip2')">
</div>
<!-- sec:authorize="hasRole('vip1')" -->
<div class="column" sec:authorize="hasRole('vip1')">
   <div class="ui raised segment">
       <div class="ui">
           <div class="content">
               <h5 class="content">Level 1</h5>
               <hr>
               <div><a th:href="@{/level1/1}"><i class="bullhorn icon"></i> Level-1-1</a></div>
               <div><a th:href="@{/level1/2}"><i class="bullhorn icon"></i> Level-1-2</a></div>
               <div><a th:href="@{/level1/3}"><i class="bullhorn icon"></i> Level-1-3</a></div>
           </div>
       </div>
   </div>
</div>

<div class="column" sec:authorize="hasRole('vip2')">
   <div class="ui raised segment">
       <div class="ui">
           <div class="content">
               <h5 class="content">Level 2</h5>
               <hr>
               <div><a th:href="@{/level2/1}"><i class="bullhorn icon"></i> Level-2-1</a></div>
               <div><a th:href="@{/level2/2}"><i class="bullhorn icon"></i> Level-2-2</a></div>
               <div><a th:href="@{/level2/3}"><i class="bullhorn icon"></i> Level-2-3</a></div>
           </div>
       </div>
   </div>
</div>

<div class="column" sec:authorize="hasRole('vip3')">
   <div class="ui raised segment">
       <div class="ui">
           <div class="content">
               <h5 class="content">Level 3</h5>
               <hr>
               <div><a th:href="@{/level3/1}"><i class="bullhorn icon"></i> Level-3-1</a></div>
               <div><a th:href="@{/level3/2}"><i class="bullhorn icon"></i> Level-3-2</a></div>
               <div><a th:href="@{/level3/3}"><i class="bullhorn icon"></i> Level-3-3</a></div>
           </div>
       </div>
   </div>
</div>
11、测试一下!

权限控制和注销搞定!
11.3 改造”记住我”功能
现在的情况,只要登录之后,关闭浏览器,再登录,就会重新登录,但是很多网站的情况,就是有一个记住密码的功能,开始实现。
1、开启记住我功能
//定制请求的授权规则
@Override
protected void configure(HttpSecurity http) throws Exception {
//.................
   //记住我
   http.rememberMe();
}
2、我们再次启动项目测试一下,发现登录页多了一个”记住我”功能,我们登录之后关闭浏览器,然后重新打开浏览器访问,发现用户依旧存在!
实现原理:
查看浏览器的cookie
3、我们点击注销的时候,可以发现,spring security 自动删除了这个 cookie
4、结论:登录成功后,将cookie发送给浏览器保存,以后登录带上这个cookie,只要通过检查就可以免登录了。如果点击注销,则会删除这个cookie,具体的原理在JavaWeb阶段!
11.4 定制登录页
现在这个登录页面都是spring security 默认的,怎么样可以使用我们自己写的Login界面呢?
1、在刚才的登录页配置后面指定 loginpage
http.formLogin().loginPage("/toLogin");
2、然后前端也需要指向我们自己定义的 login请求
<a class="item" th:href="@{/toLogin}">
   <i class="address card icon"></i> 登录
</a>
3、我们登录,需要将这些信息发送到哪里,我们也需要配置,login.html 配置提交请求及方式,方式必须为post:
在 loginPage()源码中的注释上有写明:
<form th:action="@{/login}" method="post">
   <div class="field">
       <label>Username</label>
       <div class="ui left icon input">
           <input type="text" placeholder="Username" name="username">
           <i class="user icon"></i>
       </div>
   </div>
   <div class="field">
       <label>Password</label>
       <div class="ui left icon input">
           <input type="password" name="password">
           <i class="lock icon"></i>
       </div>
   </div>
   <input type="submit" class="ui blue submit button"/>
</form>
4、这个请求提交上来,我们还需要验证处理,怎么做呢?我们可以查看formLogin()方法的源码!我们配置接收登录的用户名和密码的参数!
http.formLogin()
  .usernameParameter("username")
  .passwordParameter("password")
  .loginPage("/toLogin")
  .loginProcessingUrl("/login"); // 登陆表单提交请求
5、在登录页增加记住我的多选框
<input type="checkbox" name="remember"> 记住我
6、后端验证处理!
//定制记住我的参数!
http.rememberMe().rememberMeParameter("remember");
7、测试,OK
11.5 【Spring Security模板】完整配置代码
package com.xleixz.config;

import org.springframework.security.config.annotation.authentication.builders.AuthenticationManagerBuilder;
import org.springframework.security.config.annotation.web.builders.HttpSecurity;
import org.springframework.security.config.annotation.web.configuration.EnableWebSecurity;
import org.springframework.security.config.annotation.web.configuration.WebSecurityConfigurerAdapter;
import org.springframework.security.crypto.bcrypt.BCryptPasswordEncoder;

@EnableWebSecurity
public class SecurityConfig extends WebSecurityConfigurerAdapter {

    //定制请求的授权规则
    @Override
    protected void configure(HttpSecurity http) throws Exception {

        http.authorizeRequests().antMatchers("/").permitAll()
                .antMatchers("/level1/**").hasRole("vip1")
                .antMatchers("/level2/**").hasRole("vip2")
                .antMatchers("/level3/**").hasRole("vip3");


        //开启自动配置的登录功能:如果没有权限,就会跳转到登录页面!
        // /login 请求来到登录页
        // /login?error 重定向到这里表示登录失败
        http.formLogin()
                .usernameParameter("username")
                .passwordParameter("password")
                .loginPage("/toLogin")
                .loginProcessingUrl("/login"); // 登陆表单提交请求

        //开启自动配置的注销的功能
        // /logout 注销请求
        // .logoutSuccessUrl("/"); 注销成功来到首页

        http.csrf().disable();//关闭csrf功能:跨站请求伪造,默认只能通过post方式提交logout请求
        http.logout().logoutSuccessUrl("/");

        //记住我
        http.rememberMe().rememberMeParameter("remember");
    }

    //定义认证规则
    @Override
    protected void configure(AuthenticationManagerBuilder auth) throws Exception {
        //在内存中定义,也可以在jdbc中去拿....
        //Spring security 5.0中新增了多种加密方式,也改变了密码的格式。
        //要想我们的项目还能够正常登陆,需要修改一下configure中的代码。我们要将前端传过来的密码进行某种方式加密
        //spring security 官方推荐的是使用bcrypt加密方式。

        auth.inMemoryAuthentication().passwordEncoder(new BCryptPasswordEncoder())
                .withUser("kuangshen").password(new BCryptPasswordEncoder().encode("123456")).roles("vip2", "vip3")
                .and()
                .withUser("root").password(new BCryptPasswordEncoder().encode("123456")).roles("vip1", "vip2", "vip3")
                .and()
                .withUser("guest").password(new BCryptPasswordEncoder().encode("123456")).roles("vip1", "vip2");
    }
}
12 Shiro
12.1 Shiro简介
Apache Shiro是Java的安全(权限)框架。
Shiro可以非常容易的开发出足够好的应用,其不仅可以用在JavaSE环境,也可以用在JavaEE环境。
Shiro可以完成:认证,授权,加密,会话管理,Web集成,缓存等。
12.2 Shiro的功能

- Authentication:身份验证、登录、验证用户是不是拥有相应的身份;
- Authorization:授权,即权限验证,验证某个已认证的用户是否拥有某个权限,即判断用户能否进行什么操作。
- Session Manager:会话管理,即用户登录后就是第一次会话,在没有退出之前,它的所有信息都在会话中;
- Cryptography:加密,保护数据的安全性,如密码加密存储到数据库中,而不是明文存储;
- Web Support:Web支持,可以非常容易的集成到Web环境;
- Caching:缓存,比如用户登录后,其用户信息,拥有的角色、权限不必每次去查看,这样可以提高效率;
- Concurrency:Shiro支持多线程应用的并发验证,即在一个线程中开启另一个线程,能把权限自动的传播过去;
- Testing:提供测试支持;
- Run As:允许一个用户伪装成另一个用户的身份进行访问;
- Remember Me:记住我,这是一个非常常见的功能,即一次登录后,下次再来就不用登录了。
12.3 Shiro架构(外部)
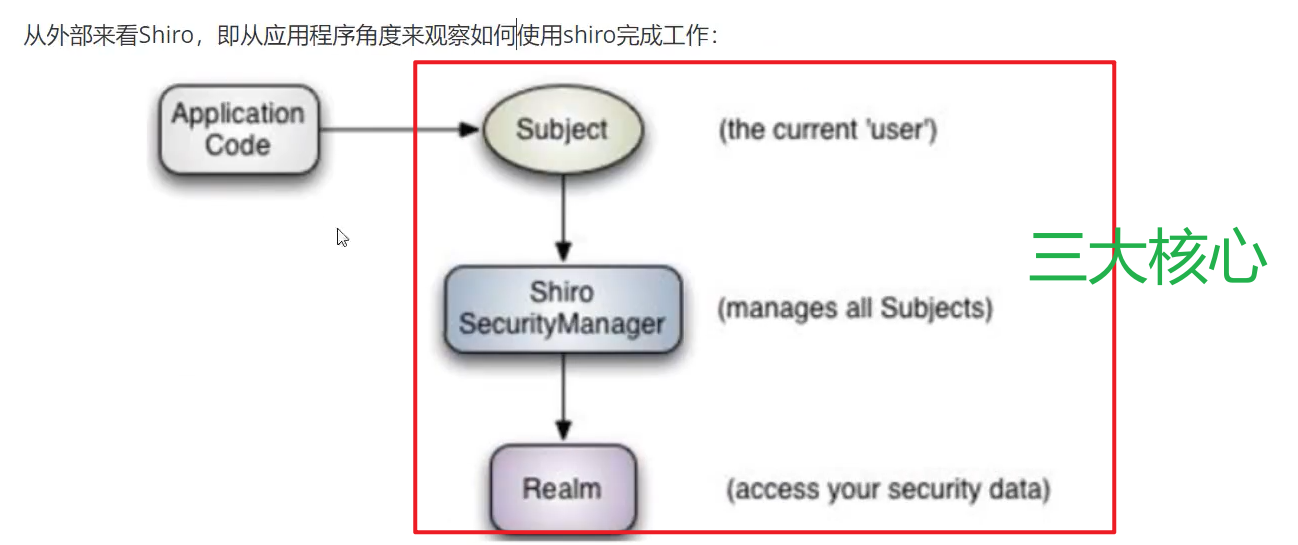
Subject:用户
SecurityManager:管理所有用户
Realm:连接数据
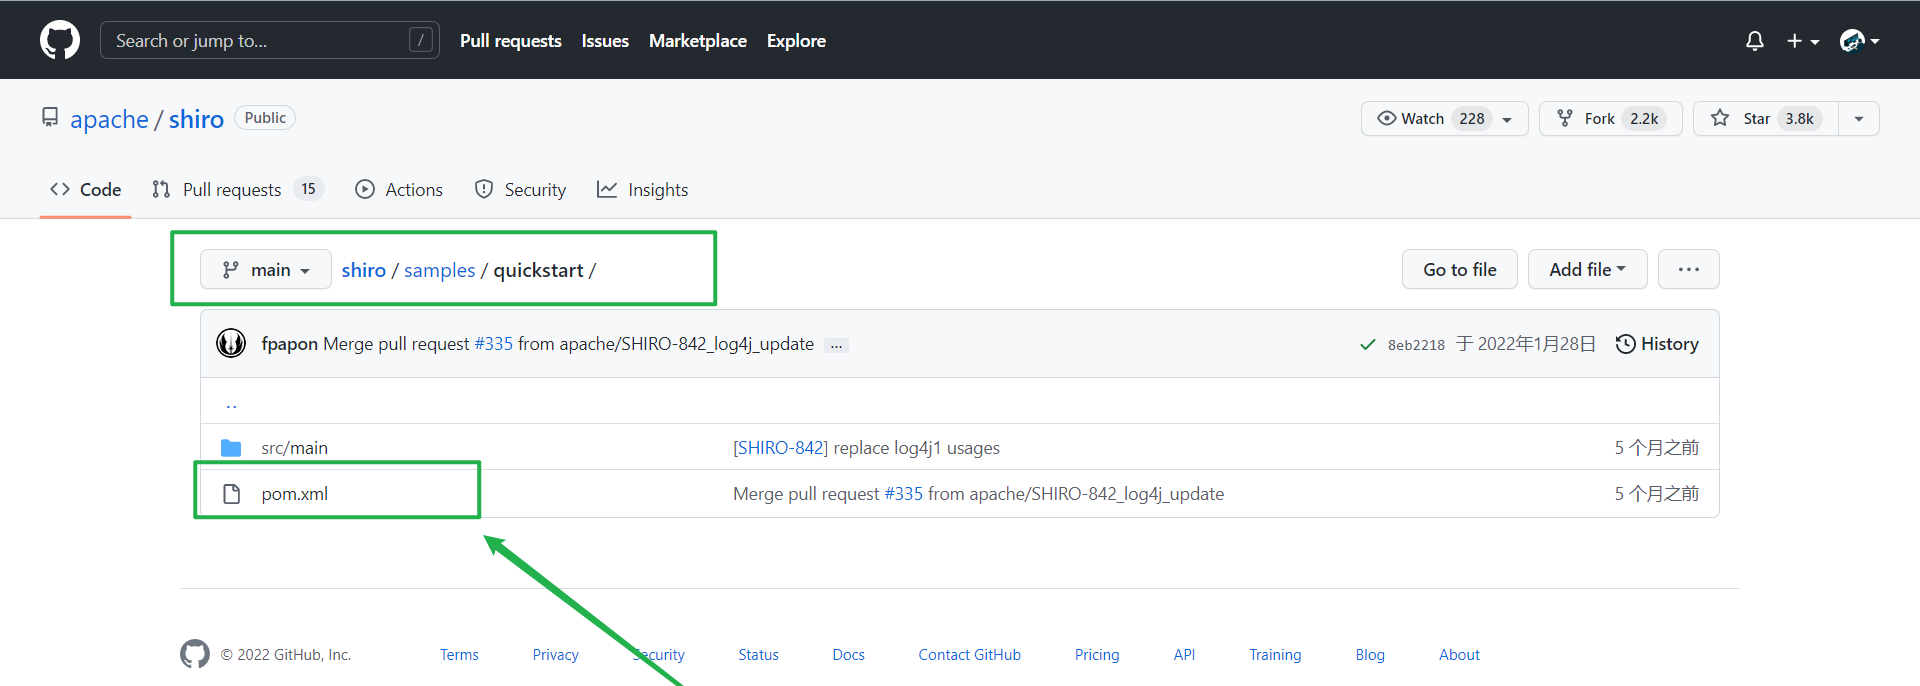
12.4 快速开始
1、导入依赖,到GitHub中寻找文档取maven依赖shiro/samples/quickstart at main · apache/shiro (github.com)

<!-- https://mvnrepository.com/artifact/org.apache.shiro/shiro-core -->
<dependency>
            <groupId>org.apache.shiro</groupId>
            <artifactId>shiro-core</artifactId>
            <version>1.8.0</version>
        </dependency>

        <!-- configure logging -->
        <dependency>
            <groupId>org.slf4j</groupId>
            <artifactId>jcl-over-slf4j</artifactId>
            <scope>runtime</scope>
            <version>1.7.21</version>
        </dependency>
        <dependency>
            <groupId>org.slf4j</groupId>
            <artifactId>slf4j-log4j12</artifactId>
            <version>1.7.21</version>
        </dependency>
        <dependency>
            <groupId>log4j</groupId>
            <artifactId>log4j</artifactId>
            <version>1.2.12</version>
</dependency>
2、配置文件
【shiro.ini】
[users]
# user 'root' with password 'secret' and the 'admin' role
root = secret, admin
# user 'guest' with the password 'guest' and the 'guest' role
guest = guest, guest
# user 'presidentskroob' with password '12345' ("That's the same combination on
# my luggage!!!" ;)), and role 'president'
presidentskroob = 12345, president
# user 'darkhelmet' with password 'ludicrousspeed' and roles 'darklord' and 'schwartz'
darkhelmet = ludicrousspeed, darklord, schwartz
# user 'lonestarr' with password 'vespa' and roles 'goodguy' and 'schwartz'
lonestarr = vespa, goodguy, schwartz

# -----------------------------------------------------------------------------
# Roles with assigned permissions
#
# Each line conforms to the format defined in the
# org.apache.shiro.realm.text.TextConfigurationRealm#setRoleDefinitions JavaDoc
# -----------------------------------------------------------------------------
[roles]
# 'admin' role has all permissions, indicated by the wildcard '*'
admin = *
# The 'schwartz' role can do anything (*) with any lightsaber:
schwartz = lightsaber:*
# The 'goodguy' role is allowed to 'drive' (action) the winnebago (type) with
# license plate 'eagle5' (instance specific id)
goodguy = winnebago:drive:eagle5
【log4j.properties】
log4j.rootLogger=INFo,stdout

log4j.appender.stdout=org.apache.log4j.consoleAppender
log4j.appender.stdout.1ayout=org.apache.log4j.PatternLayout
log4j.appender.stdout.layout.ConversionPattern=%d %p [%c ] - ‰m %n

#General Apache libraries
log4j.logger.org.apache=WARN

#Spring
log4j.logger.org.springframework=WARN

#Default Shiro Logging
log4j.logger.org.apache.shiro=INFO

#Disable verbose Logging
log4j.logger.org.apache.shiro.util.ThreadContext=WARN
log4j.logger.org.apache.shiro.cache.ehcache.EhCache=WARN
3、Hello Shiro
【Quickstart.java】
package com.xleixz;
import org.apache.shiro.SecurityUtils;
import org.apache.shiro.authc.*;
import org.apache.shiro.config.IniSecurityManagerFactory;
import org.apache.shiro.mgt.SecurityManager;
import org.apache.shiro.session.Session;
import org.apache.shiro.subject.Subject;
import org.apache.shiro.util.Factory;
import org.slf4j.Logger;
import org.slf4j.LoggerFactory;
/**
* Simple Quickstart application showing how to use Shiro's API.
*
* @since 0.9 RC2
*/
public class Quickstart {
private static final transient Logger log = LoggerFactory.getLogger(Quickstart.class);
public static void main(String[] args) {
// The easiest way to create a Shiro SecurityManager with configured
// realms, users, roles and permissions is to use the simple INI config.
// We'll do that by using a factory that can ingest a .ini file and
// return a SecurityManager instance:
// Use the shiro.ini file at the root of the classpath
// (file: and url: prefixes load from files and urls respectively):
Factory<SecurityManager> factory = new IniSecurityManagerFactory("classpath:shiro.ini");
SecurityManager securityManager = factory.getInstance();
// for this simple example quickstart, make the SecurityManager
// accessible as a JVM singleton. Most applications wouldn't do this
// and instead rely on their container configuration or web.xml for
// webapps. That is outside the scope of this simple quickstart, so
// we'll just do the bare minimum so you can continue to get a feel
// for things.
SecurityUtils.setSecurityManager(securityManager);
// Now that a simple Shiro environment is set up, let's see what you can do:
// get the currently executing user:
Subject currentUser = SecurityUtils.getSubject();
// Do some stuff with a Session (no need for a web or EJB container!!!)
Session session = currentUser.getSession();
session.setAttribute("someKey", "aValue");
String value = (String) session.getAttribute("someKey");
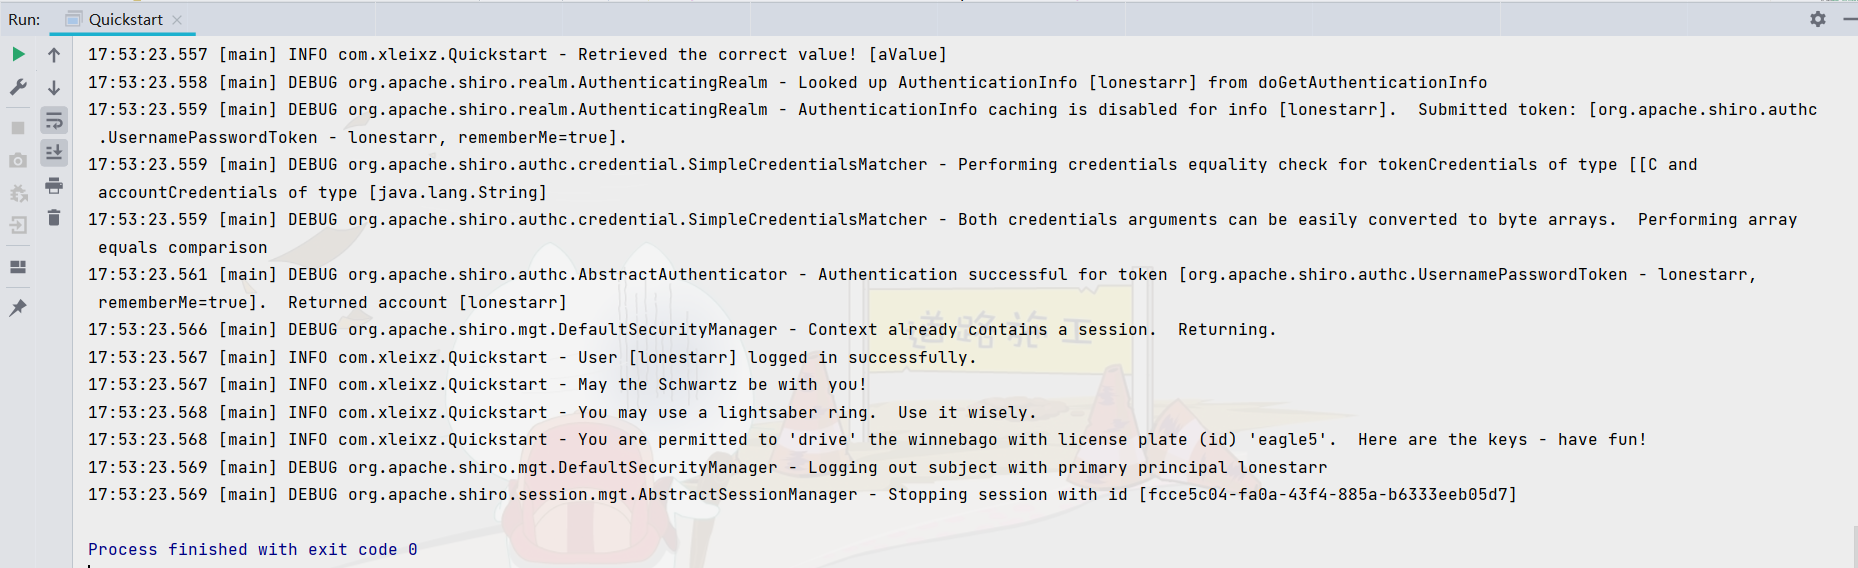
if (value.equals("aValue")) {
log.info("Retrieved the correct value! [" + value + "]");
}
// let's login the current user so we can check against roles and permissions:
if (!currentUser.isAuthenticated()) {
UsernamePasswordToken token = new UsernamePasswordToken("lonestarr", "vespa");
token.setRememberMe(true);
try {
currentUser.login(token);
} catch (UnknownAccountException uae) {
log.info("There is no user with username of " + token.getPrincipal());
} catch (IncorrectCredentialsException ice) {
log.info("Password for account " + token.getPrincipal() + " was incorrect!");
} catch (LockedAccountException lae) {
log.info("The account for username " + token.getPrincipal() + " is locked. " +
"Please contact your administrator to unlock it.");
}
// ... catch more exceptions here (maybe custom ones specific to your application?
catch (AuthenticationException ae) {
//unexpected condition? error?
}
}
//say who they are:
//print their identifying principal (in this case, a username):
log.info("User [" + currentUser.getPrincipal() + "] logged in successfully.");
//test a role:
if (currentUser.hasRole("schwartz")) {
log.info("May the Schwartz be with you!");
} else {
log.info("Hello, mere mortal.");
}
//test a typed permission (not instance-level)
if (currentUser.isPermitted("lightsaber:wield")) {
log.info("You may use a lightsaber ring. Use it wisely.");
} else {
log.info("Sorry, lightsaber rings are for schwartz masters only.");
}
//a (very powerful) Instance Level permission:
if (currentUser.isPermitted("winnebago:drive:eagle5")) {
log.info("You are permitted to 'drive' the winnebago with license plate (id) 'eagle5'. " +
"Here are the keys - have fun!");
} else {
log.info("Sorry, you aren't allowed to drive the 'eagle5' winnebago!");
}
//all done - log out!
currentUser.logout();
System.exit(0);
}
}
4、启动测试
12.5 SpringBoot 集成 Shiro
1、导入jar包
<!--Shiro整合SpringBoot的包-->
<dependency>
    <groupId>org.sidao</groupId>
    <artifactId>jsets-shiro-spring-boot-starter</artifactId>
    <version>1.0.4</version>
</dependency>
2、编写配置类【ShiroConfig.java】
import org.apache.shiro.spring.web.ShiroFilterFactoryBean;
import org.apache.shiro.web.mgt.DefaultWebSecurityManager;
import org.springframework.beans.factory.annotation.Qualifier;
import org.springframework.context.annotation.Bean;
import org.springframework.context.annotation.Configuration;

@Configuration
public class ShiroConfig {

    //第一步: 创建Realm对象, 需要自定义
    @Bean
    public UserRealm userRealm() {
        return new UserRealm();
    }

    //第二步: DefaultWebSecurityManager
    @Bean(name = "securityManager")
    public DefaultWebSecurityManager getDefaultWebSecurityManager(@Qualifier("userRealm") UserRealm userRealm) {
        DefaultWebSecurityManager securityManager = new DefaultWebSecurityManager();
        //关联UserRealm
        securityManager.setRealm(userRealm());
        return securityManager;
    }

    //ShiroFilterFactoryBean
    @Bean
    public ShiroFilterFactoryBean getShiroFilterFactoryBean(@Qualifier("securityManager") DefaultWebSecurityManager defaultWebSecurityManager) {
        ShiroFilterFactoryBean bean = new ShiroFilterFactoryBean();
        //设置安全管理器
        bean.setSecurityManager(defaultWebSecurityManager);
        return bean;
    }
}
3、自定义的UserRealm 【UserRealm.java】
import org.apache.shiro.authc.AuthenticationException;
import org.apache.shiro.authc.AuthenticationInfo;
import org.apache.shiro.authc.AuthenticationToken;
import org.apache.shiro.authz.AuthorizationInfo;
import org.apache.shiro.realm.AuthorizingRealm;
import org.apache.shiro.subject.PrincipalCollection;

//自定义的UserRealm  extends AuthorizingRealm
public class UserRealm extends AuthorizingRealm {

    //授权
    @Override
    protected AuthorizationInfo doGetAuthorizationInfo(PrincipalCollection principalCollection) {
        System.out.println("执行了------> 授权");
        return null;
    }

    //认证
    @Override
    protected AuthenticationInfo doGetAuthenticationInfo(AuthenticationToken authenticationToken) throws AuthenticationException {
        System.out.println("执行了------> 认证");
        return null;
    }
}
4、在首页准备跳转连接,并新建两个html页面add.html和update.html
<a th:href="@{/user/add}">add</a> | <a th:href="@{/user/update}">update</a>
5、实现跳转
@Controller
public class MyController {

    @RequestMapping({"/","/index"})
    public String toIndex(Model model){
        model.addAttribute("msg","Hello,Shiro");
        return "index";
    }

    @RequestMapping("/user/add")
    public String add(Model model){
        model.addAttribute("msg","add");
        return "user/add";
    }

    @RequestMapping("/user/update")
    public String update(Model model){
        model.addAttribute("msg","update");
        return "user/update";
    }
}
12.6 Shiro实现登录拦截
anno: 无需认证就可以访问
authc: 必须认证了才能访问
user: 必须拥有 记住我 功能才能用
role: 拥有某个角色权限才能访问
在ShiroConfig配置中添加内置过滤器实现登录拦截;
//ShiroFilterFactoryBean
    @Bean
    public ShiroFilterFactoryBean getShiroFilterFactoryBean(@Qualifier("securityManager") DefaultWebSecurityManager defaultWebSecurityManager) {
        ShiroFilterFactoryBean bean = new ShiroFilterFactoryBean();
        //设置安全管理器
        bean.setSecurityManager(defaultWebSecurityManager);
        return bean;
    }
添加Shiro的内置过滤器,实现拦截;
        //添加Shiro的内置过滤器
        /*
         * anon: 无需认证就可以访问
         * authc: 必须认证了才能访问
         * user: 必须拥有 记住我 功能才能用
         * role: 拥有某个角色权限才能访问
         */
        Map<String, String> filterMap= new LinkedHashMap<>();

        //filterMap.put("/user/add","authc");
        //filterMap.put("/user/update","authc");
        filterMap.put("/user/*","authc");
        bean.setFilterChainDefinitionMap(filterMap);

        bean.setLoginUrl("/toLogin");
13 Swagger
目标:
- 了解Swagger的作用和概念
- 了解前后端分离
- 在SPringBoot中集成Swagger
前后端分离时代:
前后端如何交互?
- 通过API接口访问
前后端相对独立,松耦合,前后端甚至可以部署在不同的服务器上。
这会导致一个问题:
前后端集成联调,前端人员和后端人员无法做到及时协商(前端添加一个字段,但是后端要修改的数据巨多)。
解决方案:
1、制定一个schema(计划提纲),实时更新API,降低集成风险;以前是制定Word计划文档;
2、前端测试后端接口:postman(早期第三方工具);后端提供接口,需要实时更新最新的消息及改动!(目前),引入了Swagger。
13.1 Swagger简介
世界上最流行的API框架;
RestFul API 文档在线自动生成工具,API文档与API定义同步更新;
直接运行,可以在线测试API接口;
支持多种语言:Java、PHP……
Swagger官网文档地址 API Documentation

13.2 SpringBoot 集成 Swagger
1、需要springfox-swagger jar包
swagger2
swagge ui
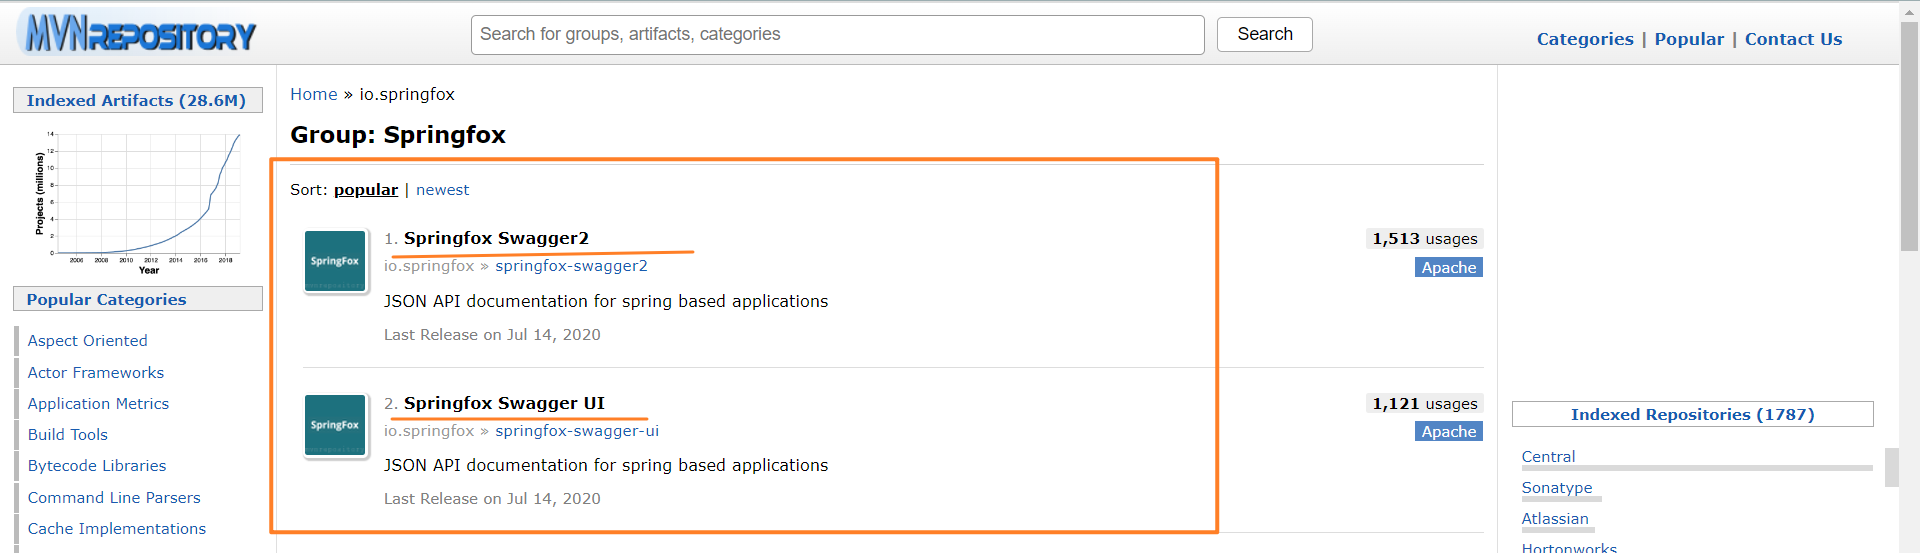
<!-- https://mvnrepository.com/artifact/io.springfox/springfox-swagger2 -->
<dependency>
    <groupId>io.springfox</groupId>
    <artifactId>springfox-swagger2</artifactId>
    <version>2.9.2</version>
</dependency>
<!-- https://mvnrepository.com/artifact/io.springfox/springfox-swagger-ui -->
<dependency>
    <groupId>io.springfox</groupId>
    <artifactId>springfox-swagger-ui</artifactId>
    <version>2.9.2</version>
</dependency>
2、编写一个Hello工程
@RestController
public class HelloController {

    @RequestMapping("/hello")
    public String Hello(){
        return "hello";
    }
}
3、配置Swagger,SpringBoot通用配置要在config目录下【SwaggerConfig.java】
@Configuration
//开启Swagger2
@EnableSwagger2
@EnableWebMvc
public class SwaggerConfig {

}
4、访问:http://localhost:8080/swagger-ui.html测试运行

13.3 配置SWagger
Swagger的bean实例Docket;所以通过配置Docket实例来配置Swaggger。
1、配置Docket实例;
@Bean //配置docket以配置Swagger具体参数
public Docket docket() {
   return new Docket(DocumentationType.SWAGGER_2);
}
2、可以通过apiInfo()属性配置文档信息;
//配置文档信息
private ApiInfo apiInfo() {
   Contact contact = new Contact("联系人名字", "http://xxx.xxx.com/联系人访问链接", "联系人邮箱");
   return new ApiInfo(
           "Swagger学习", // 标题
           "学习演示如何配置Swagger", // 描述
           "v1.0", // 版本
           "http://terms.service.url/组织链接", // 组织链接
           contact, // 联系人信息
           "Apach 2.0 许可", // 许可
           "许可链接", // 许可连接
           new ArrayList<>()// 扩展
  );
}
3、Docket 实例关联上 apiInfo();
@Bean
public Docket docket() {
   return new Docket(DocumentationType.SWAGGER_2).apiInfo(apiInfo());
}
4、重启项目,访问测试 http://localhost:8080/swagger-ui.html 看下效果;
13.4 配置扫描接口
1、构建Docket时通过select()方法配置怎么扫描接口。
@Bean
public Docket docket() {
   return new Docket(DocumentationType.SWAGGER_2)
      .apiInfo(apiInfo())
      .select()// 通过.select()方法,去配置扫描接口,RequestHandlerSelectors配置如何扫描接口
      .apis(RequestHandlerSelectors.basePackage("com.kuang.swagger.controller"))
      .build();
}
2、重启项目测试,由于我们配置根据包的路径扫描接口,所以我们只能看到一个类
3、除了通过包路径配置扫描接口外,还可以通过配置其他方式扫描接口,这里注释一下所有的配置方式:
any() // 扫描所有,项目中的所有接口都会被扫描到
none() // 不扫描接口
// 通过方法上的注解扫描,如withMethodAnnotation(GetMapping.class)只扫描get请求
withMethodAnnotation(final Class<? extends Annotation> annotation)
// 通过类上的注解扫描,如.withClassAnnotation(Controller.class)只扫描有controller注解的类中的接口
withClassAnnotation(final Class<? extends Annotation> annotation)
basePackage(final String basePackage) // 根据包路径扫描接口
4、除此之外,我们还可以配置接口扫描过滤:
@Bean
public Docket docket() {
   return new Docket(DocumentationType.SWAGGER_2)
      .apiInfo(apiInfo())
      .select()// 通过.select()方法,去配置扫描接口,RequestHandlerSelectors配置如何扫描接口
      .apis(RequestHandlerSelectors.basePackage("com.kuang.swagger.controller"))
       // 配置如何通过path过滤,即这里只扫描请求以/kuang开头的接口
      .paths(PathSelectors.ant("/kuang/**"))
      .build();
}
5、这里的可选值还有
any() // 任何请求都扫描
none() // 任何请求都不扫描
regex(final String pathRegex) // 通过正则表达式控制
ant(final String antPattern) // 通过ant()控制

13.5 配置开关
1、通过enable()方法配置是否启用swagger,如果是false,swagger将不能在浏览器中访问了
@Bean
public Docket docket() {
   return new Docket(DocumentationType.SWAGGER_2)
      .apiInfo(apiInfo())
      .enable(false) //配置是否启用Swagger,如果是false,在浏览器将无法访问
      .select()// 通过.select()方法,去配置扫描接口,RequestHandlerSelectors配置如何扫描接口
      .apis(RequestHandlerSelectors.basePackage("com.kuang.swagger.controller"))
       // 配置如何通过path过滤,即这里只扫描请求以/kuang开头的接口
      .paths(PathSelectors.ant("/kuang/**"))
      .build();
}
2、如何动态配置当项目处于test、dev环境时显示swagger,处于prod时不显示?
@Bean
public Docket docket(Environment environment) {
   // 设置要显示swagger的环境
   Profiles of = Profiles.of("dev", "test");
   // 判断当前是否处于该环境
   // 通过 enable() 接收此参数判断是否要显示
   boolean b = environment.acceptsProfiles(of);

   return new Docket(DocumentationType.SWAGGER_2)
      .apiInfo(apiInfo())
      .enable(b) //配置是否启用Swagger,如果是false,在浏览器将无法访问
      .select()// 通过.select()方法,去配置扫描接口,RequestHandlerSelectors配置如何扫描接口
      .apis(RequestHandlerSelectors.basePackage("com.kuang.swagger.controller"))
       // 配置如何通过path过滤,即这里只扫描请求以/kuang开头的接口
      .paths(PathSelectors.ant("/kuang/**"))
      .build();
}
3、可以在项目中增加一个dev的配置文件查看效果!

13.6 配置API分组

1、如果没有配置分组,默认是default。通过groupName()方法即可配置分组:
@Bean
public Docket docket(Environment environment) {
   return new Docket(DocumentationType.SWAGGER_2).apiInfo(apiInfo())
      .groupName("hello") // 配置分组
       // 省略配置....
}
2、重启项目查看分组
3、如何配置多个分组?配置多个分组只需要配置多个docket即可:
@Bean
public Docket docket1(){
   return new Docket(DocumentationType.SWAGGER_2).groupName("group1");
}
@Bean
public Docket docket2(){
   return new Docket(DocumentationType.SWAGGER_2).groupName("group2");
}
@Bean
public Docket docket3(){
   return new Docket(DocumentationType.SWAGGER_2).groupName("group3");
}
4、重启项目查看即可
13.7 实体配置
@ApiModel为类添加注释
@ApiModelProperty为类属性添加注释
1、新建一个实体类
@ApiModel("用户实体")
public class User {
   @ApiModelProperty("用户名")
   public String username;
   @ApiModelProperty("密码")
   public String password;
}
2、只要这个实体在请求接口的返回值上(即使是泛型),都能映射到实体项中:
@RequestMapping("/getUser")
public User getUser(){
   return new User();
}
3、重启查看测试
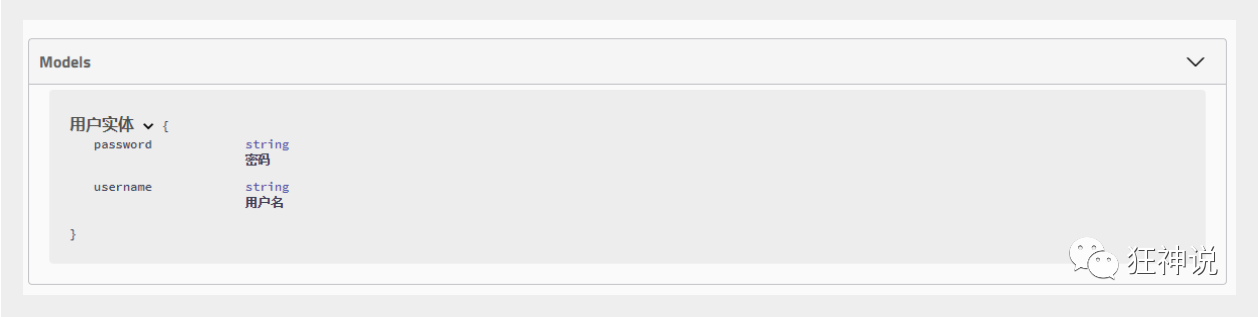
注:并不是因为@ApiModel这个注解让实体显示在这里了,而是只要出现在接口方法的返回值上的实体都会显示在这里,而@ApiModel和@ApiModelProperty这两个注解只是为实体添加注释的。
13.8 常用注解
Swagger的所有注解定义在io.swagger.annotations包下
下面列一些经常用到的,未列举出来的可以另行查阅说明:
| Swagger注解 | 简单说明 |
|---|---|
| @Api(tags = “xxx模块说明”) | 作用在模块类上 |
| @ApiOperation(“xxx接口说明”) | 作用在接口方法上 |
| @ApiModel(“xxxPOJO说明”) | 作用在模型类上:如VO、BO |
| @ApiModelProperty(value = “xxx属性说明”,hidden = true) | 作用在类方法和属性上,hidden设置为true可以隐藏该属性 |
| @ApiParam(“xxx参数说明”) | 作用在参数、方法和字段上,类似@ApiModelProperty |
也可以给请求的接口配置一些注释
@ApiOperation("小雷的接口")
@PostMapping("/xleixz")
@ResponseBody
public String xleixz(@ApiParam("这个名字会被返回")String username){
   return username;
}
这样的话,可以给一些比较难理解的属性或者接口,增加一些配置信息,让人更容易阅读!
相较于传统的Postman或Curl方式测试接口,使用swagger简直就是傻瓜式操作,不需要额外说明文档(写得好本身就是文档)而且更不容易出错,只需要录入数据然后点击Execute,如果再配合自动化框架,可以说基本就不需要人为操作了。
Swagger是个优秀的工具,现在国内已经有很多的中小型互联网公司都在使用它,相较于传统的要先出Word接口文档再测试的方式,显然这样也更符合现在的快速迭代开发行情。当然了,提醒下大家在正式环境要记得关闭Swagger,一来出于安全考虑二来也可以节省运行时内存。
13.9 拓展:其他皮肤
可以导入不同的包实现不同的皮肤定义:
1、默认的 访问 http://localhost:8080/swagger-ui.html
<dependency>
   <groupId>io.springfox</groupId>
   <artifactId>springfox-swagger-ui</artifactId>
   <version>2.9.2</version>
</dependency>
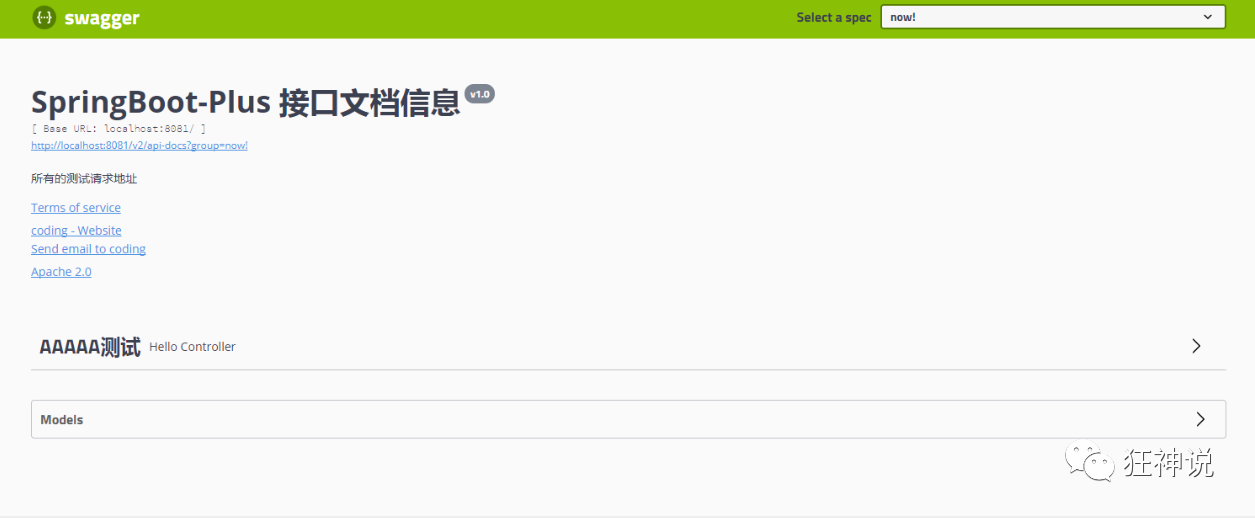
2、bootstrap-ui 访问 http://localhost:8080/doc.html
<!-- 引入swagger-bootstrap-ui包 /doc.html-->
<dependency>
   <groupId>com.github.xiaoymin</groupId>
   <artifactId>swagger-bootstrap-ui</artifactId>
   <version>1.9.1</version>
</dependency>
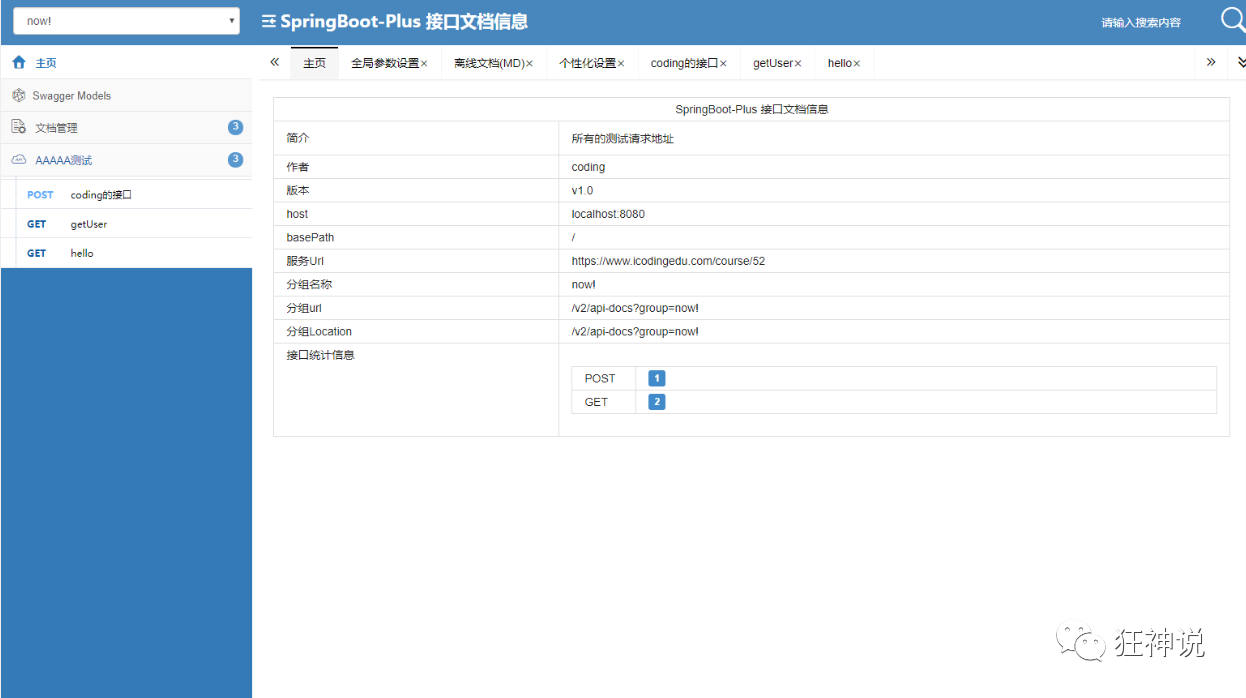
3、Layui-ui 访问 http://localhost:8080/docs.html
<!-- 引入swagger-ui-layer包 /docs.html-->
<dependency>
   <groupId>com.github.caspar-chen</groupId>
   <artifactId>swagger-ui-layer</artifactId>
   <version>1.1.3</version>
</dependency>
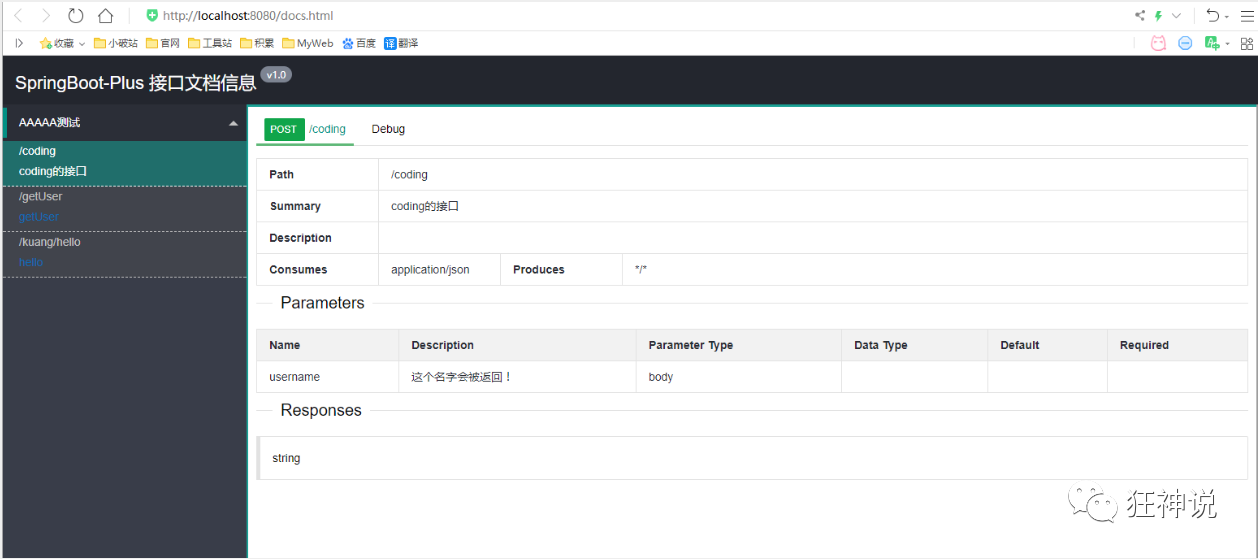
4、mg-ui 访问 http://localhost:8080/document.html
<!-- 引入swagger-ui-layer包 /document.html-->
<dependency>
   <groupId>com.zyplayer</groupId>
   <artifactId>swagger-mg-ui</artifactId>
   <version>1.0.6</version>
</dependency>
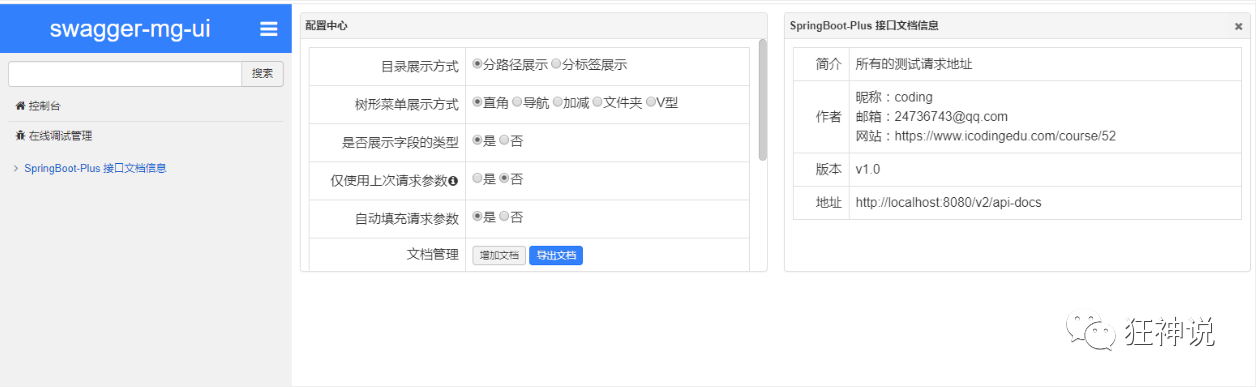
14 任务
在日常的工作中,常常会用到异步处理任务,比如在网站上发送邮件,后台会去发送邮件,此时前台会造成响应不动,直到邮件发送完毕,响应才会成功,所以一般会采用多线程的方式去处理这些任务。还有一些定时任务,比如需要在每天凌晨的时候,分析一次前一天的日志信息。还有就是邮件的发送,微信的前身也是邮件服务呢?这些东西都是怎么实现的呢?其实SpringBoot都提供了对应的支持,只需要开启一些注解支持,配置一些配置文件即可!
14.1 异步任务
1、创建一个service包
2、创建一个类AsyncService
异步处理还是非常常用的,比如我们在网站上发送邮件,后台会去发送邮件,此时前台会造成响应不动,直到邮件发送完毕,响应才会成功,所以我们一般会采用多线程的方式去处理这些任务。
编写方法,伪装正在处理数据,使用线程设置一些延时,模拟同步等待的情况;
@Service
public class AsyncService {

   public void hello(){
       try {
           Thread.sleep(3000);
      } catch (InterruptedException e) {
           e.printStackTrace();
      }
       System.out.println("业务进行中....");
  }
}
3、编写controller包
4、编写AsyncController类,写一个Controller测试一下
@RestController
public class AsyncController {

   @Autowired
   AsyncService asyncService;

   @GetMapping("/hello")
   public String hello(){
       asyncService.hello();
       return "success";
  }

}
5、访问http://localhost:8080/hello进行测试,3秒后出现success,这是同步等待的情况。
问题:我们如果想让用户直接得到消息,就在后台使用多线程的方式进行处理即可,但是每次都需要自己手动去编写多线程的实现的话,太麻烦了,我们只需要用一个简单的办法,在我们的方法上加一个简单的注解即可,如下:
6、给hello方法添加@Async注解;
//告诉Spring这是一个异步方法
@Async
public void hello(){
   try {
       Thread.sleep(3000);
  } catch (InterruptedException e) {
       e.printStackTrace();
  }
   System.out.println("业务进行中....");
}
SpringBoot就会自己开一个线程池,进行调用!但是要让这个注解生效,我们还需要在主程序上添加一个注解@EnableAsync ,开启异步注解功能;
@EnableAsync //开启异步注解功能
@SpringBootApplication
public class SpringbootTaskApplication {

   public static void main(String[] args) {
       SpringApplication.run(SpringbootTaskApplication.class, args);
  }

}
7、重启测试,网页瞬间响应,后台代码依旧执行!
14.2 定时任务
项目开发中经常需要执行一些定时任务,比如需要在每天凌晨的时候,分析一次前一天的日志信息,Spring为我们提供了异步执行任务调度的方式,提供了两个接口。
- TaskExecutor接口
- TaskScheduler接口
两个注解:
@EnableScheduling@Scheduled
cron表达式:
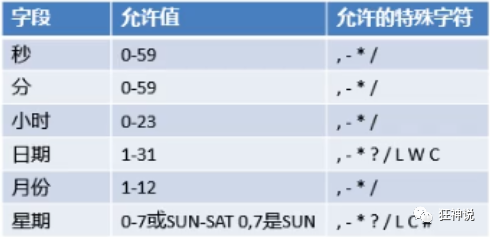
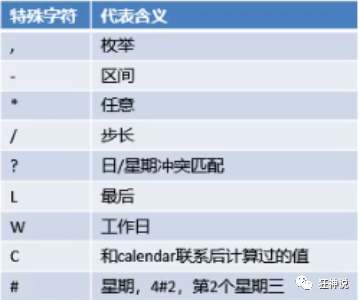
测试步骤:
1、创建一个ScheduledService
我们里面存在一个hello方法,他需要定时执行,怎么处理呢?
@Service
public class ScheduledService {

   //秒   分   时     日   月   周几
   //0 * * * * MON-FRI
   //注意cron表达式的用法;
   @Scheduled(cron = "0 * * * * 0-7")
   public void hello(){
       System.out.println("hello.....");
  }
}
2、这里写完定时任务之后,我们需要在主程序上增加@EnableScheduling 开启定时任务功能
@EnableAsync //开启异步注解功能
@EnableScheduling //开启基于注解的定时任务
@SpringBootApplication
public class SpringbootTaskApplication {

   public static void main(String[] args) {
       SpringApplication.run(SpringbootTaskApplication.class, args);
  }

}
3、Cron表达式生成器:http://www.bejson.com/othertools/cron/
4、常用的表达式
(1)0/2 * * * * ?   表示每2秒 执行任务
(1)0 0/2 * * * ?   表示每2分钟 执行任务
(1)0 0 2 1 * ?   表示在每月的1日的凌晨2点调整任务
(2)0 15 10 ? * MON-FRI   表示周一到周五每天上午10:15执行作业
(3)0 15 10 ? 6L 2002-2006   表示2002-2006年的每个月的最后一个星期五上午10:15执行作
(4)0 0 10,14,16 * * ?   每天上午10点,下午2点,4点
(5)0 0/30 9-17 * * ?   朝九晚五工作时间内每半小时
(6)0 0 12 ? * WED   表示每个星期三中午12点
(7)0 0 12 * * ?   每天中午12点触发
(8)0 15 10 ? * *   每天上午10:15触发
(9)0 15 10 * * ?     每天上午10:15触发
(10)0 15 10 * * ?   每天上午10:15触发
(11)0 15 10 * * ? 2005   2005年的每天上午10:15触发
(12)0 * 14 * * ?     在每天下午2点到下午2:59期间的每1分钟触发
(13)0 0/5 14 * * ?   在每天下午2点到下午2:55期间的每5分钟触发
(14)0 0/5 14,18 * * ?     在每天下午2点到2:55期间和下午6点到6:55期间的每5分钟触发
(15)0 0-5 14 * * ?   在每天下午2点到下午2:05期间的每1分钟触发
(16)0 10,44 14 ? 3 WED   每年三月的星期三的下午2:10和2:44触发
(17)0 15 10 ? * MON-FRI   周一至周五的上午10:15触发
(18)0 15 10 15 * ?   每月15日上午10:15触发
(19)0 15 10 L * ?   每月最后一日的上午10:15触发
(20)0 15 10 ? * 6L   每月的最后一个星期五上午10:15触发
(21)0 15 10 ? * 6L 2002-2005   2002年至2005年的每月的最后一个星期五上午10:15触发
(22)0 15 10 ? * 6#3   每月的第三个星期五上午10:15触发
14.3邮件任务
邮件发送,在我们的日常开发中,也非常的多,Springboot也帮我们做了支持
- 邮件发送需要引入spring-boot-start-mail
- SpringBoot 自动配置MailSenderAutoConfiguration
- 定义MailProperties内容,配置在application.yml中
- 自动装配JavaMailSender
- 测试邮件发送
测试:
1、引入pom依赖
<dependency>
   <groupId>org.springframework.boot</groupId>
   <artifactId>spring-boot-starter-mail</artifactId>
</dependency>
看它引入的依赖,可以看到 jakarta.mail
<dependency>
   <groupId>com.sun.mail</groupId>
   <artifactId>jakarta.mail</artifactId>
   <version>1.6.4</version>
   <scope>compile</scope>
</dependency>
2、查看自动配置类:MailSenderAutoConfiguration

这个类中存在bean,JavaMailSenderImpl
然后看下配置文件
@ConfigurationProperties(
   prefix = "spring.mail"
)
public class MailProperties {
   private static final Charset DEFAULT_CHARSET;
   private String host;
   private Integer port;
   private String username;
   private String password;
   private String protocol = "smtp";
   private Charset defaultEncoding;
   private Map<String, String> properties;
   private String jndiName;
}
3、配置文件:
spring.mail.username=24736743@qq.com
spring.mail.password=你的qq授权码
spring.mail.host=smtp.qq.com
# qq需要配置ssl
spring.mail.properties.mail.smtp.ssl.enable=true
获取授权码:在QQ邮箱中的设置->账户->开启pop3和smtp服务

4、Spring单元测试
@Autowired
JavaMailSenderImpl mailSender;

@Test
public void contextLoads() {
   //邮件设置1:一个简单的邮件
   SimpleMailMessage message = new SimpleMailMessage();
   message.setSubject("通知-明天来狂神这听课");
   message.setText("今晚7:30开会");

   message.setTo("24736743@qq.com");
   message.setFrom("24736743@qq.com");
   mailSender.send(message);
}

@Test
public void contextLoads2() throws MessagingException {
   //邮件设置2:一个复杂的邮件
   MimeMessage mimeMessage = mailSender.createMimeMessage();
   MimeMessageHelper helper = new MimeMessageHelper(mimeMessage, true);

   helper.setSubject("通知-明天来狂神这听课");
   helper.setText("<b style='color:red'>今天 7:30来开会</b>",true);

   //发送附件
   helper.addAttachment("1.jpg",new File(""));
   helper.addAttachment("2.jpg",new File(""));

   helper.setTo("24736743@qq.com");
   helper.setFrom("24736743@qq.com");

   mailSender.send(mimeMessage);
}
查看邮箱,邮件接收成功!
只需要使用Thymeleaf进行前后端结合即可开发自己网站邮件收发功能了!
15 分布式 Dubbo + Zookeeper + SpringBoot
15.1 分布式系统简介
在《分布式系统原理与范型》一书中有如下定义:“分布式系统是若干独立计算机的集合,这些计算机对于用户来说就像单个相关系统”;
分布式系统是由一组通过网络进行通信、为了完成共同的任务而协调工作的计算机节点组成的系统。分布式系统的出现是为了用廉价的、普通的机器完成单个计算机无法完成的计算、存储任务。其目的是利用更多的机器,处理更多的数据。
分布式系统(distributed system)是建立在网络之上的软件系统。
首先需要明确的是,只有当单个节点的处理能力无法满足日益增长的计算、存储任务的时候,且硬件的提升(加内存、加磁盘、使用更好的CPU)高昂到得不偿失的时候,应用程序也不能进一步优化的时候,我们才需要考虑分布式系统。因为,分布式系统要解决的问题本身就是和单机系统一样的,而由于分布式系统多节点、通过网络通信的拓扑结构,会引入很多单机系统没有的问题,为了解决这些问题又会引入更多的机制、协议,带来更多的问题……
15.2 Dubbo 文档
随着互联网的发展,网站应用的规模不断扩大,常规的垂直应用架构已无法应对,分布式服务架构以及流动计算架构势在必行,急需一个治理系统确保架构有条不紊的演进。
在Dubbo的官网文档有这样一张图
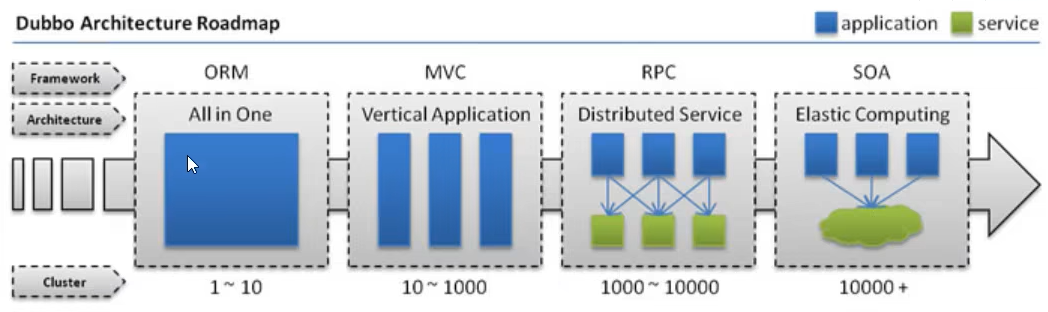
15.2.1 单一应用架构
当网站流量很小时,只需一个应用,将所有功能都部署在一起,以减少部署节点和成本。此时,用于简化增删改查工作量的数据访问框架(ORM)是关键。
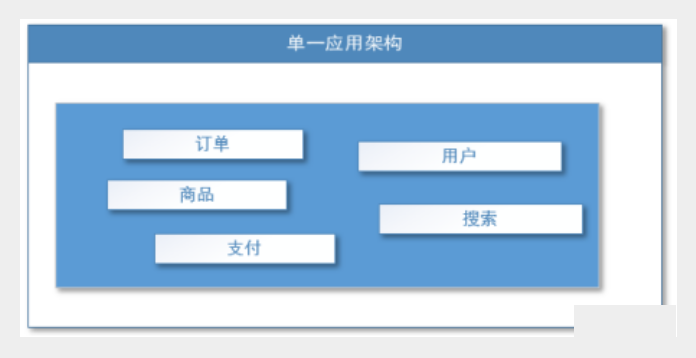
适用于小型网站,小型管理系统,将所有功能都部署到一个功能里,简单易用。
缺点:
1、性能扩展比较难
2、协同开发问题
3、不利于升级维护
15.2.2 垂直应用架构
当访问量逐渐增大,单一应用增加机器带来的加速度越来越小,将应用拆成互不相干的几个应用,以提升效率。此时,用于加速前端页面开发的Web框架(MVC)是关键。
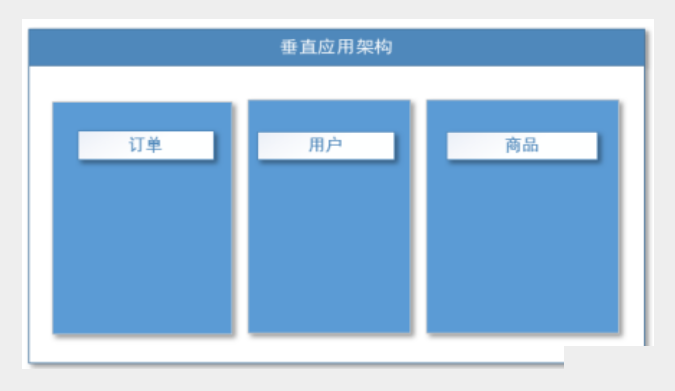
通过切分业务来实现各个模块独立部署,降低了维护和部署的难度,团队各司其职更易管理,性能扩展也更方便,更有针对性。
缺点:公用模块无法重复利用,开发性的浪费
15.2.3 分布式服务架构
当垂直应用越来越多,应用之间交互不可避免,将核心业务抽取出来,作为独立的服务,逐渐形成稳定的服务中心,使前端应用能更快速的响应多变的市场需求。此时,用于提高业务复用及整合的分布式服务框架(RPC)是关键。
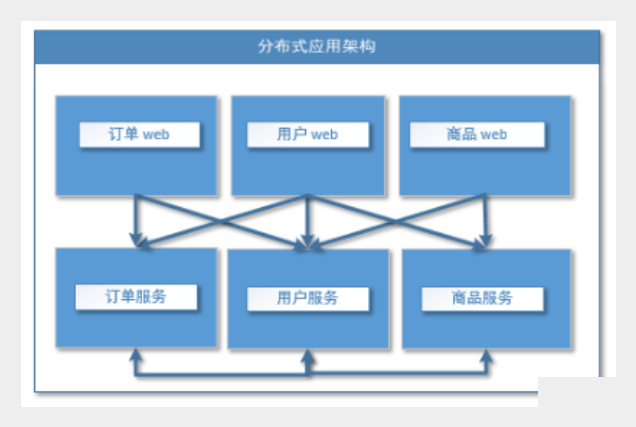
15.2.4 流动计算架构
当服务越来越多,容量的评估,小服务资源的浪费等问题逐渐显现,此时需增加一个调度中心基于访问压力实时管理集群容量,提高集群利用率。此时,用于提高机器利用率的资源调度和治理中心(SOA)[ Service Oriented Architecture]是关键。
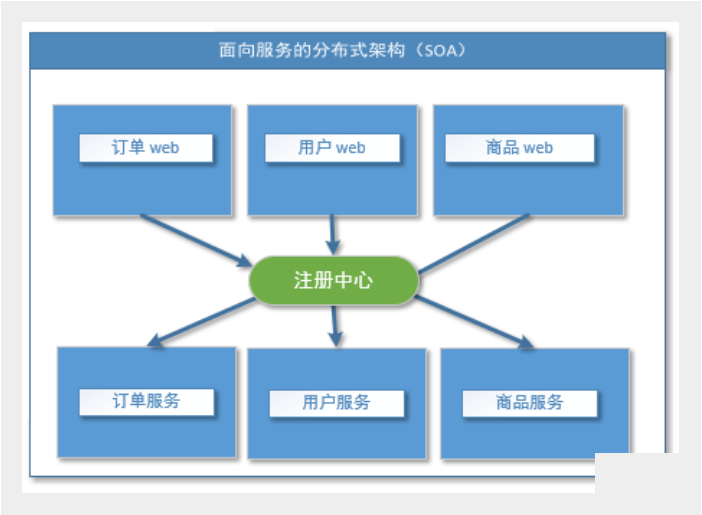
15.3 RPC简介
RPC【Remote Procedure Call】是指远程过程调用,是一种进程间通信方式,他是一种技术的思想,而不是规范。它允许程序调用另一个地址空间(通常是共享网络的另一台机器上)的过程或函数,而不用程序员显式编码这个远程调用的细节。即程序员无论是调用本地的还是远程的函数,本质上编写的调用代码基本相同。
也就是说两台服务器A,B,一个应用部署在A服务器上,想要调用B服务器上应用提供的函数/方法,由于不在一个内存空间,不能直接调用,需要通过网络来表达调用的语义和传达调用的数据。为什么要用RPC呢?就是无法在一个进程内,甚至一个计算机内通过本地调用的方式完成的需求,比如不同的系统间的通讯,甚至不同的组织间的通讯,由于计算能力需要横向扩展,需要在多台机器组成的集群上部署应用。RPC就是要像调用本地的函数一样去调远程函数;
RPC两个核心模块:通讯,序列化。
推荐阅读文章:https://www.jianshu.com/p/2accc2840a1b
RPC基本原理
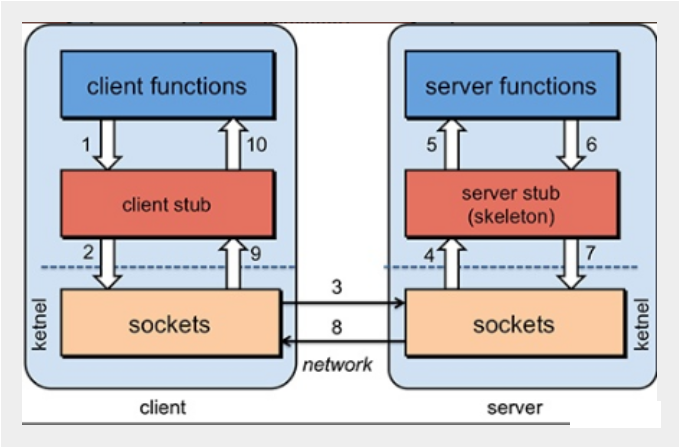
步骤解析:
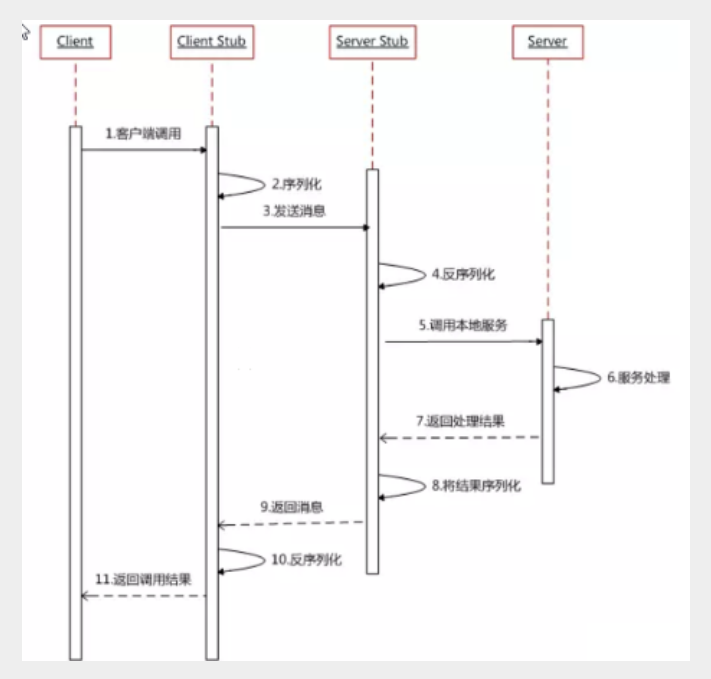
15.4 Dubbo及Zookeeper安装
Dubbo:就是一个jar包。
Apache Dubbo |ˈdʌbəʊ| 是一款高性能、轻量级的开源Java RPC框架,它提供了三大核心能力:面向接口的远程方法调用,智能容错和负载均衡,以及服务自动注册和发现。
dubbo官网 Apache Dubbo - https://dubbo.apache.org/zh/
1.了解Dubbo的特性
2.查看官方文档

服务提供者(Provider):暴露服务的服务提供方,服务提供者在启动时,向注册中心注册自己提供的服务。
服务消费者(Consumer):调用远程服务的服务消费方,服务消费者在启动时,向注册中心订阅自己所需的服务,服务消费者,从提供者地址列表中,基于软负载均衡算法,选一台提供者进行调用,如果调用失败,再选另一台调用。
注册中心(Registry):注册中心返回服务提供者地址列表给消费者,如果有变更,注册中心将基于长连接推送变更数据给消费者
监控中心(Monitor):服务消费者和提供者,在内存中累计调用次数和调用时间,定时每分钟发送一次统计数据到监控中心
调用关系说明
l 服务容器负责启动,加载,运行服务提供者。
l 服务提供者在启动时,向注册中心注册自己提供的服务。
l 服务消费者在启动时,向注册中心订阅自己所需的服务。
l 注册中心返回服务提供者地址列表给消费者,如果有变更,注册中心将基于长连接推送变更数据给消费者。
l 服务消费者,从提供者地址列表中,基于软负载均衡算法,选一台提供者进行调用,如果调用失败,再选另一台调用。
l 服务消费者和提供者,在内存中累计调用次数和调用时间,定时每分钟发送一次统计数据到监控中心。
15.4.1 Dubbo环境搭建
点进dubbo官方文档,推荐我们使用Zookeeper 注册中心;
15.4.2 Windows下安装Zookeeper
Zookeeper:注册中心。
1、下载zookeeper,解压zookeeper
官网下载链接:https://archive.apache.org/dist/zookeeper/zookeeper-3.4.14/zookeeper-3.4.14.tar.gz
2、以管理员身份运行/bin/zkServer.cmd,初次运行会报错,没有zoo.cfg配置文件;
可能遇到问题:闪退 !
解决方案:编辑zkServer.cmd文件末尾添加pause 。这样运行出错就不会退出,会提示错误信息,方便找到原因。
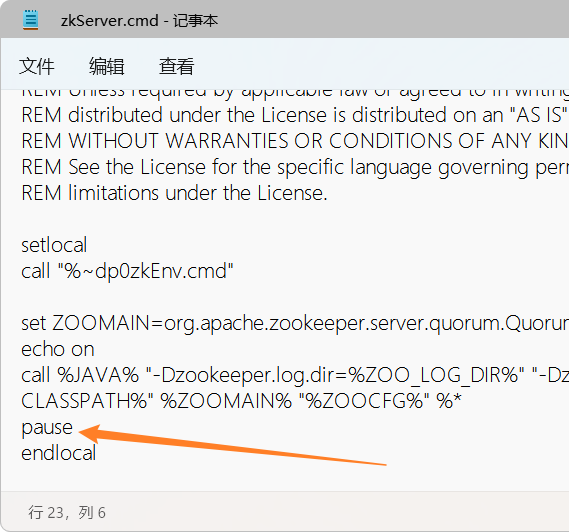
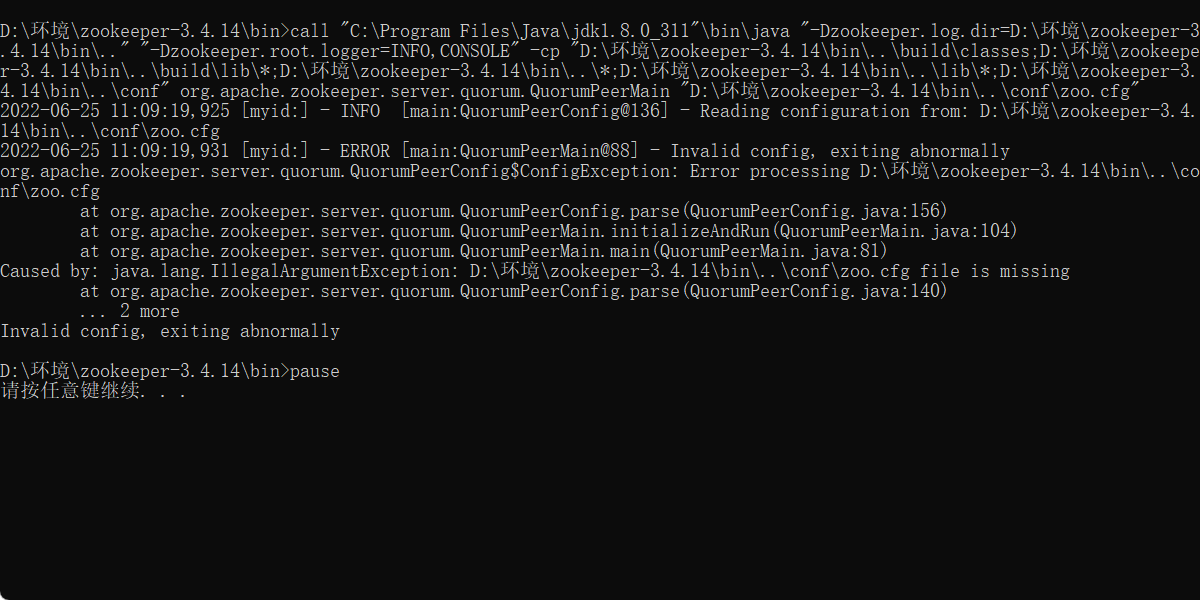
3、修改zoo.cfg配置文件
将conf文件夹下面的zoo_sample.cfg复制一份改名为zoo.cfg即可。
注意几个重要位置:
dataDir=./ 临时数据存储的目录(可写相对路径)
clientPort=2181 zookeeper的端口号
修改完成后再次启动zookeeper
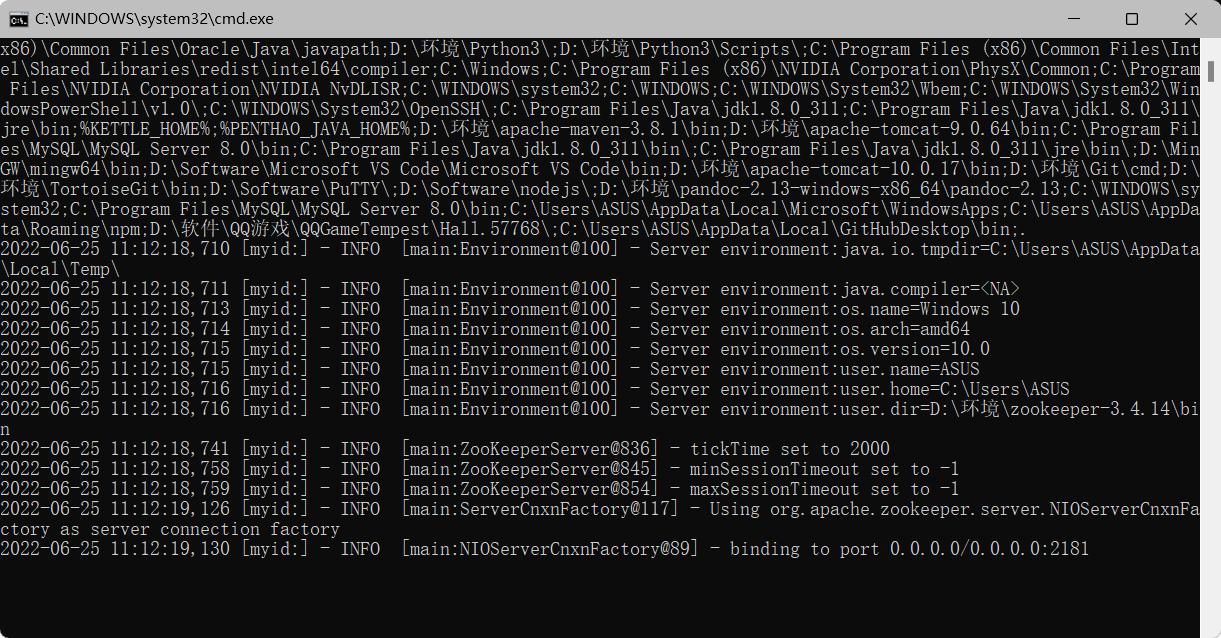
4、使用zkCli.cmd测试
ls /,列出zookeeper根下保存的所有节点
[zk: 127.0.0.1:2181(CONNECTED) 4] ls /
[zookeeper]

create -e /xleixz 123,创建一个xleixz节点,值为123

get /xleixz,获取/xleixz节点的值
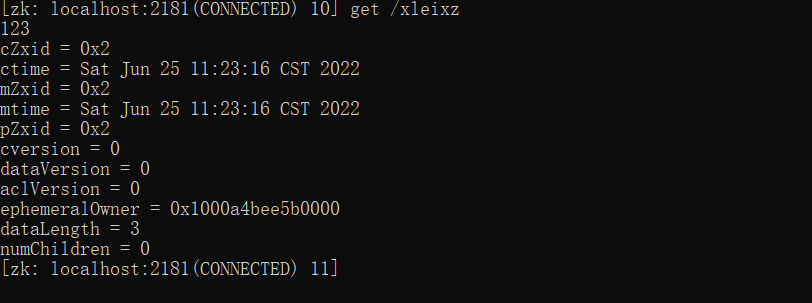
再来查看一下节点

Zookeeper安装完成!
15.4.3 Dubbo-admin安装测试
dubbo本身并不是一个服务软件。它其实就是一个jar包,能够帮你的java程序连接到zookeeper,并利用zookeeper消费、提供服务。
但是为了让用户更好的管理监控众多的dubbo服务,官方提供了一个可视化的监控程序dubbo-admin,不过这个监控即使不装也不影响使用。
dubbo-admin:是一个监控管理后台,查看注册了哪些服务,哪些服务被消费了。
安装:
1、下载dubbo-admin
地址 :https://github.com/apache/dubbo-admin/tree/master
2、解压进入目录
修改 dubbo-admin\src\main\resources \application.properties 指定zookeeper地址(可跳过不修改)
server.port=7001
spring.velocity.cache=false
spring.velocity.charset=UTF-8
spring.velocity.layout-url=/templates/default.vm
spring.messages.fallback-to-system-locale=false
spring.messages.basename=i18n/message
spring.root.password=root
spring.guest.password=guest

dubbo.registry.address=zookeeper://127.0.0.1:2181
3、在项目目录下打包dubbo-admin
mvn clean package -Dmaven.test.skip=true
第一次打包的过程有点慢,需要耐心等待!直到成功!
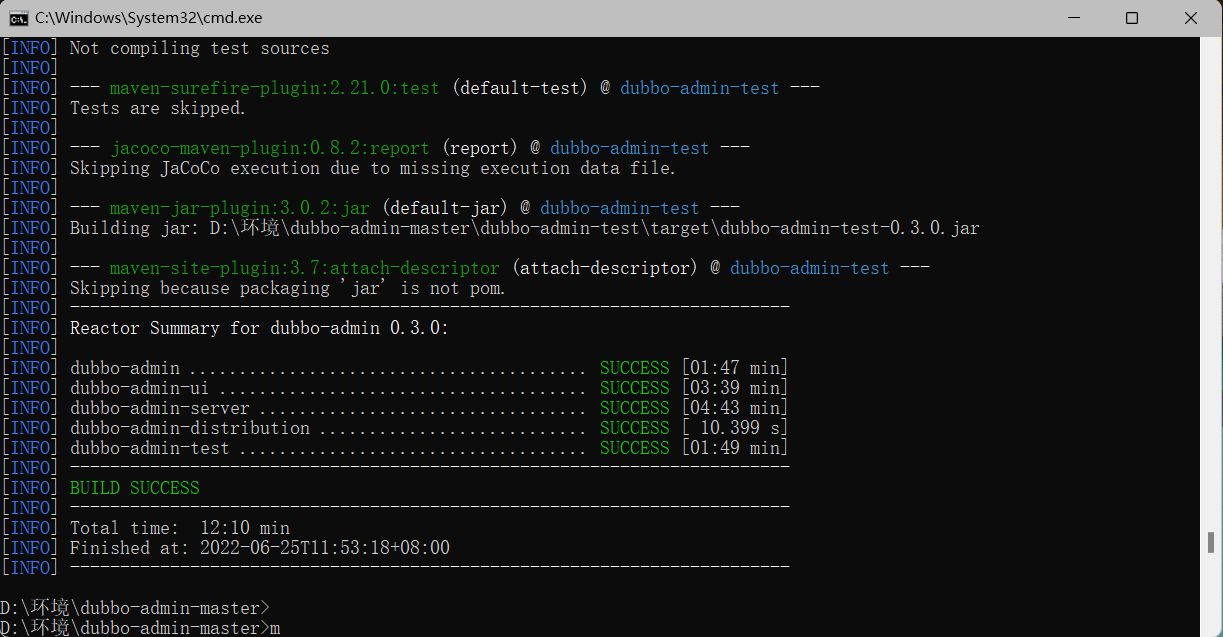
4、执行 dubbo-admin\target 下的dubbo-admin-0.0.1-SNAPSHOT.jar
java -jar dubbo-admin-0.0.1-SNAPSHOT.jar

【注意:zookeeper的服务一定要打开!】
执行完毕,我们去访问一下 http://localhost:7001/ , 这时候我们需要输入登录账户和密码,我们都是默认的root-root;
登录成功后,查看界面
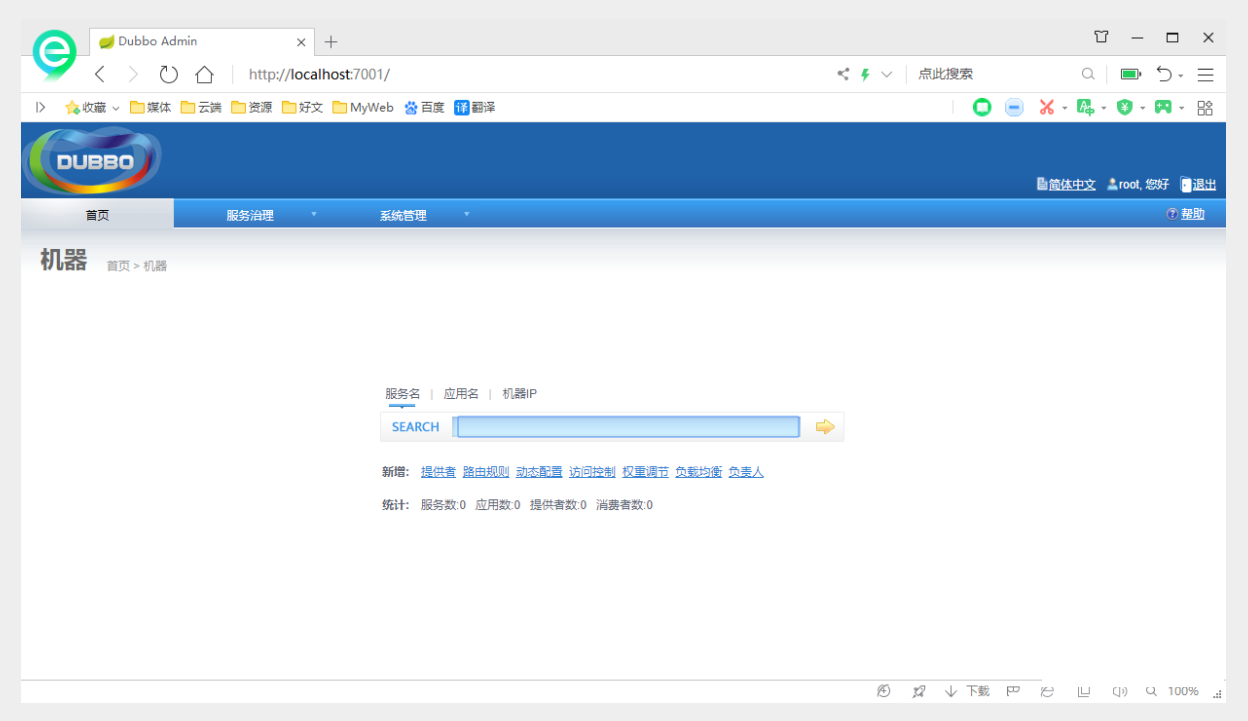
安装完成!
15.5 分布式开发 SpringBoot + Dubbo + zookeeper
分模块化开发方式;
框架搭建
1. 启动zookeeper !
2. IDEA创建一个空项目;
3.创建一个模块,实现服务提供者:provider-server , 选择web依赖即可
4.项目创建完毕,我们写一个服务,比如卖票的服务;
编写接口
public interface TicketService {
   public String getTicket();
}
编写实现类
public class TicketServiceImpl implements TicketService {
   @Override
   public String getTicket() {
       return "《狂神说Java》";
  }
}
5.创建一个Module模块,实现服务消费者:consumer-server , 选择web依赖即可
6.项目创建完毕,写一个服务,比如用户的服务;
编写service
public class UserService {
   //我们需要去拿去注册中心的服务
}
需求:现在的用户想使用买票的服务。
服务提供者
1、将服务提供者注册到注册中心,我们需要整合Dubbo和zookeeper,所以需要导包
从dubbo官网进入github,看下方的帮助文档,找到dubbo-springboot,找到依赖包
<!-- Dubbo Spring Boot Starter -->
<dependency>
   <groupId>org.apache.dubbo</groupId>
   <artifactId>dubbo-spring-boot-starter</artifactId>
   <version>2.7.3</version>
</dependency>
zookeeper的包我们去maven仓库下载,zkclient;
<!-- https://mvnrepository.com/artifact/com.github.sgroschupf/zkclient -->
<dependency>
   <groupId>com.github.sgroschupf</groupId>
   <artifactId>zkclient</artifactId>
   <version>0.1</version>
</dependency>
【新版的坑】zookeeper及其依赖包,解决日志冲突,还需要剔除日志依赖;
<!-- 引入zookeeper -->
<dependency>
   <groupId>org.apache.curator</groupId>
   <artifactId>curator-framework</artifactId>
   <version>2.12.0</version>
</dependency>
<dependency>
   <groupId>org.apache.curator</groupId>
   <artifactId>curator-recipes</artifactId>
   <version>2.12.0</version>
</dependency>
<dependency>
   <groupId>org.apache.zookeeper</groupId>
   <artifactId>zookeeper</artifactId>
   <version>3.4.14</version>
   <!--排除这个slf4j-log4j12-->
   <exclusions>
       <exclusion>
           <groupId>org.slf4j</groupId>
           <artifactId>slf4j-log4j12</artifactId>
       </exclusion>
   </exclusions>
</dependency>
2、在springboot配置文件中配置dubbo相关属性!
dubbo:
  #当前应用名字
  application:
    name: provider-server
  #注册中心地址
  registry:
    address: zookeeper://127.0.0.1:2181
  #扫描指定包下服务
  scan:
    base-packages: com.xleixz.service
3、在service的实现类中配置服务注解,发布服务!注意导包问题
//只要加了注解,就会在服务启动时注册到注册中心
@Component //这里使用了Dubbo,尽量不要使用@Service,会有两个@Service注解容易导错
public class TicketServiceImpl implements TicketService{

    @Override
    public String getTicket() {
        return "卖票";
    }
}
逻辑理解 :应用启动起来,dubbo就会扫描指定的包下带有@component注解的服务,将它发布在指定的注册中心中!
服务消费者
1、导入依赖,和之前的依赖一样;
<!--dubbo-->
<!-- Dubbo Spring Boot Starter -->
<dependency>
   <groupId>org.apache.dubbo</groupId>
   <artifactId>dubbo-spring-boot-starter</artifactId>
   <version>2.7.3</version>
</dependency>
<!--zookeeper-->
<!-- https://mvnrepository.com/artifact/com.github.sgroschupf/zkclient -->
<dependency>
   <groupId>com.github.sgroschupf</groupId>
   <artifactId>zkclient</artifactId>
   <version>0.1</version>
</dependency>
<!-- 引入zookeeper -->
<dependency>
   <groupId>org.apache.curator</groupId>
   <artifactId>curator-framework</artifactId>
   <version>2.12.0</version>
</dependency>
<dependency>
   <groupId>org.apache.curator</groupId>
   <artifactId>curator-recipes</artifactId>
   <version>2.12.0</version>
</dependency>
<dependency>
   <groupId>org.apache.zookeeper</groupId>
   <artifactId>zookeeper</artifactId>
   <version>3.4.14</version>
   <!--排除这个slf4j-log4j12-->
   <exclusions>
       <exclusion>
           <groupId>org.slf4j</groupId>
           <artifactId>slf4j-log4j12</artifactId>
       </exclusion>
   </exclusions>
</dependency>
2、配置参数
#当前应用名字
dubbo.application.name=consumer-server
#注册中心地址
dubbo.registry.address=zookeeper://127.0.0.1:2181
3. 本来正常步骤是需要将服务提供者的接口打包,然后用pom文件导入,这里使用简单的方式,直接将服务的接口拿过来,路径必须保证正确,即和服务提供者相同;
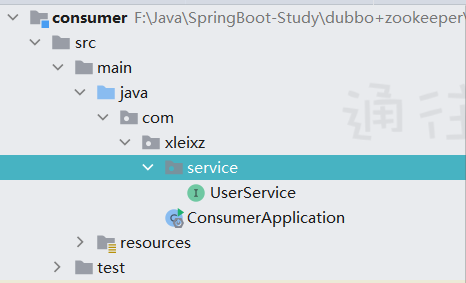
4. 完善消费者的服务类
import com.kuang.provider.service.TicketService;
import org.apache.dubbo.config.annotation.Reference;
import org.springframework.stereotype.Service;

@Service //注入到容器中
public class UserService {

   @Reference //远程引用指定的服务,他会按照全类名进行匹配,看谁给注册中心注册了这个全类名
   TicketService ticketService;

   public void bugTicket(){
       String ticket = ticketService.getTicket();
       System.out.println("在注册中心买到"+ticket);
  }

}
5. 测试类编写;
@RunWith(SpringRunner.class)
@SpringBootTest
public class ConsumerServerApplicationTests {

   @Autowired
   UserService userService;

   @Test
   public void contextLoads() {

       userService.bugTicket();

  }

}
启动测试
1. 开启zookeeper
2. 打开dubbo-admin实现监控【可以不用做】
3. 开启服务者
4. 消费者消费测试,结果:
监控中心 :
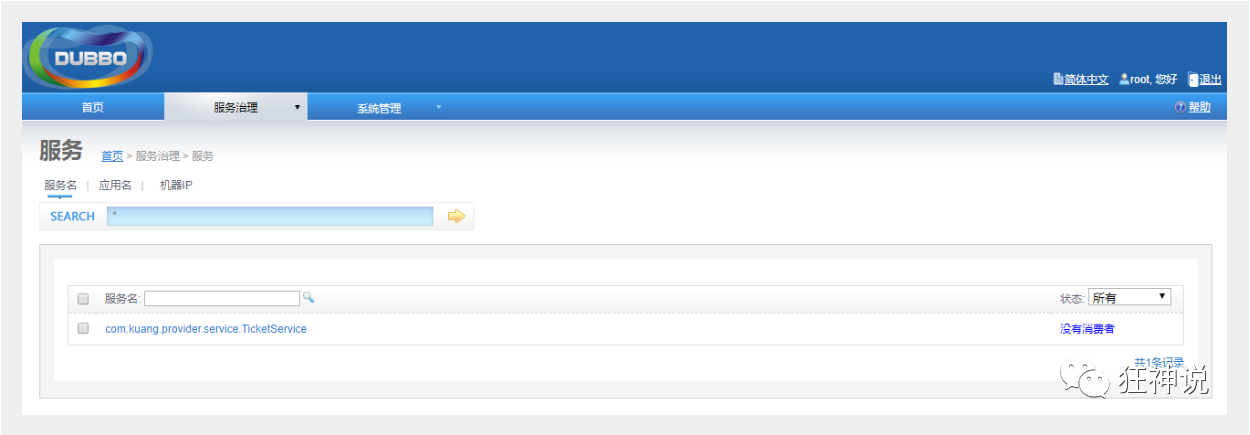
步骤思路总结:
前提:Zookeeper服务已开启!!
1、提供者提供服务
a、导入依赖

b、配置注册中心的地址,以及服务发现名,和要扫描的包

c、在要被注册的服务上面添加注解@Service,注意是apache.dubbo下的包
2、消费者如何消费(如何互通)
a、导入依赖

b、配置注册中心的地址,配置自己的服务名

c、从远程注入服务,使用注解[@Reference ](/Reference )
| 这就是SpingBoot + dubbo + zookeeper实现分布式开发的应用,其实就是一个服务拆分的思想; |
|---|
完结:2022-06-25

若有收获,就点个赞吧
0 人点赞
