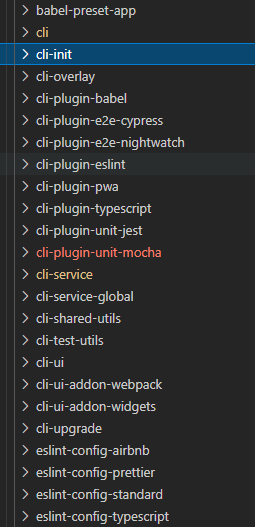
Vue Cli 主体上分为四个模块 cli、cli-service、cli-service-global、ui 和各种插件。
cli
cli 模块是 VueCLi3 的核心模块,这里封装了关键的项目构建功能(creat)即模板功能、持续构建的插件管理功能(add、inspect)、模板配置预设的 config 管理功能、以及其他高级功能的调用入口(service、ui)。
cli 通过 create 命令实现了基本的模板功能,通过 add、inspect 、invoke 提供了对模板的可持续构建。
记:构建思路
执行流程
这里的核心是 Generator + GeneratorAPI ,一个负责构建(管理插件、管理流程),一个负责模块化构建内容(插件)。
Generator
核心代码:
询问配置:
//询问配置const promptApi = new PromptModuleAPI(this);promptModules.forEach((m) => m(promptApi));
例如bable配置: ```javascript module.exports = (cli) => { cli.injectFeature({ name: “Babel”, value: “babel”, short: “Babel”, description: “Transpile modern JavaScript to older versions (for compatibility)”, link: “https://babeljs.io/“, checked: true, });
cli.onPromptComplete((answers, options) => { logInfo(‘onPromptComplete:根据选择结果,将选择结果最终合并到 options (preset) 中’) if (answers.features.includes(“ts”)) { if (!answers.useTsWithBabel) {
return;
} } else if (!answers.features.includes(“babel”)) { return; } options.plugins[“@vue/cli-plugin-babel”] = {}; }); };
2. 加载插件-》构造项目```javascriptconst plugins = await this.reslovePlugins(preset.plugins);const generator = new Generator(this.context, {pkg,plugins,completeCbs: this.createCompleteCbs,});await generator.generate();
加载插件
plugins.forEach(({ id, apply, options }) => {const api = new GeneratorAPI(id, this, options, rootOptions);apply(api, options, rootOptions, invoking);});
例如调用cli-service generator 进行项目默认模板的初始化。
写入文件
async generate({ extractConfigFiles = false, checkExisting = false } = {}) {logStep("4.3 generator-generate,再次保存各个配置文件");this.files["package.json"] = JSON.stringify(this.pkg, null, 2) + "\n";// write/update file tree to diskconst initialFiles = Object.assign({}, this.files)await writeFileTree(this.context, this.files, initialFiles);}
总的执行流程如下:
bin/vue creat app-name-> create 构建开始、 收集输入的参数、判断是否覆盖之前的文件。-> new Creator 进入到 Creator 重开始构建过程,这里可以看到完整的构建流程准备配置、选择配置、安装依赖-> new Generator 这里是安装npm 依赖完成后,拿到插件,主要是 @vue/cli-service 开始构建模板内容, 也会以依次执行其他插件的构建过程-> 构建的核心即 GeneratorAPI ,该函数封装了模板输出的方法,它和模板的关系,类似于 dom 和虚拟 dom 的关系,但是也包括的渲染过程。该模块也是 vue-cli 插件系统实现的核心。正因为这里开发的接口和统一的输出才能实现插件系统。
记:依赖
chalk
样式更丰富的 log 日志插件,用例: ```javascript const chalk = require(“chalk”);
console.log(chalk.blue(“-> “ + msg));
<a name="vN7aZ"></a>### [didyoumean](https://www.npmjs.com/package/didyoumean)匹配输入可能对应的结果,这个可能可以是准确值,也可以是相似值,默认近似比例 0.4,可以配置近似程度。```javascriptvar input = 'insargrm'var list = ['facebook', 'twitter', 'instagram', 'linkedin'];console.log(didYouMean(input, list));> 'instagram'// The method matches 'insargrm' to 'instagram'.input = 'google plus';console.log(didYouMean(input, list));> null
这个插件通常用来获取用户可能输入的命令,并做进一步的提示:
比如用户输入 ‘create’,而实际命令是 ‘creat’,就可以利用这个插件给出 ‘did you mean creat?’之类的提示。
commander
命令解析插件,解析用户输入。
commander 中文文档:https://github.com/tj/commander.js/blob/master/Readme_zh-CN.md
用法:https://segmentfault.com/a/1190000019350684
program.command('inspect [paths...]').description('inspect the webpack config in a project with vue-cli-service').option('--mode <mode>').option('--rule <ruleName>', 'inspect a specific module rule').option('--plugin <pluginName>', 'inspect a specific plugin').option('--rules', 'list all module rule names').option('--plugins', 'list all plugin names').option('-v --verbose', 'Show full function definitions in output').action((paths, cmd) => {require('../lib/inspect')(paths, cleanArgs(cmd))});program.parse(process.argv);
inquirer
命令行交互工具。
const { action } = await inquirer.prompt([{name: "action",type: "list",message: "文件已存在,请选择操作",choices: [{ name: "覆盖", value: "overwrite" },{ name: "合并", value: "merge" },{ name: "取消", value: false },],},]);if (!action) {process.exit(0);} else if (action === "overwrite") {await fs.remove(appPath);}
execa
是更好的子进程管理工具(A better child_process)。本质上就是衍生一个 shell,传入的 command 字符串在该 shell 中直接处理。
例如对安装依赖过程的封装处理:
function executeCommand(command, args, targetDir) {return new Promise((resolve, reject) => {console.log(command, args);const child = execa(command, args, {cwd: targetDir,stdio: ["inherit", "pipe", "pipe"],});child.stdout.on("data", (buffer) => {let str = buffer.toString().trim();// console.log(str);process.stdout.write(str);});child.on("close", (code) => {logInfo("依赖安装结果:" + code);if (code !== 0) {reject(`command failed: ${command} ${args.join(" ")}`);return;}resolve();});});}
download-github-repo / download-git-repo
可以用于下载整个仓库、或者制定分支、指定文件夹、指定文件。
download(repo, destination, callback)
Semver
globby
使用通配符去搜索文件
cli-service-global
cli-service-global 是对 cli-service 的外层封装,封装了对单个js/vue文件的 service 模式。
基本原理是通过内置的 template 模板文件夹,将要调试的文件注入到 template 中。
template 文件结构如下:
--template-- index.html-- main.js
记:构建思路
执行流程
核心代码:
核心流程:
const creatService = function (context, entry, asLib) {logInfo('注入bable和eslint 插件,以及其他基础配置,通过 globalConfigPlugin 模拟一套完整的配置环境')return new Service(context,{projectOptions: {compiler: true,lintOnSave: true},plugins: [globalConfigPlugin(context, entry, asLib)]})}exports.serve = function (_entry, args) {logStep('构建入口信息')const { context, entry } = resolveEntry(_entry);logStep('创建service,并执行 serve')creatService(context, entry).run('serve', args)}exports.build = function (_entry, args) {logStep('构建入口信息')const { context, entry } = resolveEntry(_entry);logStep('asLib,是否有目标输出的html文件')const asLib = args.target && args.target !== 'app'if (asLib) {args.entry = entry}logStep('创建service,并执行 build')creatService(context, entry).run('build', args)}
总结:
构建入口信息判断入口文件是否存在,如果没有传入入口文件则读默认的。创建service,并执行 serve注入bable和eslint 插件,以及其他基础配置,通过 globalConfigPlugin 模拟一套完整的配置环境生成全局性的基础配置此处配置的模式是 plugin 的模式 {id:"",apply(api,options)=>{}}预计此处配置会在 creatAPI 中 GeneratorAPI 部分调用,用于注入 webpack 配置等服务启动的入口serve{ open: true }
cli-service
cli-service 主要包括两个部分:命令部分和服务插件部分,cli-service 将 build、serve、inspct 等命令通过命令插件机制进行管理,提供了一个可扩展命令的服务管理,同时通过 服务插件可以轻易的扩展cli 相关配置和构建依赖、构建内容。
记:构建思路
执行流程
核心代码
读取依赖
从读取依赖的过程,可以看出来通过约定插件名字以 vue 开头的插件作为 cli-service的插件(约定大于配置)。
这个过程包括了命令和构建插件的扩展方式:读取用户输入的插件+pkg中的插件。
this.plugins = this.reslovePlugins(plugins);reslovePlugins(inlinePlugins, useBuilltIn) {logStep("解析拼接内部插件,以及是否使用 useBuiltIn 等其他插件,这里是 vue-cli-service 插件系统的核心入口");logInfo("这里也说明了 service 内部也采用了 plugin 的模式来实现功能的堆叠");logInfo("例如:./commands/serve ./command/build ./commands/inspect");const idToPlugin = (id) => ({id: id.replace(/^.\//, "built-in:"),apply: require(id),});const buildInPlugins = ["./commands/serve","./commands/build",// "./commands/inspect",// "./commands/help",'./config/base','./config/css','./config/dev',// './config/prod','./config/app'].map(idToPlugin);if (inlinePlugins) {logStep(`加载其他默认的插件 ${inlinePlugins}`);return buildInPlugins.concat(inlinePlugins);} else {logStep(`加载 package 中配置的插件:${this.pkg.devDependencies},${JSON.stringify(this.pkg.dependencies)}`);logInfo("这里就是为什么cli-service 可以加载pkg 中的插件,而无需额外配置的原因。");logInfo("是否是cli-service的插件依靠命名来确定:/^(@vue/|vue-|@[w-]+/vue-)cli-plugin-/");const projectPlugins = Object.keys(this.pkg.devDependencies || {}).concat(Object.keys(this.pkg.dependencies || {})).filter((id) => {return /^(@vue\/|vue-|@[\w-]+\/vue-)cli-plugin-/.test(id);}).map((id) => {let apply = () => { };try {apply = require(id);} catch (error) { }return { id, apply };});logInfo(projectPlugins);return buildInPlugins.concat(projectPlugins);}}
serve 过程
serve 过程的实现核心即利用 api.chainWebpack 去拼接 webpack 的配置。
在 cli-service 中 webpack 的配置被分为了 四个模块: app、base、css、dev。这个配置模式和cli2 以及各种基于 webpack 的构建工具类似,对大量配置进行分组处理。方便根据需求进行重组。
总结:
这里只记录cli-service 从输入命令开始的主题流程,但是其细节其实是在 serve 和 build 这些详细的命令中的。这些命令是最终执行 build 和 service 的总组装过程, cli-service 是对前期配置的管理,并不负责组装和使用。
即 cli-service 管理cmds、管理 plugins 解析配置资源、管理配置资源。
plugins 产生配置资源。
cmds 使用配置资源。
cli-service 还提供了基础的 webpack 项目构建配置。
记:webpack 插件
- /webpack/MovePlugin
- webpack/lib/NamedChunksPlugin
- html-webpack-plugin
- copy-webpack-plugin
- url-loader
- file-loader
- pug-plain-loader
总结
cli 生态的全部插件如下:
不在对其他插件做整理,大概过一遍,了解扩展能力。
通过对cli 三个核心部分的分析,大概了解了 cli 的架构思路,了解了一些实用的方法,库。也了解实现一个架构的基本流程。

