基础知识
QML提供了一种灵活的锚定位方式来布局。锚定的概念是Item的基础,并且适用于所有可视化的QML元素。锚的作用像一个契约,比竞争的几何变化更强大。锚是相对表达的,您总是需要一个相关的元素来进行锚定。
一个元素有 6 条主要的锚线(top, bottom,left, right, horizontalCenter, verticalCenter)。此外,Text 元素中还有用于文本的基线锚点。每条锚线都有一个偏移量。在top, bottom, left, 和right锚点的情况下,它们称为边距。对于horizontalCenter, verticalCenter and baseline,它们被称为偏移量。
:::success
在源码中我们增加了MouseArea。增加的作用是为了让元素正常情况下可以被移动。但是加入锚布局以后,是个什么样子呢,我们一起来看看。
:::
基础组件的源码:
// RedSquare.qmlimport QtQuickRectangle {id:rootwidth: 48height: 48color: "#8B0000"property string showText: ""property real mouse_x: 0property real mouse_y: 0Text {id: labelanchors.centerIn: parenttext:root.showText}MouseArea{anchors.fill: parentonPressed: {mouse_x = mouseXmouse_y = mouseY}onPositionChanged: {root.x = mouseX + root.x - mouse_xroot.y = mouseY + root.y - mouse_y}}border.color: Qt.lighter(color)}//GreenSquare.qmlimport QtQuickRectangle {id:rootwidth: 48height: 48color: "#228B22"property string showText: ""property real mouse_x: 0property real mouse_y: 0Text {id: labelanchors.centerIn: parenttext:root.showText}MouseArea{anchors.fill: parentonPressed: {mouse_x = mouseXmouse_y = mouseY}onPositionChanged: {root.x = mouseX + root.x - mouse_xroot.y = mouseY + root.y - mouse_y}}border.color: Qt.lighter(color)}//BlueSquare.qmlimport QtQuickRectangle {id:rootwidth: 48height: 48color: "#1E90FF"property string showText: ""property real mouse_x: 0property real mouse_y: 0Text {id: labelanchors.centerIn: parenttext:root.showText}MouseArea{anchors.fill: parentonPressed: {mouse_x = mouseXmouse_y = mouseY}onPositionChanged: {root.x = mouseX + root.x - mouse_xroot.y = mouseY + root.y - mouse_y}}border.color: Qt.lighter(color)}
- 父元素填充子元素 ```ruby import QtQuick
GreenSquare { BlueSquare { width: 12 anchors.fill: parent anchors.margins: 8 showText: ‘(1)’ } }
结果:<br />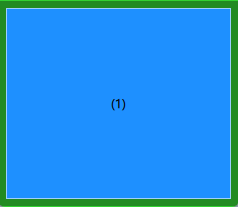2. 元素与父元素左对齐。```ruby// RepeaterExample.qmlimport QtQuickGreenSquare {BlueSquare {width: 48y: 8anchors.left: parent.leftanchors.leftMargin: 8showText: "(2)"}}
结果:
- 元素的左侧与父元素的右侧对齐。 ```ruby
import QtQuick Rectangle{ GreenSquare { width: 120 height: 40 BlueSquare { width: 48 anchors.left: parent.right showText: ‘(3)’ } } }
结果:<br />4. 居中对齐元素。`Blue1` 水平居中于父级。`Blue2 `也水平居中,但在 `Blue 1` 上,其顶部与 `Blue1` 底线对齐。```rubyimport QtQuickGreenSquare {BlueSquare {id: blue1width: 48; height: 24y: 8anchors.horizontalCenter: parent.horizontalCenter}BlueSquare {id: blue2width: 72; height: 24anchors.top: blue1.bottomanchors.topMargin: 4anchors.horizontalCenter: blue1.horizontalCentershowText: '(4)'}}
结果:
元素以父元素为中心
import QtQuickGreenSquare {BlueSquare {width: 48anchors.centerIn: parentshowText: '(5)'}}
结果:

使用水平和垂直中线,元素以父元素的左偏移居中
import QtQuickGreenSquare {BlueSquare {width: 48anchors.horizontalCenter: parent.horizontalCenteranchors.horizontalCenterOffset: -12anchors.verticalCenter: parent.verticalCentershowText: '(6)'}}
再加点料
在子元素中我们增加了
MouseArea区域,支持对子元素的拖动。试试这个例子,拖动一些方块。您将看到:

- (1)不能被拖动,因为它是锚定在所有的方面(尽管您可以拖动(1)的父级,因为它根本没有被锚定)。
- (2)可以垂直拖动,因为只有左侧被锚定。
- 这同样适用于(3)。(4)只能垂直拖动,因为两个方块都是水平居中的。
- (5)以父方为中心,因此不能被拖拽。
- 这同样适用于(7)。拖动一个元素意味着改变它的x、y位置。
由于锚定比设置x、y属性更强,拖动受到锚定线的限制。我们将在稍后讨论动画时看到这个效果。

若有收获,就点个赞吧
0 人点赞
