学习资料
官方文档
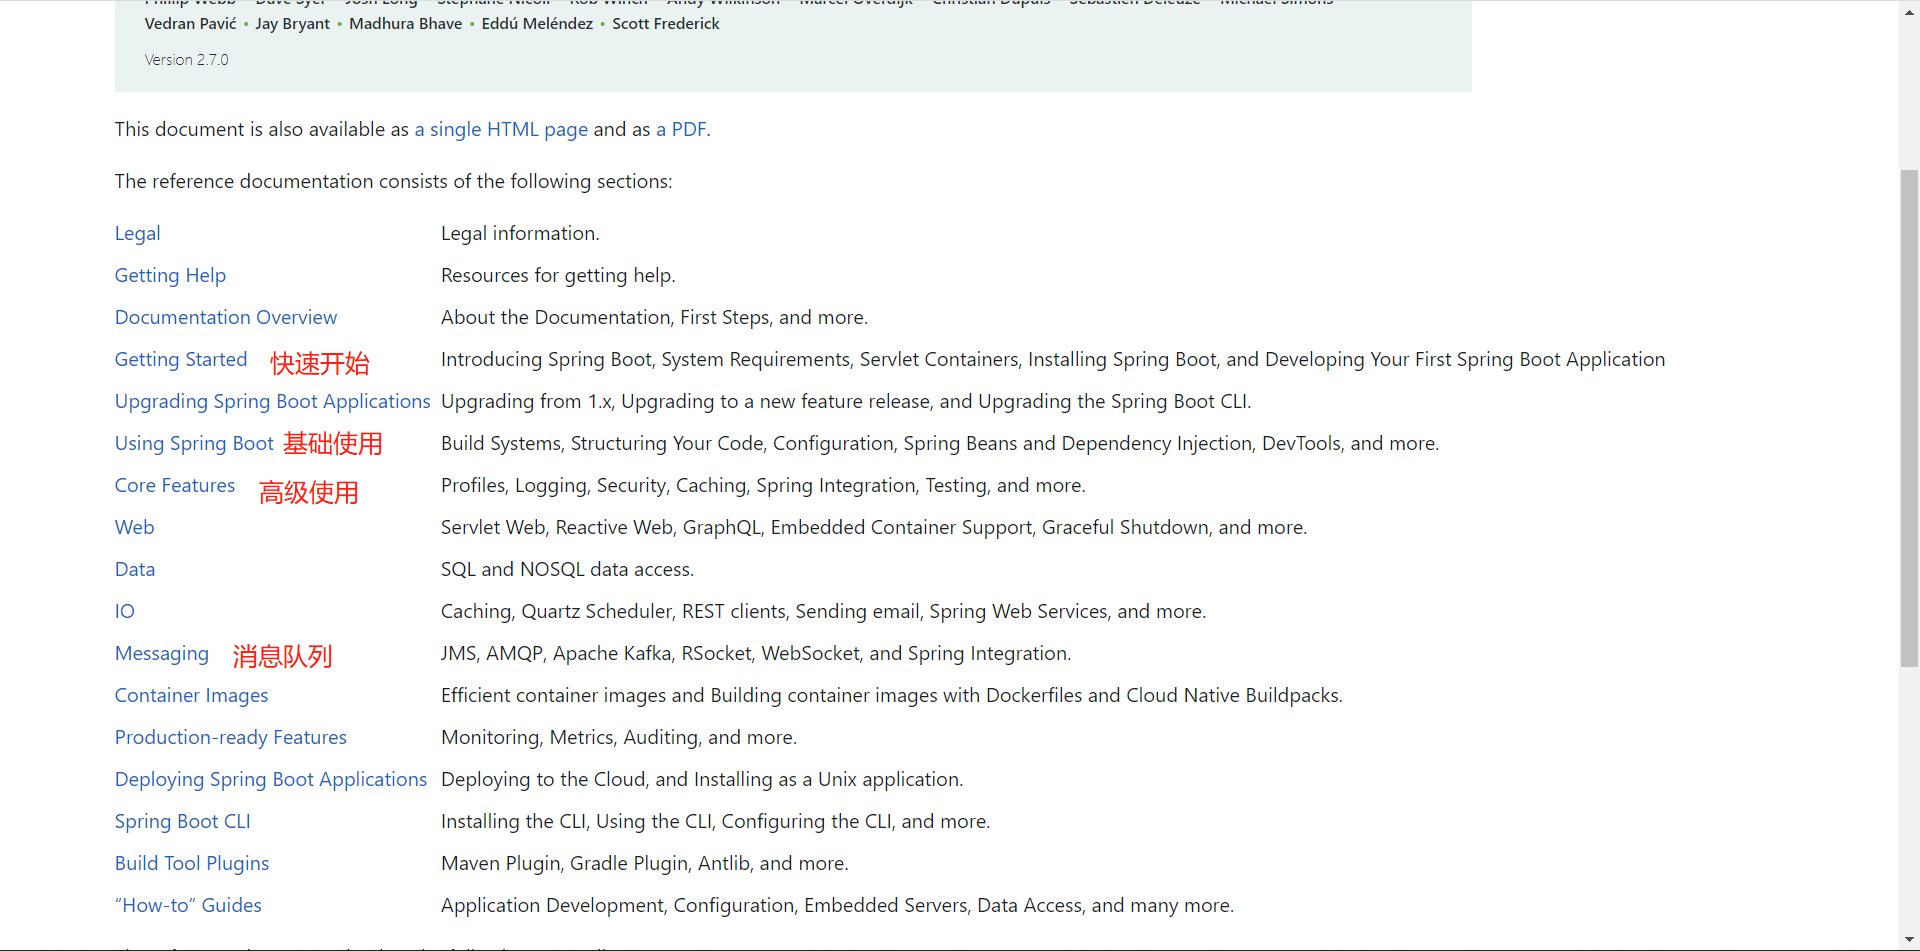
教学视频
尚硅谷雷神SpringBoot2零基础入门springboot·全套完整版[87]
| 内容 | 日期 | 进度 |
|---|---|---|
- @Configuration标签 |
6/12 | 8 |
- 底层的注解 |
6/14 | 9、10、11、12、13 |
- 自动配置的原理 |
6/15 | 14、15 |
- 开发小技巧 - yaml配置文件 |
6/16 | 16、17、18、19、20 |
- 静态文件 |
6/18 | 21、22、23 |
- 静态资源配置原理 - 404 - index |
6/19 | 24 |
- 静态资源访问的原理 - 修改表单实现rest风格 |
6/21 | 25、26、27 |
- 参数的注解 |
6/22 | 28、29、30 |
- 请求的获取参数的原理 |
6/23 | 31 |
- model map 的原理 |
6/25 | 32、33 |
| 7/1 | 34 |
- []:rest风格:访问网络资源的格式。
- 优点:简化语句、隐藏行为
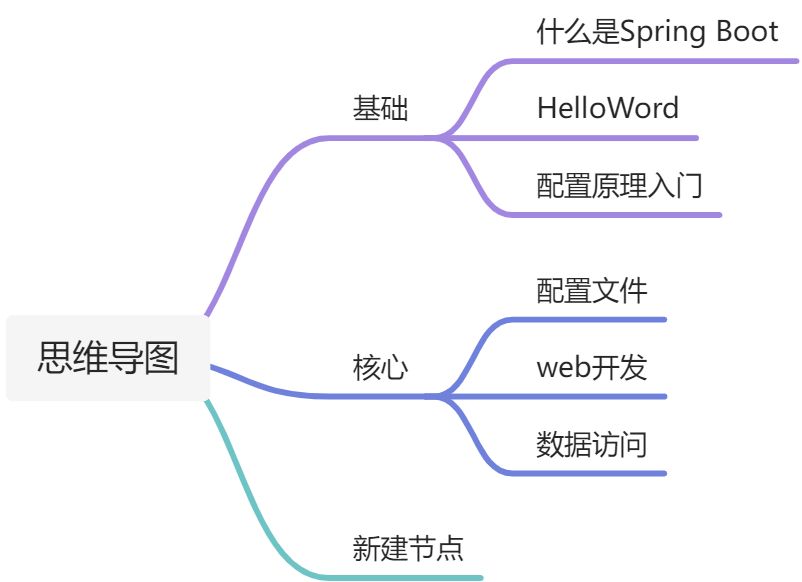
基础入门
一、Spring与SpringBoot
什么是SpringBoot?
- 开发包,使得开发变得更简单。
常用注解?
- SpringBootApplication:这是一个Spring Boot应用,
- Controller:这是一个控制器
- ResponseBody:这个控制器返回字符串。
- RestController:(Controller+ResponseBody)这是一个控制器,直接返回字符串到页面,而不是返回页面。
二、SpringBoot2入门
2、HelloWord
```xmlorg.springframework.boot spring-boot-starter-parent 2.7.0
```java/*** @SpringBootApplication:这是spring boot 应用*/@SpringBootApplicationpublic class MainApplication {public static void main(String[] args) {SpringApplication.run(MainApplication.class,args);}}
package com.wuzhi.boot.controller;import org.springframework.stereotype.Controller;import org.springframework.web.bind.annotation.RequestMapping;import org.springframework.web.bind.annotation.ResponseBody;@ResponseBody@Controllerpublic class HelloController {@RequestMapping("/hello")public String Hello(){return "<h1>hello word</h1>";}}
#application.propertiesserver.port=8082
<build><plugins><plugin><groupId>org.springframework.boot</groupId><artifactId>spring-boot-maven-plugin</artifactId></plugin></plugins></build>
java -jar boot-01-hello-1.0-SNAPSHOT.jar
三、了解自动装配
1、SpringBoot特点
1.1、依赖管理
1.2、自动装配
点击spring-boot-starter-web即可查看
- 配置好tomcat
配置好SpringMVC
#ctrl+spring-boot-starter-web<dependencies><dependency><groupId>org.springframework.boot</groupId><artifactId>spring-boot-starter-web</artifactId></dependency></dependencies>
配置好乱码问题
配置好视图解析器
@SpringBootApplicationpublic class MainApplication {public static void main(String[] args) {//1.返回IOC容器ConfigurableApplicationContext run = SpringApplication.run(MainApplication.class, args);//2.查看容器的组件String[] names = run.getBeanDefinitionNames();for (String name :names) {System.out.println(name);}}}
默认包结构:其他包放在主程序同级或者子包都能扫描。
- 配置拥有默认值点开依赖:
spring-boot-autoconfigure - 按需加载包:starter
<dependency><groupId>org.springframework.boot</groupId><artifactId>spring-boot-autoconfigure</artifactId><version>2.7.0</version><scope>compile</scope></dependency>
2、容器功能
2.1、组件添加
- @Configuration
- @Bean、@Component、Controller、Service、Reposity
- ComponentScan、Import、ImportResouce(“”)
- Conditional
- 满足某种条件将依赖进行注入。
@ConditionalOnBean(name = “tom”):容器中有tom才将这个组件才注入
2.2、原生配置文件引入
@ImportResource(“classpath:bean.xml”)
2.3、属性值绑定
将.properties中的文件的属性值封装到bean中。
@Component+@ConfigurationProperties(prefix = “”)
mycar.brand=teslamycar.price=12000
@Component@ConfigurationProperties(prefix = "mycar")//放到容器中这个注解才生效public class Car {private String brand;private Integer price;public String getBrand() {return brand;}public void setBrand(String brand) {this.brand = brand;}public Integer getPrice() {return price;}public void setPrice(Integer price) {this.price = price;}}
@EnableConfigurationProperties(Car.class)+@ConfigurationProperties(prefix = “mycar”)
@Configuration@EnableConfigurationProperties(Car.class)//放入第三方bean到容器public class MyConfig {
3、自动配置原理入门
3.1、引导加载配置类
@SpringBootConfiguration //->:@Configuration:这是一个配置类 MainApplication也是配置类@EnableAutoConfiguration//->:@AutoConfigurationPackage ->//->:@Import({AutoConfigurationImportSelector.class})@ComponentScan(excludeFilters = {@Filter(type = FilterType.CUSTOM,classes = {TypeExcludeFilter.class}), @Filter(type = FilterType.CUSTOM,classes = {AutoConfigurationExcludeFilter.class})})//指定扫描什么包
@Import({Registrar.class})public @interface AutoConfigurationPackage {
```java List
configurations = this.getCandidateConfigurations(annotationMetadata, attributes);
```java//->META-INF->spring.factories
3.2、按需配置
一股脑全部加载,但是根据注解ConditionalOnXXX使得,如果不导入包组件就不会生效。
3.3、默认修改配置
底层默认配置了属性,如果用户配置了,用户的配置优先
@ConditionalOnProperty(prefix = "server.servlet.encoding",value = {"enabled"},matchIfMissing = true)
@Bean@ConditionalOnMissingBeanpublic CharacterEncodingFilter characterEncodingFilter() {CharacterEncodingFilter filter = new OrderedCharacterEncodingFilter();filter.setEncoding(this.properties.getCharset().name());filter.setForceRequestEncoding(this.properties.shouldForce(org.springframework.boot.web.servlet.server.Encoding.Type.REQUEST));filter.setForceResponseEncoding(this.properties.shouldForce(org.springframework.boot.web.servlet.server.Encoding.Type.RESPONSE));return filter;}
3.4、总结
- spring boot先加载所有的配置类。
- 配置类按照导入的依赖类条件进行生效,并且配置类有默认值,从XXXProperties里面去取,XXXProperties绑定了配置文件application.properties。
- 生效的配置类就会给容器装配。
- 只要容器中有就有这些功能。
-
4、开发小技巧
4.1、一般步骤
引入场景
- 查看自动配置了那些属性。application.properties中添加配置
debug=true。 是否需要修改配置项。
- 自定义配置
-
4.2、Lombok
@NoArgsConstructor//无参构造器@AllArgsConstructor//为所有参数生成构造器@ToString//生成ToString@Data//编译时生成getter setter@ConfigurationProperties(prefix = "mycar")public class Car {private String brand;private Integer price;}
@Slf4j//log.infor("写入日志文件")@RestControllerpublic class HelloController {@AutowiredCar car;@RequestMapping("/car")public Car car(){log.info("car请求");return car;}}
4.3、dev-tools
<dependency><groupId>org.springframework.boot</groupId><artifactId>spring-boot-devtools</artifactId></dependency>
4.4、Spring Initailar
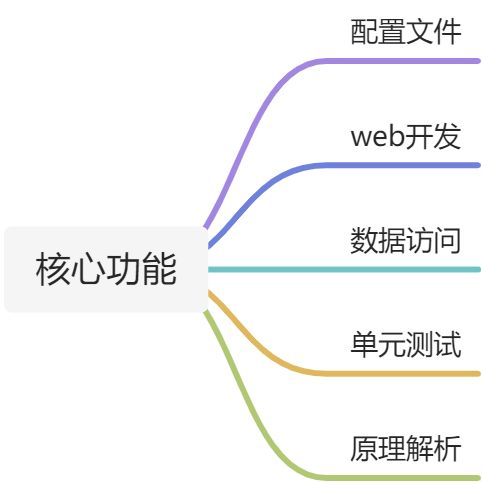
核心功能
四、配置文件
1、properties
2、yaml
五、Web开发
1、自动配置概览
2、简单功能分析
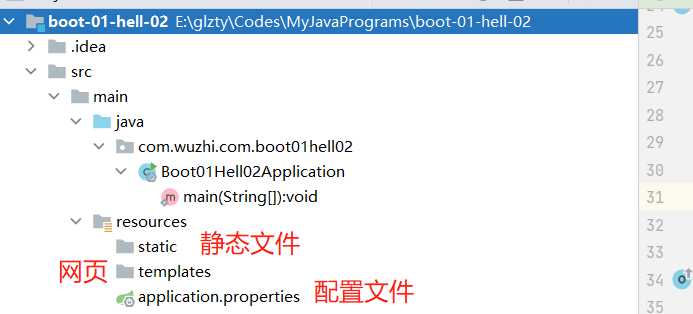
2.1、静态资源目录
存储地址:
/static(or/publicor/resourcesor/META-INF/resources)
访问方式:/+资源名称
过程:先用Contrller处理,不能处理后用/**处理。
指定访问静态资源的前缀:spring.mvc.static-path-pattern=2.2、欢迎页面
-
2.3、图标
将图标
favicon.ico放到静态资源下。-
2.4、错误路径
-
2.5、静态资源配置原理
主要的配置类
WebMvcAutoConfiguration- 内部类,看它绑定了那些属性。
- 一个内部类
WebMvcAutoConfigurationAdapter 这个内部类的方法
addResourceHandlers,调取静态资源位置。public void addResourceHandlers(ResourceHandlerRegistry registry) {if (!this.resourceProperties.isAddMappings()) {logger.debug("Default resource handling disabled");} else {this.addResourceHandler(registry, "/webjars/**", "classpath:/META-INF/resources/webjars/");this.addResourceHandler(registry, this.mvcProperties.getStaticPathPattern(), (registration) -> {registration.addResourceLocations(this.resourceProperties.getStaticLocations());if (this.servletContext != null) {ServletContextResource resource = new ServletContextResource(this.servletContext, "/");registration.addResourceLocations(new Resource[]{resource});}});}}
禁用所有静态资源
spring:web:resources:add-mappings: false #所有的静态资源都访问不了
欢迎页处理
@Beanpublic WelcomePageHandlerMapping welcomePageHandlerMapping(ApplicationContext applicationContext, FormattingConversionService mvcConversionService, ResourceUrlProvider mvcResourceUrlProvider) {WelcomePageHandlerMapping welcomePageHandlerMapping = new WelcomePageHandlerMapping(new TemplateAvailabilityProviders(applicationContext), applicationContext, this.getWelcomePage(), this.mvcProperties.getStaticPathPattern());welcomePageHandlerMapping.setInterceptors(this.getInterceptors(mvcConversionService, mvcResourceUrlProvider));welcomePageHandlerMapping.setCorsConfigurations(this.getCorsConfigurations());return welcomePageHandlerMapping;}
3、请求参数处理
0、请求映射
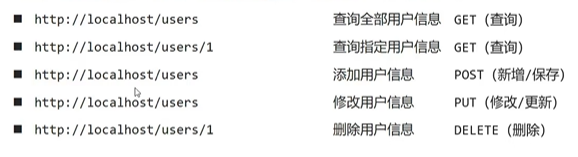
rest风格支持:(利用HTTP请求动词表示对资源的访问)
- GET-查 PUT-修改 POST-保存 DELETE-删除
表单提交参数的rest风格处理办法:拦截POST请求,根据
_method的值重写请求。 ```html
```java@Bean@ConditionalOnMissingBean({HiddenHttpMethodFilter.class})@ConditionalOnProperty(prefix = "spring.mvc.hiddenmethod.filter",name = {"enabled"})public OrderedHiddenHttpMethodFilter hiddenHttpMethodFilter() {return new OrderedHiddenHttpMethodFilter();}
protected void doFilterInternal(HttpServletRequest request, HttpServletResponse response, FilterChain filterChain) throws ServletException, IOException {HttpServletRequest requestToUse = request;if ("POST".equals(request.getMethod()) && request.getAttribute("javax.servlet.error.exception") == null) {//methodParam = _method 得到参数为 _method的参数的值String paramValue = request.getParameter(this.methodParam);if (StringUtils.hasLength(paramValue)) {String method = paramValue.toUpperCase(Locale.ENGLISH);if (ALLOWED_METHODS.contains(method)) {requestToUse = new HiddenHttpMethodFilter.HttpMethodRequestWrapper(request, method);}}}filterChain.doFilter((ServletRequest)requestToUse, response);}
spring.mvc.hiddenmethod.filter.enabled=true
- 请求方法等价写法 ```java //两个相等 // @RequestMapping(value = “/user”, method = RequestMethod.GET) @GetMapping(“/user”) public String getUser() { return “user-get”; }
//两个是相等的 // @RequestMapping(value = “/user”, method = RequestMethod.DELETE) @DeleteMapping(“/user”) public String deleteUser() { return “user-delete”; }
// @RequestMapping(value = “/user”, method = RequestMethod.POST) @PostMapping(“/user”) public String PostUser() { return “user-post”; }
@PutMapping(“/user”) public String PutUser() { return “user-put”; }
4. 请求映射原理:`DispatcherServlet`类->`doDispatch`方法1. 所有的请求都在`HandlerMapping`中<a name="Cw56K"></a>#### 1、普通参数与基本注解1. **注解**- @PathVariable:从请求路径上取值- @RequestHeader:获取请求头中的参数- @RequestParam:从请求的参数上获取- @CookieValue:获取cookie的值,cookie是用户的信息。```java// car/2/owner/gonglize?age=18&height=173@GetMapping("/car/{id}/owner/{username}")public Map<String, Object> getCar(@PathVariable("id") Integer id,@PathVariable("username") String name,@RequestHeader("User-Agent") String agent,@RequestHeader Map<String, String> header,@RequestParam("age") Integer age,@RequestParam("height") Integer height,@CookieValue("Idea-46648a83") Cookie cookie) {Map<String, Object> map = new HashMap<>();map.put("id", id);map.put("username", name);map.put("agent", agent);// map.put("header", header);map.put("age", age);map.put("height", height);map.put("cookie", cookie);System.out.println(cookie.getName() + "================" + cookie.getValue());return map;}
@RequestBody:获取post表单中的数据
<form action="/save" method="post"><input name="userName"><input name="email"><input type="submit" value="提交"></form>
/*** post请求表单** @return*/@PostMapping("/save")public Map<String, Object> postMethod(@RequestBody String content) {Map<String, Object> map = new HashMap<>();map.put("content", content);return map;}
@RequestAttribute:用于得到转发后requst中的属性值。 ```java @GetMapping(“/goto”) public String goToPage(HttpServletRequest request) {
request.setAttribute(“msg”, “成功了”); request.setAttribute(“msg1”, “我成功了”);
return “forward:/success”; }
@ResponseBody @GetMapping(“/success”) public String success(@RequestAttribute(“msg”) String msg) { return msg; }
- @MatrixVariable:处理矩阵变量的请求方式。`UrlPathHelper`->removeSemicolonContent用来支持矩阵变量。```java/*** 配置矩阵变量请求:第二种写法*/@Beanpublic WebMvcConfigurer webMvcConfigurer(){return new WebMvcConfigurer() {@Overridepublic void configurePathMatch(PathMatchConfigurer configurer) {UrlPathHelper urlPathHelper = new UrlPathHelper();//不移除 矩阵变量的请求生效urlPathHelper.setRemoveSemicolonContent(false);WebMvcConfigurer.super.configurePathMatch(configurer);}};}
// boss/1;age=45/2;age=22@GetMapping("boss/{bossId}/{empId}")public Map boss(@MatrixVariable(value = "age", pathVar = "bossId") Integer bossAge,@MatrixVariable(value = "age", pathVar = "empId") Integer empAge) {Map<String, Object> map = new HashMap<>();map.put("bossAge",bossAge);map.put("empAge",empAge);return map;}
- Servlet API
- 处理原生的请求:在类
ServletRequestMethodArgumentResolver->的方法resolveArgument中可以找到所有可以处理的请求。//HttpSession//InputStream//Reader//Principal
- 复杂参数
Map、Model=
request.setAttribute,他们是一个东西,最后将数据放到请求域中。@GetMapping("/params")public String testParam(Map<String,Object> map,Model model,HttpServletRequest request,HttpServletResponse response){map.put("map","mapValue");model.addAttribute("model","modelValue");request.setAttribute("request","requestValue");Cookie cookie = new Cookie("cookie","cookieValue");response.addCookie(cookie);return "forward:goto";}
RedirectAttributes、ServletResponse


若有收获,就点个赞吧
0 人点赞
