我在Windows上有一个C++ CMake项目,IDE使用的是Visual Studio 甲方要让我提供一个linux版本 我不想另外接触太多东西,还是希望在VS中调试
使用步骤:
- 项目代码在Windows系统上
- Visual Studio通过ssh连接一个事先准备好的linux系统
- 在Windows上打开cmake项目,并配置linux编译条件
- 和往常一样使用VS,打断点、点击运行调试
VS为我们做了什么
- 项目代码本身就在Windows上,所以VS可以为我们提供智能提示
- VS会将代码拷贝到linux系统上,根据编译条件进行编译,并使用gdb为用户提供和原来一样的调试效果
1. 安装VS linux开发组件
在Windows上,安装VS,并安装了”Linux development with C++ workload”工具集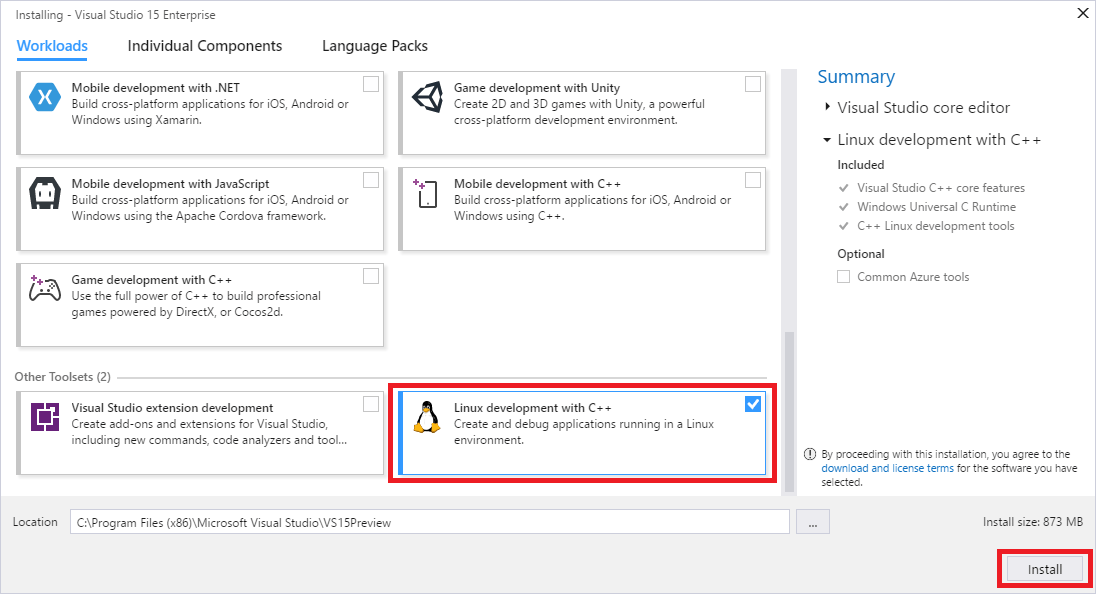
2. 准备linux开发环境
准备linux系统,有多种方式
- linux虚拟机
- WSL:适用于 Linux 的 Windows 子系统
- Docker linux容器(请参考: VS+CMake+Linux容器)
本文只说明,此开发模式对linux的要求。具体如何准备linux开发环境,本文不介绍,可参考接下来的文章。
VS+CMake跨平台开发方式,对linux开发环境有以下要求:
- gcc:Visual Studio 2017 为 GCC 提供完整支持。
- gdb:Visual Studio 会在 Linux 系统上自动启动 gdb,并使用 Visual Studio 调试器的前端在 Linux 上提供完全保真的调试体验。
- rsync 和 zip:包含 rsync 和 zip 允许 Visual Studio 将头文件从 Linux 系统提取到 Windows 文件系统以供 IntelliSense 使用。
- make
- openssh-server:Visual Studio 通过安全 SSH 连接以连接到远程 Linux 系统。
- CMake(仅 CMake 项目)
相关命令如下
安装相关依赖项
apt-get install -y openssh-server g++ gdb make ninja-build rsync zip cmake
配置ssh ```shell mkdir -p /var/run/sshd echo “PasswordAuthentication yes” >> /etc/ssh/sshd_config && ssh-keygen -A
service ssh start #开启ssh useradd -m -d /home/geodoer -s /bin/bash -G sudo geodoer #创建一个名为geodoer的用户 passwd geodoer #设置geodoer用户的密码
sudo systemctl enable ssh #系统启动时,自动开启ssh服务器
<a name="XADnT"></a>## 3. 通过SSH远程连接linux**添加一个远程连接**1. 工具 > 选项 > 跨平台 > 连接管理器 > 添加1. 配置内容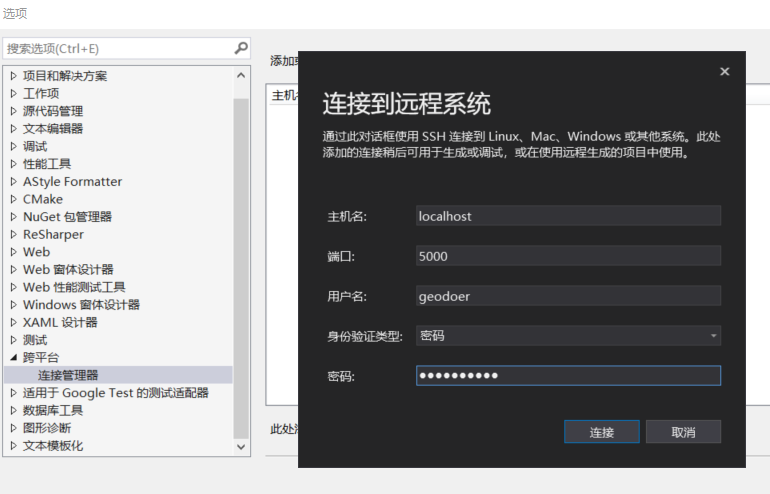<a name="x8oZM"></a>## 4. 为项目编写CMake文件为你的项目编写CMake文件<br />相关文章:- [CMake系列笔记](https://www.yuque.com/cpptd/cmake)如:1. main.cpp```cpp#include<iostream>using namespace std;int main(){std::cout << "hello world" << std::endl;return 0;}
- CMakeLists.txt
cmake_minimum_required(VERSION 3.8)project(demo)add_executable(demo main.cpp)
5. 创建VS+CMake项目的配置文件
接下来就是为VS+CMake项目,添加在linux、windows上的编译策略
相关文章
Windows编译策略
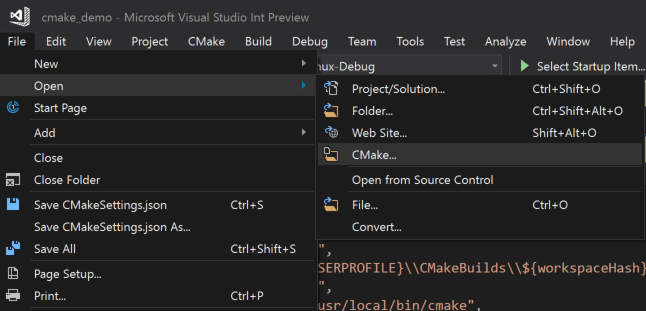
- 用VS打开cmakelists.txt文件
在项目根目录下创建
CMakeSettings.json文件,并加入一个配置结点{"configurations": []}
在
CMakeSettings.json文件的空白处,右键 > 添加配置
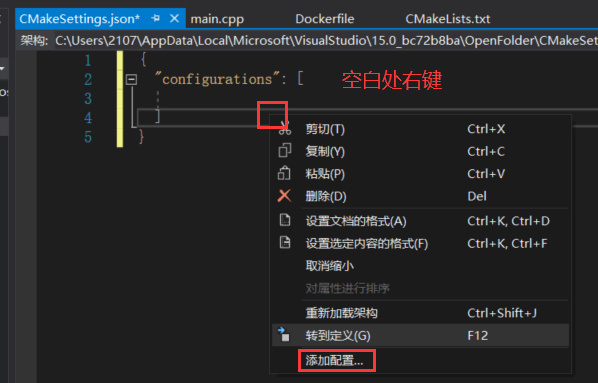
选择添加
x64-debug{"configurations": [{"name": "x64-Debug","generator": "Ninja","configurationType": "Debug","inheritEnvironments": ["msvc_x64_x64"],"buildRoot": "${env.USERPROFILE}\\CMakeBuilds\\${workspaceHash}\\build\\${name}","installRoot": "${env.USERPROFILE}\\CMakeBuilds\\${workspaceHash}\\install\\${name}","cmakeCommandArgs": "","buildCommandArgs": "-v","ctestCommandArgs": ""}]}
添加之后,选择CMakeLists.txt文件,按ctrl+s保存这个文件。VS就会帮你生成项目
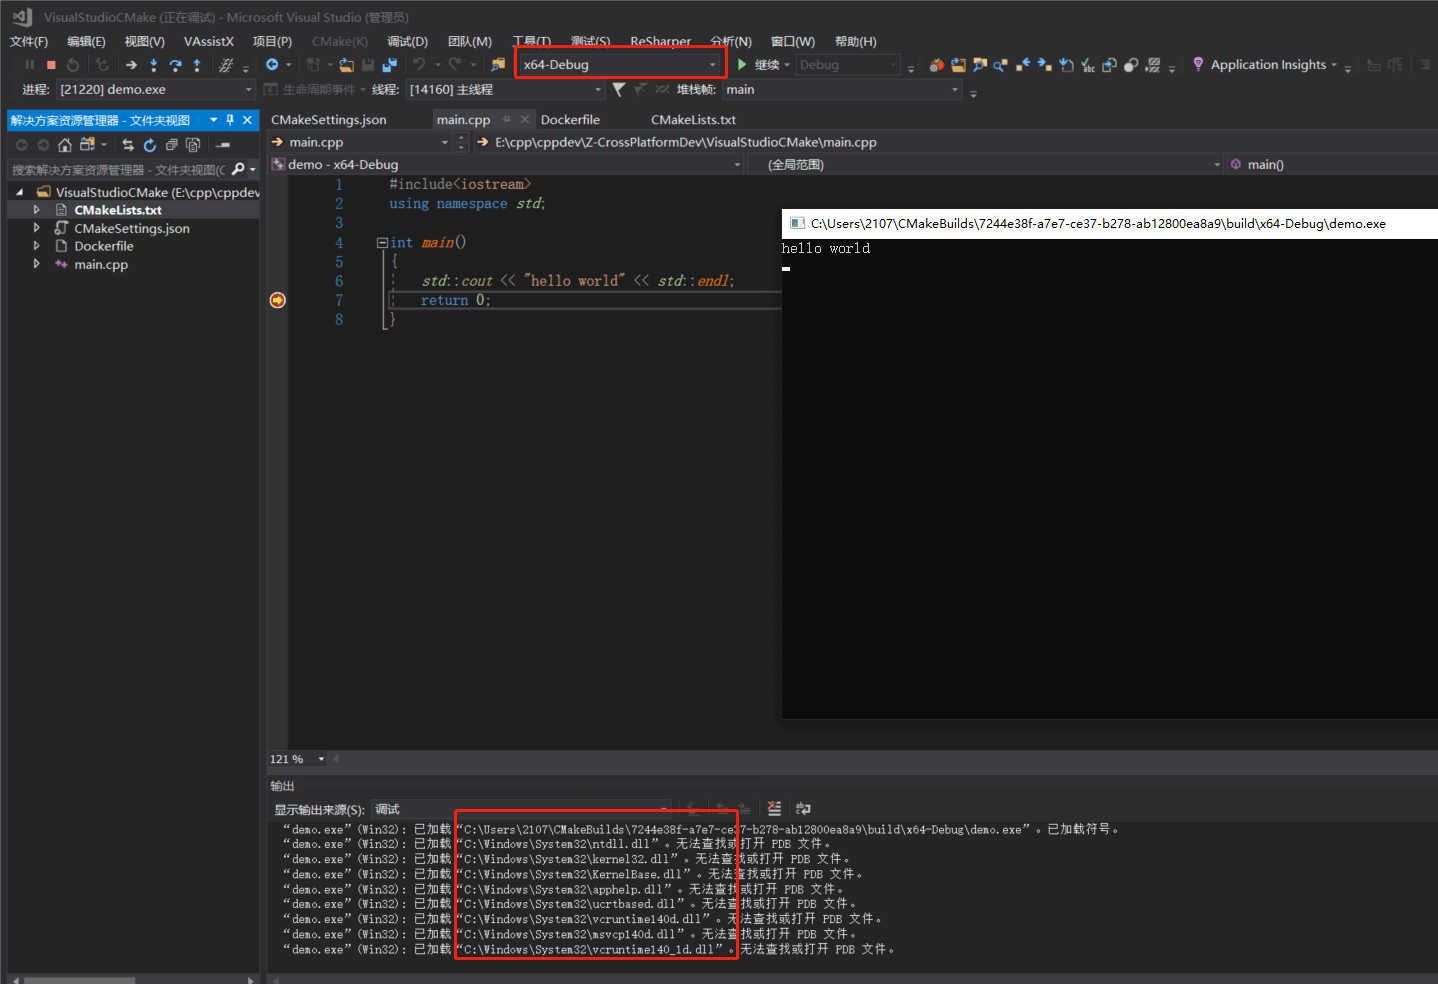
- 然后,选择
x64-debug策略,你就可以直接运行调试Windows代码了。
Linux编译策略
- 同样,在
CMakeSettings.json中添加linux-debug编译策略 添加之后,我们要根据自身linux环境,调整相关参数,比如CMake所在路径
{"configurations": [{"name": "x64-Debug","generator": "Ninja","configurationType": "Debug","inheritEnvironments": ["msvc_x64_x64"],"buildRoot": "${env.USERPROFILE}\\CMakeBuilds\\${workspaceHash}\\build\\${name}","installRoot": "${env.USERPROFILE}\\CMakeBuilds\\${workspaceHash}\\install\\${name}","cmakeCommandArgs": "","buildCommandArgs": "-v","ctestCommandArgs": ""},{"name": "Linux-Debug","generator": "Unix Makefiles","remoteMachineName": "${defaultRemoteMachineName}","configurationType": "Debug","remoteCMakeListsRoot": "/var/tmp/src/${workspaceHash}/${name}","cmakeExecutable": "/usr/bin/cmake","buildRoot": "${env.USERPROFILE}\\CMakeBuilds\\${workspaceHash}\\build\\${name}","installRoot": "${env.USERPROFILE}\\CMakeBuilds\\${workspaceHash}\\install\\${name}","remoteBuildRoot": "/var/tmp/build/${workspaceHash}/build/${name}","remoteInstallRoot": "/var/tmp/build/${workspaceHash}/install/${name}","remoteCopySources": true,"remoteCopySourcesOutputVerbosity": "Normal","remoteCopySourcesConcurrentCopies": "10","remoteCopySourcesMethod": "rsync","remoteCopySourcesExclusionList": [".vs",".git"],"rsyncCommandArgs": "-t --delete --delete-excluded","remoteCopyBuildOutput": false,"cmakeCommandArgs": "","buildCommandArgs": "","ctestCommandArgs": "","inheritEnvironments": ["linux_x64"]}]}
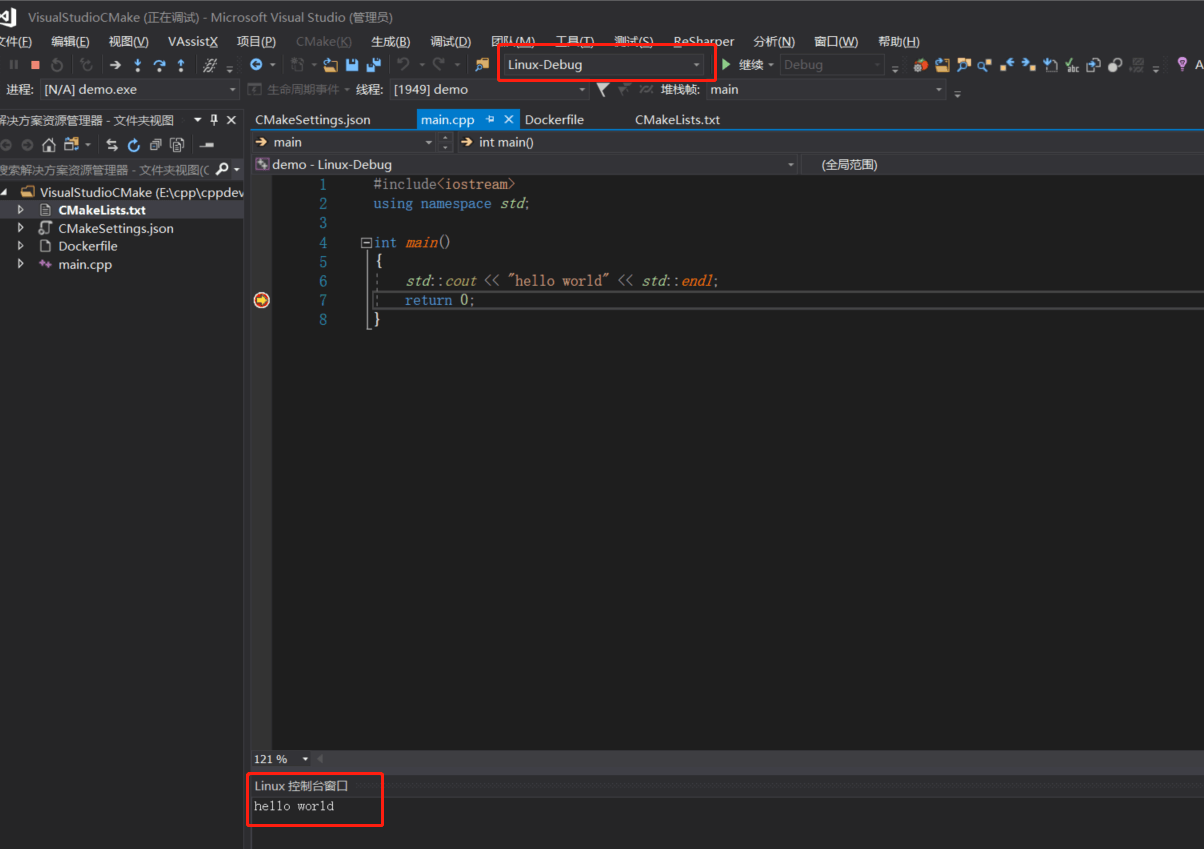
然后切换到
CMakeLists.txt文件下,一样ctrl+s保存此文件。VS就会帮我们自动生成工程- 切换到
linux-debug下。即可调试项目了

若有收获,就点个赞吧
0 人点赞
