一、前置知识
1 SSDS

- Faster R-CNNs是常见的基于深度学习的神经网络。除了技术层面理解难度较大,其训练难度也比较困难。而且这种算法的速度不快,大约在7FPS左右。
- YOLO的速度很快,在TianXGPU上可以达到40-90 FPS,最快的版本可能达到155 FPS。但YOLO存在的问题是精度还有待提高。
- SSDs由谷歌开发的,在精度和速度方面较为平衡。相对于Faster R-CNNs,它的算法更加了当易懂。相对于YOLO,又更加准确。
2 MobileNets:高效(深度)神经网路
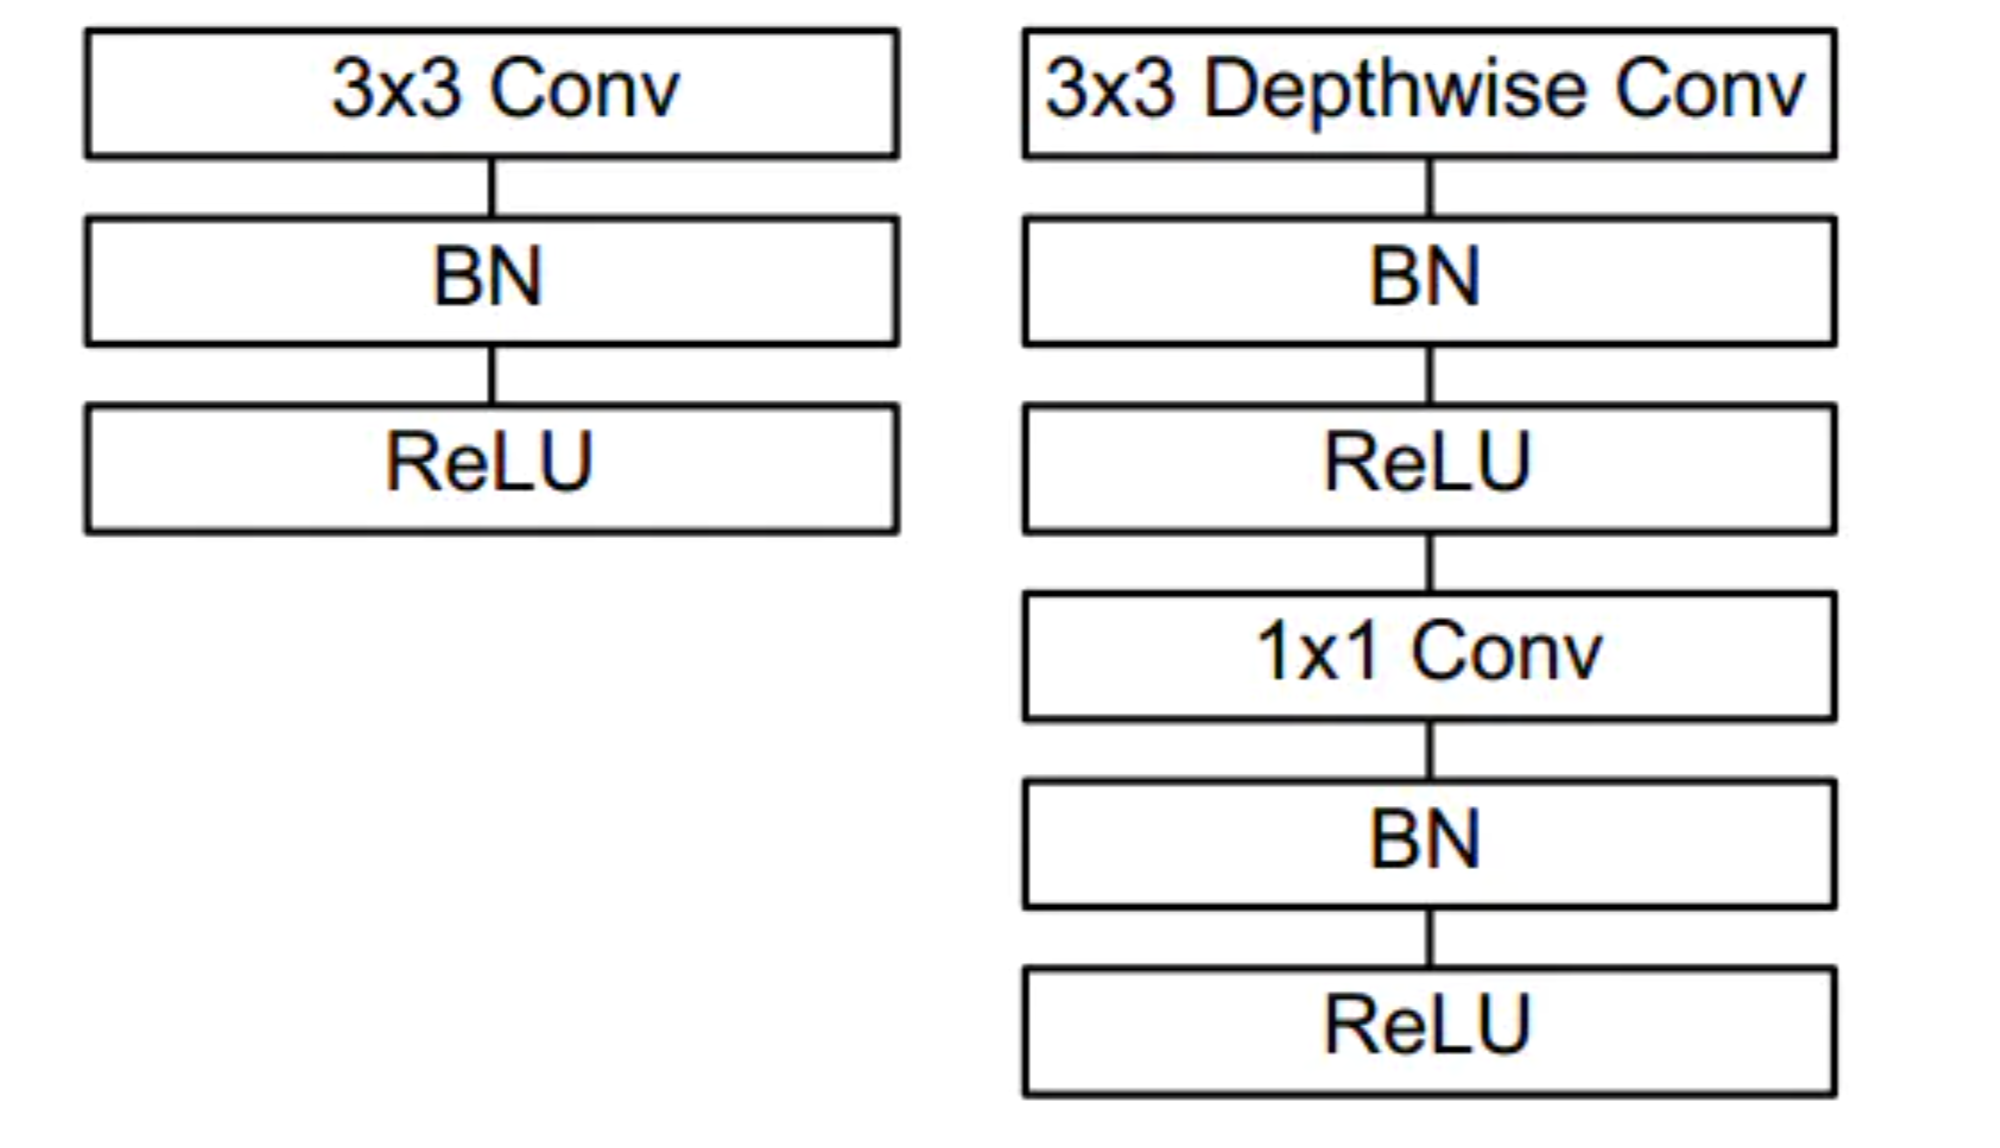
上图左边是标准的卷积层,包含batchnorm和ReLU。 右图是将卷积层分为depthwise 和pointwise 层,然后再加上batchnorm和ReLU。
当搭建目标检测网络时,常用的网络架构有VGG 或者ResNet,但这些网络结构可能非常大,大约会有200-500MB。这类网络架构不适用于资源有限的设备,因为因为他们的规模太大计算结果太多。作为替代的选择,我们使用MobileNets这种轻量型架构。这种架构是为了手机等一些嵌入式设备而设计的。MobileNets与传统CNNs不同之处在于可分离卷积(depthwiseseparable convolution)。
二、实验过程
本次实验搭建的目标检测系统是将MobileNets和SSDs框架结合起来,实现更快速,更高效的基于深度学习的目标检测。
MobileNets SSDs的初始训练集:COCO dataset,测试集:PASCAL VOC,得到了72.7%的平均准确率。该框架可以检测20种物体(1种是背景类的),包括飞机、单车、鸟、船、瓶子、公交车、汽车、猫、椅子、奶牛、餐桌、狗、马、摩托车、人、盆栽、羊、沙发、火车、和电视机。
下面开始实验:
1.传入预训练模型路径、caffe模型、图像等初始参数
ap = argparse.ArgumentParser()# 图片路径ap.add_argument("-i", "--image",default="human.jpeg",help="path to input image")# caffe模型路径ap.add_argument("-p", "--prototxt",default="MobileNetSSD_deploy.prototxt.txt",help="path to Caffe 'deploy' prototxt file")# 预训练模型路径ap.add_argument("-m", "--model",default="MobileNetSSD_deploy.caffemodel",help="path to Caffe pre-trained model")# 置信度设置ap.add_argument("-c", "--confidence", type=float, default=0.2,help="minimum probability to filter weak detections")args = vars(ap.parse_args())
需要的模型和图片和py文件放在同一目录下,如图:(模型包和py文件打包放在文末,可以直接拿来调试使用)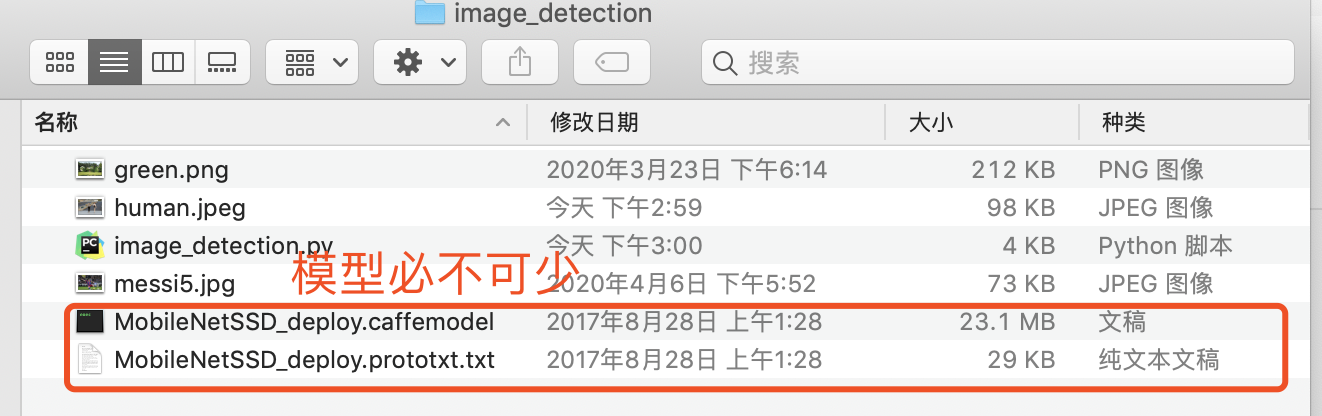
2.初始化类标签&边界框颜色:
# 此处是根据输出,定义对应的物体CLASSES = ["background", "aeroplane", "bicycle", "bird", "boat","bottle", "bus", "car", "cat", "chair", "cow", "diningtable","dog", "horse", "motorbike", "person", "pottedplant", "sheep","sofa", "train", "tvmonitor"]#此处随机生成边框颜色COLORS = np.random.uniform(0, 255, size=(len(CLASSES), 3))
3.将待测图片blob传入神经网络
image = cv2.imread(args['image'])#提取图片的高,框(h, w) = image.shape[:2]# 截取图片的300 x 300的图像区域,并转换成像素二进制储存在blob中blob = cv2.dnn.blobFromImage(cv2.resize(image, (300, 300)), 0.007843, (300, 300), 127.5)# pass the blob through the network and obtain the detections and# predictionsprint("[INFO] computing object detections...")#讲存储的图片像素二进制数据输入神经网络net.setInput(blob)
4. 进行目标检测
for i in np.arange(0, detections.shape[2]):# extract the confidence (i.e., probability) associated with the# predictionconfidence = detections[0, 0, i, 2] #算出置信度 检索顺序 第0个组,的第0个组,然后在第0个组的第三(2+1)个数# filter out weak detections by ensuring the `confidence` is# greater than the minimum confidenceif confidence > args["confidence"]:# extract the index of the class label from the `detections`,# then compute the (x, y)-coordinates of the bounding box for# the objectidx = int(detections[0, 0, i, 1])box = detections[0, 0, i, 3:7] * np.array([w, h, w, h]) #0.34239042 0.30729017 0.6769601 0.82230425(startX, startY, endX, endY) = box.astype("int") #进行数据变换 int型# display the predictionlabel = "{}: {:.2f}%".format(CLASSES[idx], confidence * 100)print("[INFO] {}".format(label))cv2.rectangle(image, (startX, startY), (endX, endY),COLORS[idx], 2) #在什么上面画一个,起始点是多少,终点是多少的,颜色是什么的,线条粗细的,矩形y = startY - 15 if startY - 15 > 15 else startY + 15
三、实验结果
| 检测结果 | 输出信息 |
|---|---|
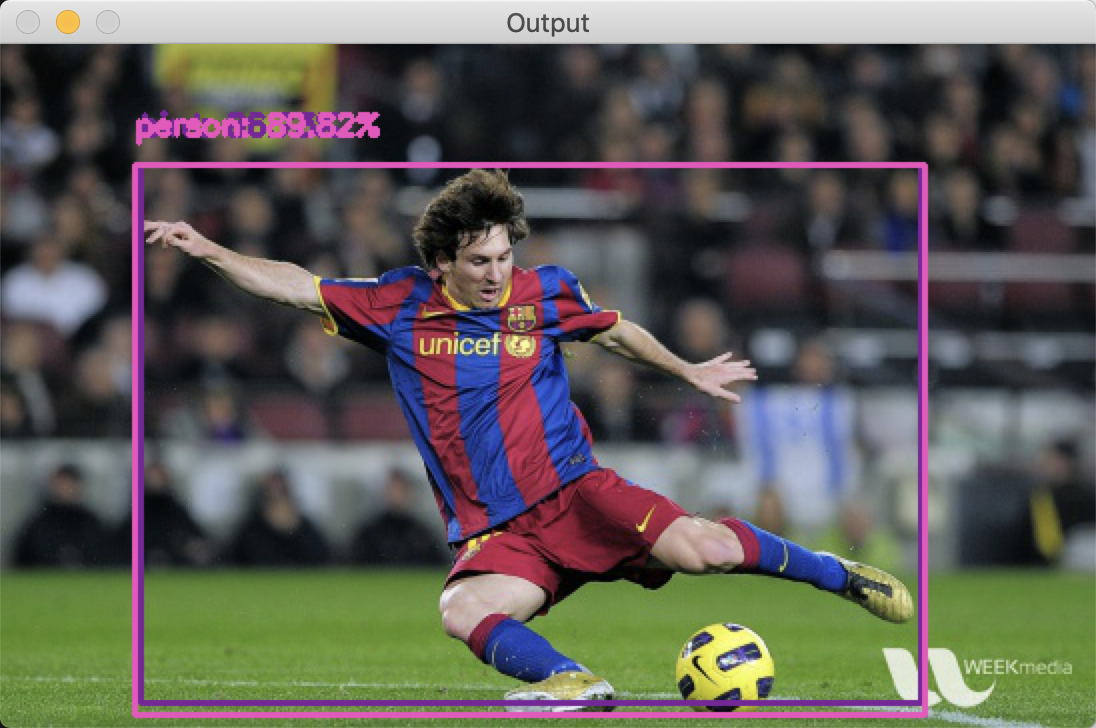 |
[INFO] bird: 86.73% [INFO] person: 89.82% (模型判断86.73是鸟哈哈哈哈哈,还好人的概率要高一些) |
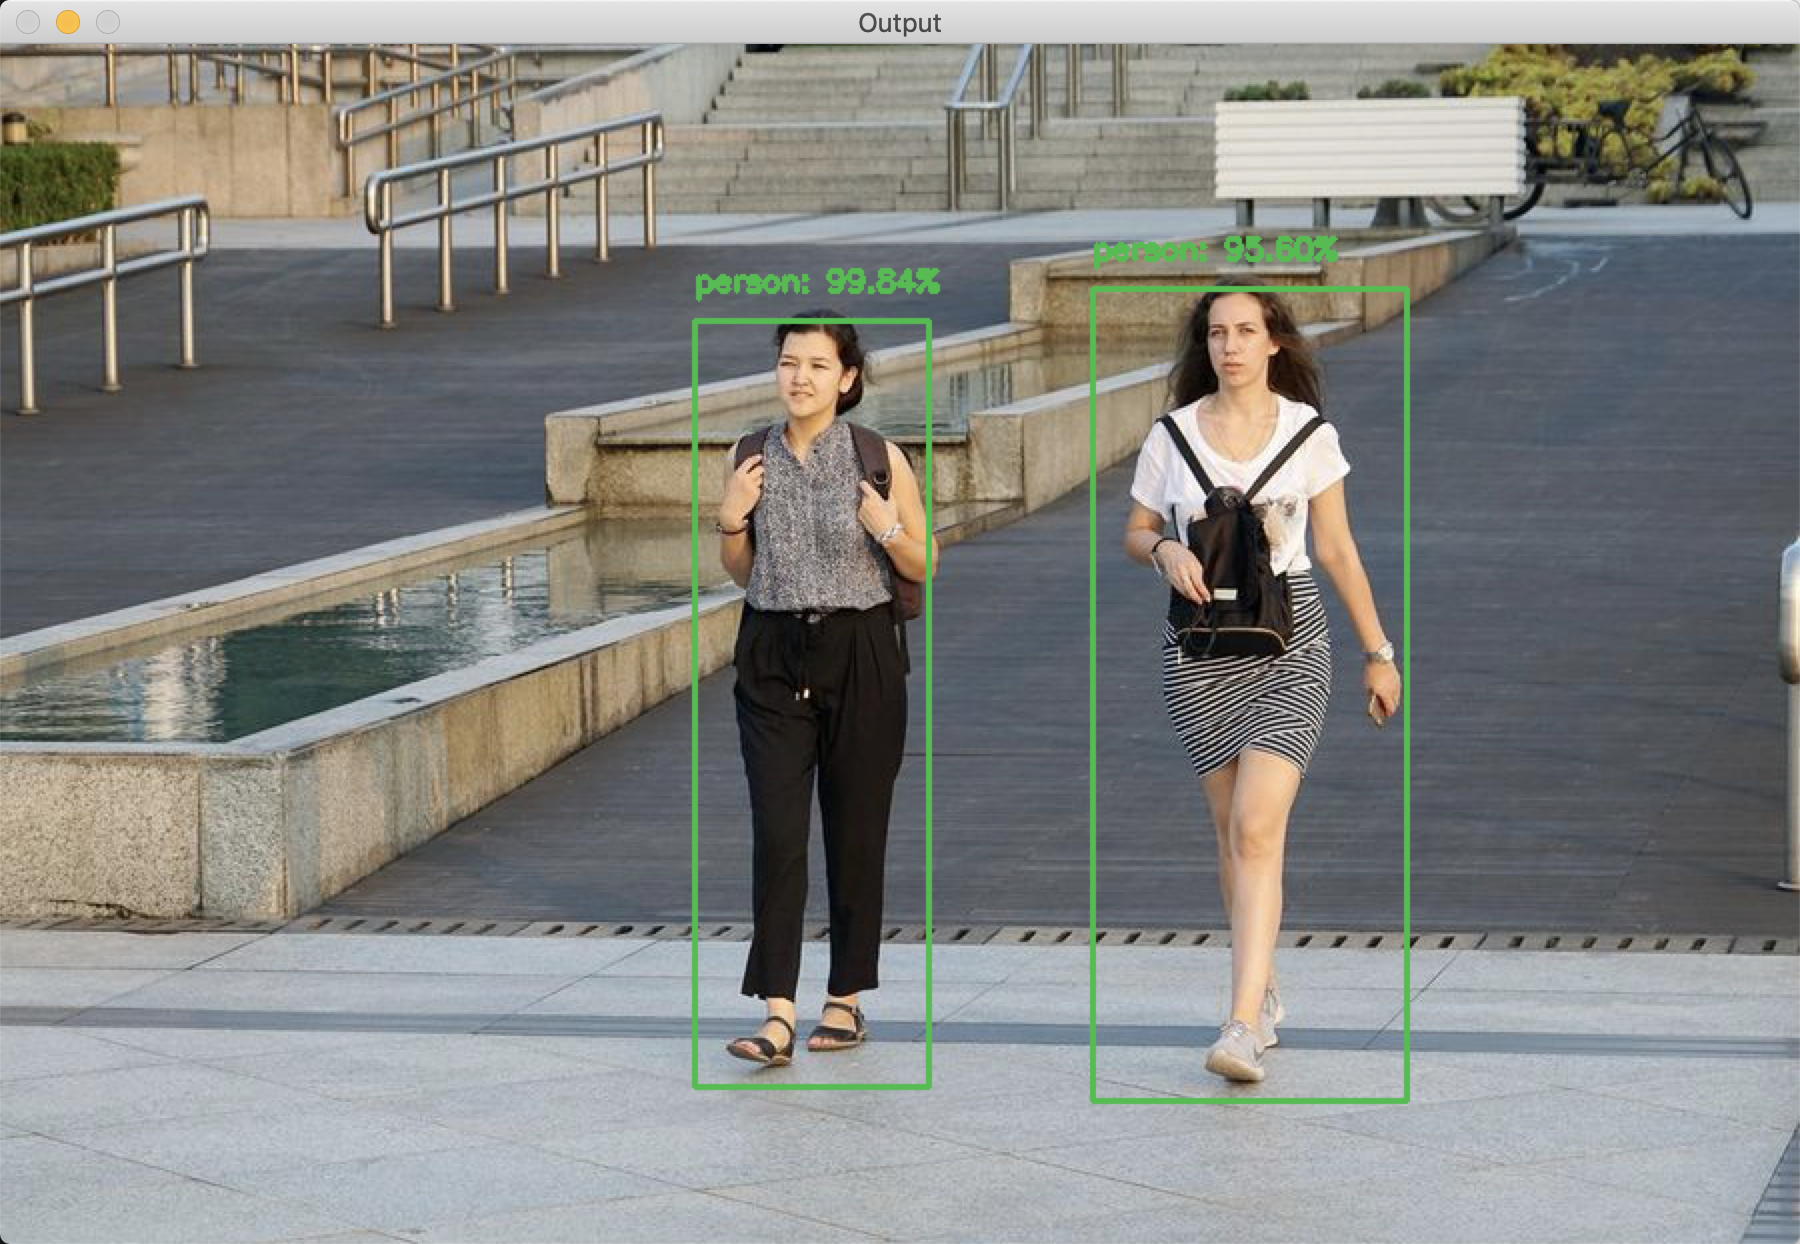 |
[INFO] person: 99.84% [INFO] person: 95.60% 这个识别较为准确 |
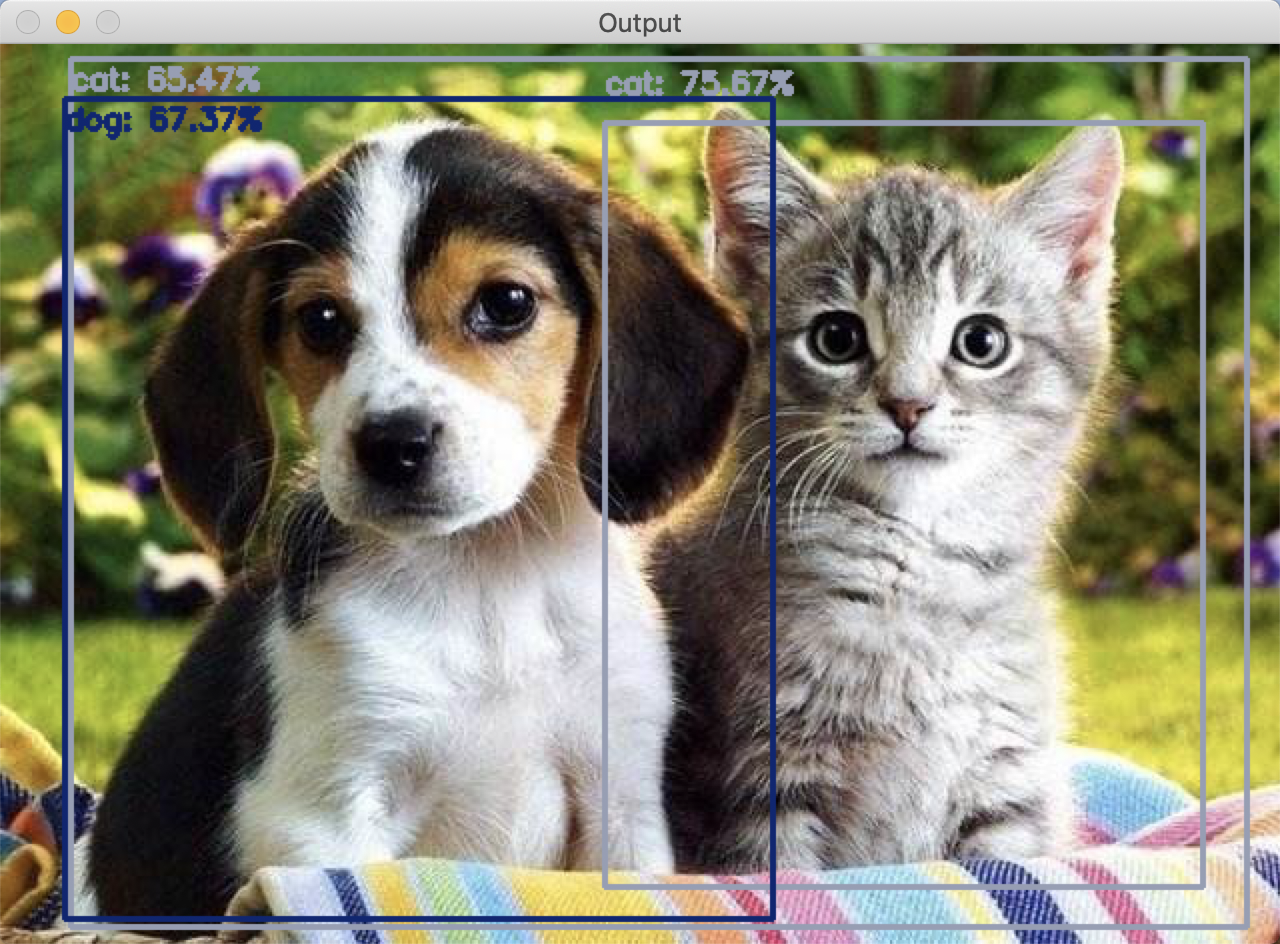 |
[INFO] cat: 75.67% [INFO] cat: 65.47% [INFO] dog: 67.37% (这个的效果也不是特别好,最后两个猫狗合体也给框出来了) |
其他问题:
有一些图片传进去后无法检测,可能是由于场景过于复杂,计算缓慢的原因。
四、源码&模型下载
下面的压缩包里有预训练的模型、caffe模型以及目标检测的py文件,还有一下图片检测素材。
image_detection .zip

若有收获,就点个赞吧
0 人点赞
