1. Docker Registry 分类
Docker Registry 有两部分组成:
- Repostitory
- 由特定的一组镜像组成的仓库称为 Repostitory
- 一个 Docker Registry 可以包含多个 Repostitory
- Repostitory 可以分为两个大类
- 官方的仓库,格式 仓库名:标签,如 nginx:latest
- 其它类,如用户仓库、第三方仓库、私有仓库等等
- 一个镜像可以有多个标签
- Index
提供用户认证、镜像检索功能
2. docker-registry 安装使用
docker-registry 是 Docker 官方提供的镜像仓库管理软件,可以提供 docker pull 和 docker push 等操作,但是没有web 界面,镜像管理非常不方便,一般不作为私有仓库使用。
[root@centos-82 ~]# yum install -y docker-registry ## 实际安装软件包是 docker distribution[root@centos-82 ~]# rpm -ql docker-distribution/etc/docker-distribution/registry/config.yml ## Configuration/usr/bin/registry/usr/lib/systemd/system/docker-distribution.service ## Service......
[root@centos-82 ~]# vim /etc/docker-distribution/registry/config.yml  ## 配置端口和镜像存放目录
version: 0.1
log:
  fields:
    service: registry
storage:
    cache:
        layerinfo: inmemory
    filesystem:
        rootdirectory: /data/docker-registry
http:
    addr: :5000
[root@centos-82 ~]# mkdir /data/docker-registry
[root@centos-82 ~]# systemctl start docker-distribution.service
[root@centos-82 ~]# ss -lntp | grep 5000
LISTEN     0      128         :::5000                    :::*                   users:(("registry",pid=9789,fd=3)
[root@centos-81 ~]# docker tag httpd:v0.2 hub.docker.reg:5000/httpd:v0.2 ## /etc/hosts 配置域名映射
[root@centos-81 ~]# docker push hub.docker.reg:5000/httpd:v0.2 ## docker 默认使用https协议
The push refers to a repository [hub.docker.reg:5000/httpd]
Get https://hub.docker.reg:5000/v1/_ping: http: server gave HTTP response to HTTPS client
[root@centos-81 ~]# vim /etc/docker/daemon.json ##添加http协议的registry
{
    "registry-mirrors":["https://registry.docker-cn.com"],
    "insecure-registries":["hub.docker.reg:5000"]
}
[root@centos-81 ~]# systemctl restart docker
[root@centos-81 ~]# docker push hub.docker.reg:5000/httpd:v0.2
[root@centos-81 ~]# curl -s http://192.168.1.82:5000/v2/httpd/tags/list | python -mjson.tool ## 根据仓库名获取tags
{
    "name": "httpd",
    "tags": [
        "v0.2",
        "v0.1"
    ]
}
[root@centos-82 ~]# tree /data/docker-registry/
/data/docker-registry/
└── docker
    └── registry
        └── v2
            ├── blobs
            │   └── sha256
            │       ├── 3f
            │       │   └── 3f22152f75b71784bfb6946248858ace5fad0e1a0db4a208f20607d88810e60c
            │       │       └── data
            │       ├── 6d
            │       │   └── 6df52055d83b6b866af9d4907574421aedfdf3f8c27c1ba45e7d1c9236000f80
            │       │       └── data
            │       └── 95
            │           └── 95090e1ca932d43e6791e981e310d67d50af9ef7fe4ec1fda859064e6533a21c
            │               └── data
            └── repositories
                └── httpd
                    ├── _layers
                    │   └── sha256
                    │       ├── 3f22152f75b71784bfb6946248858ace5fad0e1a0db4a208f20607d88810e60c
                    │       │   └── link
                    │       └── 6df52055d83b6b866af9d4907574421aedfdf3f8c27c1ba45e7d1c9236000f80
                    │           └── link
                    ├── _manifests
                    │   ├── revisions
                    │   │   └── sha256
                    │   │       └── 95090e1ca932d43e6791e981e310d67d50af9ef7fe4ec1fda859064e6533a21c
                    │   │           └── link
                    │   └── tags
                    │       └── v0.2
                    │           ├── current
                    │           │   └── link
                    │           └── index
                    │               └── sha256
                    │                   └── 95090e1ca932d43e6791e981e310d67d50af9ef7fe4ec1fda859064e6533a21c
                    │                       └── link
                    └── _uploads
[root@centos-81 ~]# docker image ls | grep hub
[root@centos-81 ~]# docker pull hub.docker.reg:5000/httpd:v0.1 ## 从私有registry拉取镜像
Trying to pull repository hub.docker.reg:5000/httpd ...
v0.1: Pulling from hub.docker.reg:5000/httpd
Digest: sha256:ec0aa9e4aff0ab1a001f87277324df24281a00513637f0c8045c59c2667f3eb8
Status: Downloaded newer image for hub.docker.reg:5000/httpd:v0.1
[root@centos-81 ~]# docker image ls | grep hub
hub.docker.reg:5000/httpd   v0.1                562ec613ec3a        4 weeks ago         1.2 MB
3. Harbor 安装使用
3.1. Harbor 介绍
Docker-distribution 虽然能实现私有镜像仓库,但是管理复杂,且没有web界面,不支持搜索等。VMware基于docker distribution二次开发了Harbor,实现了web界面管理仓库,功能性极大的增强。Harbor 的特性:
- 基于多用户,多项目的访问控制
- 镜像复制
- 可以在WEB界面管理镜像仓库,并且支持中文
- 日志审计
3.2. Harbor 安装
Harbor 的安装分两种类型,一种是使用 docker-compose 启动,另一种是使用 helm 在Kubernetes中部署。其中docker-compose 部署方式比较推荐,其部署难度极低,并且方便管理,规模不大的情况下可以通过部署两个docker-compose实例相互同步,并且使用VIP或者负载均衡完成简易版的高可用方案。3.2.1. 依赖
| Resource | Capacity | Description | | —- | —- | —- | | CPU | minimal 2 CPU | 4 CPU is preferred | | Mem | minimal 4GB | 8GB is preferred | | Disk | minimal 40GB | 160GB is preferred |
| Software | Version | Description |
|---|---|---|
| Docker engine | Version 17.06.0-ce+ | For installation instructions, please refer to: https://docs.docker.com/engine/installation/ |
| Docker Compose | Version 1.18.0 or higher | For installation instructions, please refer to: https://docs.docker.com/compose/install/ |
| Openssl | latest is preferred | Generate certificate and keys for Harbor |
| Port | Protocol | Description |
|---|---|---|
| 443 | HTTPS | Harbor portal and core API will accept requests on this port for https protocol |
| 4443 | HTTPS | Connections to the Docker Content Trust service for Harbor, only needed when Notary is enabled |
| 80 | HTTP | Harbor portal and core API will accept requests on this port for http protocol |
3.2.2. 安装和配置
[root@centos-81 ~]# mkdir /opt/{src,release,apps} ; cd /opt/src/
[root@centos-81 src]# wget https://github.com/goharbor/harbor/releases/download/v2.2.2/harbor-offline-installer-v2.2.2.tgz
[root@centos-81 src]# tar -I pigz -xf harbor-offline-installer-v2.2.2.tgz -C /opt/release/
[root@centos-81 src]# mv /opt/release/harbor /opt/release/harbor-v2.2.2
[root@centos-81 src]# ln -sf /opt/release/harbor-v2.2.2 /opt/apps/harbor
[root@centos-81 src]# mkdir -p /opt/logs/harbor /data/harbor/ssl
[root@centos-81 ~]# cp /opt/apps/harbor/harbor.yml.tmpl /opt/apps/harbor/harbor.yml
[root@centos-81 ~]# grep -Ev "^$|#" /opt/apps/harbor/harbor.yml
# 指定访问的域名
hostname: harbor-local.ddn.com
http:
  port: 80
https:
  port: 443
  # 证书的格式为crt
  certificate: /data/harbor/ssl/harbor.crt
  private_key: /data/harbor/ssl/harbor.key
# 初始admin 密码
harbor_admin_password: Harbor12345
database:
  max_idle_conns: 50
  max_open_conns: 1000
# 数据目录独立出来
data_volume: /data/harbor
trivy:
  ignore_unfixed: false
  skip_update: false
  insecure: false
jobservice:
  max_job_workers: 10
notification:
  webhook_job_max_retry: 10
chart:
  absolute_url: disabled
# 日志目录独立出来
log:
  level: info
  local:
    rotate_count: 50
    rotate_size: 50M
    location: /opt/log/harbor
_version: 2.2.0
proxy:
  http_proxy:
  https_proxy:
  no_proxy:
  components:
    - core
    - jobservice
    - trivy
# 开启指标导出器
metric:
  enabled: true
  port: 9090
  path: /metrics
[root@centos-81 harbor]# cd /opt/apps/harbor
[root@centos-81 harbor]# ./prepare --with-notary --with-trivy --with-chartmuseum
[root@centos-81 harbor]# docker-compose up -d
[root@centos-81 harbor]# docker-compose ps
      Name                     Command                  State                                                       Ports
-------------------------------------------------------------------------------------------------------------------------------------------------------------------------
chartmuseum         ./docker-entrypoint.sh           Up (healthy)
harbor-core         /harbor/entrypoint.sh            Up (healthy)
harbor-db           /docker-entrypoint.sh            Up (healthy)
harbor-exporter     /harbor/entrypoint.sh            Up
harbor-jobservice   /harbor/entrypoint.sh            Up (healthy)
harbor-log          /bin/sh -c /usr/local/bin/ ...   Up (healthy)   127.0.0.1:1514->10514/tcp
harbor-portal       nginx -g daemon off;             Up (healthy)
nginx               nginx -g daemon off;             Up (healthy)   0.0.0.0:4443->4443/tcp,:::4443->4443/tcp, 0.0.0.0:80->8080/tcp,:::80->8080/tcp,
                                                                    0.0.0.0:443->8443/tcp,:::443->8443/tcp, 0.0.0.0:9090->9090/tcp,:::9090->9090/tcp
notary-server       /bin/sh -c migrate-patch - ...   Up
notary-signer       /bin/sh -c migrate-patch - ...   Up
redis               redis-server /etc/redis.conf     Up (healthy)
registry            /home/harbor/entrypoint.sh       Up (healthy)
registryctl         /home/harbor/start.sh            Up (healthy)
trivy-adapter       /home/scanner/entrypoint.sh      Up (healthy)
3.2.3. 启停Harbor
手动管理:
# 启动Harbor服务
[root@centos-81 ~]# cd /opt/apps/harbor && docker-compose up -d
# 停止Harbor服务
[root@centos-81 ~]# cd /opt/apps/harbor && docker-compose down
使用systemd管理 ```yaml [root@centos-81 ~]# cat /usr/lib/systemd/system/harbor.service [Unit] Description=Harbor Service After=network.target ntpd.service chronyd.service docker.service Requires=docker.service
[Service] Type=oneshot WorkingDirectory=/opt/apps/harbor ExecStartPre=/usr/local/bin/docker-compose stop ExecStart=/usr/local/bin/docker-compose up -d ExecStart=/usr/local/bin/docker-compose ps ExecStop=/usr/local/bin/docker-compose stop TimeoutStartSec=120 TimeoutStopSec=90 RemainAfterExit=yes
[Install] WantedBy=multi-user.target
[root@centos-81 ~]# systemctl enable harbor [root@centos-81 ~]# systemctl start harbor [root@centos-81 ~]# systemctl stop harbor
<a name="m3MVS"></a>
## 3.3. Harbor 管理
<a name="MnBbt"></a>
### 3.3.1. 项目管理
<a name="Jx47F"></a>
#### 3.3.1.1. 登录
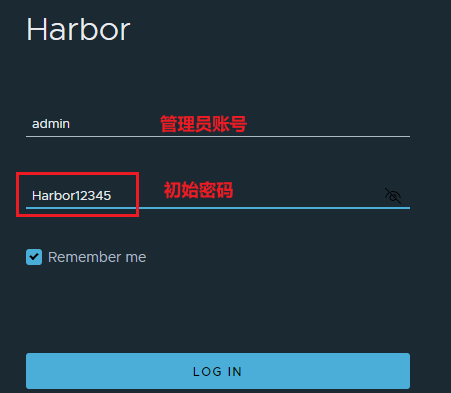
- 浏览器访问`https://harbor-local.ddn.com`,初始管理员账号 `admin/Harbor122345`
<br />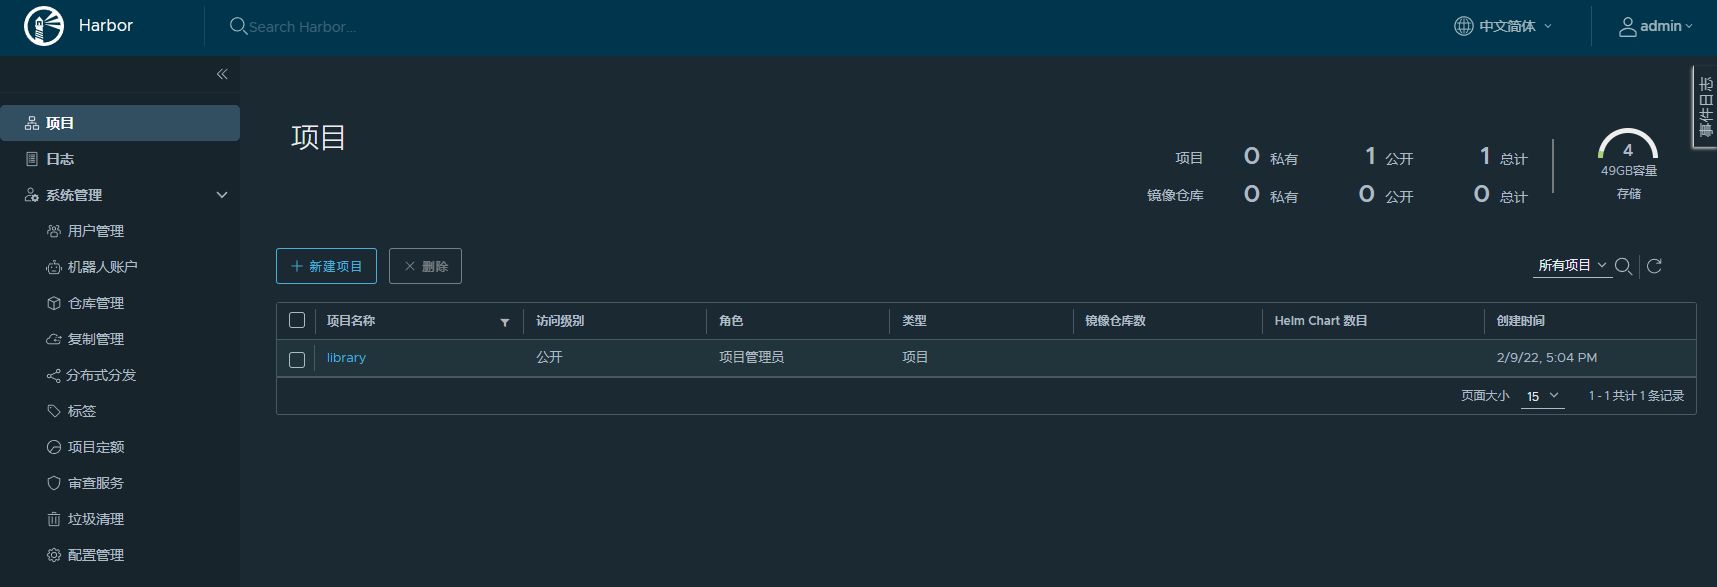
<a name="YtDeB"></a>
#### 3.3.3.2. 创建项目
【项目】-->【新建项目】<br />
<a name="gbnmA"></a>
#### 3.3.3.3. 镜像名称规范
如果公司第一次使用docker仓库,那么重点在于如何规范仓库名称和镜像tag,否则后续维护中会很多问题。在使用harbor管理镜像的场景中,可以参考以下规范:
- 项目名称规范:
- 公开项目:项目名称通常为public或者base等,存放开源镜像或者基础镜像,比如Nginx、Jenkins、CentOS、Python等
- 业务项目:根据业务项目取名,通常为私有镜像居多。是基于基础镜像或者开源镜像封装制作
- 仓库名称规范:
- 单一名称:通常为具体服务名称,通过tag区分不同版本,比如rankserver、gateserver、prometheus等
- 复合名称:基于开源或基础镜像构建出来的镜像,比如jenkins-slave-python,jenkins-slave-ansible,nginx-php等
- Tag名称规范:
- 开源镜像:采用和开源镜像同步的tag。比如 kibana:7.8.0,prometheus:v2.30.3等
- 二次封装镜像:对开源镜像增加额外功能制作而成,比如 jenkins-slave-ansible:4.9-2.11.4,其中4.9为jenkins-slave版本,2.11.4为ansible版本
- 增加补丁镜像:对现有的镜像做了微调,没有修改版本,比如jenkins-slave-ansible:4.9-2.11.4-1,其中末尾1为第一次补丁版本
- 业务镜像:通过tag-commit_id-timestamp作为镜像tag,其中代码发布的版本tag可以省略
遵循上述规范的镜像案例如下:
```yaml
# 开源镜像,从docker hub上下载并同步到harbor的镜像:
harbor-local.ddn.com/public/golang:1.15.1
harbor-local.ddn.com/public/prometheus:v2.30.3
harbor-local.ddn.com/public/jenkins-slave:4.9
# 二次封装的镜像
harbor-local.ddn.com/public/jenkins-slave-ansible:4.9-2.11.4
harbor-local.ddn.com/public/jenkins-slave-python:4.9-3.8.10
harbor-local.ddn.com/public/jenkins-slave-python:4.9-3.8.10-1
harbor-local.ddn.com/public/centos-openjdk:7.9.2009-11-2
harbor-local.ddn.com/public/alpine-alert-proxy:3.13.5-1.0.2
# 业务镜像
harbor-local.ddn.com/devops/cmdb:e465264d-20220210155129
harbor-local.ddn.com/devops/job-center:2.3.5-544105f0-20211227091055
3.3.3.4. 镜像推送和拉取
# 登录harbor账号,登录信息在 ~/.docker/config.json 下使用base64编码存储
[root@duduniao ~]# docker login -u admin harbor-local.ddn.com

# 推送镜像,需要登录的用户对该project有推送镜像权限
[root@duduniao ~]# docker tag jenkins:2.60.3 harbor-local.ddn.com/public/jenkins:2.60.3
[root@duduniao ~]# docker push harbor-local.ddn.com/public/jenkins:2.60.3

# 拉取镜像,需要登录的用户对该project有拉取镜像权限。公开仓库无需登录
[root@duduniao ~]# docker pull harbor-local.ddn.com/public/jenkins:2.60.3

# 退出登录
[root@duduniao ~]# docker logout harbor-local.ddn.com
3.3.2. 认证管理
3.3.2.1. LDAP登录
Harbor 支持多种用户认证方式,最常用的是LDAP和数据库,默认为数据库。数据库表示需要管理员手动创建账号并管理,如果企业中有域控或者其它LDAP认证服务,可以推荐使用LDAP模式。
数据库认证方式很简单,此处仅演示LDAP模式下,配置AD域控登录方式,在配置前需要上传自建的所有本地用户。
【系统管理】—>【配置管理】—>【认证配置】。点击保存后再点击测试LDAP服务器。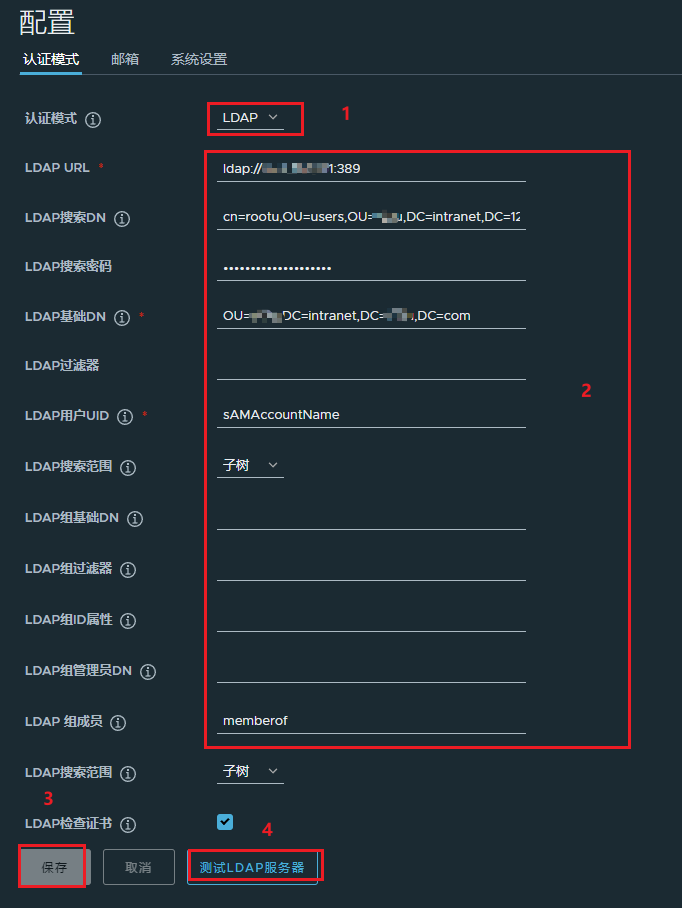
3.3.2.2. 权限管理
Harbor在配置LDAP登录后,每当新用户登录后,会自动在【用户管理】和【组管理】下出现该用户的信息,在【用户管理】中可将选中的用户设置为管理员,组管理中可手动指定LDAP中的组。
Harbor使用的是RBAC,基于角色的实现对项目的访问控制,目前可以分配的角色有五种:
- 受限访客(Limited Guest):不具备完整的项目读取权限,仅能拉取镜像。
- 访客(Guest):具备完整的项目读取权限,但是不能推送镜像。
- 开发者(Developer):具备完整的项目读写权限。
- 维护人员(Maintainer):具备完整的项目读写权限,也可以扫描镜像、删除镜像、查看复制任务
- 项目管理员(Project Admin):当前项目的最高权限,可以添加和删除用户。项目创建者默认为项目管理员
针对Harbor的权限管理,通常遵循以下步骤:
- 配置LDAP登录认证(参考 3.3.2.1. LDAP登录)
- 设置管理员账号,通常不建议使用admin账号登录
【系统管理】—>【用户管理】—>勾选用户—>【设置为管理员】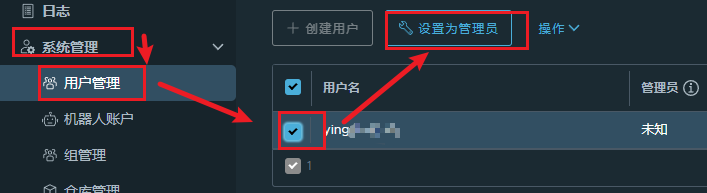
- 配置LDAP组,用于后续权限分配
大部分场景下,给各部门或者项目组配置两个LDAP组即可,一个是具备管理权限的admin组,一个是普通权限的general组,其它特殊场景可以直接针对用户赋予权限而不是组。
需要注意的是,admin组不一定是具备管理员权限,仅代表较高权限的用户组,这两个组在其它服务中也会使用,比如Jenkins,Kuboard等。
比如技术中心部分设置了两个组: jszx_admin, jszx_general 组,对于jszx 项目而言,jszx_admin为维护者,jszx_general为开发人员。
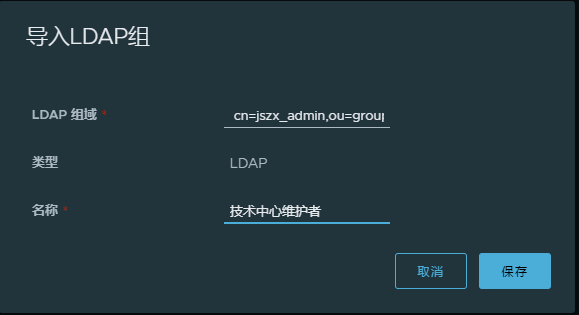
【系统管理】—>【组管理】—>【新建】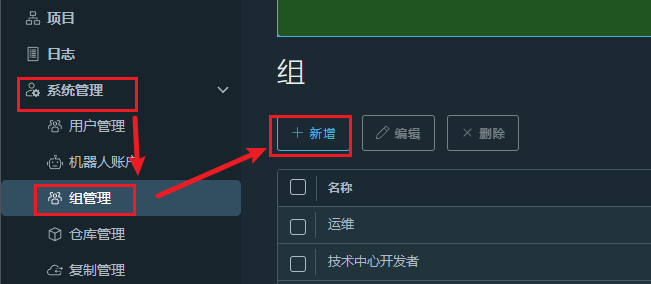

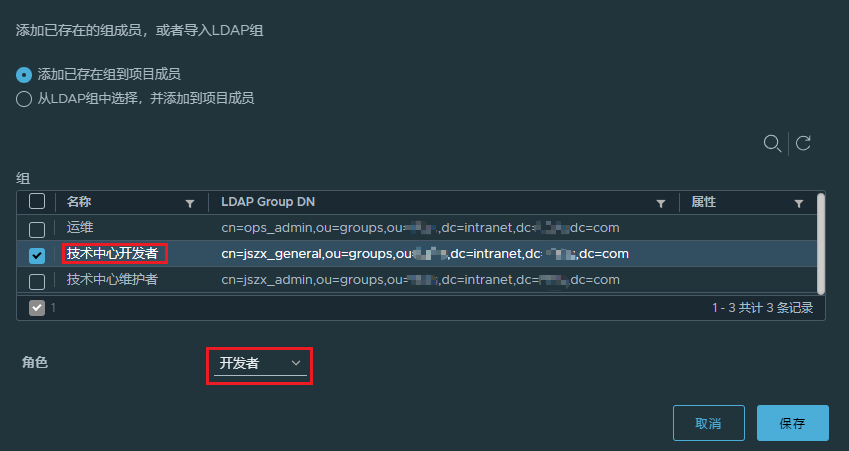
- 创建项目,并分配组权限
【项目】—>【新建项目】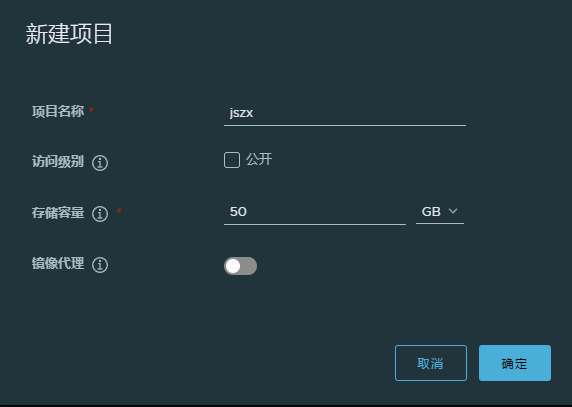
点击项目名称(jszx)—>【成员】—>【+组】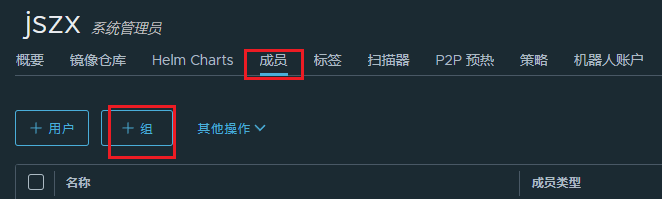

3.3.2.3. 机器人账号管理
通常情况下,在CICD流程中,对镜像镜像推拉操作都推荐使用机器人账号,而不是用户账号。比较推荐的做法是:
- 小公司或者项目组之间CICD环境隔离度低,那么推荐共用机器人账号,一个用来CI阶段推送镜像,一个用来CD阶段拉取镜像
- 大公司或者项目组之间CICD环境隔离度高,可以每个项目组单独配置一个CI和CD的机器人账号
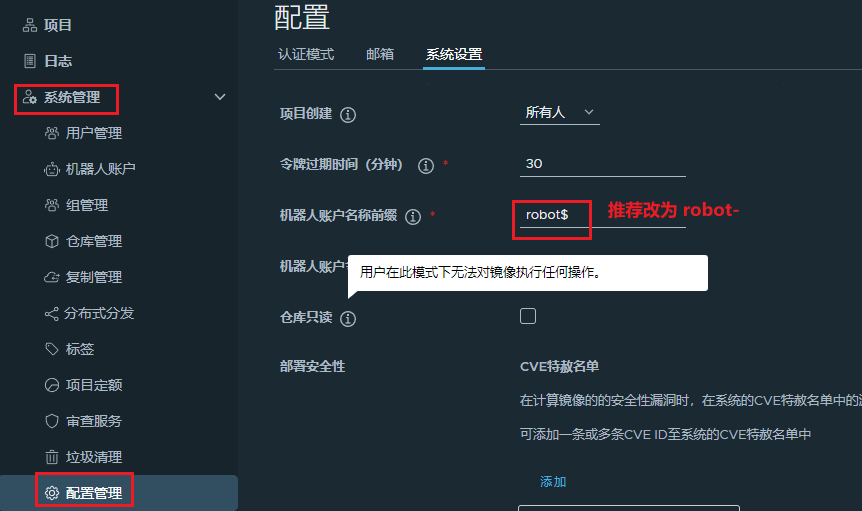
- 配置机器人账号前缀:【系统管理】—>【配置管理】—>【系统设置】,因为 $ 符号在命令行会被解析成变量,推荐使用 - 替换 $
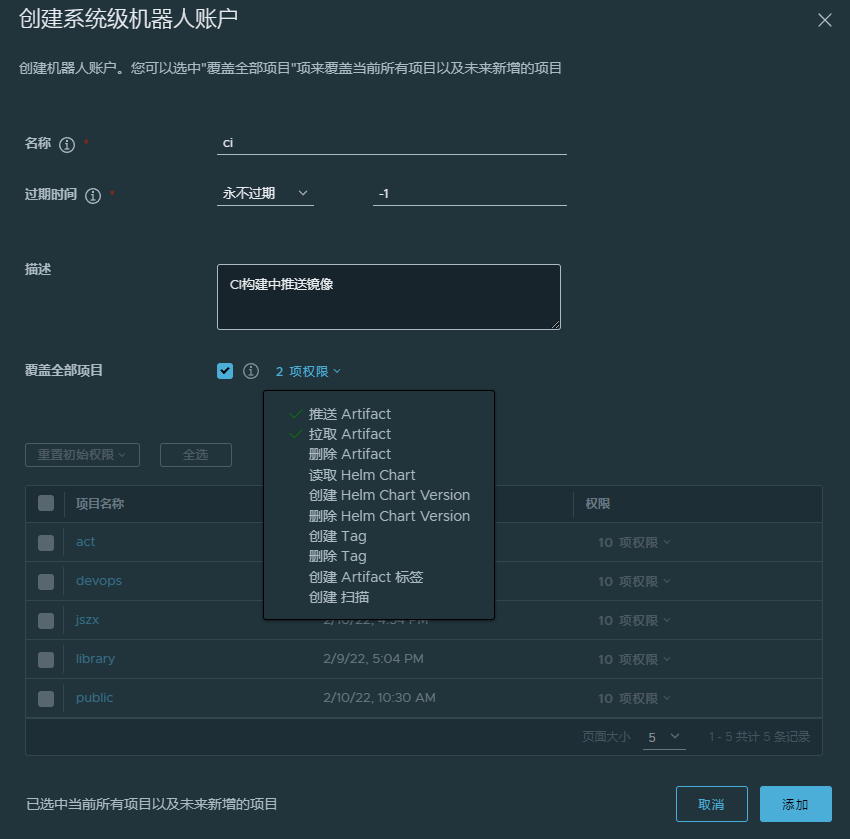
- 添加机器人

3.3.3. 仓库同步
3.3.4. 监控和告警
需要在Harbor中配置导出器端口和路径,Prometheus配置采集配置如下所示,并配置Dashboard
scrape_configs:
  - job_name: 'harbor-exporter'
    scrape_interval: 20s
    static_configs:
      - targets: ['10.4.7.81:9090']

  - job_name: 'harbor-core'
    scrape_interval: 20s
    params:
      comp: ['core']
    static_configs:
      - targets: ['10.4.7.81:9090']

  - job_name: 'harbor-registry'
    scrape_interval: 20s
    params:
      comp: ['registry']
    static_configs:
      - targets: ['10.4.7.81:9090']
3.3.5. Harbor高可用方案
3.3.6. Harbor升级

若有收获,就点个赞吧
0 人点赞
