源码地址:
https://gitee.com/jack_whh/dcs-websocket-session
在显示项目中遇到了一个问题,需要使用到websocket与小程序建立长链接。由于项目是负载均衡的,存在项目部署在多台机器上。这样就会存在一个问题,当一次请求负载到第一台服务器时,socketsession在第一台服务器线程上,第二次请求,负载到第二台服务器上,需要通过id查找当前用户的session时,是查找不到的。

- 可以看到,由于websocket的session并没有实现序列化接口。所以无法将session序列化到redis中。
- web的中的httpsession 主要是通过下面的两个管理器实现序列化的。
org.apache.catalina.session.StandardManagerorg.apache.catalina.session.PersistentManager
StandardManager是Tomcat默认使用的,在web应用程序关闭时,对内存中的所有HttpSession对象进行持久化,把他们保存到文件系统中。默认的存储文件为
<tomcat安装目录>/work/Catalina/<主机名>/<应用程序名>/sessions.ser
PersistentManager比StandardManager更为灵活,只要某个设备提供了实现org.apache.catalina.Store接口的驱动类,PersistentManager就可以将HttpSession对象保存到该设备。

所以spring-session-redis 解决分布场景下的session共享就是将session序列化到redis中间件中,使用filter 加装饰器模式解决分布式场景httpsession 共享问题。
# 解决方案
- 使用消息中间件解决websocket session共享问题。
- 使用redis的发布订阅模式解决
本文使用方式二
使用StringRedisTemplate的convertAndSend方法向指定频道发送指定消息:
this.execute((connection) -> {connection.publish(rawChannel, rawMessage);return null;}, true);
redis的命令publish channel message
添加一个监听的容器以及一个监听器适配器
@BeanRedisMessageListenerContainer container(RedisConnectionFactory connectionFactory, MessageListenerAdapter listenerAdapter){RedisMessageListenerContainer container = new RedisMessageListenerContainer();container.setConnectionFactory(connectionFactory);// 可以添加多个 messageListener,配置不同的交换机container.addMessageListener(listenerAdapter, new PatternTopic(Constants.REDIS_CHANNEL));// 订阅最新消息频道return container;}@BeanMessageListenerAdapter listenerAdapter(RedisReceiver receiver){// 消息监听适配器return new MessageListenerAdapter(receiver, "onMessage");}
添加消息接收器
/*** 消息监听对象,接收订阅消息*/@Componentpublic class RedisReceiver implements MessageListener {Logger log = LoggerFactory.getLogger(this.getClass());@Autowiredprivate WebSocketServer webSocketServer;/*** 处理接收到的订阅消息*/@Overridepublic void onMessage(Message message, byte[] pattern){String channel = new String(message.getChannel());// 订阅的频道名称String msg = "";try{msg = new String(message.getBody(), Constants.UTF8);//注意与发布消息编码一致,否则会乱码if (!StringUtils.isEmpty(msg)){if (Constants.REDIS_CHANNEL.endsWith(channel))// 最新消息{JSONObject jsonObject = JSON.parseObject(msg);webSocketServer.sendMessageByWayBillId(Long.parseLong(jsonObject.get(Constants.REDIS_MESSAGE_KEY).toString()),jsonObject.get(Constants.REDIS_MESSAGE_VALUE).toString());}else{//TODO 其他订阅的消息处理}}else{log.info("消息内容为空,不处理。");}}catch (Exception e){log.error("处理消息异常:"+e.toString());e.printStackTrace();}}}
websocket的配置类
import org.springframework.context.annotation.Bean;import org.springframework.context.annotation.Configuration;import org.springframework.web.socket.config.annotation.EnableWebSocket;import org.springframework.web.socket.server.standard.ServerEndpointExporter;/*** @description: websocket的配置类* @dateTime: 2021/6/16 15:43*/@Configuration@EnableWebSocketpublic class WebSocketConfiguration {@Beanpublic ServerEndpointExporter serverEndpointExporter() {return new ServerEndpointExporter();}}
添加websocket的服务组件
import com.alibaba.fastjson.JSON;import org.slf4j.Logger;import org.slf4j.LoggerFactory;import org.springframework.beans.factory.annotation.Autowired;import org.springframework.data.redis.core.StringRedisTemplate;import org.springframework.stereotype.Component;import org.springframework.util.StringUtils;import javax.validation.constraints.NotNull;import javax.websocket.*;import javax.websocket.server.PathParam;import javax.websocket.server.ServerEndpoint;import java.io.IOException;import java.io.UnsupportedEncodingException;import java.util.HashMap;import java.util.Map;import java.util.concurrent.ConcurrentHashMap;import java.util.concurrent.atomic.AtomicInteger;@ServerEndpoint("/websocket/{id}")@Componentpublic class WebSocketServer {private static final long sessionTimeout = 600000;private static final Logger log = LoggerFactory.getLogger(WebSocketServer.class);/*** 当前在线连接数*/private static AtomicInteger onlineCount = new AtomicInteger(0);/*** 用来存放每个客户端对应的 WebSocketServer 对象*/private static ConcurrentHashMap<Long, WebSocketServer> webSocketMap = new ConcurrentHashMap<>();/*** 与某个客户端的连接会话,需要通过它来给客户端发送数据*/private Session session;/*** 接收 id*/private Long id;@Autowiredprivate StringRedisTemplate template;/*** 连接建立成功调用的方法*/@OnOpenpublic void onOpen(Session session, @PathParam("id") Long id) {session.setMaxIdleTimeout(sessionTimeout);this.session = session;this.id = id;if (webSocketMap.containsKey(id)) {webSocketMap.remove(id);webSocketMap.put(id, this);} else {webSocketMap.put(id, this);addOnlineCount();}log.info("编号id:" + id + "连接,当前在线数为:" + getOnlineCount());try {sendMessage("连接成功!");} catch (IOException e) {log.error("编号id:" + id + ",网络异常!!!!!!");}}/*** 连接关闭调用的方法*/@OnClosepublic void onClose() {if (webSocketMap.containsKey(id)) {webSocketMap.remove(id);subOnlineCount();}log.info("编号id:" + id + "退出,当前在线数为:" + getOnlineCount());}/*** 收到客户端消息后调用的方法** @param message 客户端发送过来的消息*/@OnMessagepublic void onMessage(String message, Session session) {log.info("编号id消息:" + id + ",报文:" + message);}/*** 发生错误时调用** @param session* @param error*/@OnErrorpublic void onError(Session session, Throwable error) {log.error("编号id错误:" + this.id + ",原因:" + error.getMessage());error.printStackTrace();}/*** @description: 分布式 使用redis 去发布消息* @dateTime: 2021/6/17 10:31*/public void sendMessage(@NotNull String key,String message) {String newMessge= null;try {newMessge = new String(message.getBytes(Constants.UTF8), Constants.UTF8);} catch (UnsupportedEncodingException e) {e.printStackTrace();}Map<String,String> map = new HashMap<String, String>();map.put(Constants.REDIS_MESSAGE_KEY, key);map.put(Constants.REDIS_MESSAGE_VALUE, newMessge);template.convertAndSend(Constants.REDIS_CHANNEL, JSON.toJSONString(map));}/*** @description: 单机使用 外部接口通过指定的客户id向该客户推送消息。* @dateTime: 2021/6/16 17:49*/public void sendMessageByWayBillId(@NotNull Long key, String message) {WebSocketServer webSocketServer = webSocketMap.get(key);if (!StringUtils.isEmpty(webSocketServer)) {try {webSocketServer.sendMessage(message);log.info("编号id为:"+key+"发送消息:"+message);} catch (IOException e) {e.printStackTrace();log.error("编号id为:"+key+"发送消息失败");}}log.error("编号id号为:"+key+"未连接");}/*** 实现服务器主动推送*/public void sendMessage(String message) throws IOException {this.session.getBasicRemote().sendText(message);}public static synchronized AtomicInteger getOnlineCount() {return onlineCount;}public static synchronized void addOnlineCount() {WebSocketServer.onlineCount.getAndIncrement();}public static synchronized void subOnlineCount() {WebSocketServer.onlineCount.getAndDecrement();}}
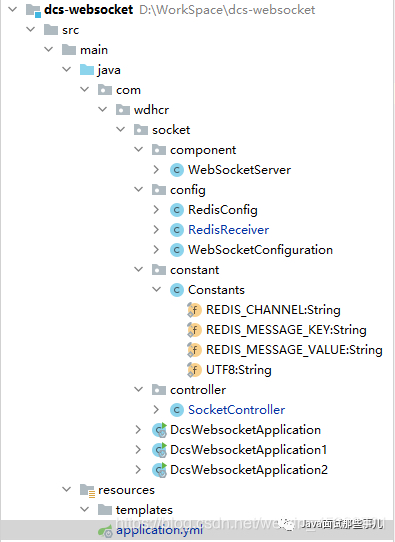
- 项目结构
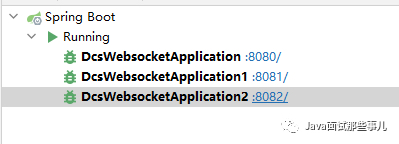
将该项目使用三个端口号启动三个服务
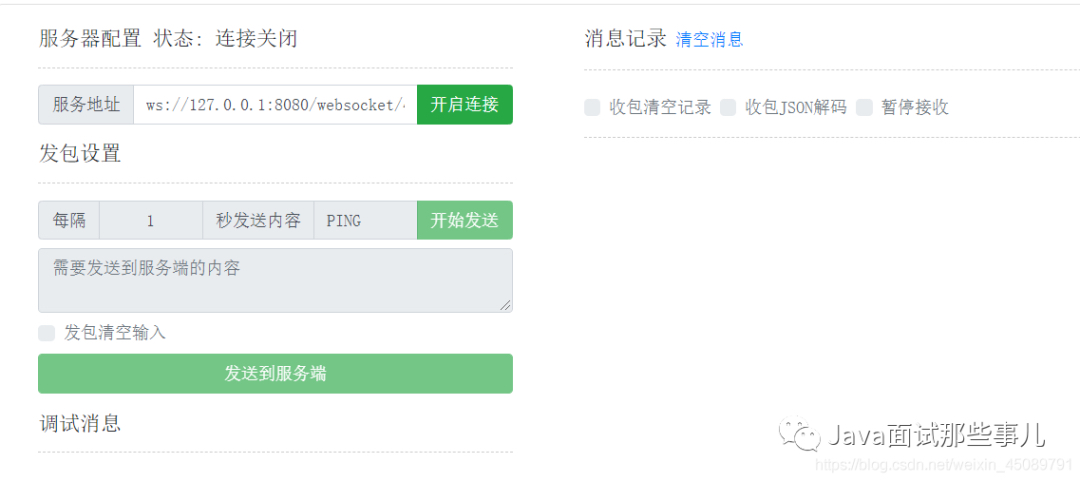
使用下面的这个网站进行演示。
http://www.easyswoole.com/wstool.html
启动两个页面网址分别是:
- ws://127.0.0.1:8081/websocket/456
- ws://127.0.0.1:8082/websocket/456
使用postman给http://localhost:8080/socket/456 发送请求
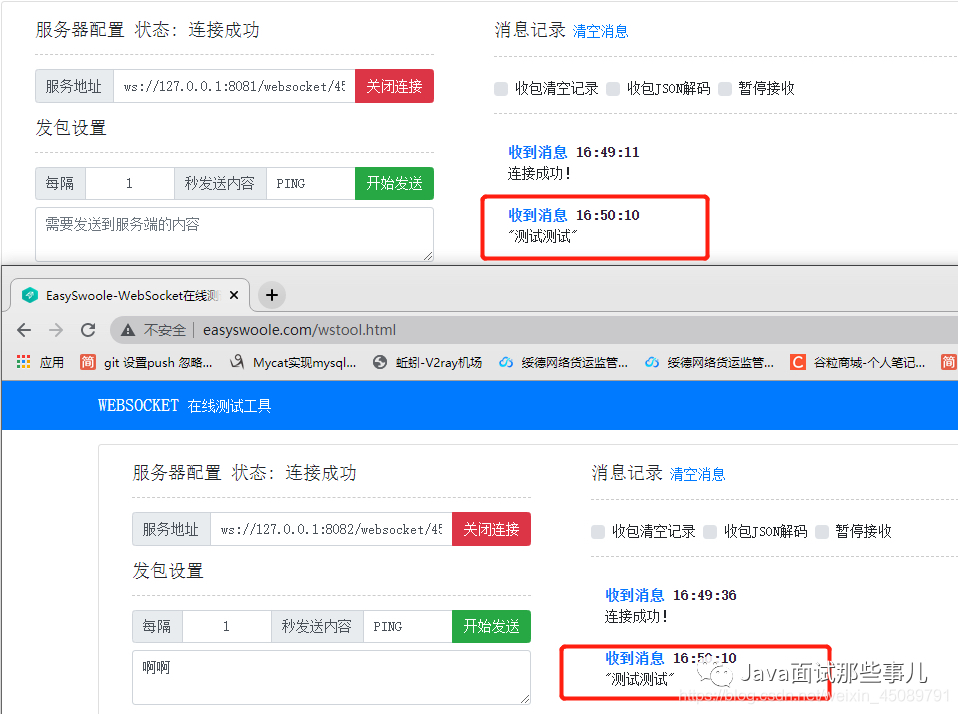
可以看到,我们给8080服务发送的消息,我们订阅的8081和8082 服务可以也可以使用该编号进行消息的推送。
使用8082服务发送这个消息格式{“KEY”:456,”VALUE”:”aaaa”} 的消息。其他的服务也会收到这个信息。
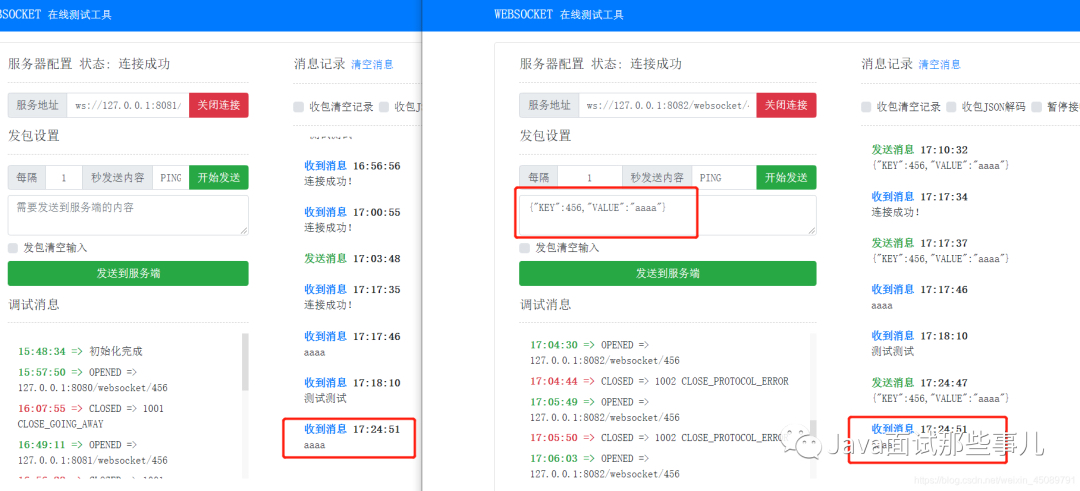
以上就是使用redis的发布订阅解决websocket 的分布式session 问题。

