Dataway 是基于 DataQL 服务聚合能力,为应用提供的一个接口配置工具。可以让使用者无需开发任何代码就可以配置一个满足需求的接口。
Dataway 是 Hasor 生态中的一员,因此在 Spring 中使用 Dataway 首先要做的就是打通两个生态。根据官方文档中推荐的方式我们将 Hasor 和 Spring Boot 整合起来。
使用:
1、依赖
<!-- https://mvnrepository.com/artifact/net.hasor/hasor-spring --><dependency><groupId>net.hasor</groupId><artifactId>hasor-spring</artifactId><version>4.2.5</version></dependency><!-- https://mvnrepository.com/artifact/net.hasor/hasor-dataway --><dependency><groupId>net.hasor</groupId><artifactId>hasor-dataway</artifactId><version>4.2.5</version></dependency>
hasor-spring 负责 Spring 和 Hasor 框架之间的整合。
hasor-dataway 是工作在 Hasor 之上,利用 hasor-spring 我们就可以使用 dataway了。
2、配置
2.1、配置 Dataway
dataway 会提供一个界面让我们配置接口,这一点类似 Swagger 只要jar包集成就可以实现接口配置。找到我们 springboot 项目的配置文件 application.yml
# 是否启用 Dataway 功能(必选:默认false)HASOR_DATAQL_DATAWAY: true# 是否开启 Dataway 后台管理界面(必选:默认false)HASOR_DATAQL_DATAWAY_ADMIN: true# dataway API工作路径(可选,默认:/api/)HASOR_DATAQL_DATAWAY_API_URL: /api/# dataway-ui 的工作路径(可选,默认:/interface-ui/)HASOR_DATAQL_DATAWAY_UI_URL: /interface-ui/# SQL执行器方言设置(可选,建议设置)HASOR_DATAQL_FX_PAGE_DIALECT: mysql
Dataway 一共涉及到 5个可以配置的配置项,但不是所有配置都是必须的。
其中HASOR_DATAQL_DATAWAY、HASOR_DATAQL_DATAWAY_ADMIN 两个配置是必须要打开的,默认情况下 Datawaty 是不启用的。
2.2、初始化数据表
Dataway 需要两个数据表才能工作,下面是这两个数据表的建表语句。下面这个 SQL 可以在 dataway的依赖 jar 包中 “META-INF/hasor-framework/mysql” 目录下面找到,创建数据表的语句是用 mysql 语法写的
drop table interface_info;CREATE TABLE interface_info (api_id varchar(64) NOT NULL COMMENT 'ID',api_method varchar(12) NOT NULL COMMENT 'HttpMethod:GET、PUT、POST',api_path varchar(512) NOT NULL COMMENT '拦截路径',api_status varchar(4) NOT NULL COMMENT '状态:-1-删除, 0-草稿,1-发布,2-有变更,3-禁用',api_comment varchar(255) NOT NULL COMMENT '注释',api_type varchar(24) NOT NULL COMMENT '脚本类型:SQL、DataQL',api_script mediumtext NOT NULL COMMENT '查询脚本:xxxxxxx',api_schema mediumtext NOT NULL COMMENT '接口的请求/响应数据结构',api_sample mediumtext NOT NULL COMMENT '请求/响应/请求头样本数据',api_option mediumtext NOT NULL COMMENT '扩展配置信息',api_create_time varchar(32) NOT NULL COMMENT '创建时间',api_gmt_time varchar(32) NOT NULL COMMENT '修改时间',PRIMARY KEY (api_id),UNIQUE KEY uk_interface_info (api_path)) ENGINE=InnoDB DEFAULT CHARSET=utf8mb4 COMMENT='Dataway 中的API';drop table interface_release;CREATE TABLE interface_release (pub_id varchar(64) NOT NULL COMMENT 'Publish ID',pub_api_id varchar(64) NOT NULL COMMENT '所属API ID',pub_method varchar(12) NOT NULL COMMENT 'HttpMethod:GET、PUT、POST',pub_path varchar(512) NOT NULL COMMENT '拦截路径',pub_status varchar(4) NOT NULL COMMENT '状态:-1-删除, 0-草稿,1-发布,2-有变更,3-禁用',pub_comment varchar(255) NOT NULL COMMENT '注释',pub_type varchar(24) NOT NULL COMMENT '脚本类型:SQL、DataQL',pub_script mediumtext NOT NULL COMMENT '查询脚本:xxxxxxx',pub_script_ori mediumtext NOT NULL COMMENT '原始查询脚本,仅当类型为SQL时不同',pub_schema mediumtext NOT NULL COMMENT '接口的请求/响应数据结构',pub_sample mediumtext NOT NULL COMMENT '请求/响应/请求头样本数据',pub_option mediumtext NOT NULL COMMENT '扩展配置信息',pub_release_time varchar(32) NOT NULL COMMENT '发布时间(下线不更新)',PRIMARY KEY (pub_id),KEY idx_interface_release_api (pub_api_id),KEY idx_interface_release_path (pub_path)) ENGINE=InnoDB DEFAULT CHARSET=utf8mb4 COMMENT='Dataway API 发布历史。';drop index idx_interface_release on interface_release;create index idx_interface_release on interface_release (pub_api_id);
3、配置数据源
作为 Spring Boot 项目有着自己完善的数据库方面工具支持。我们这次采用 druid + mysql + spring-boot-starter-jdbc 的方式。
3.1、依赖
<dependency><groupId>mysql</groupId><artifactId>mysql-connector-java</artifactId><version>5.1.49</version></dependency><dependency><groupId>com.alibaba</groupId><artifactId>druid</artifactId><version>1.1.23</version></dependency><dependency><groupId>org.springframework.boot</groupId><artifactId>spring-boot-starter-jdbc</artifactId></dependency><dependency><groupId>com.alibaba</groupId><artifactId>druid-spring-boot-starter</artifactId><version>1.1.10</version></dependency>
3.2、配置
spring:datasource:driver-class-name: com.mysql.jdbc.Drivertype: com.alibaba.druid.pool.DruidDataSourceurl: jdbc:mysql://localhost:3306/dataway-demo?useUnicode=true&characterEncoding=utf8&zeroDateTimeBehavior=convertToNull&useSSL=true&serverTimezone=GMT%2B8&nullCatalogMeansCurrent=trueusername: rootpassword: 123456druid:filter:stat:log-slow-sql: trueslow-sql-millis: 1initial-size: 3max-active: 10max-wait: 60000min-idle: 3stat-view-servlet:login-password: adminlogin-username: admin
4、把数据源设置到 Hasor 容器中
Spring Boot 和 Hasor 本是两个独立的容器框架,我们做整合之后为了使用 Dataway 的能力需要把 Spring 中的数据源设置到 Hasor 中。
首先新建一个 Hasor 的 模块,并且将其交给 Spring 管理。然后把数据源通过 Spring 注入进来。
@DimModule@Componentpublic class ExampleModule implements SpringModule {@Autowiredprivate DataSource dataSource = null;@Overridepublic void loadModule(ApiBinder apiBinder) throws Throwable {//DataSource form Spring boot into HasorapiBinder.installModule(new JdbcModule(Level.Full, this.dataSource));}}
Hasor 启动的时候会调用 loadModule 方法,在这里再把 DataSource 设置到 Hasor 中。
5、在SprintBoot 中启用 Hasor
@EnableHasor@EnableHasorWeb@SpringBootApplication(scanBasePackages = {"com.zukxu.dataway"})public class DataWayApplication {public static void main(String[] args) {SpringApplication.run(DataWayApplication.class);}}
6、启动
启动应用,并输入地址进行访问
根据配置的地址【/interface-ui/】进行访问
7、新建接口
Dataway 提供了两种语言模式,我们可以使用强大的 DataQL 查询语言,也可以直接使用 SQL 语言(在 Dataway 内部 SQL 语言也会被转换为 DataQL 的形式执行。)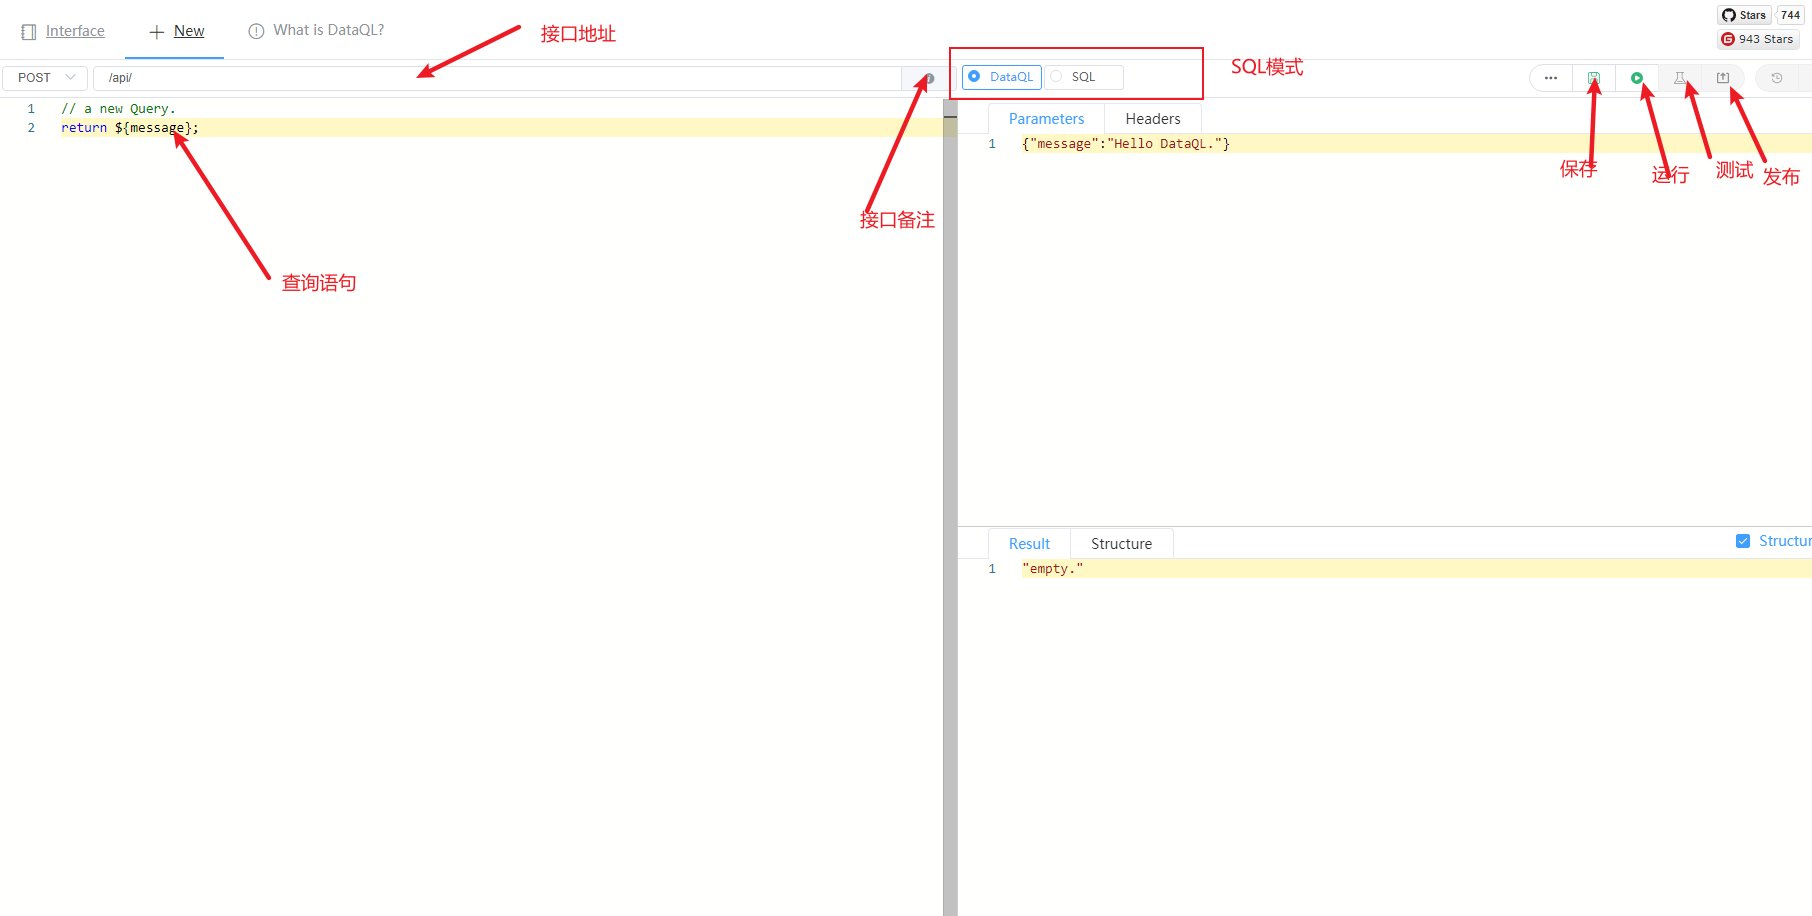
发布完毕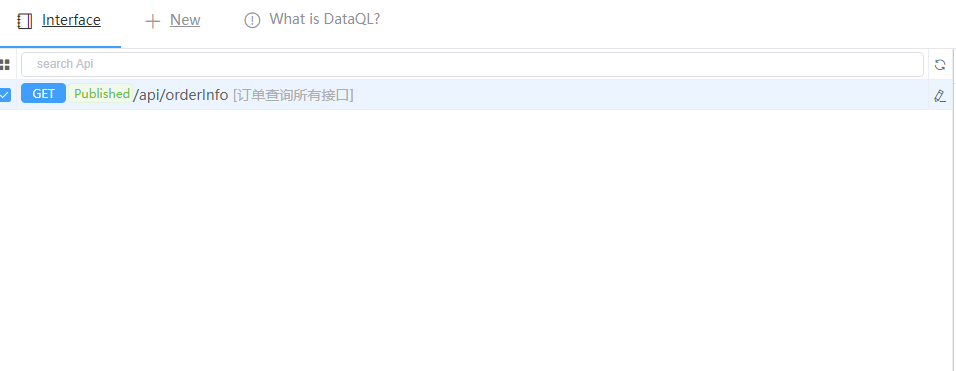
浏览器直接请求接口地址就能得到返回值
Dataway只适合做简单的查询语句和删除语句
附录:
- Dataway 官方手册:https://www.hasor.net/web/dataway/about.html
- DataQL 手册地址:https://www.hasor.net/web/dataql/what_is_dataql.html
- Hasor 项目的首页:https://www.hasor.net/web/index.html

若有收获,就点个赞吧
0 人点赞
