参考:https://dev.mysql.com/doc/refman/8.0/en/windows-installation.html
1 环境
CPU: AMD A4-5000 APU with Radeon(TM) HD Graphics 1.50 GHz,4核
内存:8GB
操作系统: Windows 10 教育版,21H1(build 19043.1165)
MySQL Server: MySQL Server 8.0.29,社区版
2 安装依赖
Microsoft Visual C++ 2019 Redistributable: 已安装,跳过该步骤
3 选择 MySQL 安装方法
可以选择以下方法之一安装 MySQL,参见: https://dev.mysql.com/doc/refman/8.0/en/windows-choosing-package.html
官方认为 MySQL Installer 最简单,推荐这种方法。本文用 MySQL Installer 安装 MySQL。
4 用 MySQL Installer 安装 MySQL
参考: https://dev.mysql.com/doc/refman/8.0/en/mysql-installer.html
MySQL Installer 可以安装、卸载、配置、升级、降级以下 MySQL 产品:
- MySQL Servers
MySQL Applications
MySQL Workbench, MySQL Shell, MySQL Router, and MySQL for Visual Studio.
MySQL Connectors
MySQL Connector/NET, MySQL Connector/Python, MySQL Connector/ODBC, MySQL Connector/J, and MySQL Connector/C++. To install MySQL Connector/Node.js
- Documentation and Sampleshttps://dev.mysql.com/downloads/installer/
MySQL Reference Manuals (by version) in PDF format and MySQL database samples (by version).
4.1 安装 MySQL Installer 依赖
MySQL Installer 依赖 Microsoft .NET Framework 4.5.2 或以上版本,需确保已安装了.NET Framework。Windows 10 21H1 预装了 .NET Framework 4.8,所以跳过该步骤。
4.2 下载 MySQL Installer
MySQL 有社区版和商业版,本文安装社区版。在 https://dev.mysql.com/downloads/installer/ 页面下载 MySQL Installer,有 2 种 MySQL Installer:
- Web: Contains MySQL Installer and configuration files only. The web package option downloads only the MySQL products you select to install, but it requires an internet connection for each download. The size of this file is approximately 2 MB. The file name has the form mysql-installer-web-community-VERSION.N.msi in which VERSION is the MySQL server version number such as 8.0 and N is the package number, which begins at 0.
- Full or Current Bundle: Bundles all of the MySQL products for Windows (including the MySQL server). The file size is over 300 MB, and the name has the form mysql-installer-community-VERSION.N.msi in which VERSION is the MySQL Server version number such as 8.0 and N is the package number, which begins at 0.
因为 Web MySQL Installer 体积小,只下载需要安装的产品,所以本文使用 Web MySQL Installer,如图4-1。虽然 MySQL Installer 是 32 位程序,但他可以安装 32 位和 64 位 MySQL 产品。
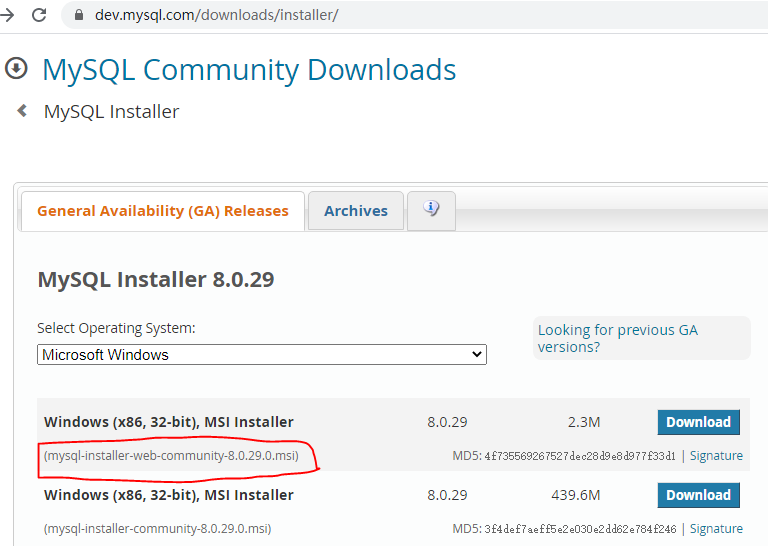
图4-1 下载 Web MySQL Installer
4.3 选择安装类型
运行下载的 MySQL Installer 程序,如图4-2,选择安装类型 Custom,以自定义要安装哪些 MySQL 产品,然后点击 Next。
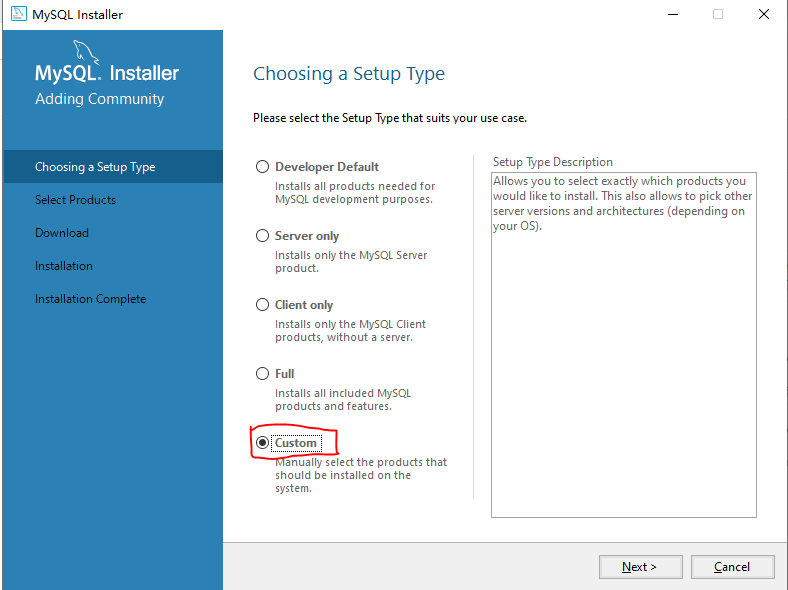
图4-2 选择安装类型
4.4 选择产品
如图4-3,选择要安装的产品。本文安装以下产品:
- MySQL Server 8.0.29 - X64
- MySQL Workbench 8.0.29 - X64
- MySQL Shell 8.0.29 - X64(TODO: 该产品有何用途,是否需要)
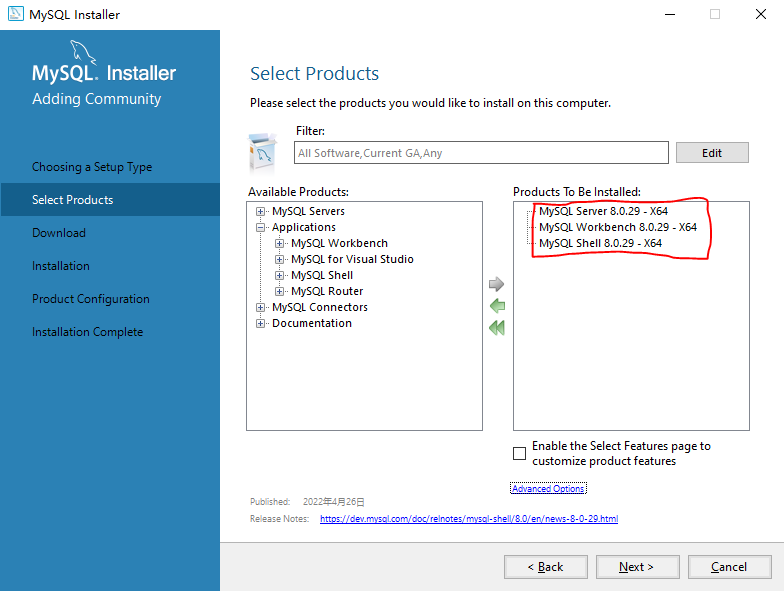
图4-3 选择要安装的产品
如图4-4,选中1个产品,然后点击 Advanced Options,会出现该产品的高级选项设置对话框。
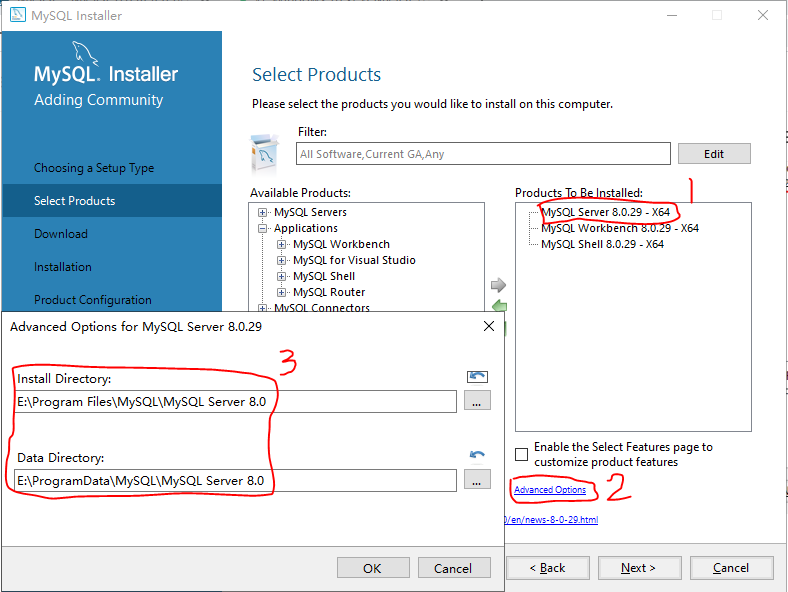
图4-4 设置产品的高级选项
本文的产品高级选项设置如下:
- MySQL Server 8.0.29 - X64
- Install Directory: E:\Program Files\MySQL\MySQL Server 8.0
- Data Directory: E:\ProgramData\MySQL\MySQL Server 8.0
- MySQL Workbench 8.0.29 - X64
- Install Directory: E:\Program Files\MySQL\MySQL Workbench 8.0
- MySQL Shell 8.0.29 - X64
- Install Directory: E:\Program Files\MySQL\MySQL Shell 8.0
选择好产品,并设置产品高级选项后,点击 Next。
4.5 下载产品
如图4-5,点击 Execute,下载要安装的产品。下载完成后,点击 Next。
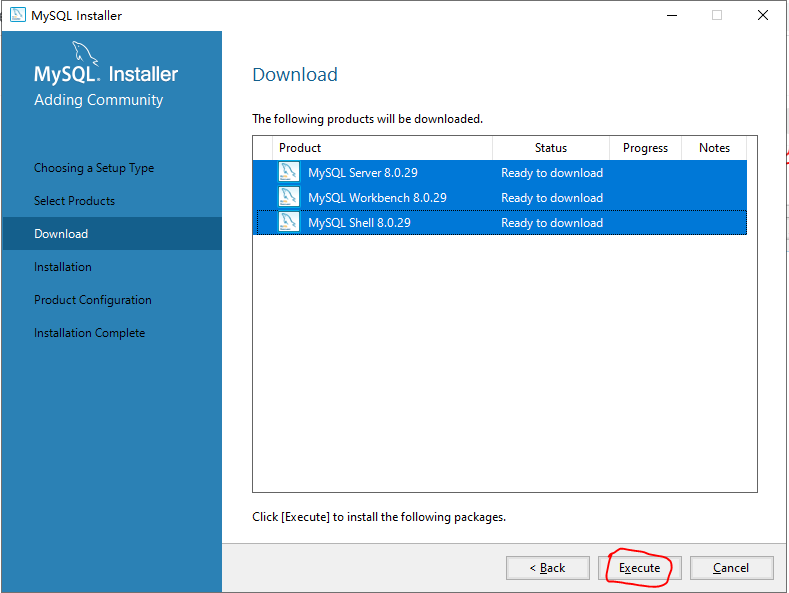
图4-5 下载要安装的产品
4.6 安装产品
如图4-6,点击 Execute,安装产品。安装完成后,点击 Next。
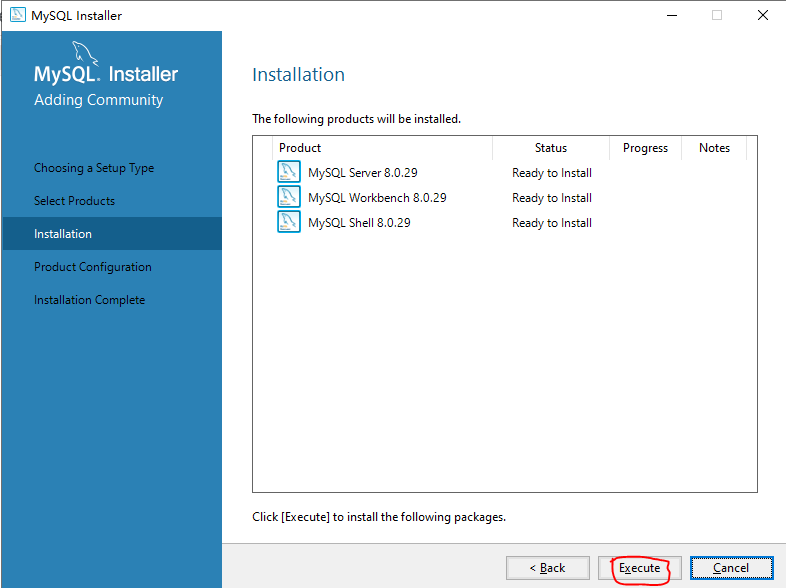
图4-6 安装产品
4.7 产品配置开始
上一步安装了产品,现在可以配置产品。如图4-7,点击 Next 以配置产品
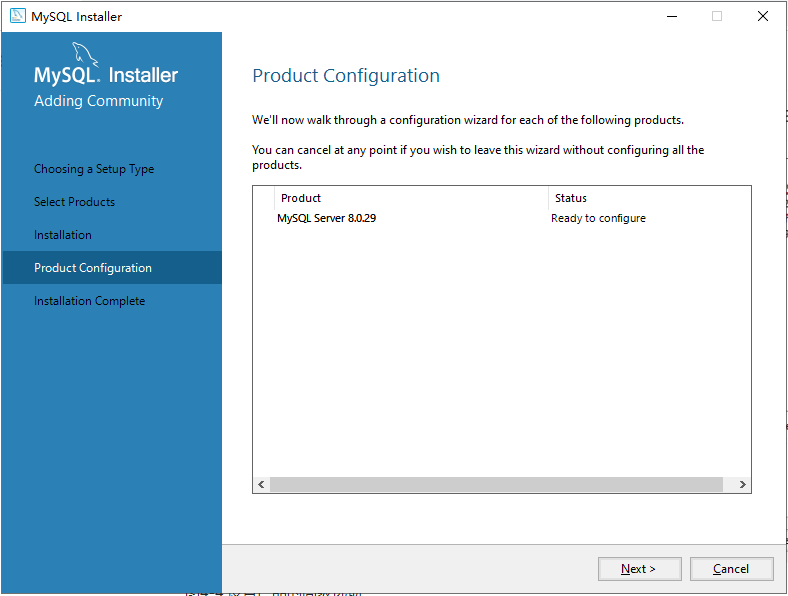
图4-7 待配置的产品列表
4.8 配置 MySQL Server 8.0
本节配置 MySQL Server 8.0。
4.8.1 Type and Networking
因为是在个人电脑上为了开发程序安装 MySQL,所以 Config Type 选择 Development Computer(默认值)。
选中 Show Advanced and Logging Options,以便配置高级和日志选项。
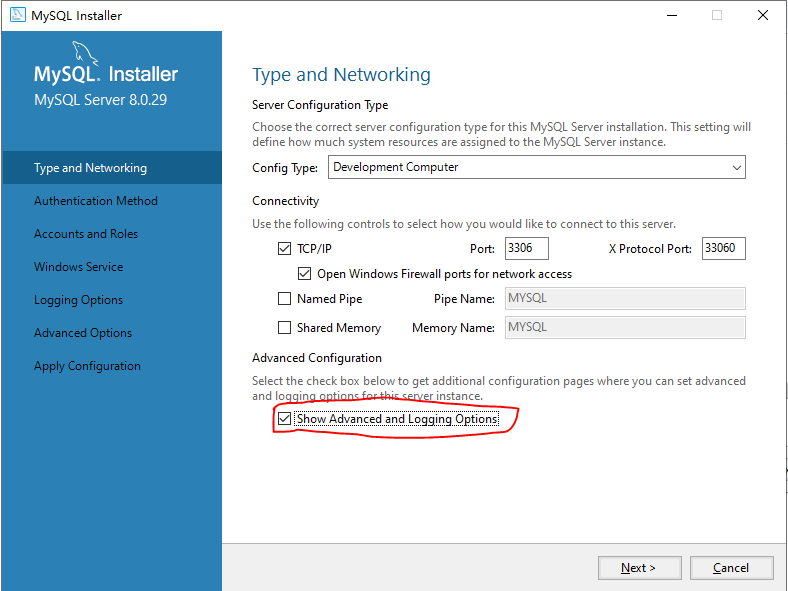
图4-8 MySQL Server 8.0 配置 - Type and Networking
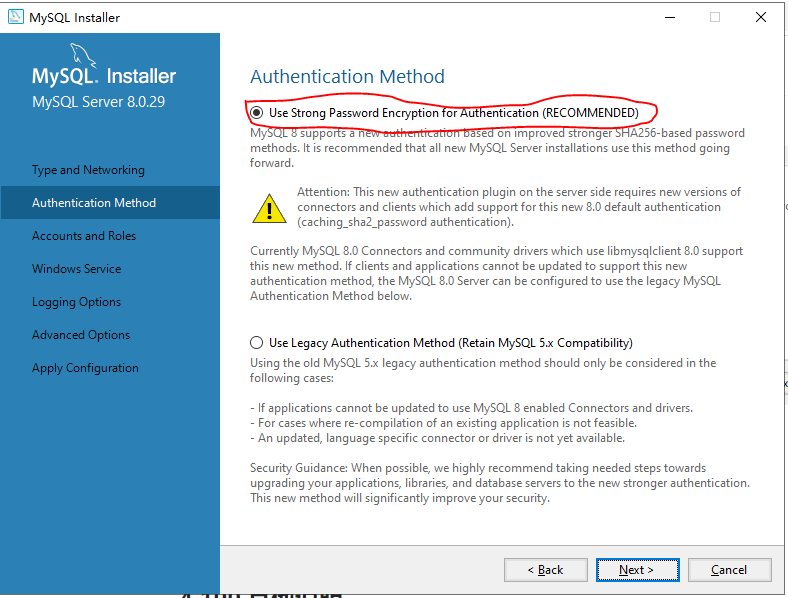
4.8.2 Authentication Method
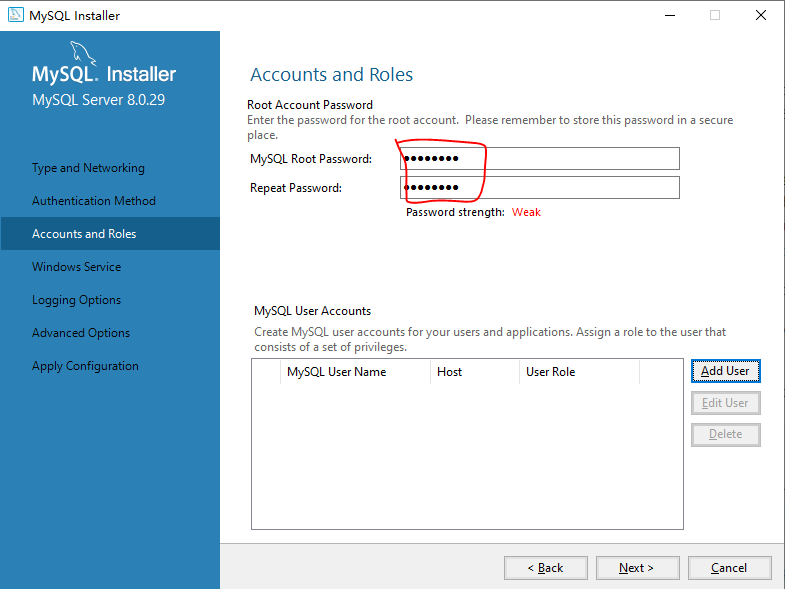
4.8.3 Accounts and Roles
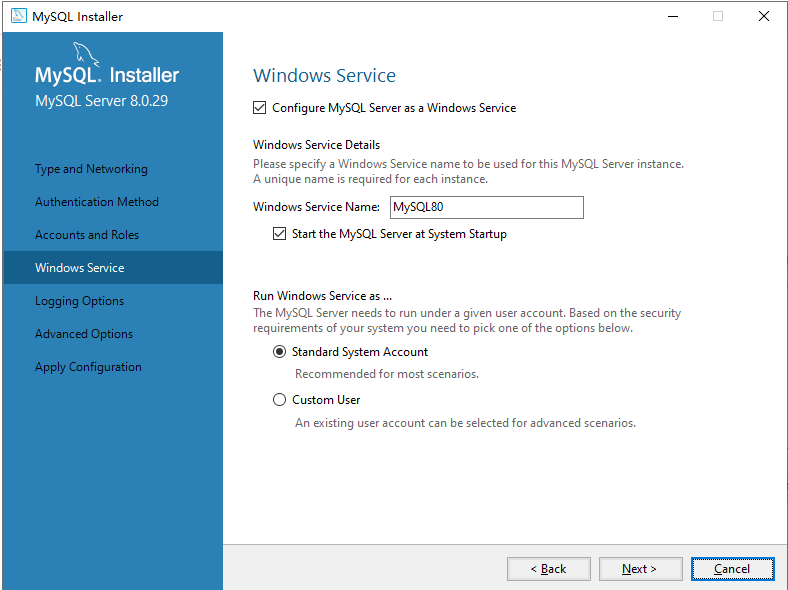
4.8.4 Windows Service
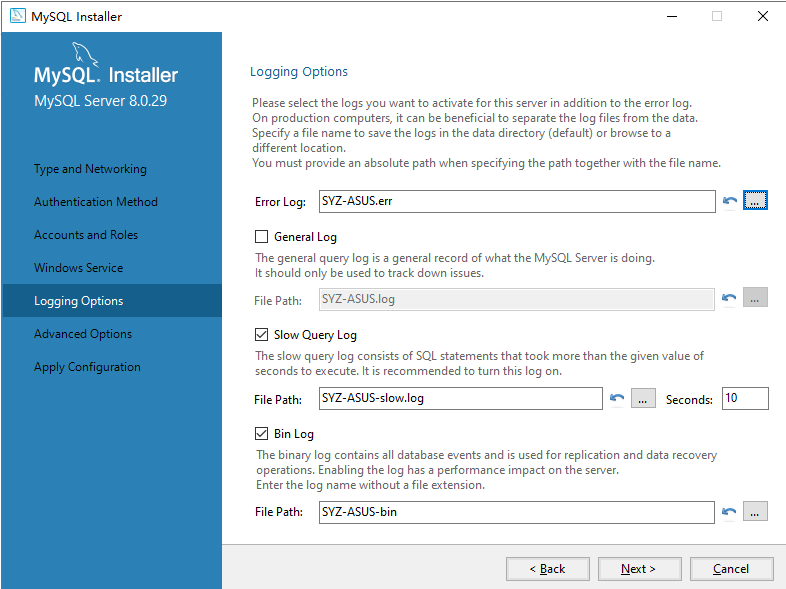
4.8.5 Logging Options
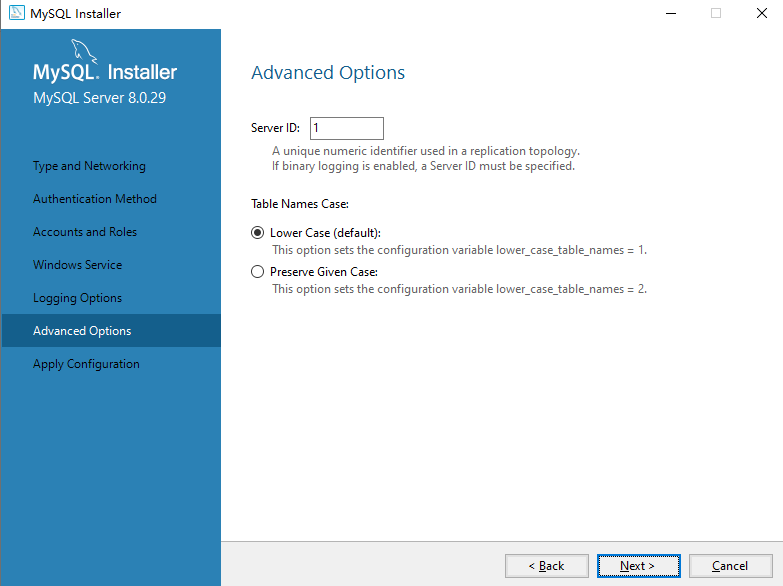
4.8.6 Advanced Options
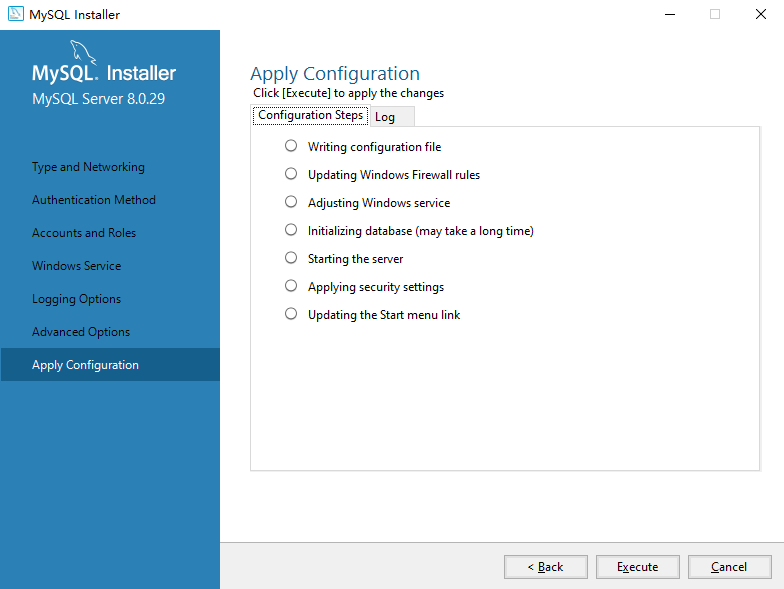
4.8.7 Apply Configuration
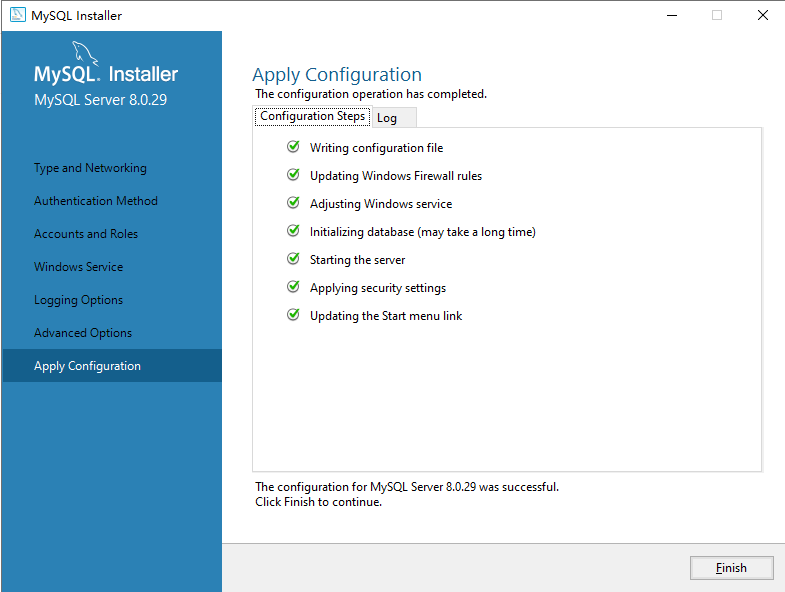
4.9 产品配置完成

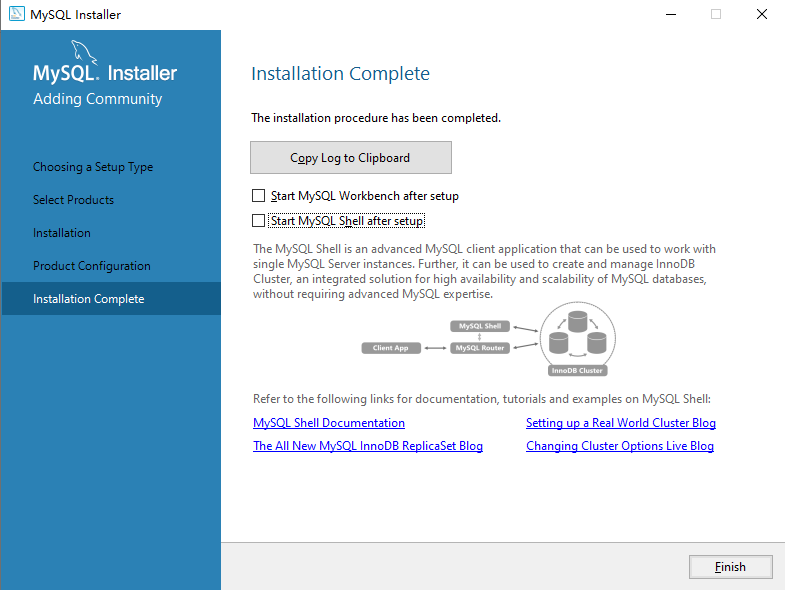
4.10 安装完成
4.10 验证安装
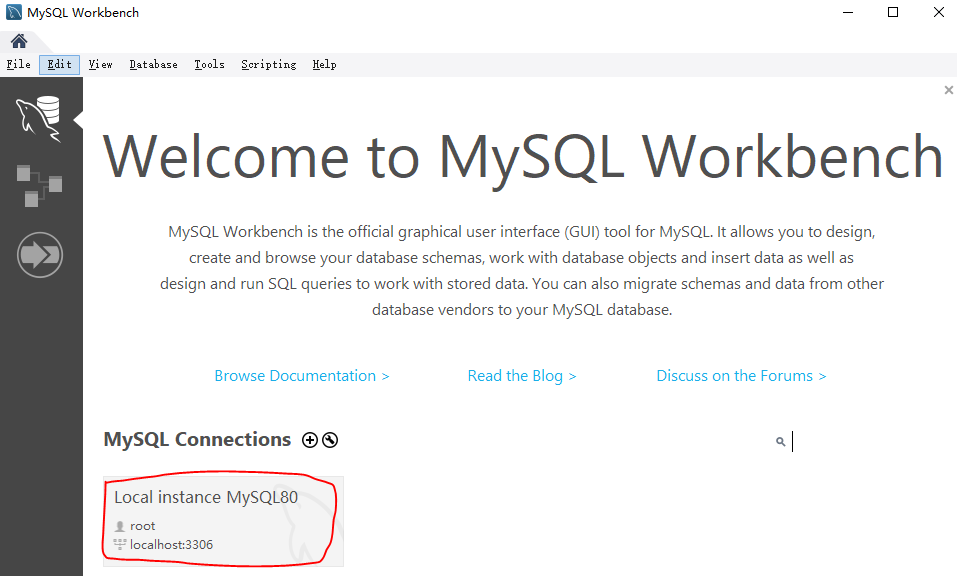
安装完成后,MySQL Service 应该已经自动启动了。现在用 MySQL Workbench 连接 MySQL,验证 MySQL Server 是否安装成功。
运行 MySQL Workbench,发现已经有了1个 MySQL 连接,如下图。双击该连接,输入 “4.8.3 Accounts and Roles” 中设置的密码,连接成功,证明 MySQL Server 和 MySQL Workbench 都安装成功。
4.11 其他说明
首次运行下载的 MySQL Installer msi 程序后,该程序会安装 MySQL Installer,以后可以点击【开始菜单 >MySQL>MySQL Installer - Community】运行 MySQL Installer,管理(安装、卸载、升级、降级) MySQL 产品。而下载的 MySQL Installer msi 则可以删除。

若有收获,就点个赞吧
0 人点赞
