sudo vi /etc/sysconfig/network-scripts/ifcfg-ens192
# 添加配置 ONBOOT=yesIPADDR=192.168.72.122GATEWAY=192.168.72.254NETMASK=255.255.255.0DNS1=114.114.114.114DNS2=8.8.8.8
sudo service network restart
设置免密操作
# 授权可编辑/etc/sudoers 文件sudo chmod -v u+w /etc/sudoers
sudo vi /etc/sudoers
添加如下内容(xcsoft为需要免密操作的用户名)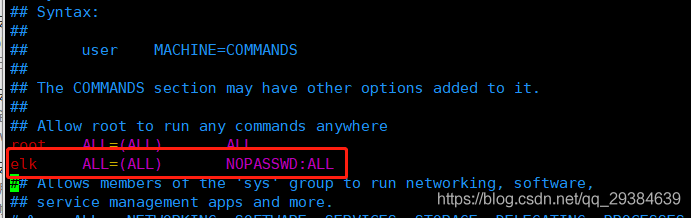
xcsoft ALL=(ALL) NOPASSWD:ALL%wheel ALL=(ALL) NOPASSWD:ALL
# 取消sudoers文件写权限sudo chmod -v u-w /etc/sudoers
断开ssh重新连接
配置软件源
# 备份系统旧配置文件sudo mv /etc/yum.repos.d/CentOS-Base.repo /etc/yum.repos.d/CentOS-Base.repo.backup# 编辑源sudo vi /etc/yum.repos.d/CentOS-Base.repo
# CentOS-Base.repo## The mirror system uses the connecting IP address of the client and the# update status of each mirror to pick mirrors that are updated to and# geographically close to the client. You should use this for CentOS updates# unless you are manually picking other mirrors.## If the mirrorlist= does not work for you, as a fall back you can try the# remarked out baseurl= line instead.##[os]name=Qcloud centos os - $basearchbaseurl=http://mirrors.cloud.tencent.com/centos/$releasever/os/$basearch/enabled=1gpgcheck=1gpgkey=http://mirrors.cloud.tencent.com/centos/RPM-GPG-KEY-CentOS-7[updates]name=Qcloud centos updates - $basearchbaseurl=http://mirrors.cloud.tencent.com/centos/$releasever/updates/$basearch/enabled=1gpgcheck=1gpgkey=http://mirrors.cloud.tencent.com/centos/RPM-GPG-KEY-CentOS-7[centosplus]name=Qcloud centosplus - $basearchbaseurl=http://mirrors.cloud.tencent.com/centos/$releasever/centosplus/$basearch/enabled=0gpgcheck=1gpgkey=http://mirrors.cloud.tencent.com/centos/RPM-GPG-KEY-CentOS-7[cloud]name=Qcloud centos contrib - $basearchbaseurl=http://mirrors.cloud.tencent.com/centos/$releasever/cloud/$basearch/openstack-kilo/enabled=0gpgcheck=1gpgkey=http://mirrors.cloud.tencent.com/centos/RPM-GPG-KEY-CentOS-7[cr]name=Qcloud centos cr - $basearchbaseurl=http://mirrors.cloud.tencent.com/centos/$releasever/cr/$basearch/enabled=0gpgcheck=1gpgkey=http://mirrors.cloud.tencent.com/centos/RPM-GPG-KEY-CentOS-7[extras]name=Qcloud centos extras - $basearchbaseurl=http://mirrors.cloud.tencent.com/centos/$releasever/extras/$basearch/enabled=1gpgcheck=1gpgkey=http://mirrors.cloud.tencent.com/centos/RPM-GPG-KEY-CentOS-7[fasttrack]name=Qcloud centos fasttrack - $basearchbaseurl=http://mirrors.cloud.tencent.com/centos/$releasever/fasttrack/$basearch/enabled=0gpgcheck=1gpgkey=http://mirrors.cloud.tencent.com/centos/RPM-GPG-KEY-CentOS-7
sudo yum clean allsudo yum makecachesudo yum update
安装基础软件
sudo yum install -y vim wget
# 安装 epel源sudo mv /etc/yum.repos.d/epel.repo /etc/yum.repos.d/epel.repo.backupsudo wget -O /etc/yum.repos.d/epel.repo http://mirrors.cloud.tencent.com/repo/epel-7.reposudo yum clean allsudo yum makecache
禁用ROOT登录
sudo vim /etc/ssh/sshd_config
PermitRootLogin no
sudo service sshd restart
防止暴力破解
# 安装 Fail2bansudo yum install -y fail2ban# 进入fail2ban目录cd /etc/fail2ban# 复制一份配置文件sudo cp fail2ban.conf fail2ban.localsudo cp jail.conf jail.localvim jail.d/sshd.local
[sshd]enabled=truebandtime=1yfindtime=1mmaxretry=5
sudo service fail2ban restart#重启sudo fail2ban-client status#查看sshd的详细状态sudo fail2ban-client status sshdsudo tail -f /var/log/fail2ban.logsudo service fail2ban restartsudo systemctl enable fail2ban
设置hostname
sudo hostnamectl set-hostname bigdata01
配置zabbix-agent2
sudo setenforce 0sudo sed -i -e"s/SELINUX=enforcing/SELINUX=disabled/" /etc/selinux/configecho "关闭selinux"sudo firewall-cmd --permanent --add-port=10050/tcpsudo firewall-cmd --reloadecho "打开10050端口"sudo yum install ntpdate -ysudo ntpdate -u ntp.aliyun.comecho "同步时间"sudo mv /etc/localtime{,.bak}sudo ln -s /usr/share/zoneinfo/Asia/Shanghai /etc/localtimeecho "统一时区"sudo rpm -Uvh https://repo.zabbix.com/zabbix/5.0/rhel/7/x86_64/zabbix-release-5.0-1.el7.noarch.rpmsudo sed -i 's#http://repo.zabbix.com#https://mirrors.aliyun.com/zabbix#' /etc/yum.repos.d/zabbix.reposudo yum install zabbix-agent2 -yecho "安装zabbix-agent2"sudo sed -i -e"s/127.0.0.1/10.161.17.29/" /etc/zabbix/zabbix_agent2.confsudo sed -i -e"s/Hostname=Zabbix server/Hostname=`cat /etc/hostname`/" /etc/zabbix/zabbix_agent2.confsudo sed -i -e "s/# HostMetadata=/HostMetadata=xcsoft/" /etc/zabbix/zabbix_agent2.confecho "修改配置"sudo systemctl enable --now zabbix-agent2echo "启动zabbix-agent2"

若有收获,就点个赞吧
0 人点赞
