vue2.0之后配置都写在vue.config.js文件中,这篇文章说一下项目常用的配置
配置项目根路径和指定端口
const port = 7070;module.exports = {// 上下文publicPath: '/baseProject',devServer: {port,},};
配置webpack
由于所有的配置都被封装起来了,所以我们查看webpack配置,可以用以下几个命令
vue inspect //查看webpack全部配置vue inspect --rules //查看webpack所有规则vue inspect --rule svg //查看某一个规则的详细配置,此处查看的是svg的配置
使用vue-cli创建一个项目,我们运行vue inspect —rules命令看一下输出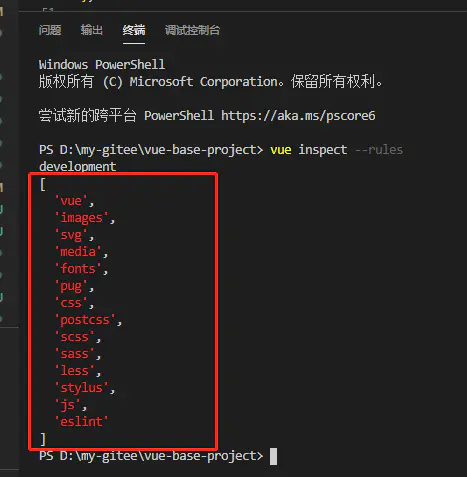
上面就是所有webpack配置的默认规则,使用第三个命令可以查看具体配置信息
需求
我们有这样一个需求:项目中想使用svg图片,但是不希望用默认的loader解析svg,所以我们要自己配置svg的规则
链式配置webpack
配置前我们需要明白怎样链式配置webpack,就是在vue.config.js里面使用chainWebpack这个方法,不明白没关系,继续走。
实现的功能点总结
1.禁用webpack默认对svg图片解析的行为
2.配置我们自己的规则解析svg图片
3.封装一个组件,自动引入所有的svg图片
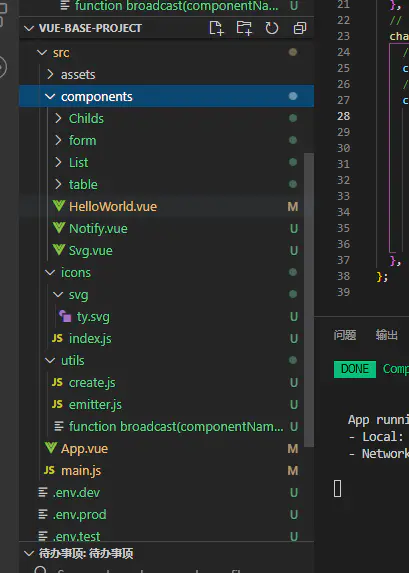
文件夹截图
功能点一:禁用webpack默认对svg图片解析的行为
首先我们查看一下svg的默认配置,运行vue inspect —rule svg命令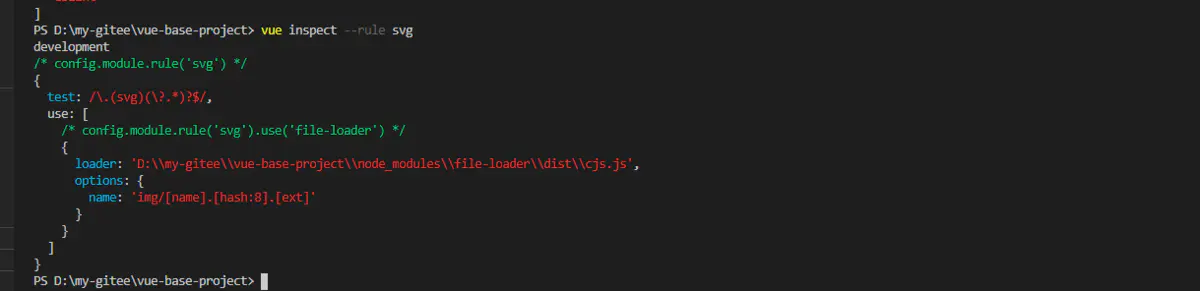
我们先看一下没禁用vue应用内部对svg图片处理之前,图片能否显示
<template><div id="app"><img src="./icons/svg/ty.svg" alt="" /></div></template><script>export default {name: "App",};</script><style>#app {font-family: Avenir, Helvetica, Arial, sans-serif;-webkit-font-smoothing: antialiased;-moz-osx-font-smoothing: grayscale;text-align: center;color: #2c3e50;margin-top: 60px;display: flex;flex-wrap: nowrap;flex-direction: column;align-items: center;}</style>
接下来vue.config.js文件中,使用chainWebpack这个方法,这个方法会传入一个config参数,利用config.module.rule()这个方法,得到svg这个规则里面的详细配置信息,之后调用.exclude这个Set对象的.add()方法,将我们不希望处理的文件夹路径添加进去,从而完成禁用。
const path = require ('path');const port = 7070;function resolve (resolvePath) {return path.join (__dirname, resolvePath);}module.exports = {// 上下文publicPath: '/baseProject',devServer: {port,},// 链式webpackchainWebpack (config) {// 禁用vue应用内部对svg的处理config.module.rule ('svg').exclude.add (resolve ('./src/icons/svg'));},};
最后我们看一下配置完的svg之后的规则,有什么不同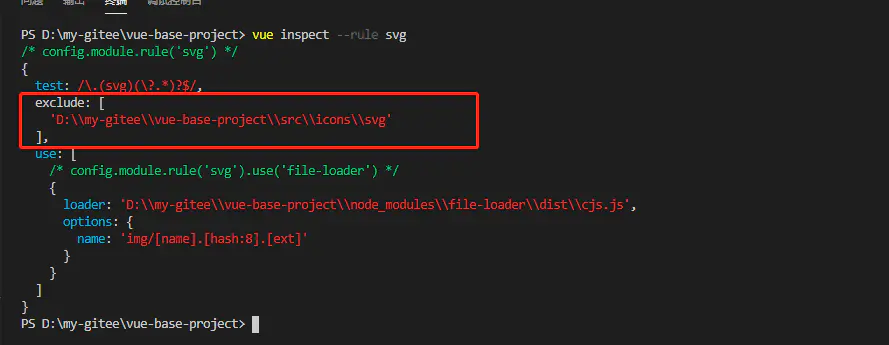
很明显在这个规则中我们添加了一个属性exclude,里面包含我们svg图片的路径,exclude翻译过来就是排除的意思,这些都是属性,不是自定义的,记住
禁用之后重新启动项目,ok,报错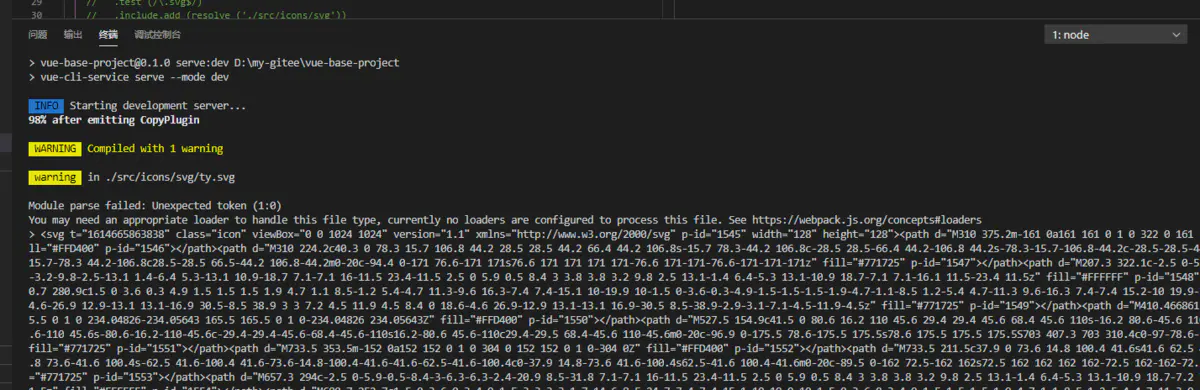 image.png
功能点二:配置我们自己的规则解析svg图片
安装依赖
npm i svg-sprite-loader -D
使用config.module.rule(“icons”)创建一个icons规则
const path = require ('path');const port = 7070;function resolve (resolvePath) {return path.join (__dirname, resolvePath);}module.exports = {// 上下文publicPath: '/baseProject',devServer: {port,},// 链式配置webpackchainWebpack (config) {// 禁用系统内部对svg的处理config.module.rule ('svg').exclude.add (resolve ('./src/icons/svg'));// 新建规则处理svg文件config.module.rule ('icons').test (/\.svg$/) //添加匹配规则.include.add (resolve ('./src/icons/svg')) //添加我们要处理的文件路径.end () //上面的add方法改变了上下文,调用end()退回到include这一级.use ('svg-sprite-loader') //使用"svg-sprite-loader"这个依赖.loader ('svg-sprite-loader')//选中这个依赖.options ({symbolId: 'icon-[name]', // 这个配置是这个包的配置不属于webpack,可以查看相关文档,symbolId指定我们使用svg图片的名字}); //传入配置},};
使用vue inspect —rule icons查看我们新配置的icons规则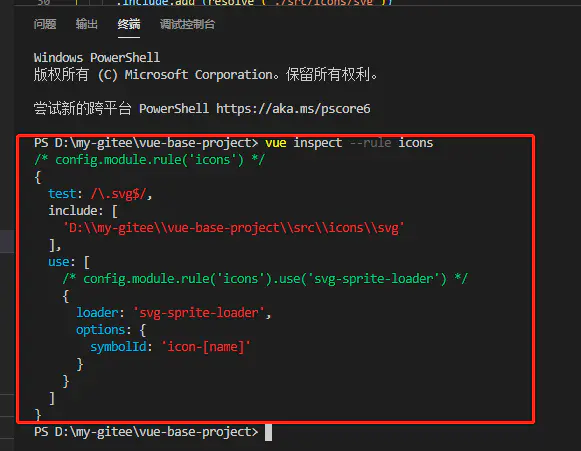
页面中使用,成功启动,图片也可以展示
<template><div id="app"><svg><use xlink:href="#icon-ty"></use></svg></div></template><script>import "./icons/svg/ty.svg";export default {name: "App",};</script><style>#app {font-family: Avenir, Helvetica, Arial, sans-serif;-webkit-font-smoothing: antialiased;-moz-osx-font-smoothing: grayscale;text-align: center;color: #2c3e50;margin-top: 60px;display: flex;flex-wrap: nowrap;flex-direction: column;align-items: center;}</style>
功能三:封装一个组件,自动引入所有的svg图片
到这一步我们的svg就算是配置成功,但是项目中不可能只有一个svg图片,我们不可能每次使用svg图片的时候都要引入,我们希望更加丝滑一些,所以我们要封装一个组件并且自动引入所有的svg图片
我们希望用的时候,传入一个名字就可以
<Svgs name="ty"></Svgs>
新建Svg.vue
<template><div><svg><use :xlink:href="className"></use></svg></div></template><script>export default {props: {name: {type: String,required: true,},},computed: {className() {return `#icon-${this.name}`;},},};</script>
在icons文件夹中新建index.js
const req = require.context ('./svg', false, /\.svg$/);//这是webpack里面的方法,接收一个文件夹路径,接受一个布尔值是否递归遍历,接收一个正则,匹配这个文件,返回的req就是一个函数,可以自己输出看一下req.keys ().map (req);
main.js中引入
import Vue from 'vue';import App from './App.vue';import '@/icons/index.js';Vue.config.productionTip = false;new Vue ({render: h => h (App),}).$mount ('#app');
App.vue中使用这个组件
<template><div id="app"><Svgs name="ty"></Svgs></div></template><script>import Svgs from "comp/Svg.vue";export default {components: {Svgs,},name: "App",};</script><style>#app {font-family: Avenir, Helvetica, Arial, sans-serif;-webkit-font-smoothing: antialiased;-moz-osx-font-smoothing: grayscale;text-align: center;color: #2c3e50;margin-top: 60px;display: flex;flex-wrap: nowrap;flex-direction: column;align-items: center;}</style>
图片成功显示,配置成功

若有收获,就点个赞吧
0 人点赞
