LNMP:
L: Linux
N: Nginx
M: MariaDB(MySql)
P: PHP
再加上数据库管理工具“phpMyAdmin”
Nginx
安装nginx
sudo apt install nginx
启动nginx服务
service nginx restart
MariaDB(MySql)
安装MariaDB
apt update apt install mariadb-server
安装完成,MariaDB 服务将会自动启动
查看服务是否已经启动
systemctl status mariadb
MariaDB 服务器有一个脚本叫做mysql_secure_installation,它允许你可以很容易提高数据库服务器安全。
设置root密码和其他安全选项
mysql_secure_installation
Set root password? [Y/n] y Remove anonymous users? [Y/n] y Disallow root login remotely? [Y/n] y Remove test database and access to it? [Y/n] n Reload privilege tables now? [Y/n] y
查看用户
select user(); use mysql; select user,host,password from user;
查看权限
show grants for root@localhost;
创建用户
create user ‘admin’@’%’ identified by ‘123456’;
删除用户
DROP USER ‘username’@’host’;
用户权限
GRANT privileges ON databasename.tablename TO ‘username’@’host’;
用以上命令授权的用户不能给其它用户授权,如果想让该用户可以授权,用以下命令
GRANT privileges ON databasename.tablename TO ‘username’@’host’ WITH GRANT OPTION;
PHP
添加PHP源
sudo add-apt-repository ppa:ondrej/php sudo apt update sudo apt upgrade
安装php
apt install php php-fpm php-mysql php-common php-curl php-cli php-mcrypt php-mbstring
启动php
service php7.0-fpm start service php7.0-fpm status
配置 nginx 服务器
cd /etc/nginx/site-avaliabel vim default
-- 配置 www 目录root /home/service_http/nginx;-- 新加 index.php# Add index.php to the list if you are using PHPindex index.html index.htm index.nginx-debian.html index.php;-- 打开注释-- location ~ \.php$-- include snippets/fastcgi-php.conf;-- fastcgi_pass unix:/var/run/php/php7.0-fpm.sock; location ~ \.php$-- (要和 /etc/php/7.0/fpm/pool.d 中的 www.conf 中的 listen = /run/php/php7.0-fpm.sock 一致)# pass PHP scripts to FastCGI server#location ~ \.php$ {include snippets/fastcgi-php.conf;# With php-fpm (or other unix sockets):fastcgi_pass unix:/run/php/php8.0-fpm.sock;# # With php-cgi (or other tcp sockets):# fastcgi_pass 127.0.0.1:9000;}
修改配置文件后,需要重新编译配置文件,检查是否配置成功,然后重启 nginx
nginx -t service nginx restart
home中新建文件夹service_http,在service_http中新建文件夹nginx,将index.nginx-debian.html复制到nginx文件夹中
cd cd .. mkdir service_http cd service_http mkdir nginx cp /var/www/html/index.nginx-debian.html nginx/
浏览器中输入服务器IP地址 http://192.168.2.31/ ,看到如下页面,说明nginx配置成功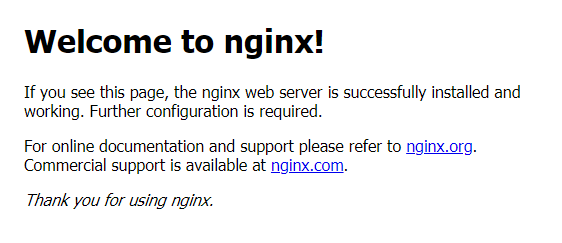
在/home/service_http/nginx文件夹中新建文件index.php
cd cd /home/service_http/nginx touch index.php
在index.php中写入如下代码
<?php

phpinfo();

?>
浏览器输入网址 http://192.168.2.31/index.php ,看到如下页面,说明php安装配置成功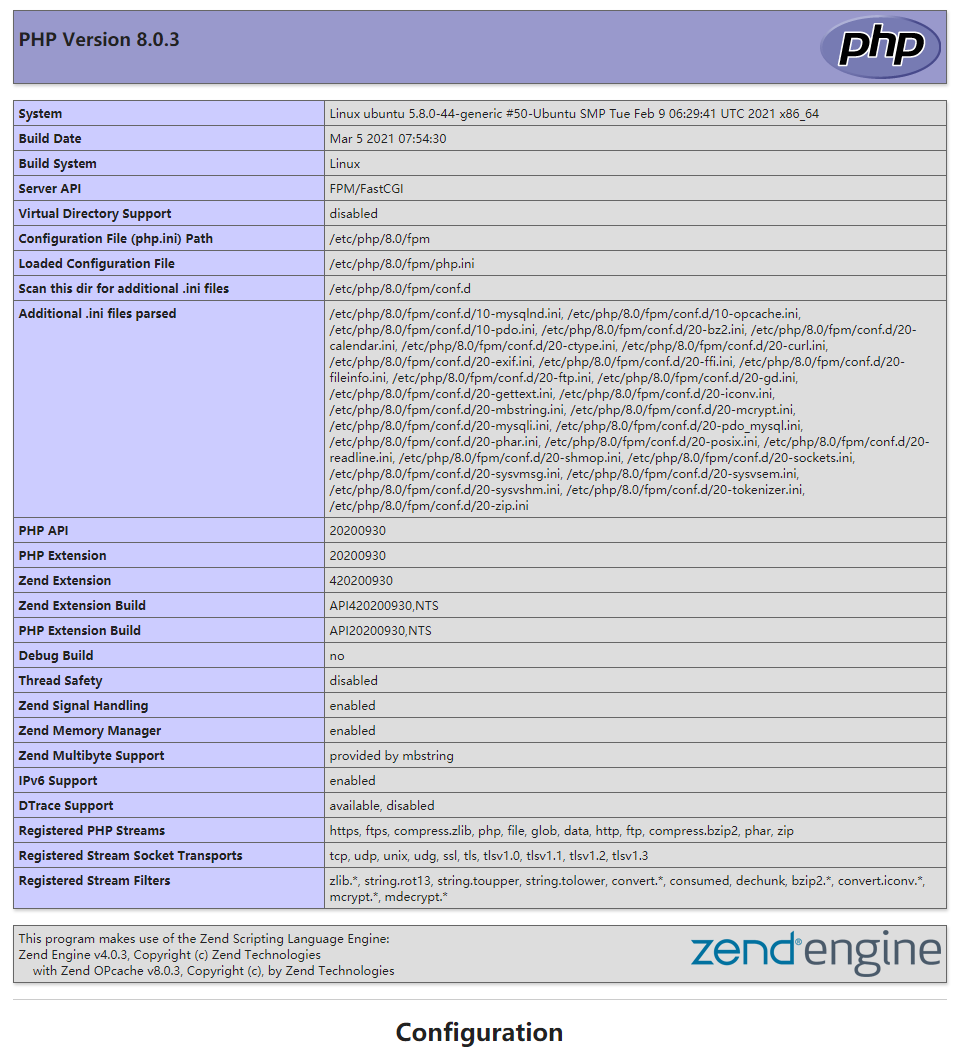
phpMyAdmin
安装phpMyAdmin
apt install phpmyadmin
安装程序将要求您选择应自动配置为运行phpMyAdmin的Web服务器。没有选择Nginx的选项,按TAB键选择“确定”,然后按Enter。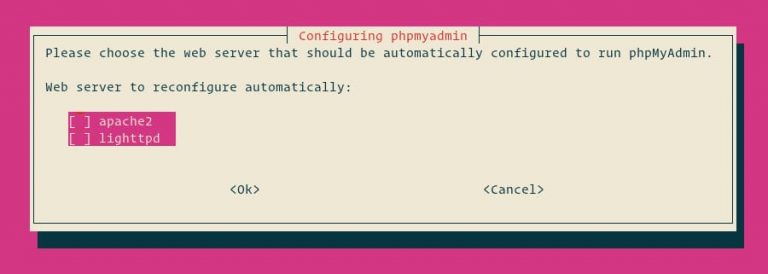
安装程序将询问您是否要使用dbconfig-common工具来设置数据库。选择是,然后按Enter。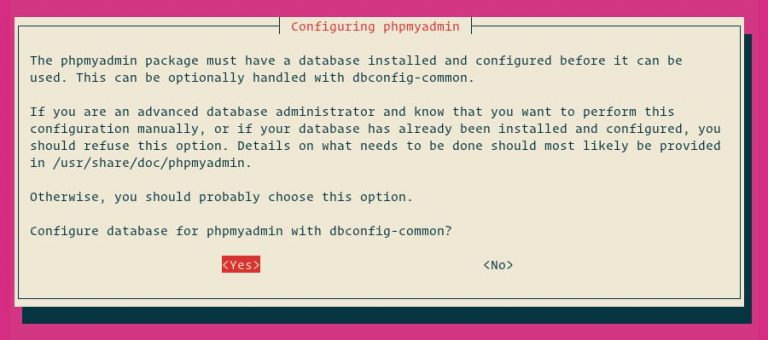
输入phpMyAdmin的密码以在数据库中注册,选择OK,然后按Enter。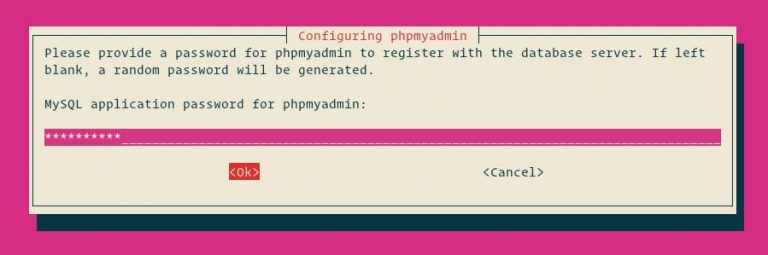
系统将提示您确认密码,输入相同的密码,选择确定,然后按Enter。
从phpMyAdmin目录创建一个符号链接:
ln -s /usr/share/phpmyadmin /home/service_http/nginx/phpmyadmin
浏览器输入网址 http://192.168.2.31/phpmyadmin/index.php 看到如下界面,说明phpMyAdmin安装成功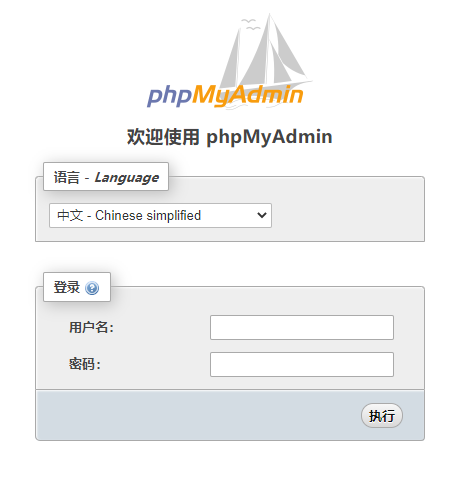

若有收获,就点个赞吧
0 人点赞
