
为了方便接下来的学习,我们创建一个新的子应用 opt
python manage.py startapp opt
因为接下来的功能中需要使用到登陆功能,所以我们使用django内置admin站点并创建一个管理员.
python3 manage.py makemigrationspython3 manage.py migratepython3 manage.py createsuperuser

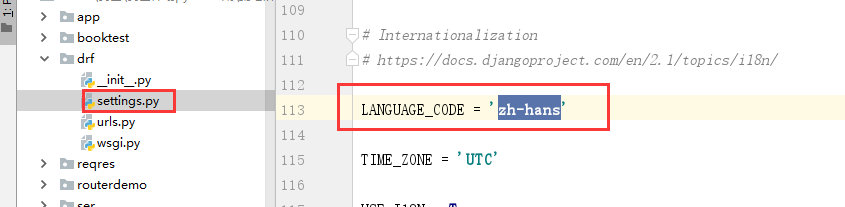
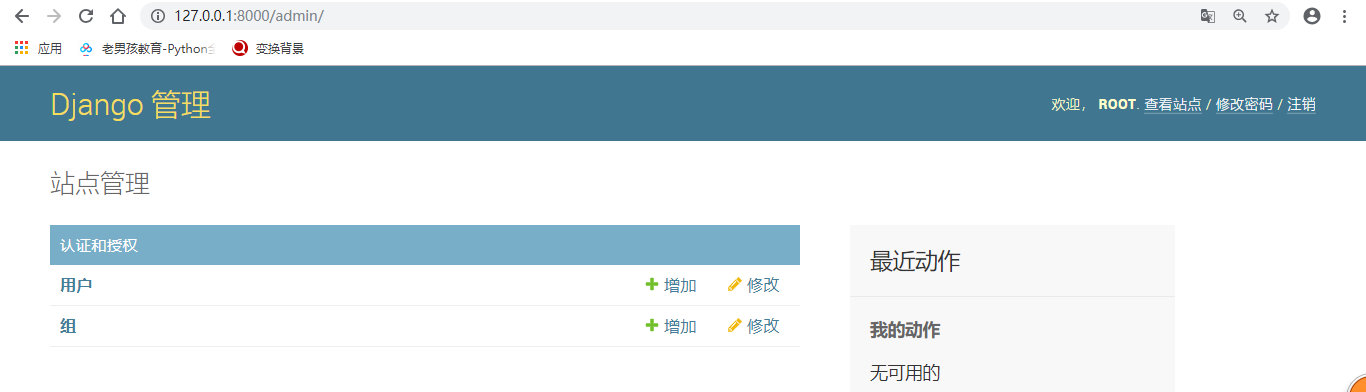
创建管理员以后,访问admin站点,先修改站点的语言配置
settings.py
LANGUAGE_CODE = 'zh-hans' # 中文TIME_ZONE = 'Asia/Shanghai' # 时区是亚洲上海USE_I18N = True # 国际化USE_L10N = True # 本地化USE_TZ = True # 数据库是否使用TIME_ZONE,True表示使用上海的时区,False表示不使用,使用UTC时间,然后转成上海,会差8个小时
一 认证Authentication
1.1 自定义认证方案
1.1.1 编写models
# models.pyclass User(models.Model):username=models.CharField(max_length=32)password=models.CharField(max_length=32)user_type=models.IntegerField(choices=((1,'超级用户'),(2,'普通用户'),(3,'二笔用户')))class UserToken(models.Model):user=models.OneToOneField(to='User')token=models.CharField(max_length=64)
1.1.2 新建认证类
from rest_framework.authentication import BaseAuthenticationclass TokenAuth():def authenticate(self, request):token = request.GET.get('token')token_obj = models.UserToken.objects.filter(token=token).first()if token_obj:returnelse:raise AuthenticationFailed('认证失败')def authenticate_header(self,request):pass
1.1.3 编写视图
def get_random(name):import hashlibimport timemd=hashlib.md5()md.update(bytes(str(time.time()),encoding='utf-8'))md.update(bytes(name,encoding='utf-8'))return md.hexdigest()class Login(APIView):def post(self,reuquest):back_msg={'status':1001,'msg':None}try:name=reuquest.data.get('name')pwd=reuquest.data.get('pwd')user=models.User.objects.filter(username=name,password=pwd).first()if user:token=get_random(name)models.UserToken.objects.update_or_create(user=user,defaults={'token':token})back_msg['status']='1000'back_msg['msg']='登录成功'back_msg['token']=tokenelse:back_msg['msg'] = '用户名或密码错误'except Exception as e:back_msg['msg']=str(e)return Response(back_msg)class Course(APIView):authentication_classes = [TokenAuth, ]def get(self, request):return HttpResponse('get')def post(self, request):return HttpResponse('post')
1.1.4 全局使用
REST_FRAMEWORK={"DEFAULT_AUTHENTICATION_CLASSES":["app01.service.auth.Authentication",]}
1.1.5 局部使用
#局部使用,只需要在视图类里加入:authentication_classes = [TokenAuth, ]
1.2 内置认证方案(需要配合权限使用)
可以在配置文件中配置全局默认的认证方案
REST_FRAMEWORK = {'DEFAULT_AUTHENTICATION_CLASSES': ('rest_framework.authentication.SessionAuthentication', # session认证'rest_framework.authentication.BasicAuthentication', # 基本认证)}
也可以在每个视图中通过设置authentication_classess属性来设置
from rest_framework.authentication import SessionAuthentication, BasicAuthenticationfrom rest_framework.views import APIViewclass ExampleView(APIView):# 类属性authentication_classes = [SessionAuthentication, BasicAuthentication]...
认证失败会有两种可能的返回值:
- 401 Unauthorized 未认证
-
二 权限Permissions
权限控制可以限制用户对于视图的访问和对于具体数据对象的访问。
在执行视图的dispatch()方法前,会先进行视图访问权限的判断
- 在通过get_object()获取具体对象时,会进行模型对象访问权限的判断
2.1 自定义权限
2.1.1 编写权限类
# 限制只有超级用户能访问from rest_framework.permissions import BasePermissionclass UserPermission(BasePermission):message = '不是超级用户,查看不了'def has_permission(self, request, view):# user_type = request.user.get_user_type_display()# if user_type == '超级用户':# 权限在认证之后,所以能取到useruser_type = request.user.user_typeprint(user_type)if user_type == 1:return Trueelse:return False
2.1.2 全局使用
REST_FRAMEWORK={"DEFAULT_AUTHENTICATION_CLASSES":["app01.service.auth.Authentication",],"DEFAULT_PERMISSION_CLASSES":["app01.service.permissions.SVIPPermission",]}
2.1.3 局部使用
# 局部使用只需要在视图类里加入:permission_classes = [UserPermission,]
2.1.4 说明
如需自定义权限,需继承rest_framework.permissions.BasePermission父类,并实现以下两个任何一个方法或全部- `.has_permission(self, request, view)`是否可以访问视图, view表示当前视图对象- `.has_object_permission(self, request, view, obj)`是否可以访问数据对象, view表示当前视图, obj为数据对象
2.2 内置权限
2.2.1 内置权限类
from rest_framework.permissions import AllowAny,IsAuthenticated,IsAdminUser,IsAuthenticatedOrReadOnly- AllowAny 允许所有用户- IsAuthenticated 仅通过认证的用户- IsAdminUser 仅管理员用户- IsAuthenticatedOrReadOnly 已经登陆认证的用户可以对数据进行增删改操作,没有登陆认证的只能查看数据。
2.2.2 全局使用
可以在配置文件中全局设置默认的权限管理类,如
REST_FRAMEWORK = {....'DEFAULT_PERMISSION_CLASSES': ('rest_framework.permissions.IsAuthenticated',)}
如果未指明,则采用如下默认配置
'DEFAULT_PERMISSION_CLASSES': ('rest_framework.permissions.AllowAny',)
2.2.3 局部使用
也可以在具体的视图中通过permission_classes属性来设置,如
from rest_framework.permissions import IsAuthenticatedfrom rest_framework.views import APIViewclass ExampleView(APIView):permission_classes = (IsAuthenticated,)...
2.2.4 实际操作
# 创建超级用户,登陆到admin,创建普通用户(注意设置职员状态,也就是能登陆)# 全局配置IsAuthenticated# setting.py'DEFAULT_PERMISSION_CLASSES': ('rest_framework.permissions.IsAuthenticated',)# urls.pypath('test/', views.TestView.as_view()),# views.pyclass TestView(APIView):def get(self,request):return Response({'msg':'个人中心'})# 登陆到admin后台后,直接访问可以,如果没登陆,不能访问##注意:如果全局配置了rest_framework.permissions.IsAdminUser# 就只有管理员能访问,普通用户访问不了
三 限流Throttling
可以对接口访问的频次进行限制,以减轻服务器压力。
一般用于付费购买次数,投票等场景使用.
3.1 自定义频率类
3.1.1 编写频率类
# 自定义的逻辑#(1)取出访问者ip#(2)判断当前ip不在访问字典里,添加进去,并且直接返回True,表示第一次访问,在字典里,继续往下走#(3)循环判断当前ip的列表,有值,并且当前时间减去列表的最后一个时间大于60s,把这种数据pop掉,这样列表中只有60s以内的访问时间,#(4)判断,当列表小于3,说明一分钟以内访问不足三次,把当前时间插入到列表第一个位置,返回True,顺利通过#(5)当大于等于3,说明一分钟内访问超过三次,返回False验证失败class MyThrottles():VISIT_RECORD = {}def __init__(self):self.history=Nonedef allow_request(self,request, view):#(1)取出访问者ip# print(request.META)ip=request.META.get('REMOTE_ADDR')import timectime=time.time()# (2)判断当前ip不在访问字典里,添加进去,并且直接返回True,表示第一次访问if ip not in self.VISIT_RECORD:self.VISIT_RECORD[ip]=[ctime,]return Trueself.history=self.VISIT_RECORD.get(ip)# (3)循环判断当前ip的列表,有值,并且当前时间减去列表的最后一个时间大于60s,把这种数据pop掉,这样列表中只有60s以内的访问时间,while self.history and ctime-self.history[-1]>60:self.history.pop()# (4)判断,当列表小于3,说明一分钟以内访问不足三次,把当前时间插入到列表第一个位置,返回True,顺利通过# (5)当大于等于3,说明一分钟内访问超过三次,返回False验证失败if len(self.history)<3:self.history.insert(0,ctime)return Trueelse:return Falsedef wait(self):import timectime=time.time()return 60-(ctime-self.history[-1])
3.1.2 全局使用
REST_FRAMEWORK = {'DEFAULT_THROTTLE_CLASSES':['app01.utils.MyThrottles',],}
3.1.3 局部使用
#在视图类里使用throttle_classes = [MyThrottles,]
3.2 内置频率类
3.2.1 根据用户ip限制
#写一个类,继承自SimpleRateThrottle,(根据ip限制)from rest_framework.throttling import SimpleRateThrottleclass VisitThrottle(SimpleRateThrottle):scope = 'luffy'def get_cache_key(self, request, view):return self.get_ident(request)#在setting里配置:(一分钟访问三次)REST_FRAMEWORK = {'DEFAULT_THROTTLE_RATES':{'luffy':'3/m' # key要跟类中的scop对应}}# 可以全局使用,局部使用
了解:错误信息中文显示
class Course(APIView):authentication_classes = [TokenAuth, ]permission_classes = [UserPermission, ]throttle_classes = [MyThrottles,]def get(self, request):return HttpResponse('get')def post(self, request):return HttpResponse('post')def throttled(self, request, wait):from rest_framework.exceptions import Throttledclass MyThrottled(Throttled):default_detail = '傻逼啊'extra_detail_singular = '还有 {wait} second.'extra_detail_plural = '出了 {wait} seconds.'raise MyThrottled(wait)
3.2.2 限制匿名用户每分钟访问3次
REST_FRAMEWORK = {'DEFAULT_THROTTLE_CLASSES': ('rest_framework.throttling.AnonRateThrottle',),'DEFAULT_THROTTLE_RATES': {'anon': '3/m',}}# 使用 `second`, `minute`, `hour` 或`day`来指明周期。# 可以全局使用,局部使用
3.2.3 限制登陆用户每分钟访问10次
REST_FRAMEWORK = {'DEFAULT_THROTTLE_CLASSES': ('rest_framework.throttling.UserRateThrottle'),'DEFAULT_THROTTLE_RATES': {'user': '10/m'}}# 可以全局使用,局部使用
3.2.4 其他
1) AnonRateThrottle
限制所有匿名未认证用户,使用IP区分用户。
使用DEFAULT_THROTTLE_RATES['anon'] 来设置频次
2)UserRateThrottle
限制认证用户,使用User id 来区分。
使用DEFAULT_THROTTLE_RATES['user'] 来设置频次
3)ScopedRateThrottle
限制用户对于每个视图的访问频次,使用ip或user id。
例如:
class ContactListView(APIView):throttle_scope = 'contacts'...class ContactDetailView(APIView):throttle_scope = 'contacts'...class UploadView(APIView):throttle_scope = 'uploads'...REST_FRAMEWORK = {'DEFAULT_THROTTLE_CLASSES': ('rest_framework.throttling.ScopedRateThrottle',),'DEFAULT_THROTTLE_RATES': {'contacts': '1000/day','uploads': '20/day'}}
实例
全局配置中设置访问频率
'DEFAULT_THROTTLE_RATES': {'anon': '3/minute','user': '10/minute'}
from rest_framework.authentication import SessionAuthenticationfrom rest_framework.permissions import IsAuthenticatedfrom rest_framework.generics import RetrieveAPIViewfrom rest_framework.throttling import UserRateThrottleclass StudentAPIView(RetrieveAPIView):queryset = Student.objects.all()serializer_class = StudentSerializerauthentication_classes = [SessionAuthentication]permission_classes = [IsAuthenticated]throttle_classes = (UserRateThrottle,)

若有收获,就点个赞吧
0 人点赞
