JDBC
1、JDBC是什么?
Java DataBase Connectivity(Java语言连接数据库)
2、JDBC的本质是什么?
JDBC是SUN公司制定的一套接口(interface)
java.sql.*; (这个软件包下有很多接口。)
接口都有调用者和实现者。
面向接口调用、面向接口写实现类,这都属于面向接口编程。
为什么要面向接口编程?
解耦合:降低程序的耦合度,提高程序的扩展力。
多态机制就是非常典型的:面向抽象编程。(不要面向具体编程)
建议:
Animal a = new Cat();
Animal a = new Dog();
// 喂养的方法
public void feed(Animal a){ // 面向父类型编程。
}
不建议:
Dog d = new Dog();
Cat c = new Cat();
思考:为什么SUN制定一套JDBC接口呢?
因为每一个数据库的底层实现原理都不一样。
Oracle数据库有自己的原理。
MySQL数据库也有自己的原理。
MS SqlServer数据库也有自己的原理。
….
每一个数据库产品都有自己独特的实现原理。
JDBC的本质到底是什么?
一套接口。
3、JDBC开发前的准备工作,先从官网下载对应的驱动jar包,然后将其配置到环境变量classpath当中。
classpath=.;D:\course\06-JDBC\resources\MySql Connector Java 5.1.23\mysql-connector-java-5.1.23-bin.jar
以上的配置是针对于文本编辑器的方式开发,使用IDEA工具的时候,不需要配置以上的环境变量。
IDEA有自己的配置方式。
4、JDBC编程六步(需要背会)
第一步:注册驱动(作用:告诉Java程序,即将要连接的是哪个品牌的数据库)
第二步:获取连接(表示JVM的进程和数据库进程之间的通道打开了,这属于进程之间的通信,重量级的,使用完之后一定要关闭通道。)
第三步:获取数据库操作对象(专门执行sql语句的对象)
第四步:执行SQL语句(DQL DML….)
第五步:处理查询结果集(只有当第四步执行的是select语句的时候,才有这第五步处理查询结果集。)
第六步:释放资源(使用完资源之后一定要关闭资源。Java和数据库属于进程间的通信,开启之后一定要关闭。)
package com.zxx.jdbc;import java.sql.Connection;import java.sql.DriverManager;import java.sql.SQLException;import java.sql.Statement;import java.util.ResourceBundle;public class JDBCTest01 {public static void main(String[] args) {Connection connection=null;Statement statement= null;//使用资源绑定器绑定属性配置文件ResourceBundle bundle =ResourceBundle.getBundle("jdbc");String url =bundle.getString("url");String user=bundle.getString("user");String password=bundle.getString("password");try {//1.类加载执行静态代码块,获取数据库驱动Class.forName("com.mysql.jdbc.Driver");//2.获取数据库连接connection= DriverManager.getConnection(url,user,password);//3.获取数据库操作对象statement = connection.createStatement();//4.执行sqlString sql="delete from emp where empno=7902 ";int i = statement.executeUpdate(sql);System.out.println(i);} catch (ClassNotFoundException e) {e.printStackTrace();} catch (SQLException e) {e.printStackTrace();}finally {//5.关闭流if (statement!=null){try {statement.close();} catch (SQLException e) {e.printStackTrace();}}if (connection!=null){try {connection.close();} catch (SQLException e) {e.printStackTrace();}}}}}
//jdbc.propertiesurl=jdbc:mysql://localhost:3306/bjpowernodeuser=rootpassword=root
package com.zxx.jdbc;import java.sql.*;import java.util.ResourceBundle;public class JDBCTest01 {public static void main(String[] args) {Connection connection=null;Statement statement= null;//使用资源绑定器绑定属性配置文件ResourceBundle bundle =ResourceBundle.getBundle("jdbc");String url =bundle.getString("url");String user=bundle.getString("user");String password=bundle.getString("password");try {Class.forName("com.mysql.jdbc.Driver");connection= DriverManager.getConnection(url,user,password);statement = connection.createStatement();String sql="select * from dept";ResultSet resultSet = statement.executeQuery(sql);//遍历结果集while (resultSet.next()){//取第一个元素的数据int deptno1= resultSet.getInt(1);//取列名为dept的元素,更加精准,推荐使用int deptno2= resultSet.getInt("deptno");System.out.println(deptno1);System.out.println(deptno2);}} catch (ClassNotFoundException e) {e.printStackTrace();} catch (SQLException e) {e.printStackTrace();}finally {if (statement!=null){try {statement.close();} catch (SQLException e) {e.printStackTrace();}}if (connection!=null){try {connection.close();} catch (SQLException e) {e.printStackTrace();}}}}}
使用idea创建数据库驱动
1.首先先创建一个空的project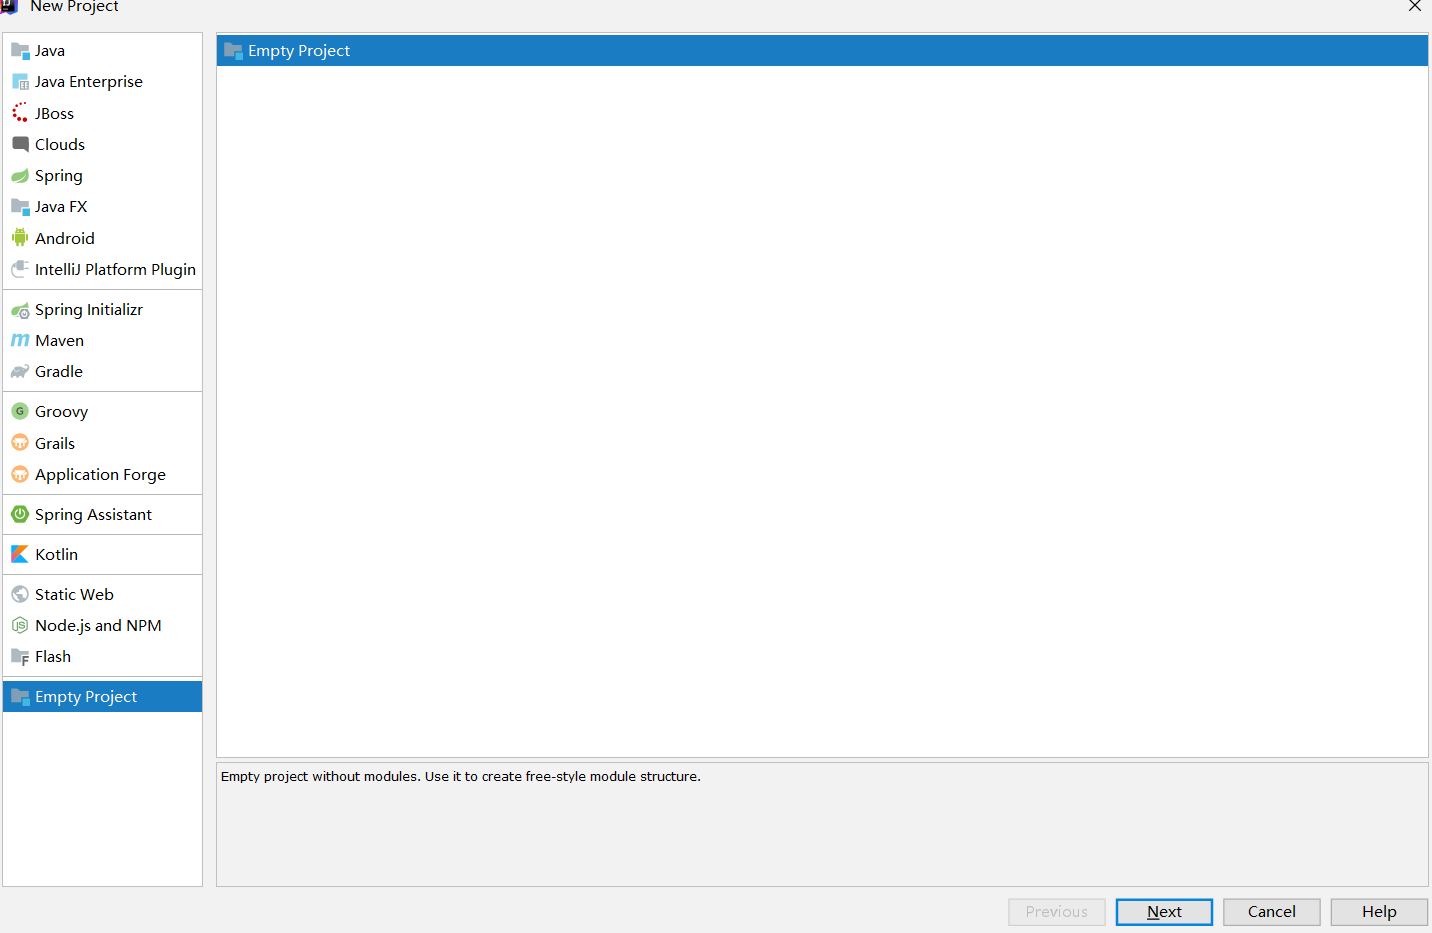
2.创建一个空的java模块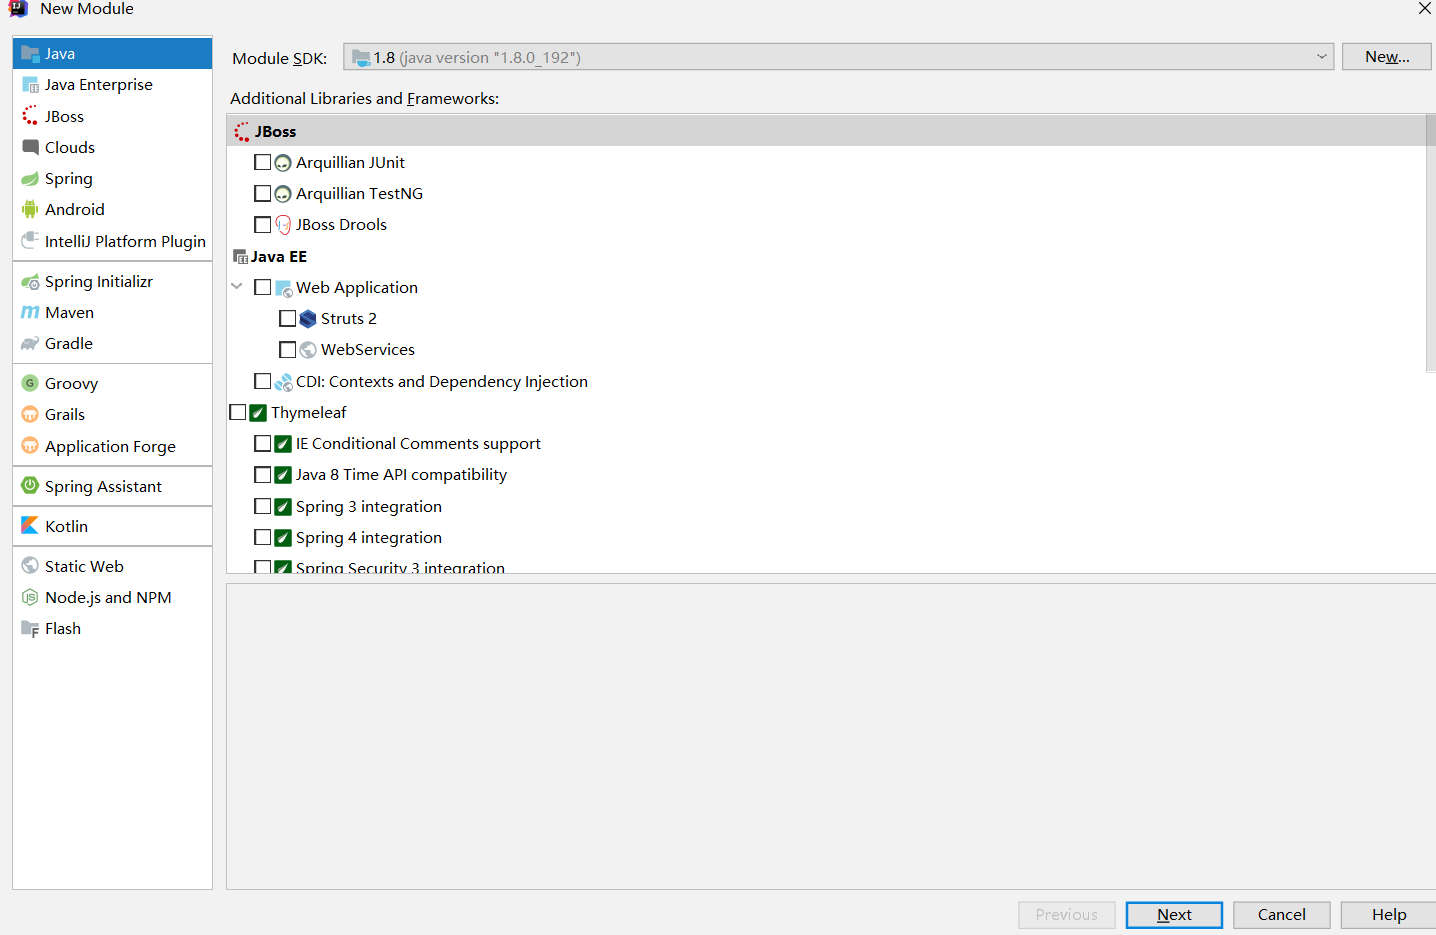
3.选择以下选项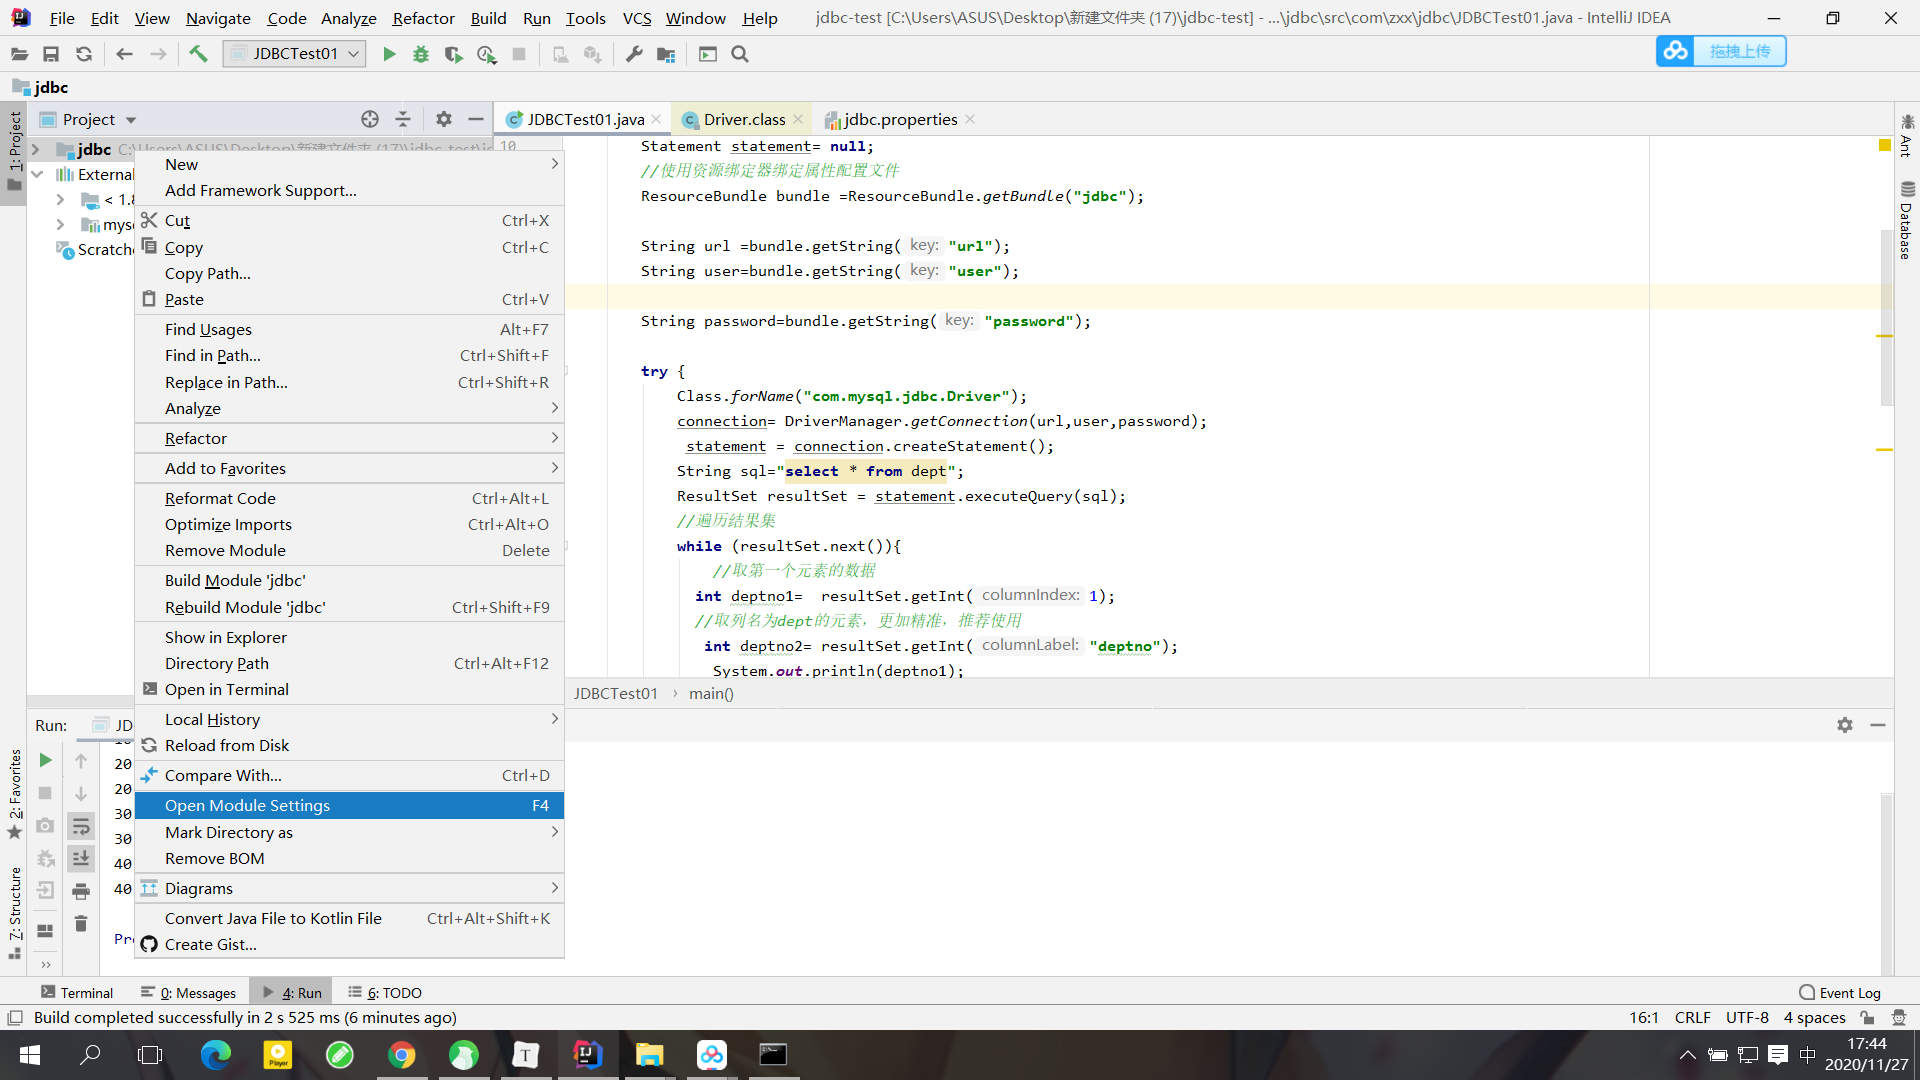
4.导入mysql驱动的jar包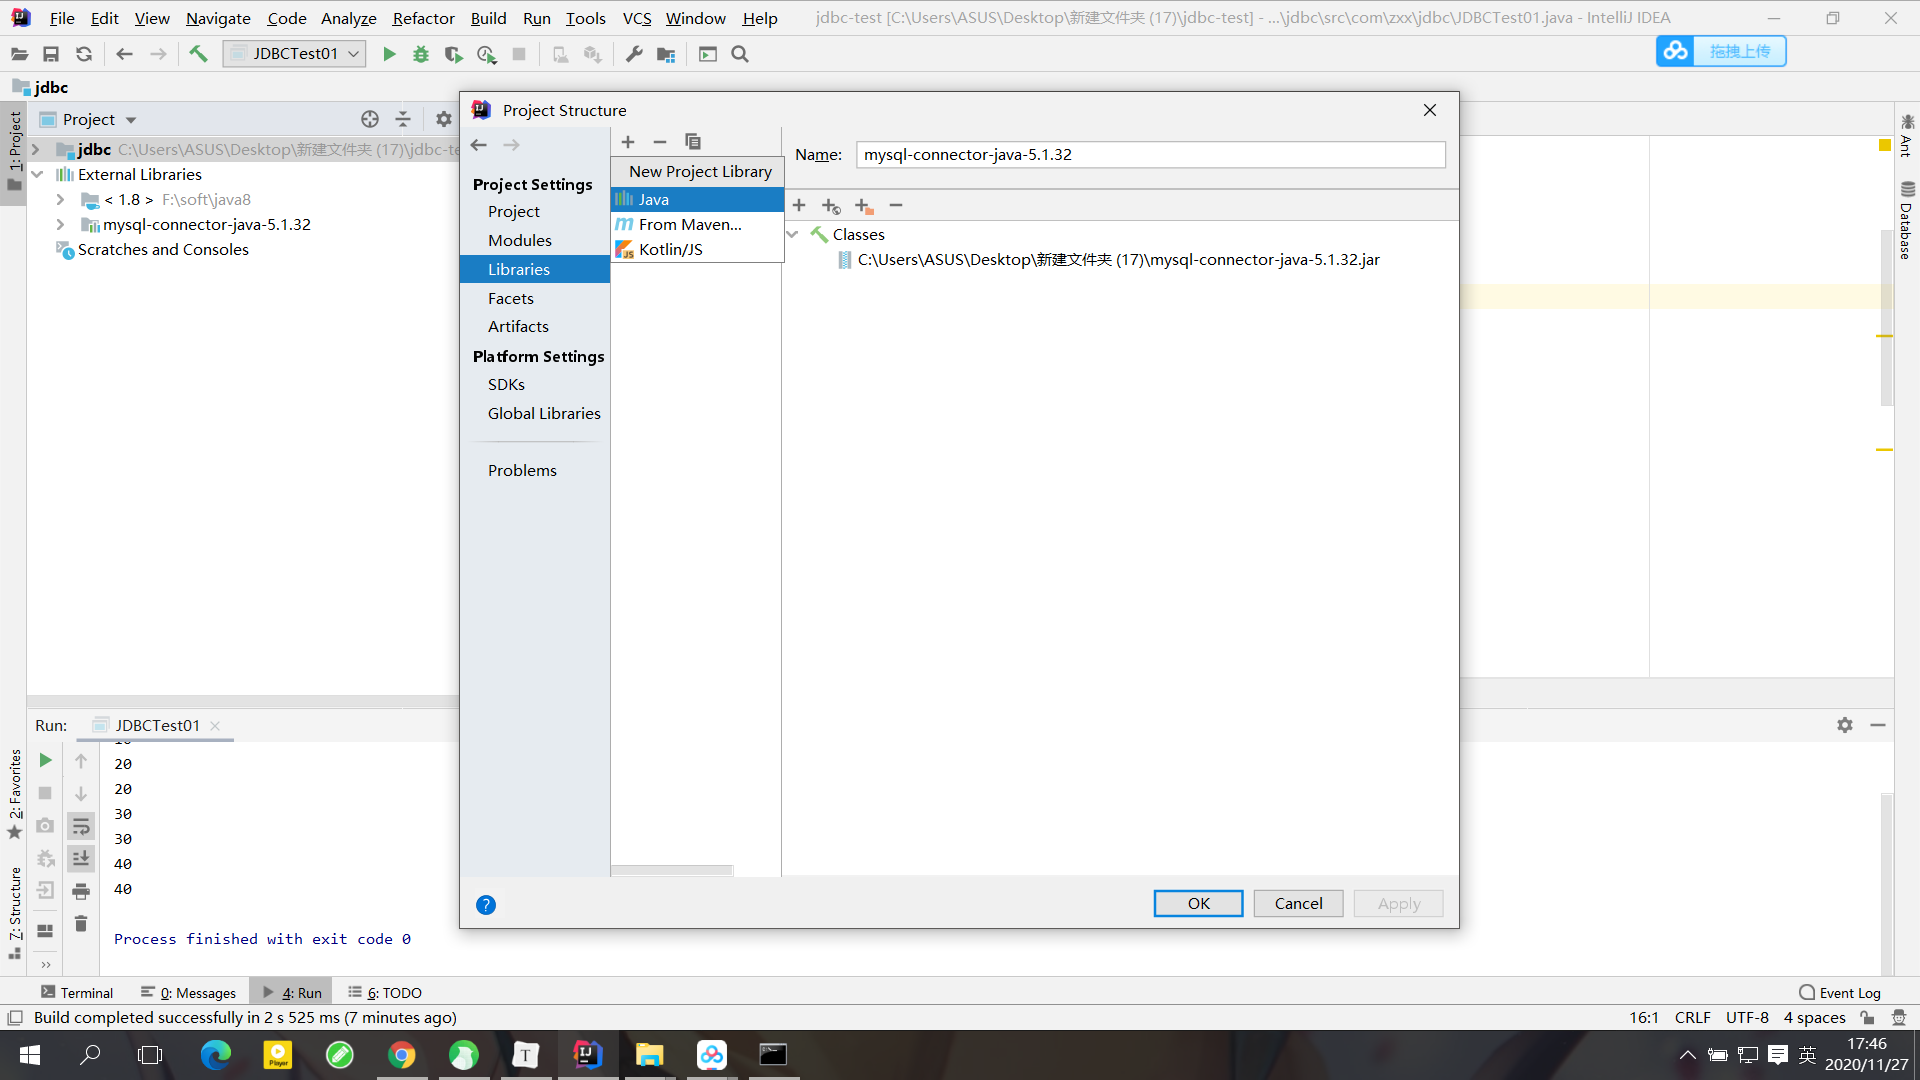
用statement时会引发sql注入的问题
package com.zxx.jdbc;import java.sql.*;import java.util.HashMap;import java.util.Map;import java.util.Scanner;public class JDBCTest02 {public static void main(String[] args) {//初始化界面Map<String,String> userLoginInfo=initUI();//验证用户名和密码boolean loginSuccess= login(userLoginInfo);//输出结果System.out.println(loginSuccess ? "登录成功":"登录失败");}/**** @param userLoginInfo 用户登录* @return true 登录成功,false 登录失败*/private static boolean login(Map<String, String> userLoginInfo) {//JDBC代码Connection connection=null;Statement statement=null;ResultSet resultSet=null;boolean state=false;//1.获取数据库驱动try {Class.forName("com.mysql.jdbc.Driver");//2.获取数据库连接connection= DriverManager.getConnection("jdbc:mysql://localhost:3306/bjpowernode","root","root");//3.创建数据库操作对象statement =connection.createStatement();//4.执行sql//在输入密码fs' or '1'='1会引发sql注入的问题String sql ="select * from t_user where lgoinName='"+userLoginInfo.get("loginName")+"' and loginPassword='"+userLoginInfo.get("loginPassword")+"'";resultSet = statement.executeQuery(sql);//5.处理结果集if (resultSet.next()){state=true;}} catch (ClassNotFoundException e) {e.printStackTrace();} catch (SQLException e) {e.printStackTrace();}finally {//6.关闭流if (resultSet!=null){try {resultSet.close();} catch (SQLException e) {e.printStackTrace();}}if (statement!=null){try {statement.close();} catch (SQLException e) {e.printStackTrace();}}if (connection!=null){try {connection.close();} catch (SQLException e) {e.printStackTrace();}}}return state;}/*** 初始化用户界面* @return 用户输入的用户名和密码等登录信息*/private static Map<String, String> initUI() {Scanner scanner=new Scanner(System.in);System.out.println("用户名");String loginName=scanner.nextLine();System.out.println("密码");String loginPassword=scanner.nextLine();Map<String,String> userLoginInfo=new HashMap<>();userLoginInfo.put("loginName",loginName);userLoginInfo.put("loginPassword",loginPassword);return userLoginInfo;}}
解决sql注入
package com.zxx.jdbc;import java.sql.*;import java.util.HashMap;import java.util.Map;import java.util.Scanner;public class JDBCTest02 {public static void main(String[] args) {//初始化界面Map<String,String> userLoginInfo=initUI();//验证用户名和密码boolean loginSuccess= login(userLoginInfo);//输出结果System.out.println(loginSuccess ? "登录成功":"登录失败");}/**** @param userLoginInfo 用户登录* @return true 登录成功,false 登录失败*/private static boolean login(Map<String, String> userLoginInfo) {//JDBC代码Connection connection=null;PreparedStatement statement=null;ResultSet resultSet=null;boolean state=false;//1.获取数据库驱动try {Class.forName("com.mysql.jdbc.Driver");//2.获取数据库连接connection= DriverManager.getConnection("jdbc:mysql://localhost:3306/bjpowernode","root","root");//3.创建预编译的数据库操作对象//在编译前定好sql语句的格式String sql ="select * from t_user where lgoinName=? and loginPassword=?";//程序执行到此处,会发送sql语句框子给DBMS 然后DBMS进行sql语句的预先编译statement=connection.prepareStatement(sql);//给占位符?传值 第一个问号下标是1 第二个问号下标是2statement.setString(1,userLoginInfo.get("loginName"));statement.setString(2,userLoginInfo.get("loginPassword"));//4.执行sqlresultSet = statement.executeQuery();//5.处理结果集if (resultSet.next()){state=true;}} catch (ClassNotFoundException e) {e.printStackTrace();} catch (SQLException e) {e.printStackTrace();}finally {//6.关闭流if (resultSet!=null){try {resultSet.close();} catch (SQLException e) {e.printStackTrace();}}if (statement!=null){try {statement.close();} catch (SQLException e) {e.printStackTrace();}}if (connection!=null){try {connection.close();} catch (SQLException e) {e.printStackTrace();}}}return state;}/*** 初始化用户界面* @return 用户输入的用户名和密码等登录信息*/private static Map<String, String> initUI() {Scanner scanner=new Scanner(System.in);System.out.println("用户名");String loginName=scanner.nextLine();System.out.println("密码");String loginPassword=scanner.nextLine();Map<String,String> userLoginInfo=new HashMap<>();userLoginInfo.put("loginName",loginName);userLoginInfo.put("loginPassword",loginPassword);return userLoginInfo;}}
解决sql注入的关键:用户提供的信息中含有sql关键字,但是这些关键字并没有参与编译 不起作用
statement和preparestatement的区别
前者存在sql注入
前者编译一次执行一次 后者编译一次 可执行多次 效率更高
后者会在编译阶段进行安全检查
当业务要求sql注入时才会使用前者
jdbc的事务是自动提交的 每执行一条sql语句 就会提交一次 而具体业务有多条sql
重点三行代码
conn.setAutoCommit(false) 关闭自动提交 改为手动
conn.commit()提交
conn.rollback()回滚

若有收获,就点个赞吧
0 人点赞
