create-react-app
使用 create-react-app 新建一个 typescript 项目
npx create-react-app ts-with-react --typescript// 常规新建react项目后添加typescript支撑
React.FunctionComponent
react 官方提供的一个类型,用来写 tsx 中的函数组件
- 自带一个默认的泛型接口 ```typescript interface IHelloProps { message: string }
const HomePage: React.FunctionComponent
可以通过这个接口自己定义传入参数的类型- 通过这个类型生成的函数组件自带一些静态的属性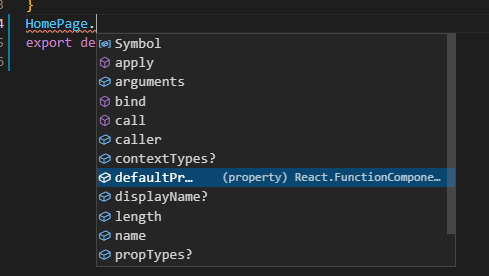- 可以简写成类型别名```typescriptconst HomePage: React.FC<IHelloProps> = (props) => {return (<div>{props.message}</div>)}export default HomePage
自定义hook
- 将组件的逻辑提取到可服用的函数中
例子: 抽取一个自定义的Hook,实现鼠标移动获取当前鼠标位置的坐标
import React ,{useState, useEffect} from 'react'const useMousePosition = () => {const [position, setPosition] = useState({x: 0, y:0})useEffect(() => {const updateMouse = (e: MouseEvent) =>{setPosition({x: e.clientX, y: e.clientY})}document.addEventListener('mousemove', updateMouse)return () =>{document.removeEventListener('mousemove', updateMouse)}}, [])return position}export default useMousePosition
注意,自定义的 hook 文件名必须以 use 开头,如 useMousePosition.ts
- 没有 hook 之前,高阶组件(HOC)是怎么做的
高阶组件就是一个函数,该函数接收一个组件为参数,并且返回一个新组件
使用高阶组件的弊端:
需要添加无需要的节点,代码可读性不高
- 使用自定义 Hook 完成一个加载图片的功能 ```typescript import { useState, useEffect } from “react”; import axios from ‘axios’
const useURLLoader = (url: string, deps: any[] = []) => {
const [data, setData] = useState
useEffect(() => { setLoading(true)
axios.get(url).then(res => {console.log(res, 'res')setData(res.data)setLoading(false)})
}, deps)
return [data, isLoading] } export default useURLLoader
通过自定义的 hook ,我们可以直接在其他需要实现加载图片的地方使用```typescriptconst [data, isLoading] = useURLLoader('https://dog.ceo/api/breeds/image/random', [isUpdate])
对于 useState 的理解
state 并没有监听什么数据的变化,每次渲染中都是相对对独立的,我们看到的更新是因为 state 对应的组件进行了重新渲染,并得到了新的state
useContext
对于 useContext 的复习
在 react 的组件中,状态一层一层的往下传递,如果有一个全局的状态需要在很多组件中使用,那么根组件和当前组件之间的所有组件都需要传递这个状态,useContext 就是为了解决这个问题出现的
context 可以共享对于组件来说是一些全局的属性
- 创建一个控制全局颜色主题的 context ```typescript // 第一步,在根组件中创建 context,定义context 的属性 interface IThemeProps { [key: string]: {color: string, background: string} }
// 主题的类型,以及主题属性 const themes: IThemeProps = { ‘light’: { color: ‘#000’, background: ‘#222’ } } const themes: IThemeProps = { ‘light’: { color: ‘#000’, background: ‘#222’ } }
// 第二步,创建传递属性使用的context,并导出 export const ThemeContext = React.createContext(themes.light)
// 第三步,包裹住需要使用该属性的所有组件的父组件
// 第四步,在需要使用全局属性的地方引用 useContext,并导入创建的context import { ThemeContext } from ‘../../xxx’ const theme = useContext(ThemeContext)
hook规则
- 只允许在最顶层使用 hook
- 只允许在函数组件中使用 hook
组件库
完成一个组件库需要考虑的:
行内样式,定义一个样式对象,直接传入组件
- css in js
- style components
- sass/less
构建色彩体系
- 系统色板 - 基础色板 + 中性色板
- 产品色板 - 品牌色 + 功能体系
图标ICON的解决方案
- 雪碧图
css sprite - fontIcon
- svg
Font-awesome

若有收获,就点个赞吧
0 人点赞
