安装mailx
yum -y install mailx
安装完成后修改配置文件
vi /etc/mail.rc
在配置文件后追加以下内容:
set from=xxxxxx@qq.com
set smtp=smtps://smtp.qq.com:465
set smtp-auth-user=xxxxxx@qq.com
set smtp-auth-password=授权码
set smtp-auth=login
set ssl-verify=ignore
set nss-config-dir=/root/.certs
在QQ邮箱中开启smtp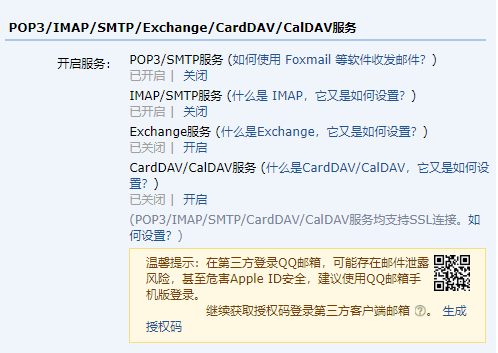
将QQ邮箱的SSL证书保存到本地
mkdir -p /root/.certs/ #创建保存证书的文件夹
echo -n | openssl s_client -connect smtp.qq.com:465 | sed -ne ‘/-BEGIN CERTIFICATE-/,/-END CERTIFICATE-/p’ > ~/.certs/qq.crt
certutil -A -n “GeoTrust SSL CA” -t “C,,” -d ~/.certs -i ~/.certs/qq.crt
certutil -A -n “GeoTrust Global CA” -t “C,,” -d ~/.certs -i ~/.certs/qq.crt
certutil -L -d /root/.certs
防止出现发送邮件警报错误,需要到证书所在目录执行以下命令:
certutil -A -n “GeoTrust SSL CA - G3” -t “Pu,Pu,Pu” -d ./ -i qq.crt
返回提示以下内容即可:
Notice: Trust flag u is set automatically if the private key is present.
测试邮件发送:
echo “message” |mail -s “title” xxxx@qq.com

若有收获,就点个赞吧
0 人点赞
