1、SpringBoot特点
1.1、依赖管理
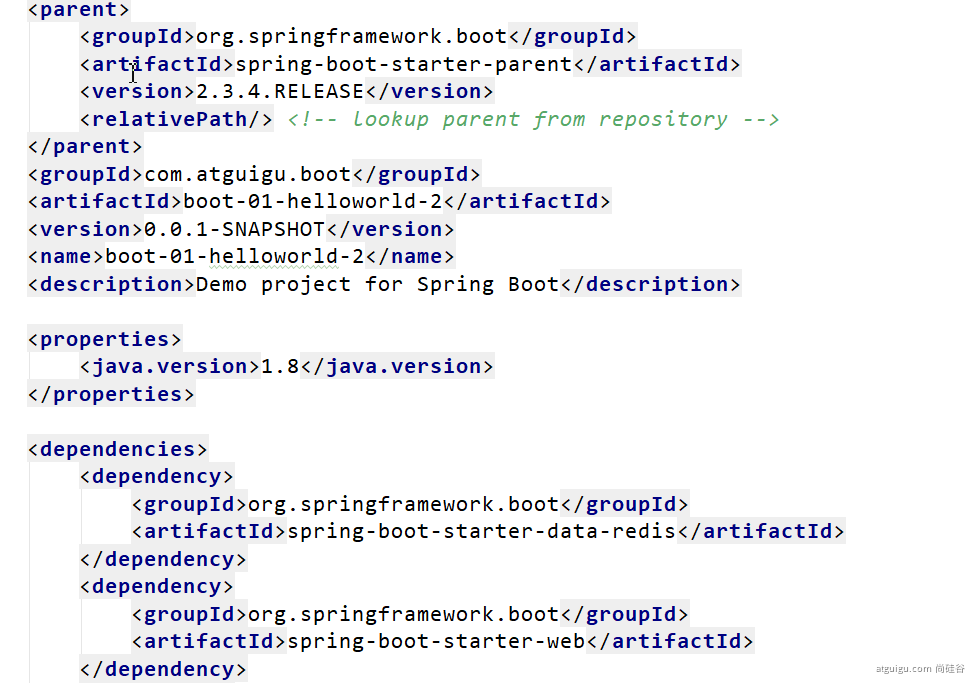
- 父项目做依赖管理
```xml
依赖管理
org.springframework.boot spring-boot-starter-parent 2.3.4.RELEASE
他的父项目
1.无需关注版本号,自动版本仲裁(引入非版本仲裁的jar,要写版本号)
2.查看spring-boot-dependencies里面规定当前依赖的版本
spring-boot-starter-parent ——>spring-boot-dependencies
3.可以修改默认版本号,在当前项目里面重写配置
- 开发导入starter场景启动器```xml1、见到很多 spring-boot-starter-* : *就某种场景2、只要引入starter,这个场景的所有常规需要的依赖我们都自动引入3、SpringBoot所有支持的场景https://docs.spring.io/spring-boot/docs/current/reference/html/using-spring-boot.html#using-boot-starter4、见到的 *-spring-boot-starter: 第三方为我们提供的简化开发的场景启动器。5、所有场景启动器最底层的依赖<dependency><groupId>org.springframework.boot</groupId><artifactId>spring-boot-starter</artifactId><version>2.3.4.RELEASE</version><scope>compile</scope></dependency>
1.2、自动配置
自动配好Tomcat
- 引入Tomcat依赖。
- 配置Tomcat
<dependency><groupId>org.springframework.boot</groupId><artifactId>spring-boot-starter-tomcat</artifactId><version>2.3.4.RELEASE</version><scope>compile</scope></dependency>
自动配好SpringMVC
- 引入SpringMVC全套组件
- 自动配好SpringMVC常用组件(功能)
- 自动配好Web常见功能,如:字符编码问题
- SpringBoot帮我们配置好了所有web开发的常见场景
默认的包结构
- 主程序所在包及其下面的所有子包里面的组件都会被默认扫描进来
- 无需以前的包扫描配置
- 想要改变扫描路径,@SpringBootApplication(scanBasePackages=“com.atguigu”)
- 或者@ComponentScan 指定扫描路径
@SpringBootApplication等同于@SpringBootConfiguration@EnableAutoConfiguration@ComponentScan("com.atguigu.boot")
- 或者@ComponentScan 指定扫描路径
各种配置拥有默认值
- 默认配置最终都是映射到某个类上,如:MultipartProperties
- 配置文件的值最终会绑定每个类上,这个类会在容器中创建对象
- 按需加载所有自动配置项
- 非常多的starter
- 引入了哪些场景这个场景的自动配置才会开启
- SpringBoot所有的自动配置功能都在 spring-boot-autoconfigure 包里面
- ……
2、容器功能
2.1、组件添加
1、@Configuration
- 基本使用
- Full模式与Lite模式
- 示例
- 最佳实战
- 配置 类组件之间无依赖关系用Lite模式加速容器启动过程,减少判断(proxyBeanMethods = false)
- 配置类组件之间有依赖关系,方法会被调用得到之前单实例组件,用Full模式(proxyBeanMethods = true)
#############################Configuration使用示例######################################################/*** 1、配置类里面使用@Bean标注在方法上给容器注册组件,默认也是单实例的* 2、配置类本身也是组件* 3、proxyBeanMethods:代理bean的方法(默认true)* Full(proxyBeanMethods = true)【保证每个@Bean方法被调用多少次返回的组件都是单实例的】* Lite(proxyBeanMethods = false)【每个@Bean方法被调用多少次返回的组件都是新创建的】* 组件依赖必须使用Full模式默认。其他默认使用Lite模式* Full(proxyBeanMethods = true) MyConfig对象为代理对象*/@Configuration(proxyBeanMethods = false) //告诉SpringBoot这是一个配置类 == 配置文件public class MyConfig {/*** @return*/@Bean //给容器中添加组件。以方法名作为组件的id。返回类型就是组件类型。返回的值,就是组件在容器中的实例public User user01(){User zhangsan = new User("zhangsan", 18);//user组件依赖了Pet组件zhangsan.setPet(tomcatPet());return zhangsan;}@Bean("tom")public Pet tomcatPet(){return new Pet("tomcat");}}################################@Configuration测试代码如下########################################@SpringBootConfiguration@EnableAutoConfiguration@ComponentScan("com.atguigu.boot")public class MainApplication {public static void main(String[] args) {//1、返回我们IOC容器ConfigurableApplicationContext run = SpringApplication.run(MainApplication.class, args);//2、查看容器里面的组件String[] names = run.getBeanDefinitionNames();for (String name : names) {System.out.println(name);}//3、从容器中获取指定名称的组件User user = run.getBean( "user01",User.class);User user1 = run.getBean("user01", User.class);MyConfig myConfig = run.getBean( MyConfig.class);MyConfig myConfig1 = run.getBean( MyConfig.class);Pet pet = run.getBean( "tom",Pet.class);System.out.println(user1 == user);//true trueSystem.out.println(myConfig.user01()==myConfig1.user01());//true falseSystem.out.println(user==myConfig.user01());//true falseSystem.out.println(user1.getPet() == pet);//true falseSystem.out.println(myConfig.user01().getPet()==pet);//true falseSystem.out.println(user1.getPet()==pet);//true false//如果@Configuration(proxyBeanMethods = true) 代理对象调用方法。SpringBoot总会检查这个组件是否在容器中有。保持组件单实例//得到结果:true,true,true,true,true,true//如果@Configuration(proxyBeanMethods = false)每个@Bean方法被调用多少次返回的组件都是新创建的//得到结果:true,false,false,false,false,false}}
2、@Bean、@Component、@Controller、@Service、@Repository
3、@ComponentScan、@Import
* 4、@Import({User.class, DBHelper.class})* 给容器中自动创建出这两个类型的组件、默认组件的名字就是全类名* 可以是自己定义的类,也可以引用jar中的类* 注意:是通过实体类中的无参构造器生成对象的*/@Import({User.class, DBHelper.class})@Configuration(proxyBeanMethods = false)public class MyConfig {}
@Import 高级用法: https://www.bilibili.com/video/BV1gW411W7wy?p=8
4、@Conditional
条件装配:满足Conditional指定的条件,则进行组件注入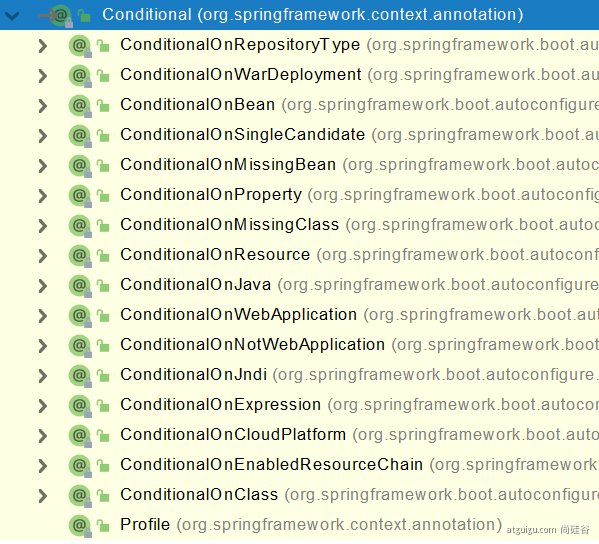
=====================测试条件装配==========================@Configuration(proxyBeanMethods = false) //告诉SpringBoot这是一个配置类 == 配置文件//@ConditionalOnBean(name = "tom")@ConditionalOnMissingBean(name = "tom")public class MyConfig {/*** Full:外部无论对配置类中的这个组件注册方法调用多少次获取的都是之前注册容器中的单实例对象* @return*/@Bean //给容器中添加组件。以方法名作为组件的id。返回类型就是组件类型。返回的值,就是组件在容器中的实例public User user01(){User zhangsan = new User("zhangsan", 18);//user组件依赖了Pet组件zhangsan.setPet(tomcatPet());return zhangsan;}@Bean("tom22")public Pet tomcatPet(){return new Pet("tomcat");}}public static void main(String[] args) {//1、返回我们IOC容器ConfigurableApplicationContext run = SpringApplication.run(MainApplication.class, args);//2、查看容器里面的组件String[] names = run.getBeanDefinitionNames();for (String name : names) {System.out.println(name);}boolean tom = run.containsBean("tom");System.out.println("容器中Tom组件:"+tom);boolean user01 = run.containsBean("user01");System.out.println("容器中user01组件:"+user01);boolean tom22 = run.containsBean("tom22");System.out.println("容器中tom22组件:"+tom22);}
2.2、原生配置文件引入
1、@ImportResource
======================beans.xml=========================<?xml version="1.0" encoding="UTF-8"?><beans xmlns="http://www.springframework.org/schema/beans"xmlns:xsi="http://www.w3.org/2001/XMLSchema-instance"xmlns:context="http://www.springframework.org/schema/context"xsi:schemaLocation="http://www.springframework.org/schema/beans http://www.springframework.org/schema/beans/spring-beans.xsd http://www.springframework.org/schema/context https://www.springframework.org/schema/context/spring-context.xsd"><bean id="haha" class="com.atguigu.boot.bean.User"><property name="name" value="zhangsan"></property><property name="age" value="18"></property></bean><bean id="hehe" class="com.atguigu.boot.bean.Pet"><property name="name" value="tomcat"></property></bean></beans>
@ImportResource("classpath:beans.xml")public class MyConfig {}======================测试=================boolean haha = run.containsBean("haha");boolean hehe = run.containsBean("hehe");System.out.println("haha:"+haha);//trueSystem.out.println("hehe:"+hehe);//true
2.3、配置绑定
如何使用Java读取到properties文件中的内容,并且把它封装到JavaBean中,以供随时使用;
public class getProperties {public static void main(String[] args) throws FileNotFoundException, IOException {Properties pps = new Properties();pps.load(new FileInputStream("a.properties"));Enumeration enum1 = pps.propertyNames();//得到配置文件的名字while(enum1.hasMoreElements()) {String strKey = (String) enum1.nextElement();String strValue = pps.getProperty(strKey);System.out.println(strKey + "=" + strValue);//封装到JavaBean。}}}
1、@ConfigurationProperties
/*** 只有在容器中的组件,才会拥有SpringBoot提供的强大功能*/@Component@ConfigurationProperties(prefix = "mycar")public class Car {private String brand;private Integer price;public String getBrand() {return brand;}public void setBrand(String brand) {this.brand = brand;}public Integer getPrice() {return price;}public void setPrice(Integer price) {this.price = price;}@Overridepublic String toString() {return "Car{" +"brand='" + brand + '\'' +", price=" + price +'}';}}
2、@EnableConfigurationProperties + @ConfigurationProperties
3、@Component + @ConfigurationProperties
@EnableConfigurationProperties(Car.class)//1、开启Car配置绑定功能//2、把这个Car这个组件自动注册到容器中public class MyConfig {}
3.4、最佳实践
- 引入场景依赖
- 查看自动配置了哪些(选做)
- 自己分析,引入场景对应的自动配置一般都生效了
- 配置文件中debug=true开启自动配置报告。Negative(不生效)\Positive(生效)
是否需要修改
- 参照文档修改配置项
- 自定义加入或者替换组件
- @Bean、@Component。。。
- 自定义器 XXXXXCustomizer;
-
4、开发小技巧
4.1、Lombok
简化JavaBean开发
<dependency><groupId>org.projectlombok</groupId><artifactId>lombok</artifactId></dependency>idea中搜索安装lombok插件
```java ===============================简化JavaBean开发=================================== @NoArgsConstructor //@AllArgsConstructor @Data @ToString @EqualsAndHashCode public class User {
private String name; private Integer age;
private Pet pet;
public User(String name,Integer age){ this.name = name; this.age = age; } }
================================简化日志开发=================================== @Slf4j @RestController public class HelloController { @RequestMapping(“/hello”) public String handle01(@RequestParam(“name”) String name){
log.info("请求进来了....");return "Hello, Spring Boot 2!"+"你好:"+name;}
}
<a name="PTNhW"></a>## 4.2、dev-tools```xml<dependency><groupId>org.springframework.boot</groupId><artifactId>spring-boot-devtools</artifactId><optional>true</optional></dependency>
项目或者页面修改以后:Ctrl+F9;
4.3、Spring Initailizr(项目初始化向导)
0、选择我们需要的开发场景
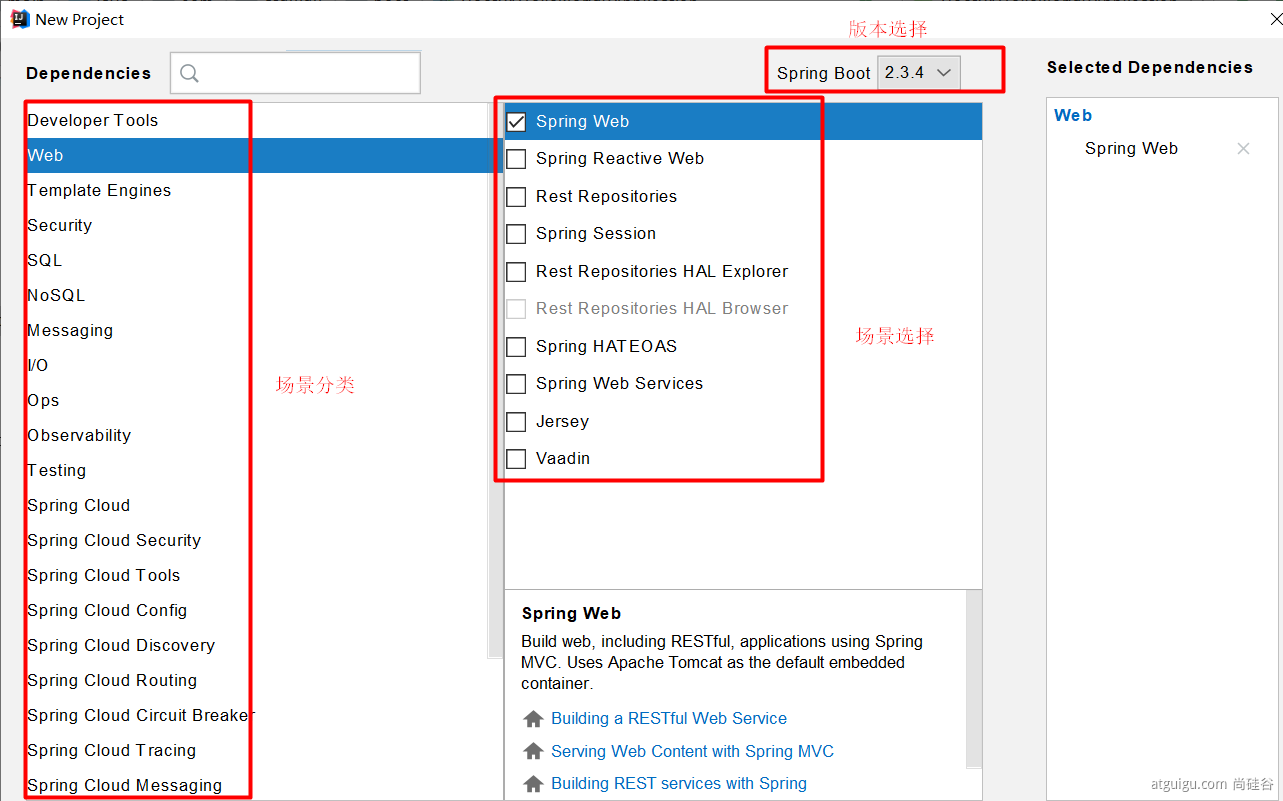
1、自动依赖引入
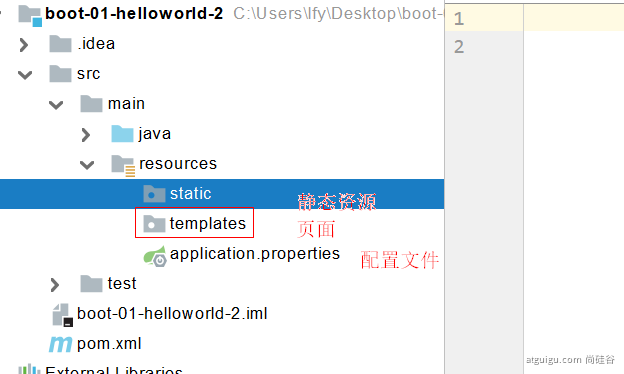
2、自动创建项目结构
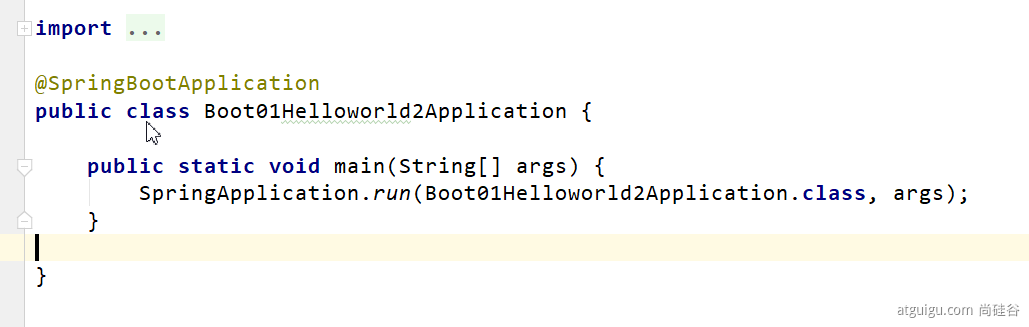
3、自动编写好主配置类

若有收获,就点个赞吧
0 人点赞
