第六章 RESTful web服务
在本章中,我们将会讨论如下话题:
- 创建一个REST服务器
- 身份校验
- 频率限制
- 版本控制
- 错误处理
介绍
本章将会帮助你了解一些便利的东西,包括Yii URL路由,控制器和视图。你将能够更加灵活的创建自己的控制器和视图。
创建一个REST服务器
在接下来的章节中,我们使用了一个例子,给你演示如何用最少的代码,简历和设置RESTful API。这小节会在本章的其它小节中复用。
准备
- 按照官方指南http://www.yiiframework.com/doc-2.0/guide-start-installation.html的描述,使用Composer包管理器创建一个新的应用。
- 使用如下命令创建一个migration,用于创建一个文章表:
./yii migrate/create create_film_table
- 然后,使用如下代码更新刚刚创建的migration方法,
up:
public function up(){$tableOptions = null;if ($this->db->driverName === 'mysql') {$tableOptions = 'CHARACTER SET utf8 COLLATE utf8_general_ci ENGINE=InnoDB';}$this->createTable('{{%film}}', ['id' => $this->primaryKey(),'title' => $this->string(64)->notNull(),'release_year' => $this->integer(4)->notNull(),], $tableOptions);$this->batchInsert('{{%film}}',['id','title','release_year'], [[1, 'Interstellar', 2014],[2, "Harry Potter and the Philosopher's Stone",2001],[3, 'Back to the Future', 1985],[4, 'Blade Runner', 1982],[5, 'Dallas Buyers Club', 2013],]);}
使用如下代码更新down方法:
public function down(){$this->dropTable('film');}
- 运行创建好的migration
create_film_table。 - 使用Gii生成
Film模型。 - 使用整洁的URL配置你的应用服务器。如果你使用带有
mod_rewrite的Apache服务器,并将AllowOverride打开,那么你就可以添加如下代码到@web目录下的.htaccess文件中:
Options +FollowSymLinksIndexIgnore */*RewriteEngine on# if a directory or a file exists, use it directlyRewriteCond %{REQUEST_FILENAME} !-fRewriteCond %{REQUEST_FILENAME} !-d# otherwise forward it to index.phpRewriteRule . index.php
如何做…
- 使用如下代码创建控制器
@app/controller/FilmController.php:
<?phpnamespace app\controllers;use yii\rest\ActiveController;class FilmController extends ActiveController{public $modelClass = app\models\Film';}
更新配置文件@app/config/web.php。添加urlManager组件:
'urlManager' => ['enablePrettyUrl' => true,'enableStrictParsing' => true,'showScriptName' => false,'rules' => [['class' => 'yii\rest\UrlRule', 'controller' =>'films'],],],
- 在
@app/config/web.php中重新配置请求组件:
'request' => ['cookieValidationKey' => 'mySecretKey','parsers' => ['application/json' => 'yii\web\JsonParser',],]
工作原理…
我们通过扩展\yii\rest\ActiveController来创建自己的控制器,然后设置这个控制器的modelClass属性。\yii\rest\ActiveController实现了常用动作的集合,以支持对ActiveRecord的RESTful访问。
上边通过很小的努力,就实现了对电影数据的RESTful API访问。
已经创建的API包括:
GET /films:按页列出所有的电影HEAD /films:获取电影列表的概要信息POST /films:创建一个新的电影GET /films/5:获取电影5的详情HEAD /films/5:获取电影5的概要信息PATCH /films/5 and PUT /films/5:更新电影5DELETE /films/5:删除电影5OPTIONS /films:显示/films支持的操作OPTIONS /films/5:显示/films/5支持的操作
之所以会有这些功能是因为\yii\rest\ActiveController支持如下动作:
index:列出模型view:返回模型的细节create:创建一个新的模型update:更新一个已有的模型delete:删除一个已有的模型options:返回允许的HTTP方法
verbs()方法为每一个动作定义了允许的请求方法。
为了检查我们的RESTful API是否工作正常,我们来发送几个请求。
首先使用GET请求。在控制台中运行如下命令:
curl -i -H "Accept:application/json" "http://yii-book.app/films"
你将会得到如下输出:
HTTP/1.1 200 OKDate: Wed, 23 Sep 2015 17:46:35 GMTServer: ApacheX-Powered-By: PHP/5.5.23X-Pagination-Total-Count: 5X-Pagination-Page-Count: 1X-Pagination-Current-Page: 1X-Pagination-Per-Page: 20Link: <http://yii-book.app/films?page=1>; rel=selfContent-Length: 301Content-Type: application/json; charset=UTF-8[{"id":1,"title":"Interstellar","release_year":2014},{"id":2,"title":"Harry Potter and the Philosopher'sStone","release_year":2001},{"id":3,"title":"Back to theFuture","release_year":1985},{"id":4,"title":"BladeRunner","release_year":1982},{"id":5,"title":"Dallas BuyersClub","release_year":2013}]
发送一个POST请求。在控制台中运行如下命令:
curl -i -H "Accept:application/json" -X POST -d title="New film" -d release_year=2015 "http://yii-book.app/films"
你将会得到如下输出:
HTTP/1.1 201 CreatedDate: Wed, 23 Sep 2015 17:48:06 GMTServer: ApacheX-Powered-By: PHP/5.5.23Location: http://yii-book.app/films/6Content-Length: 49Content-Type: application/json; charset=UTF-8{"title":"New film","release_year":"2015","id":6}
获取创建好的电影。在控制台中运行如下命令:
curl -i -H "Accept:application/json" "http://yii-book.app/films/6"
你将会得到如下输出:
HTTP/1.1 200 OKDate: Wed, 23 Sep 2015 17:48:36 GMTServer: ApacheX-Powered-By: PHP/5.5.23Content-Length: 47Content-Type: application/json; charset=UTF-8{"id":6,"title":"New film","release_year":2015}
发送一个DELETE请求。在控制台中运行如下命令:
curl -i -H "Accept:application/json" -X DELETE "http://yii-book.app/films/6"
你将会得到如下输出:
HTTP/1.1 204 No ContentDate: Wed, 23 Sep 2015 17:48:55 GMTServer: ApacheX-Powered-By: PHP/5.5.23Content-Length: 0Content-Type: application/json; charset=UTF-8
更多…
接下来我们看下内容negotiation和自定义Rest URL规则:
Content negotiation
你也可以很容易使用内容negotiation行为格式化你的响应:
例如,你可以将这个代码放入到你的控制器中,这样所有的数据都会以XML格式返回:
你应该看下文档中所有的格式列表。
use yii\web\Response;public function behaviors(){$behaviors = parent::behaviors();$behaviors['contentNegotiator']['formats']['application/xml']=Response::FORMAT_XML;return $behaviors;}
在控制台中运行:
curl -i -H "Accept:application/xml" "http://yii-book.app/films"
你将会得到如下输出:
HTTP/1.1 200 OKDate: Wed, 23 Sep 2015 18:02:47 GMTServer: ApacheX-Powered-By: PHP/5.5.23X-Pagination-Total-Count: 5X-Pagination-Page-Count: 1X-Pagination-Current-Page: 1X-Pagination-Per-Page: 20Link: <http://yii-book.app/films?page=1>; rel=selfContent-Length: 516Content-Type: application/xml; charset=UTF-8<?xml version="1.0" encoding="UTF-8"?><response><item><id>1</id><title>Interstellar</title><release_year>2014</release_year></item><item><id>2</id><title>Harry Potter and the Philosopher's Stone</title><release_year>2001</release_year></item><item><id>3</id><title>Back to the Future</title><release_year>1985</release_year></item><item><id>4</id><title>Blade Runner</title><release_year>1982</release_year></item><item><id>5</id><title>Dallas Buyers Club</title><release_year>2013</release_year></item></response>
自定义Rest URL规则
默认情况下,你必须记住一个以复杂格式定义的控制器ID。这是因为yii\rest\UrlRule自动复杂化控制器ID。你可以很容易的通过设置yii\rest\UrlRule::$pluralize的值为false,来关掉它:
'urlManager' => [//..'rules' => [['class' => 'yii\rest\UrlRule','controller' => 'film''pluralize' => false],],//..]
如果你希望控制器按照指定的格式出现,你可以添加一个自定义名称到键值对,其中键是控制器ID,值是真正的控制器ID,例如:
'urlManager' => [//..'rules' => [['class' => 'yii\rest\UrlRule','controller' => ['super-films' => 'film']],],//..]
参考
欲了解更多信息,参考如下地址:
- http://www.yiiframework.com/doc-2.0/guide-rest-quick-start.html
- http://www.yiiframework.com/doc-2.0/yii-rest-urlrule.html
- http://www.yiiframework.com/doc-2.0/guide-rest-response-formatting.html
- http://budiirawan.com/setup-restful-api-yii2/
身份校验
在本小节中我们将会设置身份校验模型。
准备
重复创建一个REST服务器小节中准备和如何做的所有步骤。
如何做…
- 修改
@app/controllers/FilmController:
<?phpnamespace app\controllers;use app\models\User;use Yii;use yii\helpers\ArrayHelper;use yii\rest\ActiveController;use yii\filters\auth\HttpBasicAuth;class FilmController extends ActiveController{public $modelClass = 'app\models\Film';public function behaviors(){return ArrayHelper::merge(parent::behaviors(),['authenticator' => ['authMethods' => ['basicAuth' => ['class' =>HttpBasicAuth::className(),'auth' => function ($username,$password) {$user =User::findByUsername($username);if ($user !== null && $user->validatePassword($password)){return $user;}return null;},]]]]);}}
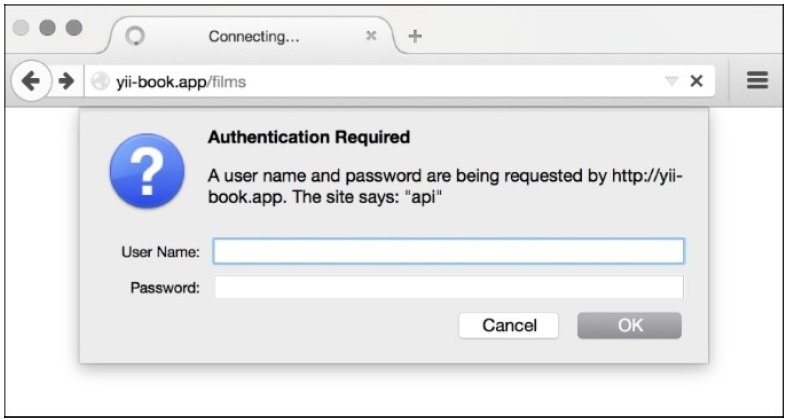
在浏览器中打开http://yii-book.app/films,确保我们配置了HTTP基本身份验证:
尝试身份验证。在控制台中运行如下命令:
curl -i -H "Accept:application/json" "http://yii-book.app/films"
你将会得到如下结果:
HTTP/1.1 401 UnauthorizedDate: Thu, 24 Sep 2015 01:01:24 GMTServer: ApacheX-Powered-By: PHP/5.5.23Www-Authenticate: Basic realm="api"Content-Length: 149Content-Type: application/json; charset=UTF-8{"name":"Unauthorized","message":"You are requesting with an invalid credential.","code":0,"status":401,"type":"yii\\web\\UnauthorizedHttpException"}
- 现在尝试使用
cURL进行auth:
curl -i -H "Accept:application/json" -u admin:admin "http://yii-book.app/films"
- 你将会得到类似如下结果:
HTTP/1.1 200 OKDate: Thu, 24 Sep 2015 01:01:40 GMTServer: ApacheX-Powered-By: PHP/5.5.23Set-Cookie: PHPSESSID=8b3726040bf8850ebd07209090333103; path=/;HttpOnlyExpires: Thu, 19 Nov 1981 08:52:00 GMTCache-Control: no-store, no-cache, must-revalidate,post-check=0, pre-check=0Pragma: no-cacheX-Pagination-Total-Count: 5X-Pagination-Page-Count: 1X-Pagination-Current-Page: 1X-Pagination-Per-Page: 20Link: <http://yii-book.app/films?page=1>; rel=selfContent-Length: 301Content-Type: application/json; charset=UTF-8[{"id":1,"title":"Interstellar","release_year":2014},{"id":2,"title":"Harry Potter and the Philosopher'sStone","release_year":2001},{"id":3,"title":"Back to theFuture","release_year":1985},{"id":4,"title":"BladeRunner","release_year":1982},{"id":5,"title":"Dallas BuyersClub","release_year":2013}]
工作原理…
我们将authenticator行为添加到了HttpBasicAuth类中,所以我们将可以通过登录名和密码进行身份校验。你可以实现官方文档中RESTful web服务部分的任意身份校验方法。
更多…
其它发送access token的方法:
- HTTP基础验证
- 查询参数
- OAuth
Yii支持所有这些身份校验方法。
参考
欲了解更多信息,参考http://www.yiiframework.com/doc-2.0/guide-rest-rate-limiting.html。
频率限制
为了防止滥用,你应该考虑为API添加频率限制。例如,你希望每一个用户在一分钟的时间内,最多调用五次API。如果调用过多,将会返回状态码429(太多的请求)。
准备
重复创建一个REST服务器小节中准备和如何做…的所有步骤。
- 创建一个migration,用于创建一个用户允许表,命令如下:
./yii migrate/create create_user_allowance_table
- 然后使用如下代码更新刚刚创建的migration,
up:
public function up(){$tableOptions = null;if ($this->db->driverName === 'mysql') {$tableOptions = 'CHARACTER SET utf8 COLLATEutf8_general_ci ENGINE=InnoDB';}$this->createTable('{{%user_allowance}}', ['user_id' => $this->primaryKey(),'allowed_number_requests' => $this->integer(10)->notNull(),'last_check_time' => $this->integer(10)->notNull()], $tableOptions);}
- 使用如下代码更新
down方法:
public function down(){$this->dropTable('{{%user_allowance}}');}
- 运行创建的
create_firm_tablemigration。 - 使用Gii模块生成
UserAllowance模型。
如何做…
首先,你必须更新@app/controllers/FilmController.php:
<?phpnamespace app\controllers;use yii\rest\ActiveController;use yii\filters\RateLimiter;use yii\filters\auth\QueryParamAuth;class FilmController extends ActiveController{public $modelClass = 'app\models\Film';public function behaviors(){$behaviors = parent::behaviors();$behaviors['authenticator'] = ['class' => QueryParamAuth::className(),];$behaviors['rateLimiter'] = ['class' => RateLimiter::className(),'enableRateLimitHeaders' => true];return $behaviors;}}
为了激活频率限制,User模型类应该实现yii\filters\RateLimitInterface,并实现三个方法:getRateLimit()、loadAllowance()、saveAllowance()。你需要添加RATE_LIMIT_NUMBER和RATE_LIMIT_RESET两个常数:
<?phpnamespace app\models;class User extends \yii\base\Object implements \yii\web\IdentityInterface, \yii\filters\RateLimitInterface{public $id;public $username;public $password;public $authKey;public $accessToken;const RATE_LIMIT_NUMBER = 5;const RATE_LIMIT_RESET = 60;// it means that user allowed only 5 requests per one minutepublic function getRateLimit($request, $action){return [self::RATE_LIMIT_NUMBER,self::RATE_LIMIT_RESET];}public function loadAllowance($request, $action){$userAllowance = UserAllowance::findOne($this->id);return $userAllowance ?[$userAllowance->allowed_number_requests,$userAllowance->last_check_time]:$this->getRateLimit($request, $action);}public function saveAllowance($request, $action,$allowance,$timestamp){$userAllowance = ($allowanceModel =UserAllowance::findOne($this->id)) ?$allowanceModel : new UserAllowance();$userAllowance->user_id = $this->id;$userAllowance->last_check_time = $timestamp;$userAllowance->allowed_number_requests =$allowance;$userAllowance->save();}// other User model methods}
工作原理…
一旦验证类实现了需要的接口,Yii将会自动使用[[yii\rest\Controller]]动作过滤器中配置的[[\yii\filter\RateLimiter]]来运行频率检查。我们也需要为authenticator行为添加QueryParamAuth类。所以,我们现在能够只需要通过查询参数传递一个access token来进行身份校验。你可以添加官方文档中RESTful web服务部分中描述的任何一个身份验证方法。
下面来解释我们的方法,非常容易理解。
getRateLimit():返回允许请求的最大数量和时间段(例如,[100,600]表示600秒内最多运行100次API调用)
loadAllowance():返回剩余运行请求的数量,以及上次检查频率限制的UNIX时间戳。
saveAllowance():保存剩余运行请求数量的值,以及当前UNIX时间戳。
我们将数据存放在MySQL数据库中。考虑到性能,你也许可以使用一个NoSQL数据库或者其它能更快获取和加载数据的存储系统。
现在我们来检查频率限制特性。运行如下代码:
curl -i "http://yii-book.app/films?access-token=100-token"
你将会得到如下输出:
HTTP/1.1 200 OKDate: Thu, 24 Sep 2015 01:35:51 GMTServer: ApacheX-Powered-By: PHP/5.5.23Set-Cookie: PHPSESSID=495a928978cc732bee853b83f521eba2; path=/;HttpOnlyExpires: Thu, 19 Nov 1981 08:52:00 GMTCache-Control: no-store, no-cache, must-revalidate, post-check=0,pre-check=0Pragma: no-cacheX-Rate-Limit-Limit: 5X-Rate-Limit-Remaining: 4X-Rate-Limit-Reset: 0X-Pagination-Total-Count: 5X-Pagination-Page-Count: 1X-Pagination-Current-Page: 1X-Pagination-Per-Page: 20Link: <http://yii-book.app/films?access-token=100-token&page=1>;rel=selfContent-Length: 301Content-Type: application/json; charset=UTF-8[{"id":1,"title":"Interstellar","release_year":2014},{"id":2,"title":"Harry Potter and the Philosopher'sStone","release_year":2001},{"id":3,"title":"Back to theFuture","release_year":1985},{"id":4,"title":"BladeRunner","release_year":1982},{"id":5,"title":"Dallas BuyersClub","release_year":2013}]
来看下返回的头部。当激活了频率限制,默认情况下每次响应将会发送当前频率限制的信息:
X-Rate-Limit-Limit:在一段时间内最大允许请求的数量 X-Rate-Limit-Remaining:在当前时间内容剩余的允许请求数量 X-Rate-Limit-Reset:这是需要等待的时间数,来获取最大数量的允许请求
现在尝试超过限制,在一分钟内运行超过5次,将会得到TooManyRequestsHttpExeption:
HTTP/1.1 429 Too Many RequestsDate: Thu, 24 Sep 2015 01:37:24 GMTServer: ApacheX-Powered-By: PHP/5.5.23Set-Cookie: PHPSESSID=bb630ca8a641ef92bd210c0a936e3149; path=/;HttpOnlyExpires: Thu, 19 Nov 1981 08:52:00 GMTCache-Control: no-store, no-cache, must-revalidate, post-check=0,pre-check=0Pragma: no-cacheX-Rate-Limit-Limit: 5X-Rate-Limit-Remaining: 0X-Rate-Limit-Reset: 60Content-Length: 131Content-Type: application/json; charset=UTF-8{"name":"Too Many Requests","message":"Rate limitexceeded.","code":0,"status":429,"type":"yii\\web\\TooManyRequestsHttpException"}
参考
欲了解更多信息,参考如下地址:
- https://en.wikipedia.org/wiki/Leaky_bucket
- http://www.yiiframework.com/doc-2.0/guide-rest-rate-limiting.html
- http://www.yiiframework.com/doc-2.0/yii-filters-ratelimiter.html
版本
如果你的API没有版本是非常可怕的。假设你有一个重大改变——和客户端开发者的计划相违背,例如重命名或者删除一个参数,或者改变响应的格式——你将冒着破坏你顾客系统的风险,进而导致愤怒的支持电话或者更糟糕的客户流失。这就是为什么你需要保持你的API是版本化的。在Yii2中,版本可以很容易的通过模块来完成,所以版本被认为是孤立的一块代码。
准备
重复创建一个REST服务器小节中准备和如何做…的所有步骤。
如何做…
- 在你的app文件夹中创建如下结构。总的来说,你需要创建
@app/modules文件夹以及v1和v2子文件夹。在每一个模块文件中,你需要创建控制器和模型文件夹:
app/modules/v1/controllers/FilmController.phpModule.phpv2/controllers/FilmController.phpModule.php
- 添加导入模块到
@app/config/web.php:
'modules' => ['v1' => ['class' => 'app\modules\v1\Module',],'v2' => ['class' => 'app\modules\v2\Module']],
- 使用如下代码创建
@app/modules/v1/controllers/FilmController.php和@app/modules/v2/controllers/FilmController.php:
<?phpnamespace app\modules\v1\controllers;use yii\rest\ActiveController;class FilmController extends ActiveController{public $modelClass = 'app\models\Film';}
<?phpnamespace app\modules\v1\controllers;use yii\rest\ActiveController;class FilmController extends ActiveController{public $modelClass = 'app\models\Film';}
使用如下代码创建@app/modules/v1/Module.php和@app/modules/v2/Module.php:
<?phpnamespace app\modules\v1;class Module extends \yii\base\Module{public function init(){parent::init();}}
<?phpnamespace app\modules\v2;class Module extends \yii\base\Module{public function init(){parent::init();}}
工作原理…
每一个模块代表我们API中的一个独立的版本:
现在你将能以两种方式指定API版本:
- 通过API URL。你可以指定v1或者v2版本。结果是
http://yiibook.app/v1/film返回版本1的电影列表,http://yiibook.app/v2/film将会返回版本2的电影列表。 - 你可以通过HTTP请求头指定一个版本号。通常来说,这可以通过
Accept头来完成:
// as a vendor content typeAccept: application/vnd.company.myproject-v1+json// via a parameterAccept: application/json; version=v1
所以,现在我们有了两个版本的API,我们可以很容易的修改v2版本。我们的老客户继续使用v1版本,新用户或者愿意升级的用户可以使用v2版本。
更多…
欲了解更多信息,参考:
- http://www.yiiframework.com/doc-2.0/guide-rest-versioning.html
- http://budiirawan.com/setup-restful-api-yii2/
错误处理
有时你希望自定义默认的错误处理格式。例如,我们需要知道响应时间戳,以及响应是否是成功的。框架提供了一个很简单的方式来做到这点。
准备
重复创建一个REST服务器小节中准备和如何做…的所有步骤。
如何做…
为了达到这个目标,你可以响应@app/config/web.php中的respond to the beforeSend event of the response组件:
'response' => ['class' => 'yii\web\Response','on beforeSend' => function ($event) {$response = $event->sender;if ($response->data !== null) {$response->data = ['success' => $response->isSuccessful,'timestamp' => time(),'path' => Yii::$app->request->getPathInfo(),'data' => $response->data,];}},],
工作原理…
为了了解代码中发生了什么,我们来试一下。首先,在控制台中运行如下代码:
curl -i "http://yii-book.app/films/1"
你将得到如下输出:
HTTP/1.1 200 OKDate: Thu, 24 Sep 2015 04:24:52 GMTServer: ApacheX-Powered-By: PHP/5.5.23Content-Length: 115Content-Type: application/json; charset=UTF-8{"success":true,"timestamp":1443068692,"path":"films/1","data":{"id":1,"title":"Interstellar","release_year":2014}}
然后,在控制台中运行如下代码:
curl -i "http://yii-book.app/films/1000"
你将得到如下代码:
HTTP/1.1 404 Not FoundDate: Thu, 24 Sep 2015 04:24:26 GMTServer: ApacheX-Powered-By: PHP/5.5.23Content-Length: 186Content-Type: application/json; charset=UTF-8{"success":false,"timestamp":1443068666,"path":"films/1000","data":{"name":"Not Found","message":"Object not found:1000","code":0,"status":404,"type":"yii\\web\\NotFoundHttpException"}}
我们在发送响应内容前做了修改。这中方法很容易定义响应是否成功。
参考
欲了解更多信息,参考http://www.yiiframework.com/doc-2.0/guide-rest-error-handling.html。

若有收获,就点个赞吧
0 人点赞
