1.安装k8s集群
1.1.安装docker
所有的node节点都必须有容器运行环境,如docker环境。
安装略。
1.2.安装kubelet、kubeadm、kubectl
kubelet:是节点上的管理者,节点上需要有什么组件,由kubelet帮我们来弄,在k8s集群中,除了kubelet是要安装到宿主机上的,其他的核心组件都是安装在容器中的。
kubectl:是一个操作k8s集群的客户端工具。这个是程序员操作k8s使用的,安装完之后k8s集群运行正常后把这个卸载掉都没什么关系。
kubeadm:安装k8s的最快的一种方式。引导kubelet去帮我们安装集群中各个节点需要的组件。也是协助程序员来操作k8s使用的。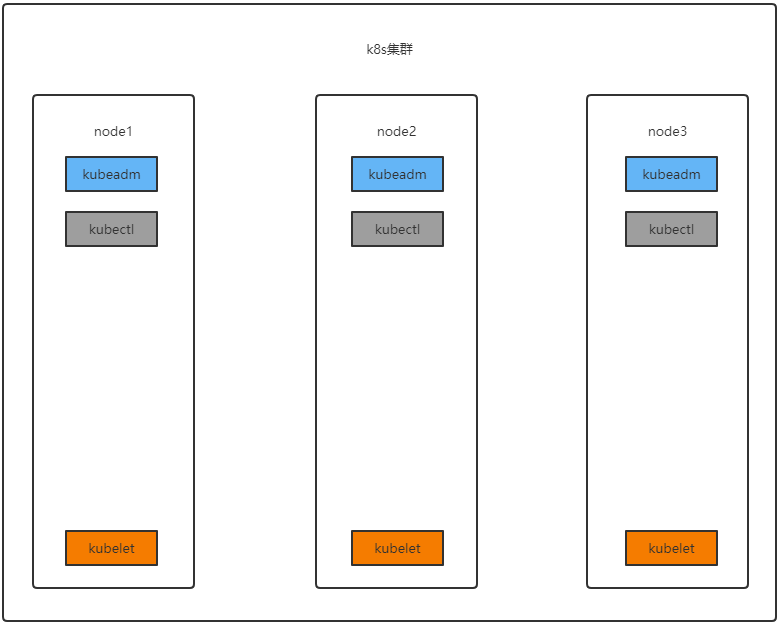
- 一台兼容的 Linux 主机。Kubernetes 项目为基于 Debian 和 Red Hat 的 Linux 发行版以及一些不提供包管理器的发行版提供通用的指令
- 每台机器 2 GB 或更多的 RAM (如果少于这个数字将会影响你应用的运行内存)
- 2 CPU 核或更多
- 集群中的所有机器的网络彼此均能相互连接(公网和内网都可以)
- 设置防火墙放行规则
- 节点之中不可以有重复的主机名、MAC 地址或 product_uuid。请参见这里了解更多详细信息。
- 设置不同hostname
- 开启机器上的某些端口。请参见这里 了解更多详细信息。
- 内网互信
- 禁用交换分区。为了保证 kubelet 正常工作,你 必须 禁用交换分区。
- 永久关闭
1.2.1.基础环境
所有机器执行以下操作
#各个机器设置自己的域名hostnamectl set-hostname xxxx# 将 SELinux 设置为 permissive 模式(相当于将其禁用)sudo setenforce 0sudo sed -i 's/^SELINUX=enforcing$/SELINUX=permissive/' /etc/selinux/config#关闭swapswapoff -ased -ri 's/.*swap.*/#&/' /etc/fstab#允许 iptables 检查桥接流量cat <<EOF | sudo tee /etc/modules-load.d/k8s.confbr_netfilterEOFcat <<EOF | sudo tee /etc/sysctl.d/k8s.confnet.bridge.bridge-nf-call-ip6tables = 1net.bridge.bridge-nf-call-iptables = 1EOFsudo sysctl --system
1.2.2.安装
cat <<EOF | sudo tee /etc/yum.repos.d/kubernetes.repo
[kubernetes]
name=Kubernetes
baseurl=http://mirrors.aliyun.com/kubernetes/yum/repos/kubernetes-el7-x86_64
enabled=1
gpgcheck=0
repo_gpgcheck=0
gpgkey=http://mirrors.aliyun.com/kubernetes/yum/doc/yum-key.gpg
   http://mirrors.aliyun.com/kubernetes/yum/doc/rpm-package-key.gpg
exclude=kubelet kubeadm kubectl
EOF


sudo yum install -y kubelet-1.20.9 kubeadm-1.20.9 kubectl-1.20.9 --disableexcludes=kubernetes

sudo systemctl enable --now kubelet
可以使用查看kubelet状态的命令 systmctl status kubelet 查看 kubelet 现在每隔几秒就会重启,因为它陷入了一个等待 kubeadm 指令的死循环,等待kubeadm下发指令
1.3.使用kubeadm引导集群

使用kubeadm执行 init 操作,可以将一个node节点变成master节点(想让哪个节点变成master就在哪个节点上面执行)。
其实就是创建了几个k8s核心组件,下载的相关镜像如下,如果网速不好,可以直接使用docker pull先将下面的镜像拉下来(所有节点都需要拉这些镜像):
kube-apiserver:v1.20.9
kube-proxy:v1.20.9
kube-controller-manager:v1.20.9
kube-scheduler:v1.20.9
coredns:1.7.0
etcd:3.4.13-0
pause:3.2
1.3.1.初始化主节点
#所有机器添加域名映射,以下需要修改为自己的,每个机器节点都要执行
echo "192.168.130.211 cluster-endpoint" >> /etc/hosts
echo "192.168.130.211 node1" >> /etc/hosts
echo "192.168.130.212 node2" >> /etc/hosts
echo "192.168.130.212 node3" >> /etc/hosts

#主节点初始化,只在node1上执行  # 192.168.130.211 这个要填k8s-master的主节点
kubeadm init \
--apiserver-advertise-address=192.168.130.211 \
--control-plane-endpoint=cluster-endpoint \
--image-repository registry.cn-hangzhou.aliyuncs.com/lfy_k8s_images \
--kubernetes-version v1.20.9 \
--service-cidr=10.96.0.0/16 \
--pod-network-cidr=192.168.0.0/16

#所有网络范围不重叠
# service-cidr 表示创建的service所在的网段
# pod-network-cidr 表示创建的pod使用的网段
耐心等待…… 如果出现了下面的这些东西, 那么k8s集群初始化成功了,记得记录下来这些信息,后面要用到:
Your Kubernetes control-plane has initialized successfully!
To start using your cluster, you need to run the following as a regular user:
mkdir -p $HOME/.kube
sudo cp -i /etc/kubernetes/admin.conf $HOME/.kube/config
sudo chown $(id -u):$(id -g) $HOME/.kube/config
Alternatively, if you are the root user, you can run:
export KUBECONFIG=/etc/kubernetes/admin.conf
You should now deploy a pod network to the cluster. Run “kubectl apply -f [podnetwork].yaml” with one of the options listed at: https://kubernetes.io/docs/concepts/cluster-administration/addons/
You can now join any number of control-plane nodes by copying certificate authorities and service account keys on each node and then running the following as root:
kubeadm join cluster-endpoint:6443 —token hums8f.vyx71prsg74ofce7 \ —discovery-token-ca-cert-hash sha256:a394d059dd51d68bb007a532a037d0a477131480ae95f75840c461e85e2c6ae3 \ —control-plane
Then you can join any number of worker nodes by running the following on each as root:
kubeadm join cluster-endpoint:6443 —token hums8f.vyx71prsg74ofce7 \ —discovery-token-ca-cert-hash sha256:a394d059dd51d68bb007a532a037d0a477131480ae95f75840c461e85e2c6ae3
1.3.2.生成kubectl客户端配置
参照上面的提示内容,将k8s的相关配置放到当前用户的家目录下的.kube/目录下,这样当前机器的当前用户就可以使用kubectl客户端工具来操作k8s集群:
mkdir -p $HOME/.kube
sudo cp -i /etc/kubernetes/admin.conf $HOME/.kube/config
sudo chown $(id -u):$(id -g) $HOME/.kube/config
1.3.3.加入其他master节点
如果你的集群中需要多个master节点(一般是奇数个),那么可以使用上面提示中的命令(复制自己的):
You can now join any number of control-plane nodes by copying certificate authorities and service account keys on each node and then running the following as root:
kubeadm join cluster-endpoint:6443 --token hums8f.vyx71prsg74ofce7 \
    --discovery-token-ca-cert-hash sha256:a394d059dd51d68bb007a532a037d0a477131480ae95f75840c461e85e2c6ae3 \
    --control-plane
1.3.4.加入其他工作节点
可以使用上面提示中的命令,将其他节点加入集群中变成工作节点(复制自己的):
Then you can join any number of worker nodes by running the following on each as root:
kubeadm join cluster-endpoint:6443 --token hums8f.vyx71prsg74ofce7 \
    --discovery-token-ca-cert-hash sha256:a394d059dd51d68bb007a532a037d0a477131480ae95f75840c461e85e2c6ae3
1.3.5.部署网络插件
You should now deploy a pod network to the cluster. Run “kubectl apply -f [podnetwork].yaml” with one of the options listed at: https://kubernetes.io/docs/concepts/cluster-administration/addons/
根据上面的提示, 你现在应该给集群部署一个网络pod,具体可以查看这个网址。
我们选择Calico的网络组件进行安装。
calico官网
# 下载部署calico所需要的yaml
curl https://docs.projectcalico.org/manifests/calico.yaml -O

# 注意, 如果在init的时候--pod-network-cidr指定的不是192.168.0.0/16
# 那么就需要在部署calico之前修改calico.yaml中的内容

# 部署calico
kubectl apply -f calico.yaml

# 查看集群部署的应用
kubectl get pods -A

# 查看集群的node节点
kubectl get nodes -A


1.4.重新生成token
上面的token默认是24小时过期,下面是重新生成新令牌的命令:
kubeadm token create --pring-join-command
1.5.安装dashboard
1.5.1.部署
kubernetes官方提供的可视化界面 https://github.com/kubernetes/dashboard
这个下载地址是github上面的,一般不容易下载下来,可以使用后面准备好的配置
kubectl apply -f https://raw.githubusercontent.com/kubernetes/dashboard/v2.3.1/aio/deploy/recommended.yaml
下载后的recommended.yaml文件内容:
# Copyright 2017 The Kubernetes Authors.
#
# Licensed under the Apache License, Version 2.0 (the "License");
# you may not use this file except in compliance with the License.
# You may obtain a copy of the License at
#
#     http://www.apache.org/licenses/LICENSE-2.0
#
# Unless required by applicable law or agreed to in writing, software
# distributed under the License is distributed on an "AS IS" BASIS,
# WITHOUT WARRANTIES OR CONDITIONS OF ANY KIND, either express or implied.
# See the License for the specific language governing permissions and
# limitations under the License.

apiVersion: v1
kind: Namespace
metadata:
  name: kubernetes-dashboard

---

apiVersion: v1
kind: ServiceAccount
metadata:
  labels:
    k8s-app: kubernetes-dashboard
  name: kubernetes-dashboard
  namespace: kubernetes-dashboard

---

kind: Service
apiVersion: v1
metadata:
  labels:
    k8s-app: kubernetes-dashboard
  name: kubernetes-dashboard
  namespace: kubernetes-dashboard
spec:
  ports:
    - port: 443
      targetPort: 8443
  selector:
    k8s-app: kubernetes-dashboard

---

apiVersion: v1
kind: Secret
metadata:
  labels:
    k8s-app: kubernetes-dashboard
  name: kubernetes-dashboard-certs
  namespace: kubernetes-dashboard
type: Opaque

---

apiVersion: v1
kind: Secret
metadata:
  labels:
    k8s-app: kubernetes-dashboard
  name: kubernetes-dashboard-csrf
  namespace: kubernetes-dashboard
type: Opaque
data:
  csrf: ""

---

apiVersion: v1
kind: Secret
metadata:
  labels:
    k8s-app: kubernetes-dashboard
  name: kubernetes-dashboard-key-holder
  namespace: kubernetes-dashboard
type: Opaque

---

kind: ConfigMap
apiVersion: v1
metadata:
  labels:
    k8s-app: kubernetes-dashboard
  name: kubernetes-dashboard-settings
  namespace: kubernetes-dashboard

---

kind: Role
apiVersion: rbac.authorization.k8s.io/v1
metadata:
  labels:
    k8s-app: kubernetes-dashboard
  name: kubernetes-dashboard
  namespace: kubernetes-dashboard
rules:
  # Allow Dashboard to get, update and delete Dashboard exclusive secrets.
  - apiGroups: [""]
    resources: ["secrets"]
    resourceNames: ["kubernetes-dashboard-key-holder", "kubernetes-dashboard-certs", "kubernetes-dashboard-csrf"]
    verbs: ["get", "update", "delete"]
    # Allow Dashboard to get and update 'kubernetes-dashboard-settings' config map.
  - apiGroups: [""]
    resources: ["configmaps"]
    resourceNames: ["kubernetes-dashboard-settings"]
    verbs: ["get", "update"]
    # Allow Dashboard to get metrics.
  - apiGroups: [""]
    resources: ["services"]
    resourceNames: ["heapster", "dashboard-metrics-scraper"]
    verbs: ["proxy"]
  - apiGroups: [""]
    resources: ["services/proxy"]
    resourceNames: ["heapster", "http:heapster:", "https:heapster:", "dashboard-metrics-scraper", "http:dashboard-metrics-scraper"]
    verbs: ["get"]

---

kind: ClusterRole
apiVersion: rbac.authorization.k8s.io/v1
metadata:
  labels:
    k8s-app: kubernetes-dashboard
  name: kubernetes-dashboard
rules:
  # Allow Metrics Scraper to get metrics from the Metrics server
  - apiGroups: ["metrics.k8s.io"]
    resources: ["pods", "nodes"]
    verbs: ["get", "list", "watch"]

---

apiVersion: rbac.authorization.k8s.io/v1
kind: RoleBinding
metadata:
  labels:
    k8s-app: kubernetes-dashboard
  name: kubernetes-dashboard
  namespace: kubernetes-dashboard
roleRef:
  apiGroup: rbac.authorization.k8s.io
  kind: Role
  name: kubernetes-dashboard
subjects:
  - kind: ServiceAccount
    name: kubernetes-dashboard
    namespace: kubernetes-dashboard

---

apiVersion: rbac.authorization.k8s.io/v1
kind: ClusterRoleBinding
metadata:
  name: kubernetes-dashboard
roleRef:
  apiGroup: rbac.authorization.k8s.io
  kind: ClusterRole
  name: kubernetes-dashboard
subjects:
  - kind: ServiceAccount
    name: kubernetes-dashboard
    namespace: kubernetes-dashboard

---

kind: Deployment
apiVersion: apps/v1
metadata:
  labels:
    k8s-app: kubernetes-dashboard
  name: kubernetes-dashboard
  namespace: kubernetes-dashboard
spec:
  replicas: 1
  revisionHistoryLimit: 10
  selector:
    matchLabels:
      k8s-app: kubernetes-dashboard
  template:
    metadata:
      labels:
        k8s-app: kubernetes-dashboard
    spec:
      containers:
        - name: kubernetes-dashboard
          image: kubernetesui/dashboard:v2.3.1
          imagePullPolicy: Always
          ports:
            - containerPort: 8443
              protocol: TCP
          args:
            - --auto-generate-certificates
            - --namespace=kubernetes-dashboard
            # Uncomment the following line to manually specify Kubernetes API server Host
            # If not specified, Dashboard will attempt to auto discover the API server and connect
            # to it. Uncomment only if the default does not work.
            # - --apiserver-host=http://my-address:port
          volumeMounts:
            - name: kubernetes-dashboard-certs
              mountPath: /certs
              # Create on-disk volume to store exec logs
            - mountPath: /tmp
              name: tmp-volume
          livenessProbe:
            httpGet:
              scheme: HTTPS
              path: /
              port: 8443
            initialDelaySeconds: 30
            timeoutSeconds: 30
          securityContext:
            allowPrivilegeEscalation: false
            readOnlyRootFilesystem: true
            runAsUser: 1001
            runAsGroup: 2001
      volumes:
        - name: kubernetes-dashboard-certs
          secret:
            secretName: kubernetes-dashboard-certs
        - name: tmp-volume
          emptyDir: {}
      serviceAccountName: kubernetes-dashboard
      nodeSelector:
        "kubernetes.io/os": linux
      # Comment the following tolerations if Dashboard must not be deployed on master
      tolerations:
        - key: node-role.kubernetes.io/master
          effect: NoSchedule

---

kind: Service
apiVersion: v1
metadata:
  labels:
    k8s-app: dashboard-metrics-scraper
  name: dashboard-metrics-scraper
  namespace: kubernetes-dashboard
spec:
  ports:
    - port: 8000
      targetPort: 8000
  selector:
    k8s-app: dashboard-metrics-scraper

---

kind: Deployment
apiVersion: apps/v1
metadata:
  labels:
    k8s-app: dashboard-metrics-scraper
  name: dashboard-metrics-scraper
  namespace: kubernetes-dashboard
spec:
  replicas: 1
  revisionHistoryLimit: 10
  selector:
    matchLabels:
      k8s-app: dashboard-metrics-scraper
  template:
    metadata:
      labels:
        k8s-app: dashboard-metrics-scraper
      annotations:
        seccomp.security.alpha.kubernetes.io/pod: 'runtime/default'
    spec:
      containers:
        - name: dashboard-metrics-scraper
          image: kubernetesui/metrics-scraper:v1.0.6
          ports:
            - containerPort: 8000
              protocol: TCP
          livenessProbe:
            httpGet:
              scheme: HTTP
              path: /
              port: 8000
            initialDelaySeconds: 30
            timeoutSeconds: 30
          volumeMounts:
          - mountPath: /tmp
            name: tmp-volume
          securityContext:
            allowPrivilegeEscalation: false
            readOnlyRootFilesystem: true
            runAsUser: 1001
            runAsGroup: 2001
      serviceAccountName: kubernetes-dashboard
      nodeSelector:
        "kubernetes.io/os": linux
      # Comment the following tolerations if Dashboard must not be deployed on master
      tolerations:
        - key: node-role.kubernetes.io/master
          effect: NoSchedule
      volumes:
        - name: tmp-volume
          emptyDir: {}
如果github上面的那个地址下载不下来的话, 可以将上面这个配置写入到一个yaml文件中,然后执行命令: kubectl apply -f recommended.yaml
1.5.2.设置访问端口
kubectl edit svc kubernetes-dashboard -n kubernetes-dashboard
type: ClusterIP 改为 type: NodePort

1.5.3.找到访问端口访问
kubectl get svc -A |grep kubernetes-dashboard

拿这个端口去访问仪表盘,如:https://192.168.130.211:31280
注意,请求协议是https的
1.5.4.创建访问账号
#创建访问账号,准备一个yaml文件; vi dash.yaml
apiVersion: v1
kind: ServiceAccount
metadata:
  name: admin-user
  namespace: kubernetes-dashboard
---
apiVersion: rbac.authorization.k8s.io/v1
kind: ClusterRoleBinding
metadata:
  name: admin-user
roleRef:
  apiGroup: rbac.authorization.k8s.io
  kind: ClusterRole
  name: cluster-admin
subjects:
- kind: ServiceAccount
  name: admin-user
  namespace: kubernetes-dashboard
kubectl apply -f dash.yaml
获取访问令牌
kubectl -n kubernetes-dashboard get secret $(kubectl -n kubernetes-dashboard get sa/admin-user -o jsonpath="{.secrets[0].name}") -o go-template="{{.data.token | base64decode}}"
token
eyJhbGciOiJSUzI1NiIsImtpZCI6InpXSkU0TjhCUmVKQzBJaC03Nk9ES2NMZ1daRTRmQ1FMZU9rRUJ3VXRnM3MifQ.eyJpc3MiOiJrdWJlcm5ldGVzL3NlcnZpY2VhY2NvdW50Iiwia3ViZXJuZXRlcy5pby9zZXJ2aWNlYWNjb3VudC9uYW1lc3BhY2UiOiJrdWJlcm5ldGVzLWRhc2hib2FyZCIsImt1YmVybmV0ZXMuaW8vc2VydmljZWFjY291bnQvc2VjcmV0Lm5hbWUiOiJhZG1pbi11c2VyLXRva2VuLXgyczhmIiwia3ViZXJuZXRlcy5pby9zZXJ2aWNlYWNjb3VudC9zZXJ2aWNlLWFjY291bnQubmFtZSI6ImFkbWluLXVzZXIiLCJrdWJlcm5ldGVzLmlvL3NlcnZpY2VhY2NvdW50L3NlcnZpY2UtYWNjb3VudC51aWQiOiIzOTZmYjdlNS0wMjA2LTQxMjctOGQzYS0xMzRlODVmYjU0MDAiLCJzdWIiOiJzeXN0ZW06c2VydmljZWFjY291bnQ6a3ViZXJuZXRlcy1kYXNoYm9hcmQ6YWRtaW4tdXNlciJ9.Hf5mhl35_R0iBfBW7fF198h_klEnN6pRKfk_roAzOtAN-Aq21E4804PUhe9Rr9e_uFzLfoFDXacjJrHCuhiML8lpHIfJLK_vSD2pZNaYc2NWZq2Mso-BMGpObxGA23hW0nLQ5gCxlnxIAcyE76aYTAB6U8PxpvtVdgUknBVrwXG8UC_D8kHm9PTwa9jgbZfSYAfhOHWmZxNYo7CF2sHH-AT_WmIE8xLmB7J11vDzaunv92xoUoI0ju7OBA2WRr61bOmSd8WJgLCDcyBblxz4Wa-3zghfKlp0Rgb8l56AAI7ML_snF59X6JqaCuAcCJjIu0FUTS5DuyIObEeXY-z-Rw

若有收获,就点个赞吧
0 人点赞
