测试环境:
| 系统 | IP | 主机名 |
|---|---|---|
| CentOS7.8 | 172.1.1.12 | master |
| CentOS7.8 | 172.1.1.13 | node-1 |
| CentOS7.8 | 172.1.1.14 | node-2 |
一、基础环境配置
1、关闭防火墙
[ `getenforce` != "Disabled" ] && setenforce 0 &> /dev/null && sed -i s/"^SELINUX=.*$"/"SELINUX=disabled"/g /etc/selinux/configsystemctl stop firewalldsystemctl disable firewalld
2、修改镜像源
wget -O /etc/yum.repos.d/CentOS-Base.repo http://mirrors.aliyun.com/repo/Centos-7.repowget -O /etc/yum.repos.d/epel.repo http://mirrors.aliyun.com/repo/epel-7.repo
3、修改hosts解析
cat >> /etc/hosts <<EOF172.1.1.12 k8s-master172.1.1.13 k8s-node-1172.1.1.14 k8s-node-2EOF
二、Master节点部署
1)安装etcd
1、安装etcd
yum install etcd -y
2、修改etcd配置文件
vim /etc/etcd/etcd.conf
6行:ETCD_LISTEN_CLIENT_URLS="http://0.0.0.0:2379" #将localhost修改为0.0.0.0,允许都可以访问21行:ETCD_ADVERTISE_CLIENT_URLS="http://172.1.1.12:2379" #配置集群节点IP
3、启动etcd
systemctl start etcdsystemctl enable etcd
4、验证etcd健康性
etcdctl cluster-health

2)安装kubernetes-master
1、安装kubernetes-master
yum install kubernetes-master.x86_64 -y
2、修改配置文件
vim /etc/kubernetes/apiserver
#### kubernetes system config## The following values are used to configure the kube-apiserver## The address on the local server to listen to.KUBE_API_ADDRESS="--insecure-bind-address=0.0.0.0" #修改成0.0.0.0# The port on the local server to listen on.KUBE_API_PORT="--port=8080" #打开注释# Port minions listen on# KUBELET_PORT="--kubelet-port=10250"# Comma separated list of nodes in the etcd clusterKUBE_ETCD_SERVERS="--etcd-servers=http://172.1.1.12:2379" #修改为etcd的IP地址# Address range to use for servicesKUBE_SERVICE_ADDRESSES="--service-cluster-ip-range=10.254.0.0/16"# default admission control policiesKUBE_ADMISSION_CONTROL="--admission-control=NamespaceLifecycle,NamespaceExists,LimitRanger,SecurityContextDeny,ResourceQuota"#在23行处删除ServiceAccount# Add your own!KUBE_API_ARGS=""
vim /etc/kubernetes/config
#### kubernetes system config## The following values are used to configure various aspects of all# kubernetes services, including## kube-apiserver.service# kube-controller-manager.service# kube-scheduler.service# kubelet.service# kube-proxy.service# logging to stderr means we get it in the systemd journalKUBE_LOGTOSTDERR="--logtostderr=true"# journal message level, 0 is debugKUBE_LOG_LEVEL="--v=0"# Should this cluster be allowed to run privileged docker containersKUBE_ALLOW_PRIV="--allow-privileged=false"# How the controller-manager, scheduler, and proxy find the apiserverKUBE_MASTER="--master=http://172.1.1.12:8080" #修改为Apiserver的IP地址
3、启动服务
systemctl start kube-apiserversystemctl enable kube-apiserversystemctl start kube-controller-managersystemctl enable kube-controller-managersystemctl start kube-schedulersystemctl enable kube-scheduler
4、验证服务健康状态
kubectl get componentstatus

三、Node节点部署
1、安装kubernetes-node
yum install kubernetes-node.x86_64 -y
2、修改配置文件
vim /etc/kubernetes/config
#### kubernetes system config## The following values are used to configure various aspects of all# kubernetes services, including## kube-apiserver.service# kube-controller-manager.service# kube-scheduler.service# kubelet.service# kube-proxy.service# logging to stderr means we get it in the systemd journalKUBE_LOGTOSTDERR="--logtostderr=true"# journal message level, 0 is debugKUBE_LOG_LEVEL="--v=0"# Should this cluster be allowed to run privileged docker containersKUBE_ALLOW_PRIV="--allow-privileged=false"# How the controller-manager, scheduler, and proxy find the apiserverKUBE_MASTER="--master=http://172.1.1.12:8080"#最后一行修改为master节点IP地址
vim /etc/kubernetes/kubelet
#### kubernetes kubelet (minion) config# The address for the info server to serve on (set to 0.0.0.0 or "" for all interfaces)KUBELET_ADDRESS="--address=0.0.0.0" #修改为0.0.0.0# The port for the info server to serve onKUBELET_PORT="--port=10250" #开启端口# You may leave this blank to use the actual hostnameKUBELET_HOSTNAME="--hostname-override=172.1.1.13" #填写本机IP(如果hostname在集群唯一,填写hostname也可以)# location of the api-serverKUBELET_API_SERVER="--api-servers=http://172.1.1.12:8080" #修改为master的IP# pod infrastructure containerKUBELET_POD_INFRA_CONTAINER="--pod-infra-container-image=registry.access.redhat.com/rhel7/pod-infrastructure:latest"# Add your own!KUBELET_ARGS=""
3、启动服务
systemctl start kubeletsystemctl enable kubeletsystemctl start kube-proxysystemctl enable kube-proxy
4、验证服务健康状态
在master执行以下命令
kubectl get nodes

四、配置flannel网络
1、安装flannel
在所有节点安装
yum install flannel -y
2、修改配置文件
在所有节点执行vim /etc/sysconfig/flanneld
# Flanneld configuration options# etcd url location. Point this to the server where etcd runsFLANNEL_ETCD_ENDPOINTS="http://172.1.1.12:2379" #修改为etcd的IP# etcd config key. This is the configuration key that flannel queries# For address range assignmentFLANNEL_ETCD_PREFIX="/atomic.io/network"# Any additional options that you want to pass#FLANNEL_OPTIONS=""
3、添加key值,配置ip地址范围
在master节点操作
etcdctl mk /atomic.io/network/config '{ "Network": "172.100.0.0/16" }'
4、启动服务
在master节点操作
yum install docker -ysystemctl start flanneldsystemctl enable flanneldsystemctl start dockersystemctl enable dockersystemctl restart kube-apiserversystemctl restart kube-controller-managersystemctl restart kube-scheduler
在node节点操作
systemctl start flanneldsystemctl enable flanneldsystemctl restart dockersystemctl restart kubeletsystemctl restart kube-proxy
5、添加iptables规则
在所有节点操作
iptables -P FORWARD ACCEPT
添加iptables后临时生效,可以写入docker system配置文件中进行每次重启生效vim /usr/lib/systemd/system/docker.service
...[Service]Type=notifyNotifyAccess=mainEnvironmentFile=-/run/containers/registries.confEnvironmentFile=-/etc/sysconfig/dockerEnvironmentFile=-/etc/sysconfig/docker-storageEnvironmentFile=-/etc/sysconfig/docker-networkEnvironment=GOTRACEBACK=crashEnvironment=DOCKER_HTTP_HOST_COMPAT=1Environment=PATH=/usr/libexec/docker:/usr/bin:/usr/sbinExecStartPost=/usr/sbin/iptables -P FORWARD ACCEPT #在文件中加入此行ExecStart=/usr/bin/dockerd-current \--add-runtime docker-runc=/usr/libexec/docker/docker-runc-current \--default-runtime=docker-runc \...
然后重启docker
systemctl daemon-reloadsystemctl restart docker
6、测试网络联通性
在master上**ping****
node节点docker地址如下:
在master上测试访问
同理,各个节点上都可以访问其他节点的docker flannel地址
六、在master上配置镜像仓库
1、修改所有节点docker配置文件
修改所有节点docker配置文件,指定私有仓库地址vim /etc/sysconfig/docker
可将原OPTIONS一行注释,将以下内容添加
OPTIONS='--selinux-enabled --log-driver=journald --signature-verification=false --registry-mirror=https://registry.docker-cn.com --insecure-registry=172.1.1.12:5000'
修改后进行重启docker,systemctl restart docker
2、在master节点上启动registry私有仓库
docker run -d -p 5000:5000 --restart=always --name registry -v /opt/my_registry:/var/lib/registry registry
3、测试使用仓库
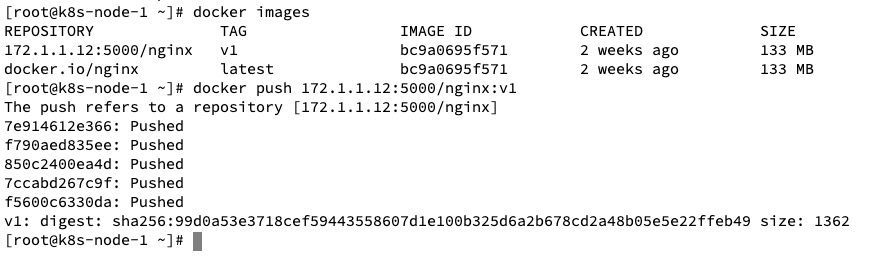
在node节点pull一个nginx镜像,然后进行打标签再push成功即可
docker pull nginxdocker tag nginx:latest 172.1.1.12:5000/nginx:v1docker push 172.1.1.12:5000/nginx:v1

若有收获,就点个赞吧
0 人点赞
