索引数据
使用curl方式
$ curl -H 'Content-Type: application/json' -XPUT 'localhost:9200/get-together/group/1?pretty' -d '{"name":"Elasticsearch Denver","organizer":"Lee"}'{"_index" : "get-together","_type" : "group","_id" : "1","_version" : 2,"result" : "updated","_shards" : {"total" : 2,"successful" : 1,"failed" : 0},"_seq_no" : 1,"_primary_term" : 2}
如果索引 get-together不存在,则会自动创建它,如果类型group不存在,则也会自动创建它,并创建一个新的映射
创建索引
$ curl -X PUT 'localhost:9200/new-index'{"acknowledged":true,"shards_acknowledged":true,"index":"new-index"}
查询映射
$ curl localhost:9200/get-together/_mapping/group?pretty{"get-together" : {"mappings" : {"group" : {"properties" : {"name" : {"type" : "text","fields" : {"keyword" : {"type" : "keyword","ignore_above" : 256}}},"organizer" : {"type" : "text","fields" : {"keyword" : {"type" : "keyword","ignore_above" : 256}}}}}}}}
修改映射
curl -XPUT "http://localhost:9200/get-together/_mapping/group" -H 'Content-Type: application/json' -d'
{
  "group": {
    "properties": {
      "name": {
        "type": "text",
        "fielddata": true
      }
    }
  }
}'
通过代码样例索引 文档
下载脚本,并执行它,准备演示的数据
$ git clone https://github.com/dakrone/elasticsearch-in-action.git
此脚本是基于elasticsearch-6.x之前版本写的,在本环境中执行时,遇到很多错误,没有成功,虽然已经尽力去解决,但不想浪费太多时间在上面。
查询数据
一般查询
- 查询索引get-together,类型group
$ curl 'localhost:9200/get-together/group/_search?q=learn&pretty'
- 在单个索引中,查询数据,效果同上面一样,因为在6.x版本后,一个索引中只有一个类型,在7.0版本中类型还可能删除。
$ curl 'localhost:9200/get-together/_search?q=learn&pretty'
在多个索引中查询,使用,号分隔
$ curl 'localhost:9200/get-together,event/_search?q=group&pretty'在所有索引中查询(省略索引标识)
$ curl 'localhost:9200/_search?q=group&pretty'还可以使用_ _all 代替所有索引,如curl ‘localhost:9200/___all/_search?q=group&pretty’,
使用Json格式请求查询数据
$ curl -s -H 'Content-Type:application/json' -XGET 'localhost:9200/get-together/group/_search?&pretty' -d '{
    "query":{
        "query_string":{
            "query":"learn",
            "default_field":"name",
            "default_operator":"AND"
        }
    }
}'
或者
$ curl -s -H 'Content-Type:application/json' -XGET 'localhost:9200/get-together/group/_search?&pretty' -d '{
    "query":{
        "query_string":{
            "query":"name:denver AND name:big"
        }
        }
    }'
如果只查询name字段中一个关键字,使用term更方便
curl -XGET "http://localhost:9200/get-together/group/_search" -H 'Content-Type: application/json' -d'
{
  "query": {
    "term": {
      "name":{
        "value": "san"
      }
    }
  }
}'
使用过滤器
使用过滤器,返回结果不计算相关性,查询更快速
curl -XGET "http://localhost:9200/get-together/_search" -H 'Content-Type: application/json' -d'
{
  "query": {
    "bool": {
       "filter": {
           "term": {
            "name":{
              "value": "san"
            }
          }
       }
    }
  }
}'
使用聚集
注意 text类型字段默认不支持聚集结果,如果对该字段进行聚集查询,会得到如下提示
Fielddata is disabled on text fields by default. Set fielddata=true on [name] in order to load fielddata in memory by uninverting the inverted index. Note that this can however use significant memory. Alternatively use a keyword field instead.”
如果要使用此字段进行聚集查询,则需要在创建mapping时指定 fielddata=true
curl -XGET "http://localhost:9200/get-together/_search" -H 'Content-Type: application/json' -d'
{
  "aggs": {
    "myaggs": {
      "terms": {
        "field": "name",
        "size": 10
      }
    }
  }
}'
修改索引映射 mapping
curl -XPUT "http://localhost:9200/get-together/_mapping/group" -H 'Content-Type: application/json' -d'
{
  "properties": {
    "name": {
      "type": "text",
      "fielddata": true
    }
  }
}'
通过id查询文档
curl -XGET "http://localhost:9200/get-together/group/5"
查询结果
{
  "took" : 2,
  "timed_out" : false,
  "_shards" : {
    "total" : 5,
    "successful" : 5,
    "skipped" : 0,
    "failed" : 0
  },
  "hits" : {
    "total" : 2,
    "max_score" : 0.2876821,
    "hits" : [
      {
        "_index" : "get-together",
        "_type" : "group",
        "_id" : "1",
        "_score" : 0.2876821,
        "_source" : {
          "name" : "Denver Clojure",
          "organizer" : [
            "Daniel",
            "Lee"
          ],
          "description" : "Group of Clojure enthusiasts from Denver who want to hack on code together and learn more about Clojure",
          "created_on" : "2012-06-15",
          "tags" : [
            "clojure",
            "denver",
            "functional programming",
            "jvm",
            "java"
          ],
          "members" : [
            "Lee",
            "Daniel",
            "Mike"
          ],
          "location_group" : "Denver, Colorado, USA"
        }
      },
      {
        "_index" : "get-together",
        "_type" : "group",
        "_id" : "3",
        "_score" : 0.2876821,
        "_source" : {
          "name" : "Elasticsearch San Francisco",
          "organizer" : "Mik",
          "description" : "Elasticsearch group for ES users of all knowledge levels",
          "created_on" : "2012-08-07",
          "tags" : [
            "elasticsearch",
            "big data",
            "lucene",
            "open source"
          ],
          "members" : [
            "Lee",
            "Igor"
          ],
          "location_group" : "San Francisco, California, USA"
        }
      }
    ]
  }
}
| “took”:2 | 花了多少毫秒时间 |
|---|---|
| “timed_out”:false | 是否超时,默认永不超时,除非在查询语句后,加了&timeout=3s |
| “_shards”:{} | 查询了多少分片,如果有个分片所在节点宕机了,并且没有副本,则会显示失败的分片数量 |
| “hits” : { “total” : 2, “max_score” : 0.2876821, |
命中统计数据,max_score:命中文档中中最高得分 |
增加集群伪节点
配置文件
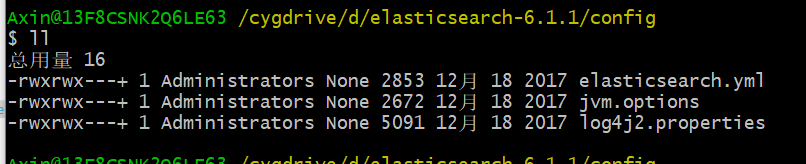
在安装根目录config目录下有三个配置文件
| 文件名 | 用途 |
|---|---|
| elasticsearch.yml | 可以此文件内修改集群名称 |
| jvm.options | 用于配置Elasticsearch运行所需的jvm内存 |
| log4j2.properties | Elasticsearch使用log4j2来记录日志,可以此文件中配置日志选项 |
如果 在Linux环境中使用rpm包进行安装的,可以在/etc/elasticsearch目录中找到
修改配置
- elasticsearch.yml
node-1:
cluster.name: my-application
node.name: node-1
#如需指定主节点可以添加以下配置
#node.master: true
#node.data: true
#linux环境中不配置network.host为本机IP地址,使用head插件通过ip地址不能访问
network.host: 127.0.0.1
http.port: 9200
#设置是否打开多播发现节点,默认true,开启后只要在同一网络环境下,集群名称相同即可加入集群
#discovery.zen.ping.multicast.enabled:true
#设置集群中master节点的初始列表,可以通过这些节点来自动发现其他新加入集群的节点
#此处如果要设置,无需设置全部节点,只设置部分节点来发现即可,默认["127.0.0.1", "[::1]"]
#[::1]是ipv6地址,相当于ipv4中的127.0.0.1
#没有必要关闭单播发现,如果只使用多播发现,在配置列表中保持空白即可
discovery.zen.ping.unicast.hosts: ["127.0.0.1:9300", "127.0.0.1:9301"]
#如果配置了此值,则必须启动指定数量的节点才能成功运行集群
discovery.zen.minimum_master_nodes: 2
node-2:
cluster.name: my-application
node.name: node-2
#如需指定主节点可以添加以下配置
#node.master: false
#node.data: true
network.host: 127.0.0.1
http.port: 9201
#设置是否打开多播发现节点,默认true
#discovery.zen.ping.multicast.enabled:true
discovery.zen.ping.unicast.hosts: ["127.0.0.1:9300", "127.0.0.1:9301"]
依次启动节点,如果没有配置node.master: true,则先启动的节点为主键节
注意:需清空data和logs目录下数据,否则组建集群失败。

若有收获,就点个赞吧
0 人点赞
