父子组件之间进行通信有 3 种办法
1、属性绑定;用于父组件向子组件的指定属性传递数据,仅能设置JSON兼容的数据。
2、事件绑定;用于子组件向父组件传递数据。
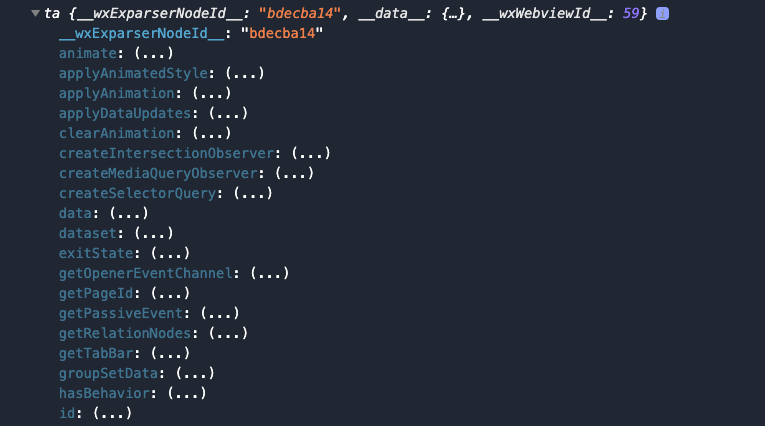
3、获取组件的实例;父组件通过this.selectComponent()获取子组件的实例对象。
属性绑定
属性绑定用于父组件向子组件传递数据,但是无法将方法传递给子组件。
<view style="margin-top: 30rpx; border: 1px solid red;"><my-test2 count="{{count}}"></my-test2></view>
Component({/*** 组件的属性列表*/properties: {count: String,},})
<view>这是父组件传递来的数据:{{count}}</view>
子组件事件绑定
事件绑定用于子组件向父组件传递事件。
1、子组件通过this.triggerEvent("自定义事件名称", {参数对象}),将数据发送给父组件。
2、在父组件中的wxml中通过自定义事件的形式接收子组件传递来的方法。
3、父组件在JS文件中实现这个方法,通过方法的e.detail获取子组件传递的数据。
接下来看案例:
<!-- 子组件点击触发 handleTapCountAdd 方法 --><view bind:tap="handleTapCountAdd">这是父组件传递来的数据:{{count}}</view>
Component({properties: {count: String,},methods: {handleTapCountAdd() {// 通过 this.triggerEvent 向父组件传递方法this.triggerEvent("countAdd", {number: Number(10)})}}})
<view style="margin-top: 30rpx; border: 1px solid red;"><!-- 父组件通过 bind:countAdd 来接收子组件传递的方法 --><my-test2 bind:countAdd="handleCountAdd" count="{{count}}"></my-test2></view>
Page({data: {count: 0},handleCountAdd(e) {// 通过 e.detail 来接收子组件传递来的数据const { number } = e.detailthis.setData({count: number + this.data.count})}})
获取子组件实例
父组件通过this.selectCompoent("id获取class选择器"),获取子组件的实例对象,从而直接访问子组件的任意数据和方法。
<view style="margin-top: 30rpx; border: 1px solid red;"><!-- 新增一个 ID --><my-test2 id="my-test2" bind:countAdd="handleCountAdd" count="{{count}}"></my-test2></view>
Page({data: {count: 0},/*** 生命周期函数--监听页面加载*/onLoad(options) {},/*** 生命周期函数--监听页面初次渲染完成*/onReady() {const obj = this.selectComponent("#my-test2")console.log(obj)},})


