1. 常见的数据库类型
关系型数据库 RDBMS: MySQL oracle PGSQL MSSQL
非关系型数据库 NoSQL: redis MongoDB(索引) ES(搜索引擎)
新型分布式解决方案 NewSQL: drds(阿里系产品)
https://db-engines.com/en/ranking 各大数据库使用排行
2. MySQL选型
一般选择官方主流版本:5.6,5.7GA(稳定发布版)2019年4月13日发布的 5.7.26
官方下载地址 推荐复制连接后,使用迅雷下载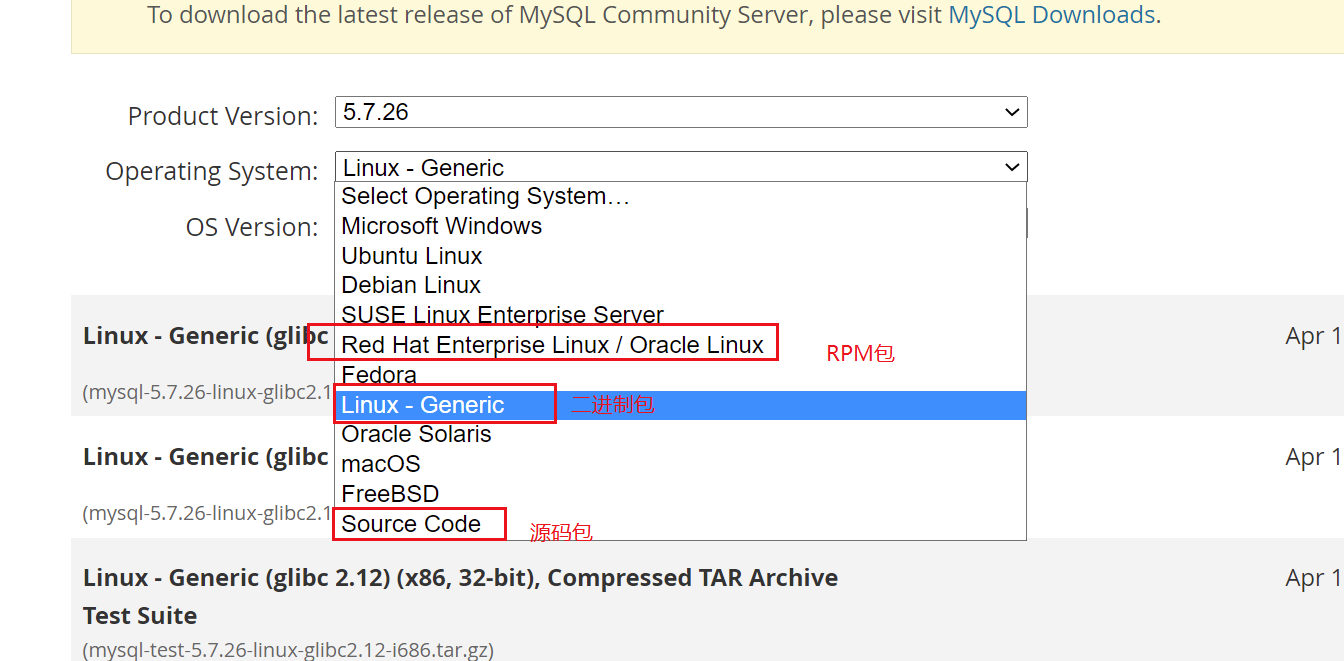
选择的是二进制包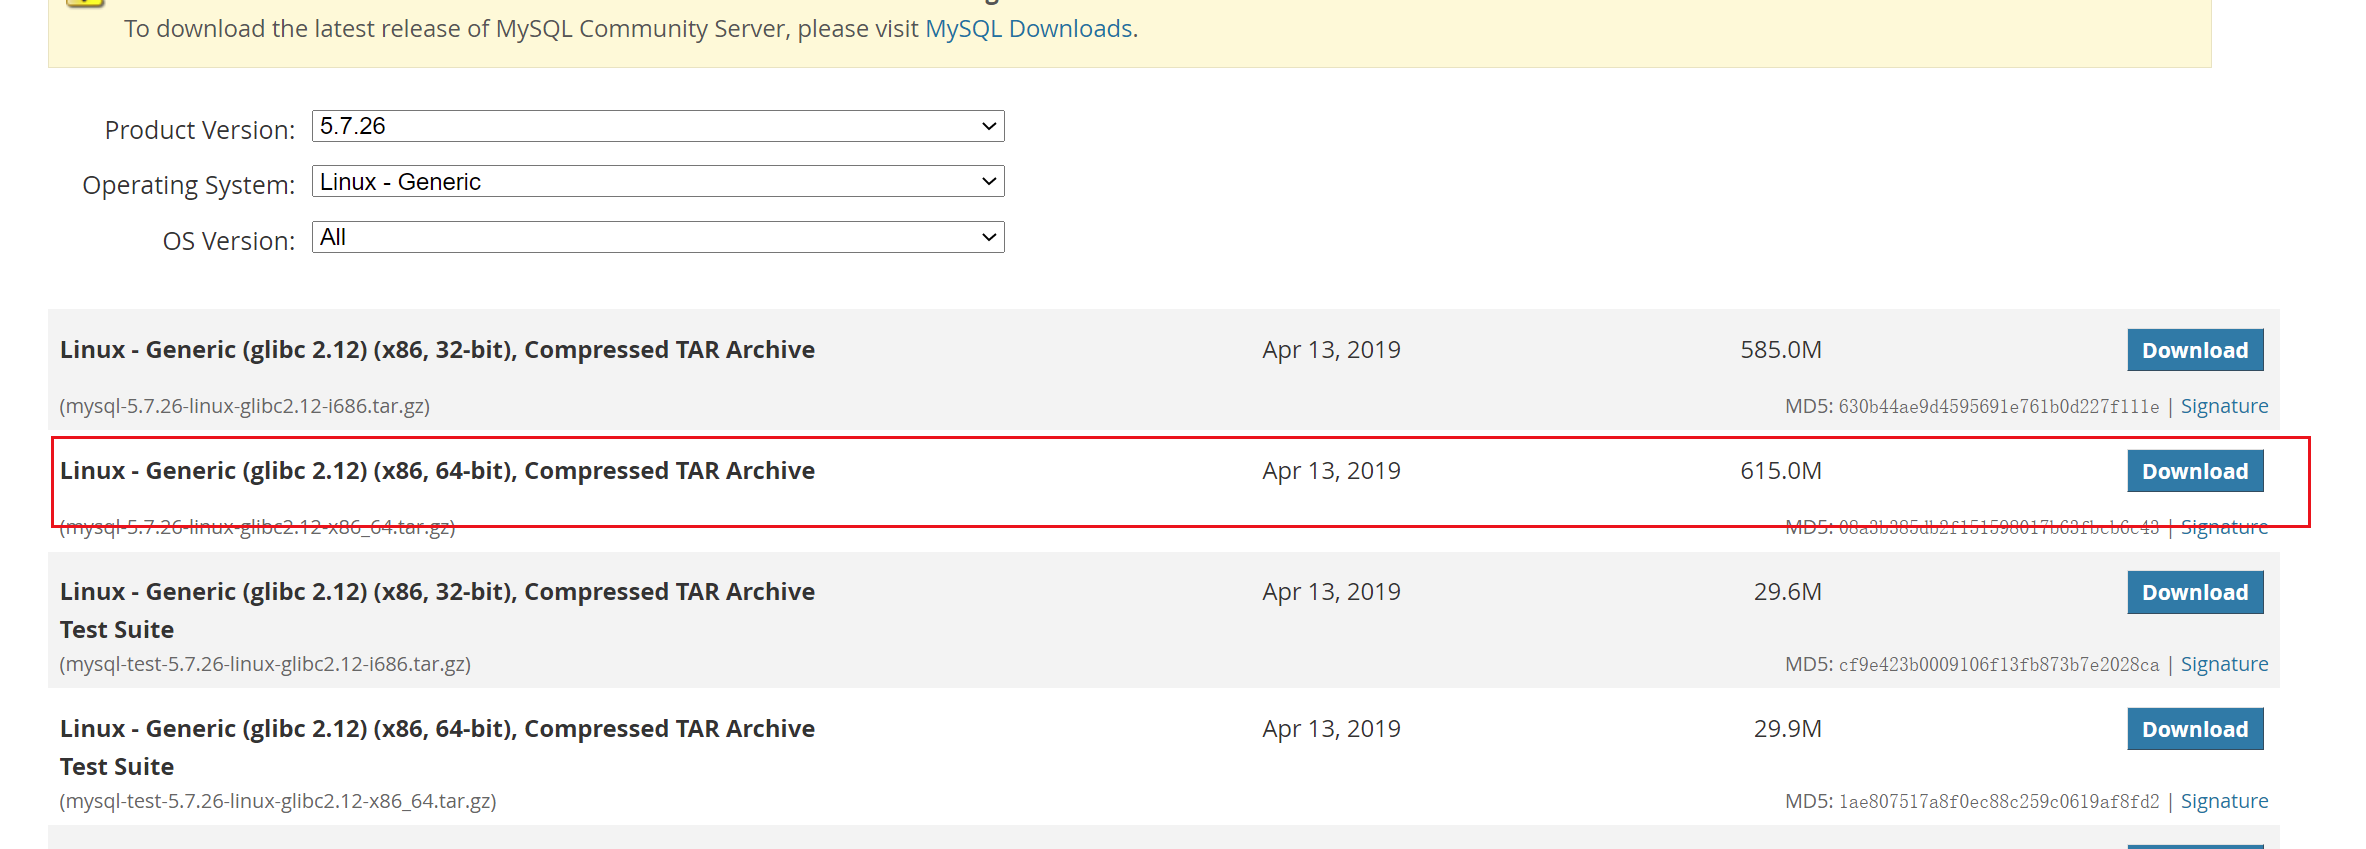
3. 安装
创建MySQL的数据目录
mkdir -p /data/mysql
把下载好的二进制包放到opt目录下(个人习惯)
yum -y install lrzsz (xshell使用的数据传输工具)
[root@localhost opt]# ls
mysql  mysql-5.7.26-linux-glibc2.12-x86_64.tar.gz
解压二进制包。并且更名
tar xf mysql-5.7.26-linux-glibc2.12-x86_64.tar.gz
mv mysql-5.7.26-linux-glibc2.12-x86_64 mysql
[root@localhost opt]# ls mysql
bin  COPYING  docs  include  lib  man  mysql.sock  mysql.sock.lock  README  share  support-files
修改环境变量
vi /etc/profile
export PATH=/opt/mysql/bin:$PATH
修改配置文件
#
[mysqld]
#数据目录
datadir=/data/mysql
#家目录
basedir=/opt/mysql
#套接字文件
socket=/opt/mysql/mysql.sock
#数据库服务管理用户
user=mysql
[mysql]
prompt=MySQL [\\d]>
[mysqld_safe]
log-error=/data/mysql/mysql.log
pid-file=/data/mysql/mysql.pid
[client]
port=3306
socket=/opt/mysql/mysql.sock
!includedir /etc/my.cnf.d
创建MySQL的用户和组,及授权
一般情况下, 数据目录会额外使用一个单独的磁盘。
useradd mysql -s /sbin/nologin
chown -R mysql:mysql /opt/mysql
chown -R mysql:mysql /data/mysql
使用systemd的方式管理MySQL
vi /etc/systemd/system/mysqld.service
[Unit]
Description=MySQL Server
Documentation=man:mysqld(5)
Documentation=http://dev.mysql.com/doc/refman/en/using-systemd.html
After=network.target
After=syslog.target
[Install]
WantedBy=multi-user.target
[Service]
User=mysql
Group=mysql
ExecStart=/opt/mysql/bin/mysqld --defaults-file=/etc/my.cnf
LimitNOFILE = 5000
或者service mysqld * 这种也可以
cp /opt/mysql/support-files/mysql.server /etc/init.d/mysqld任选其一
启动方式(c6):service mysqld start  调用mysqld_safe  调用mysqld;
启动方式(c7):systemctl start mysqld 调用了mysqld;两者均需依赖my.cnf配置文件。
启动方式:用于日常维护,或者参数测试:可以直接调用mysqld_safe –skip-grant-tables –skip-networking &  其后面可以直接添加参数。同时也会读取my.cnf 但若有冲突,则以命令行为优先.关闭方式:mysqladmin -uroot -p123qwe shutdown
初始化数据库 ```yaml yum install -y libaio-devel 安装依赖 mysqld —initialize —user=mysql —basedir=/opt/mysql —datadir=/data/mysql 2019-04-18T03:21:53.381108Z 0 [Warning] TIMESTAMP with implicit DEFAULT value is deprecated. Please use —explicit_defaults_for_timestamp server option (see documentation for more details). 2019-04-18T03:21:54.583415Z 0 [Warning] InnoDB: New log files created, LSN=45790 2019-04-18T03:21:54.697859Z 0 [Warning] InnoDB: Creating foreign key constraint system tables. 2019-04-18T03:21:54.760821Z 0 [Warning] No existing UUID has been found, so we assume that this is the first time that this server has been started. Generating a new UUID: 1daa0c57-6189-11e9-bc80-000c294234c8. 2019-04-18T03:21:54.770856Z 0 [Warning] Gtid table is not ready to be used. Table ‘mysql.gtid_executed’ cannot be opened. 2019-04-18T03:21:54.772016Z 1 [Note] A temporary password is generated for root@localhost: 9LN.fh_Ea#uU #这个为默认生成的root密码 并且会往日志中记一份 密码过期时间180天
```yaml
mysqld --initialize-insecure  --user=mysql --basedir=/opt/mysql --datadir=/data/mysql
2022-03-23T15:18:04.959891Z 0 [Warning] TIMESTAMP with implicit DEFAULT value is deprecated. Please use --explicit_defaults_for_timestamp server option (see documentation for more details).
2022-03-23T15:18:05.098165Z 0 [Warning] InnoDB: New log files created, LSN=45790
2022-03-23T15:18:05.127039Z 0 [Warning] InnoDB: Creating foreign key constraint system tables.
2022-03-23T15:18:05.200248Z 0 [Warning] No existing UUID has been found, so we assume that this is the first time that this server has been started. Generating a new UUID: 700b4272-aabc-11ec-b63f-000c295decd0.
2022-03-23T15:18:05.200845Z 0 [Warning] Gtid table is not ready to be used. Table 'mysql.gtid_executed' cannot be opened.
2022-03-23T15:18:05.207350Z 1 [Warning] root@localhost is created with an empty password ! Please consider switching off the --initialize-insecure option.
默认不生成密码.本次会使用这个方式。
编译安装的方式,参考这个博客
https://blog.51cto.com/u_14834890/2534520
4. 密码设置
当前使用的是无密码的数据库模式。 且只能在本地进行登录
MySQL [(none)]>select user,host from mysql.user;  另外两个用户,属于mysql的系统用户,无法登录
+---------------+-----------+
| user          | host      |
+---------------+-----------+
| mysql.session | localhost |
| mysql.sys     | localhost |
| root          | localhost |
+---------------+-----------+
3 rows in set (0.00 sec)
[root@localhost support-files]# mysqladmin -uroot -p password
Enter password:
New password:
Confirm new password:
Warning: Since password will be sent to server in plain text, use ssl connection to ensure password safety.
注释
Enter password:   #输入数据库的当前密码,为空 则直接回车
New password:     #输入新的密码
Confirm new password:   #再次输入密码
5. 破解密码
先关闭数据库

mysqld_safe --skip-grant-tables --skip-networking &
--skip-grant-tables 跳过授权表
--skip-networkin 关闭远程登录

也可以将这两个参数放在数据库配置文件内, 但不太方便。毕竟是临时的操作方式


]# mysqld_safe --skip-grant-tables --skip-networking &
[1] 19804
[root@localhost support-files]# 2022-03-23T15:43:16.245588Z mysqld_safe Logging to '/data/mysql/mysql.log'.
2022-03-23T15:43:16.266911Z mysqld_safe Starting mysqld daemon with databases from /data/mysql

[root@localhost support-files]#
此时就可以直接登录了。
用户的密码信息以加密的形式,存储在authentication_string 这个字段下。
MySQL [(none)]>select user,host,authentication_string from mysql.user;
+---------------+-----------+-------------------------------------------+
| user          | host      | authentication_string                     |
+---------------+-----------+-------------------------------------------+
| root          | localhost | *050376F3855A67F5E2C6514FD3130B31006C1276 |
| mysql.session | localhost | *THISISNOTAVALIDPASSWORDTHATCANBEUSEDHERE |
| mysql.sys     | localhost | *THISISNOTAVALIDPASSWORDTHATCANBEUSEDHERE |
+---------------+-----------+-------------------------------------------+
3 rows in set (0.00 sec)
修改密码
- 手动加载授权表,使用grant命令更改密码
修改完成后,再次查看authentication_string 字段,会发现其发生了变化flush privileges; grant all on *.* to root@'localhost' identified by '123'; 或者 alter user root@'localhost' identified by '123';
此时输入 exit 或者按ctrl +d 退出数据库MySQL [(none)]>select user,host,authentication_string from mysql.user; +---------------+-----------+-------------------------------------------+ | user | host | authentication_string | +---------------+-----------+-------------------------------------------+ | root | localhost | *23AE809DDACAF96AF0FD78ED04B6A265E05AA257 | | mysql.session | localhost | *THISISNOTAVALIDPASSWORDTHATCANBEUSEDHERE | | mysql.sys | localhost | *THISISNOTAVALIDPASSWORDTHATCANBEUSEDHERE | +---------------+-----------+-------------------------------------------+ 3 rows in set (0.00 sec)
重启数据库。即可按照更改后的密码进入数据库[root@localhost support-files]# mysql -uroot -p Enter password: #此处输入密码

若有收获,就点个赞吧
0 人点赞
