目的:jenkins定时构建Allure报告
Java环境搭建
- 服务器一般自带的是OpenJDK,这里建议不用OpenJDK,推荐自己装
- 教程百度即可遍地都是
- 参考文章:https://blog.csdn.net/u010993514/article/details/82926514
Python环境搭建
https://www.cnblogs.com/lemon-feng/p/11208435.html
- 安装依赖环境
- 输入命令:
<font style="color:#F5222D;">yum -y install zlib-devel bzip2-devel openssl-devel ncurses-devel sqlite-devel readline-devel tk-devel gdbm-devel db4-devel libpcap-devel xz-devel</font>
- 输入命令:
- 创建software文件夹,cd进入
- 下载python3文件
<font style="color:#F5222D;">wget https://www.python.org/ftp/python/3.8.7/Python-3.8.7.tgz</font> (用稳定版本)
没有wget命令,输入<font style="color:#F5222D;">yum -y install wget</font>,安装其依赖将会被安装
- 创建目录:
<font style="color:#F5222D;">mkdir -p /usr/local/python3</font> - 进入softwrae文件夹解压python文件,
<font style="color:#F5222D;">tar -zxvf xxx.tgz</font> - 进入加压出来的python文件夹内
- 安装gcc 输入命令
<font style="color:#F5222D;">yum install gcc</font>,确认下载安装输入y - 3.7版本之后需要一个新的包libffi-devel,安装即可:
<font style="color:#F5222D;">yum install libffi-devel -y</font> - 生成编译脚本:
<font style="color:#F5222D;">./configure --prefix=/usr/local/python3</font> - 编译:
<font style="color:#F5222D;">make</font> - 编译成功后,编译安装:
<font style="color:#F5222D;">make install</font>
- 安装gcc 输入命令
- 建立软连接
<font style="color:#F5222D;">ln -s /usr/local/python3/bin/python3 /usr/bin/python3</font><font style="color:#F5222D;">ln -s /usr/local/python3/bin/pip3 /usr/bin/pip3</font>
- 并将/usr/local/python3/bin加入PATH:
<font style="color:#F5222D;">vim /etc/profile</font>1. 粘贴以下内容
# vim ~/.bash_profile# .bash_profile# Get the aliases and functionsif [ -f ~/.bashrc ]; then. ~/.bashrcfi# User specific environment and startup programsPATH=$PATH:$HOME/bin:/usr/local/python3/binexport PATH
2. <font style="color:rgb(51, 51, 51);">按ESC,输入:wq回车退出</font>3. <font style="color:rgb(51, 51, 51);">修改完记得执行行下面的命令,让上一步的修改生效:</font>`<font style="color:#F5222D;">source ~/.bash_profile</font>`
- 检查版本

Node环境搭建
https://www.cnblogs.com/qq874455953/p/10264429.html
- 新建目录node
<font style="color:#F5222D;">cd /usr/local/node</font>进入 - 下载安装包
<font style="color:#F5222D;">wget</font><font style="color:#F5222D;background-color:rgb(245, 245, 245);"> https://npm.taobao.org/mirrors/node/v</font><font style="color:#F5222D;">12</font><font style="color:#F5222D;background-color:rgb(245, 245, 245);">.</font><font style="color:#F5222D;">12</font><font style="color:#F5222D;background-color:rgb(245, 245, 245);">.</font><font style="color:#F5222D;">0</font><font style="color:#F5222D;background-color:rgb(245, 245, 245);">/node-v</font><font style="color:#F5222D;">12</font><font style="color:#F5222D;background-color:rgb(245, 245, 245);">.</font><font style="color:#F5222D;">12</font><font style="color:#F5222D;background-color:rgb(245, 245, 245);">.</font><font style="color:#F5222D;">0</font><font style="color:#F5222D;background-color:rgb(245, 245, 245);">-linux-x</font><font style="color:#F5222D;">64</font><font style="color:#F5222D;background-color:rgb(245, 245, 245);">.tar.gz</font> - 解压
- 建立软连接
1.
<font style="color:#F5222D;">ln</font><font style="color:#F5222D;background-color:rgb(245, 245, 245);"> -s /usr/local/node/node-v</font><font style="color:#F5222D;">4</font><font style="color:#F5222D;background-color:rgb(245, 245, 245);">.</font><font style="color:#F5222D;">4</font><font style="color:#F5222D;background-color:rgb(245, 245, 245);">.</font><font style="color:#F5222D;">7</font><font style="color:#F5222D;background-color:rgb(245, 245, 245);">-linux-x</font><font style="color:#F5222D;">64</font><font style="color:#F5222D;background-color:rgb(245, 245, 245);">/bin/npm /usr/local/bin/npm</font>2. ln -s /usr/local/node/node-v4.4.7-linux-x64/bin/node /usr/local/bin/node - 查看版本

Git搭建
https://www.cnblogs.com/wulixia/p/11016684.html
<font style="color:#F5222D;">mkdir -p /usr/local/git</font>- 进入文件夹,上传gitxxx.tar.gz,然后解压
- 进入解压后的文件夹内
<font style="color:#F5222D;">yum install curl-devel expat-devel gettext-devel openssl-devel zlib-devel gcc perl-ExtUtils-MakeMaker</font>- 耐心等待安装完成,中途出现提示的时候输入y并按回车
- 提示,安装编译源码所需依赖的时候,yum自动帮你安装了git,这时候你需要先卸载这个旧版的git。
<font style="color:#F5222D;">yum -y remove git</font>
- 、编译git源码
<font style="color:#F5222D;">make prefix=/usr/local/git all</font>
- 安装git至/usr/local/git路径
<font style="color:#F5222D;">make prefix=/usr/local/git install</font>
- 配置环境变量
1. vi /etc/profile
2.
<font style="color:#F5222D;">export PATH=$PATH:/usr/local/git/</font><font style="color:#F5222D;">bin</font>3. 保存 - 刷新环境变量
<font style="color:#F5222D;">source /etc/profile</font><font style="color:#F5222D;">git --version</font>

Allure搭建
- 可下载allure-commandline-2.13.0.tgz上传到服务器至allure文件夹下
- 解压之后

- 授予package最高权限
<font style="color:#F5222D;">chmod -R 777 package</font> - 进入
<font style="color:#F5222D;">cd /usr/bin</font> - 建立软连接
<font style="color:#F5222D;">ln -s /usr/local/allure/package/bin/allure</font>
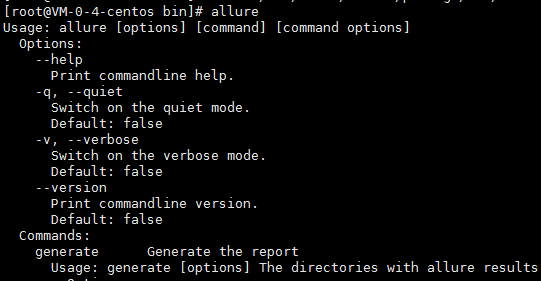
- 查看allure:即为成功

待续

