一、搭建环境
首先创建一个maven项目,在pom.xml文件中引入springboot父项目,这样这个项目就是一个springboot项目了。
<parent><groupId>org.springframework.boot</groupId><artifactId>spring-boot-starter-parent</artifactId><version>2.1.4.RELEASE</version></parent>
添加一些项目所需依赖:
<dependencies>
    <!--引入web模块-->
    <dependency>
        <groupId>org.springframework.boot</groupId>
        <artifactId>spring-boot-starter-web</artifactId>
    </dependency>

    <!--引入lombok相关依赖-->
    <dependency>
        <groupId>org.projectlombok</groupId>
        <artifactId>lombok</artifactId>
        <optional>true</optional>
    </dependency>

    <!--引入springboot单元测试模块-->
    <dependency>
        <groupId>org.springframework.boot</groupId>
        <artifactId>spring-boot-starter-test</artifactId>
        <scope>test</scope>
    </dependency>

    <!--引入fastjson-->
    <dependency>
        <groupId>com.alibaba</groupId>
        <artifactId>fastjson</artifactId>
        <version>1.2.31</version>
    </dependency>

    <!--专门用于数据绑定的依赖-->
    <dependency>
        <groupId>org.springframework.boot</groupId>
        <artifactId>spring-boot-configuration-processor</artifactId>
    </dependency>
</dependencies>
添加springboot的maven编译插件
<build>
    <finalName>springboot-study</finalName>
    <plugins>
        <plugin>
            <groupId>org.springframework.boot</groupId>
            <artifactId>spring-boot-maven-plugin</artifactId>
        </plugin>
    </plugins>
</build>
编写springboot启动类
/**
 * SpringBoot启动类
 * @author wzy
 * @version 1.0
 * @date 2019/9/16 22:41
 */
@SpringBootApplication
public class SpringBootStudyApplication {
    public static void main(String[] args) {
        SpringApplication.run(SpringBootStudyApplication.class, args);
    }
}
运行main方法启动springboot项目

二、SpringBoot应用启动入口
2.1 应用启动的三种方式
第一种最为常用。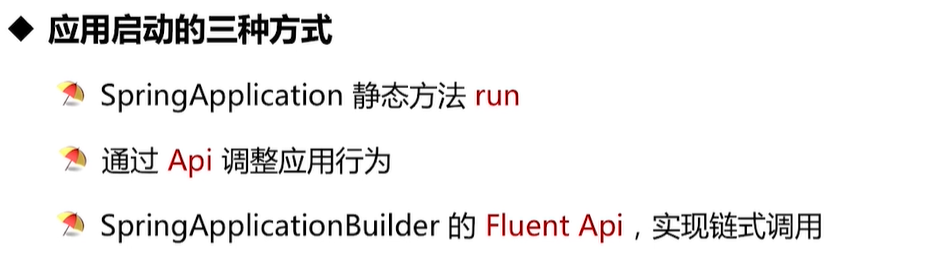
第一种启动方式:SpringApplication静态方法run
@SpringBootApplication
public class SpringBootStudyApplication {
    public static void main(String[] args) {
        //通过静态run方法
        SpringApplication.run(SpringBootStudyApplication.class, args);
    }
}
第二种方式:通过API调整应用行为
@SpringBootApplication
public class SpringBootStudyApplication {
    public static void main(String[] args) {
        //创建SpringApplication实例,去修改SpringBoot的一些行为
        SpringApplication application =
                new SpringApplication(SpringBootStudyApplication.class);
        //关闭banner打印
        application.setBannerMode(Banner.Mode.OFF);
        //设置当前应用为非web应用
        application.setWebApplicationType(WebApplicationType.NONE);
        application.run(args);
    }
}
我们可以观察到程序启动之后就运行结束了,并且没有打印出端口号,也没有打印banner,可见通过SpringApplication对象的配置是成功的。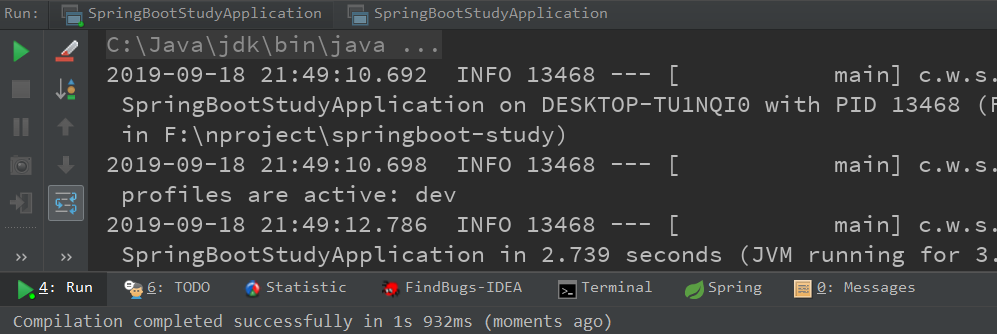
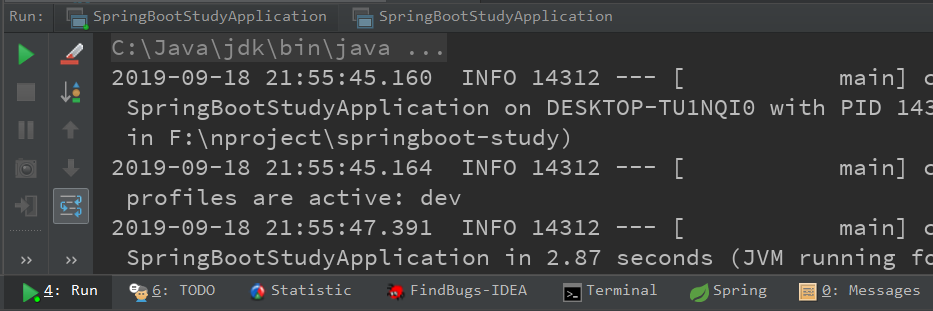
第三种方式:通过SpringApplicationBuilder flulent Api链式调用
@SpringBootApplication
public class SpringBootStudyApplication {
    public static void main(String[] args) {
        new SpringApplicationBuilder(SpringBootStudyApplication.class)
                .bannerMode(Banner.Mode.OFF)
                .web(WebApplicationType.NONE)
                .run(args);
    }
}
可以看到启动的结果与第二种结果相同:
三、SpringBoot自动配置原理
3.1 SpringBootApplication注解概述
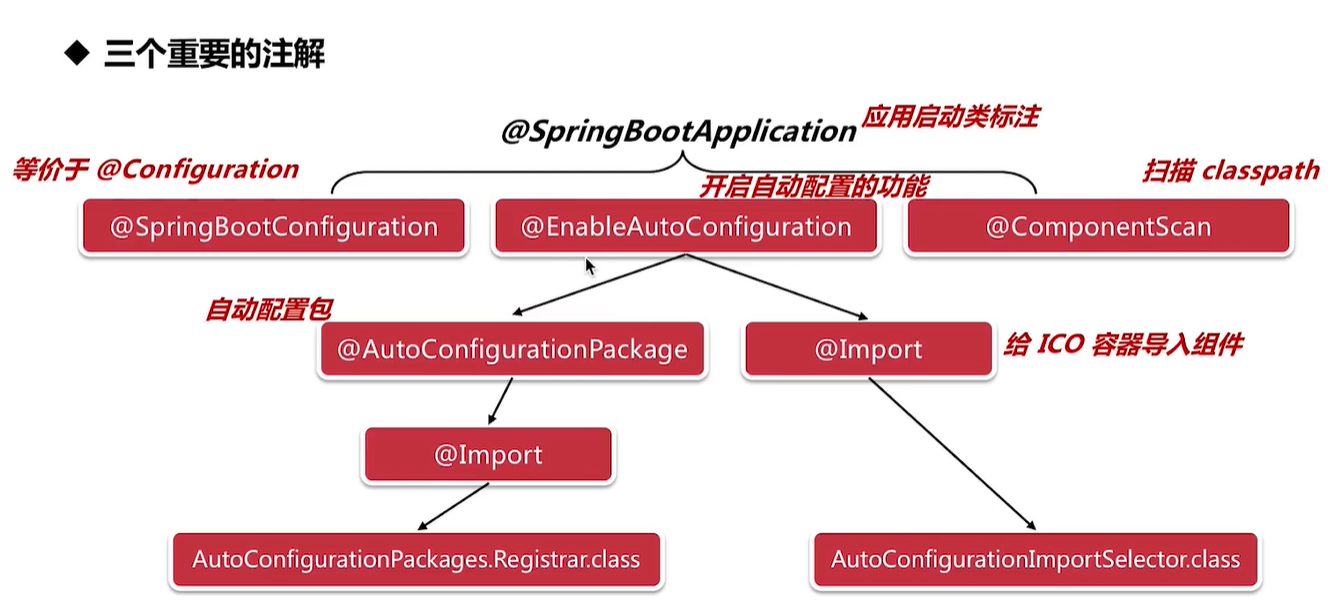
首先从@SpringBootApplication注解开始入手
@Target(ElementType.TYPE)
@Retention(RetentionPolicy.RUNTIME)
@Documented
@Inherited
@SpringBootConfiguration
@EnableAutoConfiguration
@ComponentScan(excludeFilters = {
        @Filter(type = FilterType.CUSTOM, classes = TypeExcludeFilter.class),
        @Filter(type = FilterType.CUSTOM,
                classes = AutoConfigurationExcludeFilter.class) })
public @interface SpringBootApplication {

}
查看@SpringBootConfiguration注解,可以发现,它的底层也是一个Configuration注解,标志SpringBootApplication是一个Spring容器的组件。
@Target(ElementType.TYPE)
@Retention(RetentionPolicy.RUNTIME)
@Documented
@Configuration
public @interface SpringBootConfiguration {

}
其中@EnableAutoConfiguration注解就是开启SpringBoot自动配置的注解。
@ComponentScan就是用来扫描java中的组件的注解
3.2 @EnableAutoConfiguration注解详解
首先来看一下@EnableAutoConfiguration注解的具体实现。
@Target(ElementType.TYPE)
@Retention(RetentionPolicy.RUNTIME)
@Documented
@Inherited
@AutoConfigurationPackage
@Import(AutoConfigurationImportSelector.class)
public @interface EnableAutoConfiguration {

    String ENABLED_OVERRIDE_PROPERTY = "spring.boot.enableautoconfiguration";

    /**
     * Exclude specific auto-configuration classes such that they will never be applied.
     * @return the classes to exclude
     */
    Class<?>[] exclude() default {};

    /**
     * Exclude specific auto-configuration class names such that they will never be
     * applied.
     * @return the class names to exclude
     * @since 1.3.0
     */
    String[] excludeName() default {};

}
在@EnableAutoConfiguration中有两个重要注解@AutoConfigurationPackage、@Import(AutoConfigurationImportSelector.class)
@AutoConfigurationPackage:自动配置包
@Import(AutoConfigurationImportSelector.class):给spring容器导入组件
3.2.1 @AutoConfigurationPackage
自动配置包,看一下它的源码,实际上也是导入了一个AutoConfigurationPackages.Registrar.class组件
@Target(ElementType.TYPE)
@Retention(RetentionPolicy.RUNTIME)
@Documented
@Inherited
@Import(AutoConfigurationPackages.Registrar.class)
public @interface AutoConfigurationPackage {

}
接下来查看AutoConfigurationPackages.Registrar组件的源码。
核心方法就是registerBeanDefinitions
static class Registrar implements ImportBeanDefinitionRegistrar, DeterminableImports {

        @Override
        public void registerBeanDefinitions(AnnotationMetadata metadata,
                BeanDefinitionRegistry registry) {
            register(registry, new PackageImport(metadata).getPackageName());
        }

        @Override
        public Set<Object> determineImports(AnnotationMetadata metadata) {
            return Collections.singleton(new PackageImport(metadata));
        }

    }
核心方法是registerBeanDefinitions,去扫描启动类所在包和其子包中的组件扫描到SpringIOC容器中。和@ComponentScan注解的意义不同。像springDataJPA的@Entity这类注解,是会被AutoConfigurationPackage去加载的。
3.2.2 @Import(AutoConfigurationImportSelector.class)
首先我们先查看AutoConfigurationImportSelector的具体实现,其中的核心方法就是selectImports,选择注入、
@Override
public String[] selectImports(AnnotationMetadata annotationMetadata) {
   if (!isEnabled(annotationMetadata)) {
      return NO_IMPORTS;
   }
   AutoConfigurationMetadata autoConfigurationMetadata = AutoConfigurationMetadataLoader
         .loadMetadata(this.beanClassLoader);
   AutoConfigurationEntry autoConfigurationEntry = getAutoConfigurationEntry(
         autoConfigurationMetadata, annotationMetadata);
   return StringUtils.toStringArray(autoConfigurationEntry.getConfigurations());
}
进入getAutoConfigurationEntry方法当中
protected AutoConfigurationEntry getAutoConfigurationEntry(
      AutoConfigurationMetadata autoConfigurationMetadata,
      AnnotationMetadata annotationMetadata) {
   if (!isEnabled(annotationMetadata)) {
      return EMPTY_ENTRY;
   }
   AnnotationAttributes attributes = getAttributes(annotationMetadata);
   List<String> configurations = getCandidateConfigurations(annotationMetadata,
         attributes);
   configurations = removeDuplicates(configurations);
   Set<String> exclusions = getExclusions(annotationMetadata, attributes);
   checkExcludedClasses(configurations, exclusions);
   configurations.removeAll(exclusions);
   configurations = filter(configurations, autoConfigurationMetadata);
   fireAutoConfigurationImportEvents(configurations, exclusions);
   return new AutoConfigurationEntry(configurations, exclusions);
}
进入getCandidateConfigurations方法当中,这个方法可以得到很多的配置信息,可以发现调用了SpringFactoriesLoader.loadFactoryNames()方法,
protected List<String> getCandidateConfigurations(AnnotationMetadata metadata,
      AnnotationAttributes attributes) {
   List<String> configurations = SpringFactoriesLoader.loadFactoryNames(
         getSpringFactoriesLoaderFactoryClass(), getBeanClassLoader());
   Assert.notEmpty(configurations,
         "No auto configuration classes found in META-INF/spring.factories. If you "
               + "are using a custom packaging, make sure that file is correct.");
   return configurations;
}
继续查看loadFactoryNames源代码,可以看到了调用了loadSpringFactories方法
public static List<String> loadFactoryNames(Class<?> factoryClass, @Nullable ClassLoader classLoader) {
   String factoryClassName = factoryClass.getName();
   return loadSpringFactories(classLoader).getOrDefault(factoryClassName, Collections.emptyList());
}
进入到loadSpringFactories方法里面,这个方法就是自动配置的核心配置,首先有一个url的获取之后得到resource。
private static Map<String, List<String>> loadSpringFactories(@Nullable ClassLoader classLoader) {
   MultiValueMap<String, String> result = cache.get(classLoader);
   if (result != null) {
      return result;
   }

   try {
      Enumeration<URL> urls = (classLoader != null ?
            classLoader.getResources(FACTORIES_RESOURCE_LOCATION) :
            ClassLoader.getSystemResources(FACTORIES_RESOURCE_LOCATION));
      result = new LinkedMultiValueMap<>();
      while (urls.hasMoreElements()) {
         URL url = urls.nextElement();
         UrlResource resource = new UrlResource(url);
         Properties properties = PropertiesLoaderUtils.loadProperties(resource);
         for (Map.Entry<?, ?> entry : properties.entrySet()) {
            String factoryClassName = ((String) entry.getKey()).trim();
            for (String factoryName : StringUtils.commaDelimitedListToStringArray((String) entry.getValue())) {
               result.add(factoryClassName, factoryName.trim());
            }
         }
      }
      cache.put(classLoader, result);
      return result;
   }
   catch (IOException ex) {
      throw new IllegalArgumentException("Unable to load factories from location [" +
            FACTORIES_RESOURCE_LOCATION + "]", ex);
   }
}
我们可以看到获取资源的的位置在:META-INF/spring.factories,所以自动配置的核心实现就是到META-INF/spring.factories里去查找已经配置的jar包,把对应的类包装成 properties文件,之后对properties进行遍历,之后result.add(),获取到key的值,添加到容器当中。
public static final String FACTORIES_RESOURCE_LOCATION = "META-INF/spring.factories";
四、SpringBoot配置文件加载顺序
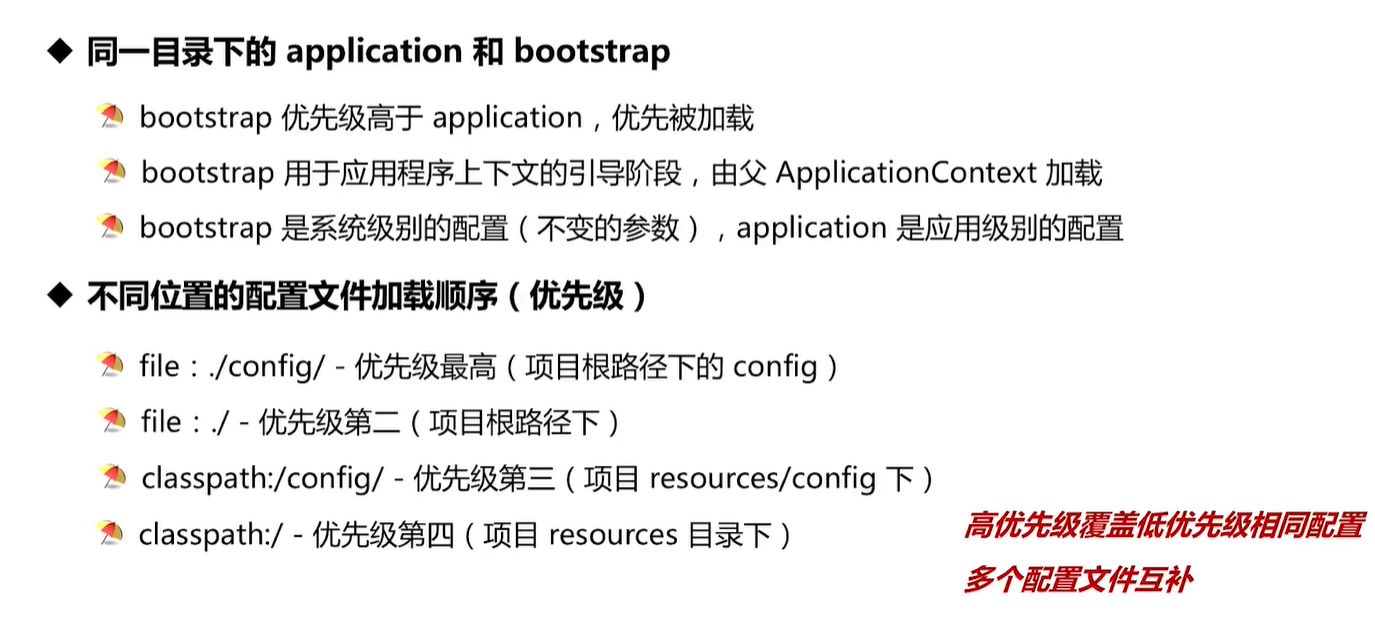
除此之外我们还可以对多个环境中的配置文件进行切换。
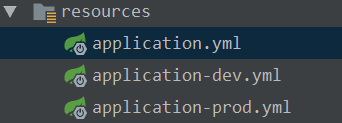
application.yml
server:
  port: 8000
  servlet:
    context-path: /imooc
spring:
  profiles:
    active: dev
application-dev.yml
server:
  port: 8001
  servlet:
    context-path: /imooc-dev
application-prod.yml
server:
  port: 8002
  servlet:
    context-path: /imooc-prod
启动主程序,我们可以注意到dev配置文件生效,因为我们在application.yml 中的spring.profiles.active指定了生效的配置文件。<br />
五、配置的注入方式
首先在application.yml中定义如下配置,下面我们通过两种方式去读取imooc.springboot.version和imooc.springboot.name的配置信息。
server:
  port: 8000
  servlet:
    context-path: /imooc
imooc:
  springboot:
    version: 2.1,2.1.4
    name: study
首先我们定一个TestController类,并声明两个要注入的配置属性。
@Slf4j
@RestController
@RequestMapping("/test")
public class TestController {
    private String name;

    private String version;

    @RequestMapping(value = "/getProperties")
    public String getNameAndVersion() {
        return "name:" + name + ", version:" + version;
    }
}
5.1 @Value方式注入配置
第一种方式配置的注入方式@Value
@Slf4j
@RestController
@RequestMapping("/test")
public class TestController {
    @Value("${imooc.springboot.name}")
    private String name;

    @Value("${imooc.springboot.version}")
    private String version;

    @RequestMapping(value = "/getProperties")
    public String getNameAndVersion() {
        return "name:" + name + ", version:" + version;
    }
}
访问接口进行测试,可以看到正确的注入了配置。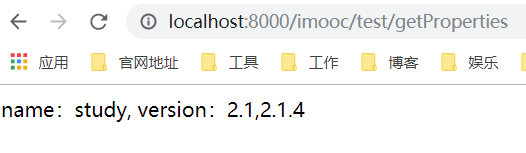
5.2 @ConfigurationProperties方式进行注入
第二种配置注入方式采用的是@ConfigurationProperties注解进行注入,使用这种方式注入,首先需要引入下面的依赖。
<!--专门用于数据绑定的依赖-->
<dependency>
    <groupId>org.springframework.boot</groupId>
    <artifactId>spring-boot-configuration-processor</artifactId>
</dependency>
@ConfigurationProperties使用方法
@Slf4j
@Data
@RestController
@RequestMapping("/test")
@ConfigurationProperties(prefix = "imooc.springboot")
public class TestController {
    private String name;

    private String version;

    @RequestMapping(value = "/getProperties")
    public String getNameAndVersion() {
        return "name:" + name + ", version:" + version;
    }

}
这里要注意两点,@ConfigurationProperties注解的prefix属性就是注入属性的前缀,定义的属性名称必须与配置文件中相同,除此之外还要注意,使用@Data注解,生成get/set方法,因为这样Spring才可以使用set方法对配置的属性进行注入。
六、SpringBoot定时任务
在SpringBoot中开启定时任务,首先在启动类中加上@EnableScheduling注解,开启SpringBoot的定时任务。
@EnableScheduling
@SpringBootApplication
public class SpringBootStudyApplication {
    public static void main(String[] args) {
        SpringApplication.run(SpringBootStudyApplication.class, args);
    }
}
编写定时任务类,首先创建schedule包,之后包下面创建定时任务类:
下面分别演示四种类型的定时任务
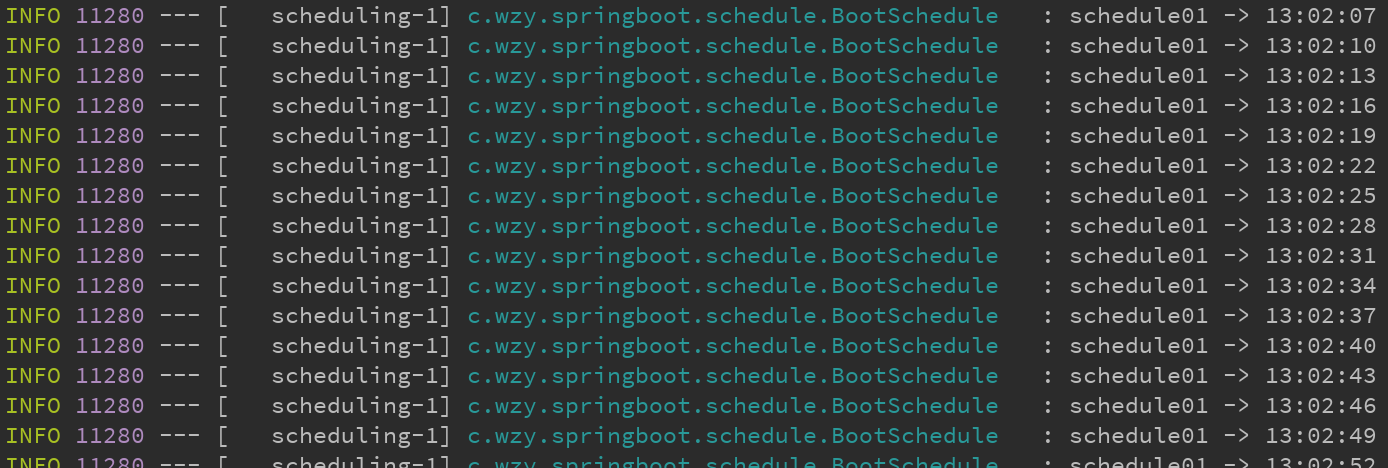
6.1 fixedRate方式
第一种是以固定的频率执行,上一次开始执行时间点之后3000毫秒再执行,这里要注意因为定时任务无须手动开启,所以要将这个类注册为一个Spring的组件,@Slf4j注解的作用是输出日志。
@Slf4j
@Component
public class BootSchedule {
    private final DateTimeFormatter fmt = DateTimeFormatter.ofPattern(
            "HH:mm:ss"
    );

    /**
     * 上一次开始执行时间点之后3000毫秒再执行
     */
    @Scheduled(fixedRate = 3000)
    public void schedule01() {
        log.info("schedule01 -> {}", LocalDateTime.now().format(fmt));
    }
}
测试结果:
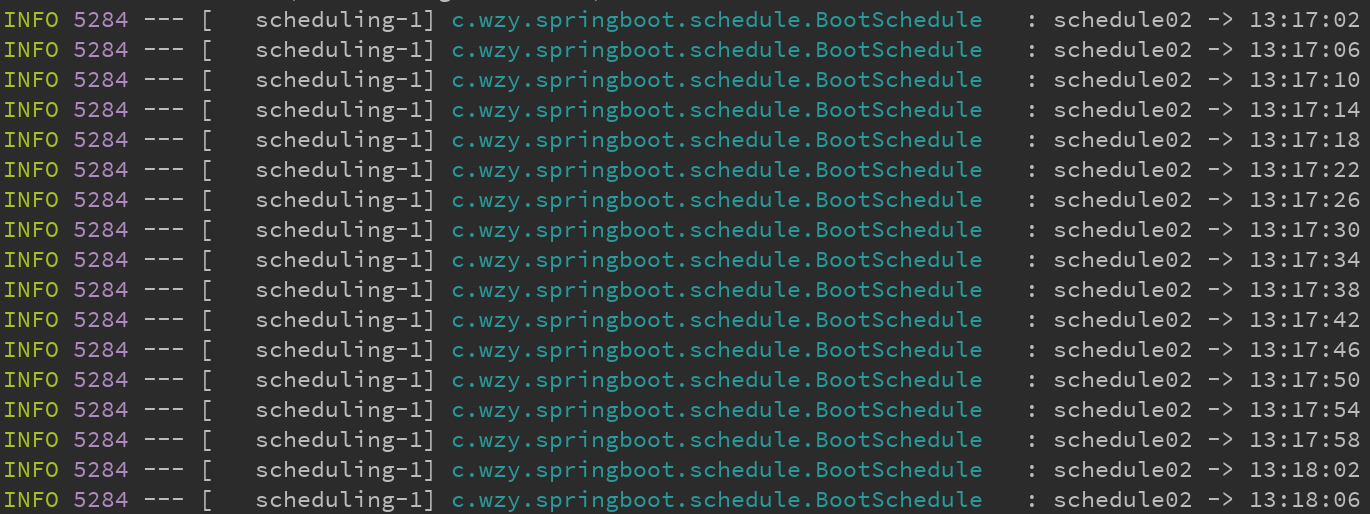
6.2 fixedDelay方式
第二种定时任务的执行方式是上一次执行完毕时间点之后3秒再执行
/**
 * 上一次执行完毕时间点之后3秒再执行
 */
@Scheduled(fixedDelay = 3000)
public void schedule02() throws InterruptedException {
    Thread.sleep(1000);
    log.info("schedule02 -> {}", LocalDateTime.now().format(fmt));
}
测试结果:
因为下一次执行定时任务需要等到上一次执行完成也就是相当于每隔1s+3s=4s执行一次任务
6.3 initialDelay与fixedRate组合方式
第三种就是在第一次执行任务之前设置一个延迟的时间,配合之前两种方式使用。
/**
 * 第一次延迟两秒之后执行,之后按照每三秒执行一次
 */
@Scheduled(initialDelay = 2000, fixedRate = 3000)
public void schedule03() {
    log.info("schedule03 -> {}", LocalDateTime.now().format(fmt));
}
测试结果不是很明显,因为看不到第一次延迟三秒的效果。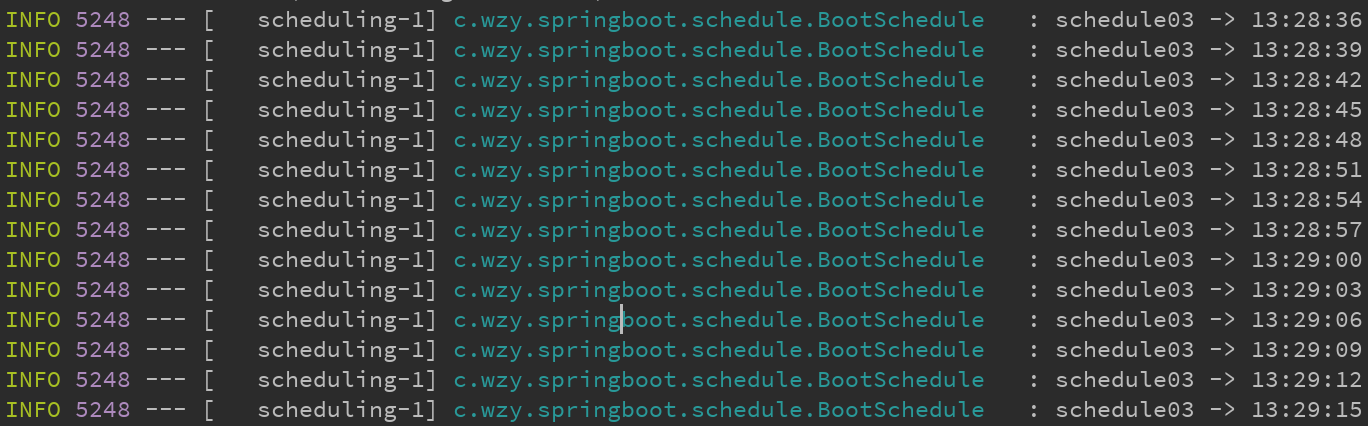
6.4 使用Cron表达式
第四种是工作当中比较常用的Cron表达式,这个表达式的含义就是每三秒执行一次
/**
 * 每三秒执行一次
 */
@Scheduled(cron = "*/3 * * * * ?")
public void schedule03() {
    log.info("schedule03 -> {}", LocalDateTime.now().format(fmt));
}
测试结果,也符合我们的预期。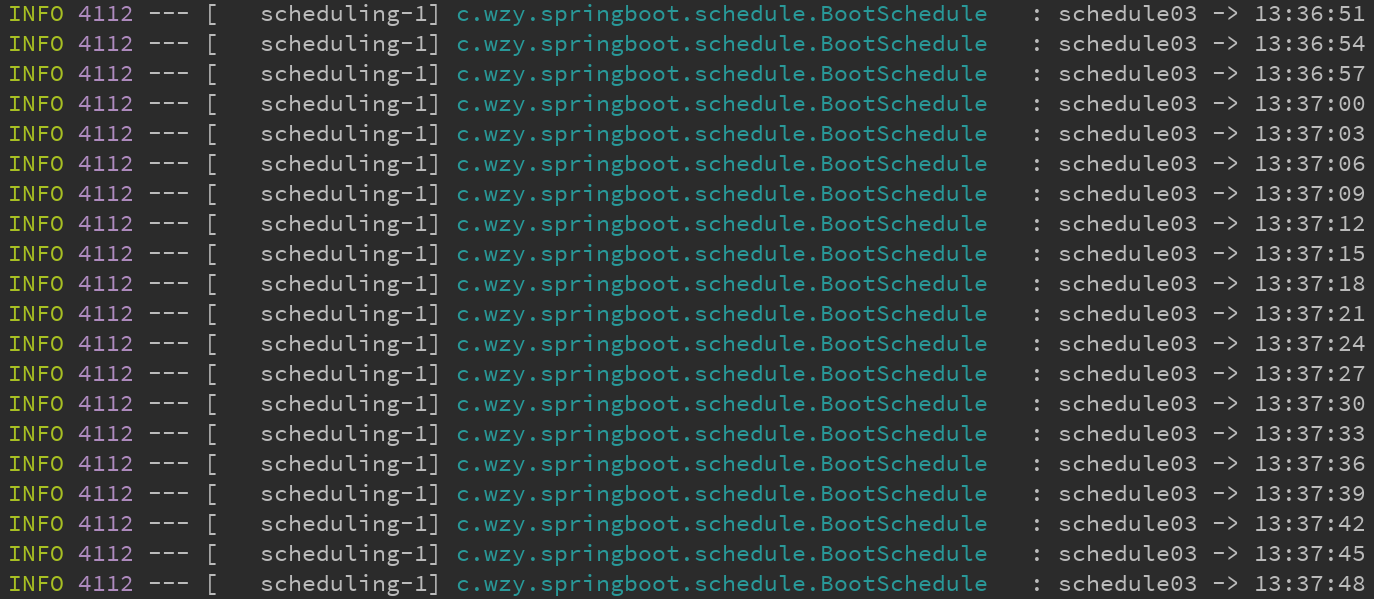
七、SpringBoot异步任务
可以直接调用无须等待返回,需要有springboot-web的依赖才能使用异步任务。
<!--引入web模块-->
<dependency>
    <groupId>org.springframework.boot</groupId>
    <artifactId>spring-boot-starter-web</artifactId>
</dependency>
并且我们需要在启动类上,加上@EnableAsync标志这个SpringBoot应用支持异步服务。
@EnableScheduling
@SpringBootApplication
@EnableAsync
public class SpringBootStudyApplication {
    public static void main(String[] args) {
        SpringApplication.run(SpringBootStudyApplication.class, args);
    }
}
首先创建一个async包,在包下面创建AsyncService类,并且加上组件的注解@Component
@Component
@Slf4j
public class AsyncService {

}
编写第一个异步任务,实际上是另开一个线程处理异步任务,在异步任务中,让线程睡眠2秒钟,将方法标志为@Async,那么这个方法就成为一个异步任务,这个异步任务是没有返回值的
@Async
public void asyncProcess() throws InterruptedException {
    log.info("async process task, current thread name -> {}",
            Thread.currentThread().getName());
    TimeUnit.SECONDS.sleep(2);
}
定义一个有返回值的异步任务方法
@Async
public Future<Integer> asyncProcessHasReturn() throws InterruptedException {
    log.info("async process task (has return), current thread name -> {}",
            Thread.currentThread().getName());
    TimeUnit.SECONDS.sleep(2);
    return new AsyncResult<>(100);
}
编写TestAsync类,测试两个异步服务方法。
@SpringBootTest
@RunWith(SpringRunner.class)
@Slf4j
public class AsyncTest {
    @Autowired
    private AsyncService asyncService;
    @Test
    public void testAsyncProcess() throws InterruptedException {
        asyncService.asyncProcess();
    }

    @Test
    public void testAsyncProcessHasReturn() throws InterruptedException, ExecutionException {
        Future<Integer> resultFuture = asyncService.asyncProcessHasReturn();
        log.info("asyncProcessHasReturn method result: {}", resultFuture.get());
    }
}
第一个方法的测试结果,可以看到日志成功输出
第二个方法的测试结果,可以看到日志成功输出,并打印了返回值
SpringBoot异步任务的默认线程池,的线程不能重复利用,因为默认的核心线程数是1,这样是非常浪费资源的,所以需要我们手动去创建一个线程池,需要进行优化。
首先我们在config包中创建一个线程池配置类,创建线程池并注入到Spring容器中,之后我们还定义了一个异常任务处理类,异步任务的异常处理类,异步任务分为两类,一类是有返回值的,一类是没有返回值的任务,我们这里定义的是没有返回值得异常处理,有返回值的异常处理是需要调用的客户端去处理的,在获取返回值时处理异常。并且我们使用@Configuration标志其是一个配置类。
/**
 * 自定义异步线程池配置
 * @author wzy
 * @version 1.0
 * @date 2019/9/21 22:31
 */
@Slf4j
@Configuration
public class AsyncPoolConfig implements AsyncConfigurer {

    /**
     * 返回线程池,并将这个bean注入到容器中。
     * @return Executor 实际返回的是一个线程池
     */
    @Bean
    @Override
    public Executor getAsyncExecutor() {
        ThreadPoolTaskExecutor executor = new ThreadPoolTaskExecutor();
        //核心线程数量,默认值是1
        executor.setCorePoolSize(10);
        //最大线程数
        executor.setMaxPoolSize(20);
        //缓冲队列的容量
        executor.setQueueCapacity(20);
        //超出核心线程数的线程最大存活时间
        executor.setKeepAliveSeconds(60);

        //线程的前缀
        executor.setThreadNamePrefix("ImoocAsync");

        //是否等待所有线程执行完毕之后才关闭线程池,默认是false也就是默认关闭线程池直接关闭不会等到任务完成
        executor.setWaitForTasksToCompleteOnShutdown(true);
        //关闭线程池,等待任务执行的时长,默认是0
        executor.setAwaitTerminationSeconds(60);

        //拒绝策略,用于被拒绝的任务的执行策略,如果被拒绝则放到调用线程中执行,如果调用线程已经结束了,那么就会丢弃任务。
        executor.setRejectedExecutionHandler(
                new ThreadPoolExecutor.CallerRunsPolicy()
        );

        //初始化线程池
        executor.initialize();
        return executor;
    }

    /**
     * 异步任务的异常处理类,异步任务分为两类,一类是有返回值的,一类是没有返回值的任务
     * 我们这里定义的是没有返回值得异常处理,有返回值的异常处理是需要调用的客户端去处理的。
     * @return 异常处理器
     */
    @Override
    public AsyncUncaughtExceptionHandler getAsyncUncaughtExceptionHandler() {
        return new AsyncExceptionHandler();
    }

    /**
     * 定义异常处理接口的实现类
     */
    class AsyncExceptionHandler implements AsyncUncaughtExceptionHandler {

        @Override
        public void handleUncaughtException(Throwable throwable,
                                            Method method,
                                            Object... objects) {
            log.info("AsyncError: {}, Method: {}, Param: {}",
                    throwable.getMessage(),
                    method.getName(),
                    JSON.toJSONString(objects));
            throwable.printStackTrace();
            //TODO:发送短信给相应的负责人,发送邮件或者短信

        }
    }
}
因为方法上使用@Bean方法,那么这个bean的id就是方法名,所以我们在使用@Async内加上参数getAsyncExecutor。
@Component
@Slf4j
public class AsyncService {

    @Async("getAsyncExecutor")
    public void asyncProcess() throws InterruptedException {
        log.info("async process task, current thread name -> {}",
                Thread.currentThread().getName());
        TimeUnit.SECONDS.sleep(2);
    }

    @Async("getAsyncExecutor")
    public Future<Integer> asyncProcessHasReturn() throws InterruptedException {
        log.info("async process task (has return), current thread name -> {}",
                Thread.currentThread().getName());
        TimeUnit.SECONDS.sleep(2);
        return new AsyncResult<>(100);
    }

}
第一个方法的测试结果,可以看到日志成功输出

第二个方法的测试结果,可以看到日志成功输出,并打印了返回值

可以看出我们的自定义线程池生效了,输出结果和之前只一致的,并且我们可以发现线程的名称也发生了变化。
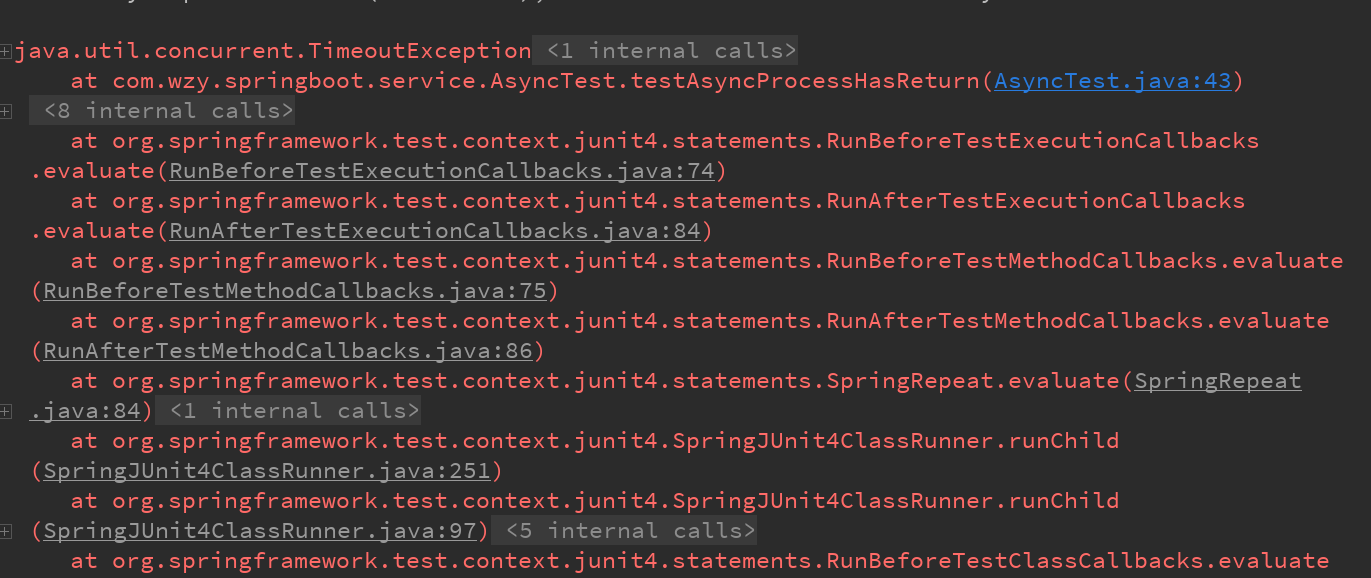
我们在有返回值得方法中加入等待时间,超时则抛出异常,测试我们编写的异常处理类
@Async("getAsyncExecutor")
public Future<Integer> asyncProcessHasReturn() throws InterruptedException {
    log.info("async process task (has return), current thread name -> {}",
            Thread.currentThread().getName());
    TimeUnit.SECONDS.sleep(2);
    return new AsyncResult<>(100);
}
测试结果,符合预期抛出了我们所定义的异常
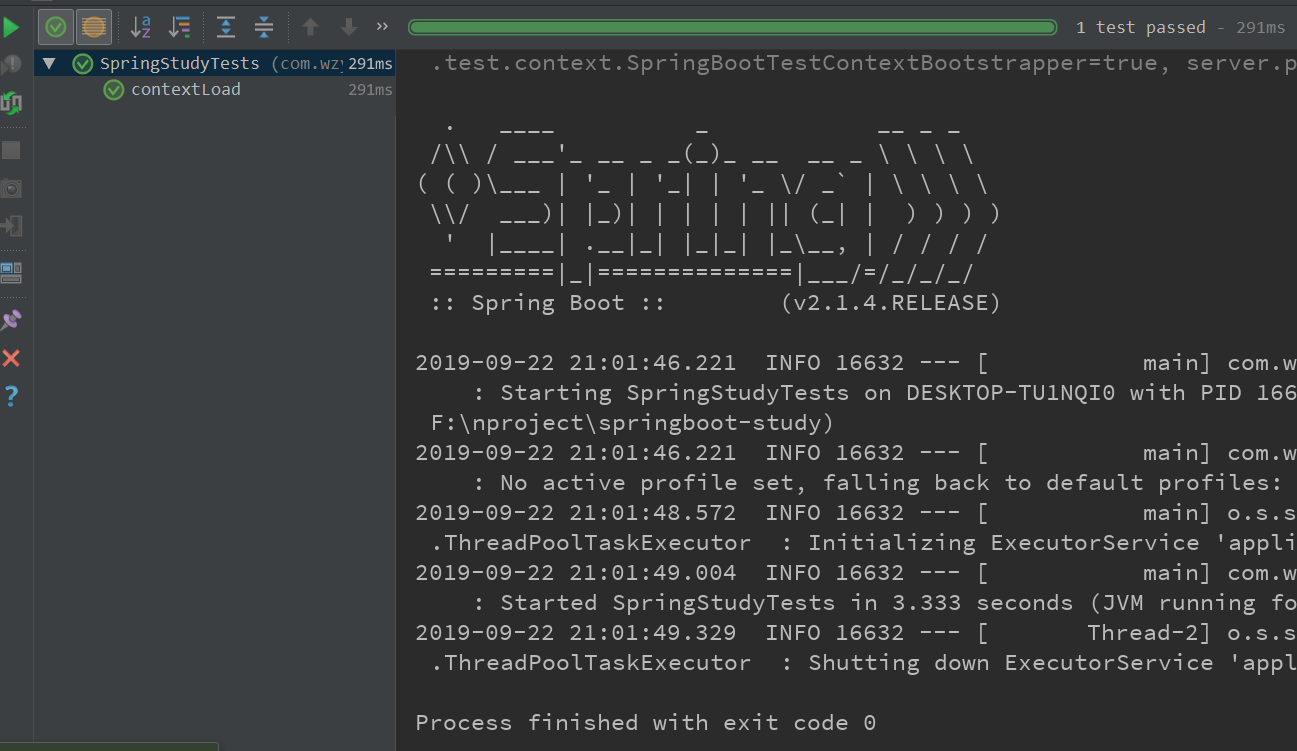
八、SpringBoot单元测试
使用@SpringBootTest注解和使用@RunWith(SpringRunner.class)注解,环境依赖于主应用程序,包括相关的配置,编写contextLoad方法就是为了测试上下文环境是否正确。
@SpringBootTest
@RunWith(SpringRunner.class)
public class SpringStudyTests {
    /**
     * 测试上下文环境
     */
    @Test
    public void contextLoad() {

    }
}
可以看出运行结果是正常的。
具体测试方法在上一章节已经测试过了,如下对异步任务测试代码。
@SpringBootTest
@RunWith(SpringRunner.class)
@Slf4j
public class AsyncTest {
    @Test
    public void contextLoad() {

    }

    @Autowired
    private AsyncService asyncService;
    @Test
    public void testAsyncProcess() throws InterruptedException {
        asyncService.asyncProcess();
    }

    @Test
    public void testAsyncProcessHasReturn() throws InterruptedException, ExecutionException {
        Future<Integer> resultFuture = asyncService.asyncProcessHasReturn();
        log.info("asyncProcessHasReturn method result: {}", resultFuture.get());
    }
}
九、SpringBoot开机启动
作用就是开机启动时做一些操作,比如说给运营人员发送短信,或者给用户推送。
SpringBoot有两种方式实现这一功能,一是实现CommandLineRunner接口,二是实现ApplicationRunner接口。首先我们定义一个runner包,两者传递参数的方式不同,分别创建实现了这两个接口的类。
ApplicationRunner接口实现类
@Slf4j
@Component
public class BootApplicationRunner implements ApplicationRunner {
    /**
     * 开机启动方法
     * @param args
     * @throws Exception
     */
    @Override
    public void run(ApplicationArguments args) throws Exception {
        log.info("This is boot application runner");
    }
}
CommandLineRunner接口实现类
/**
 * CommandLineRunner方式的开机启动类
 * @author wzy
 * @version 1.0
 * @date 2019/9/22 22:01
 */
@Slf4j
@Component
public class BootCommandLineRunner implements CommandLineRunner {
    @Override
    public void run(String... args) throws Exception {
        log.info("This is boot command line runner...");
    }
}
我们直接启动主应用类,我们可以看到默认是先去执行实现ApplicationRunner接口类的run方法。
如果我们想改变两者的执行顺序,那么使用@Order注解或者实现Order接口,来改变优先级。数字越小越先去执行(优先级高),数字越大越后去执行(优先级低)。
我们为两个实现类分别加上注解@Order
@Order(2)
@Slf4j
@Component
public class BootApplicationRunner implements ApplicationRunner {
    /**
     * 开机启动方法
     * @param args
     * @throws Exception
     */
    @Override
    public void run(ApplicationArguments args) throws Exception {
        log.info("This is boot application runner");
    }
}
@Order(1)
@Slf4j
@Component
public class BootCommandLineRunner implements CommandLineRunner {
    @Override
    public void run(String... args) throws Exception {
        log.info("This is boot command line runner...");
    }
}
重新运行主启动类,观察打印日志结果,我们可以发现BootCommandLineRunner类的run方法先执行,说明@Order注解发挥了作用。
十、SpringBoot Jackson的使用技巧
Jackson有两类注解一类标注在类上,一类标注在方法上。首先创建一个vo包之后,在包下面创建一个Imoocer类。
@Data
@NoArgsConstructor
@AllArgsConstructor
@Builder
public class Imoocer {
    private String name;

    private int age;

    private String address;

    private Date registerTime;
}
下面介绍第一个注解,@JsonProperty作用在属性上面,作为属性的别名,如果不设置属性的别名,那么fastjson转换为json字符串时,key就是registerTime。
@Data
@NoArgsConstructor
@AllArgsConstructor
@Builder
public class Imoocer {
    private String name;

    private int age;

    private String address;

    @JsonProperty("rt")
    private Date registerTime;
}
第二个注解就是@JsonIgnore,标识了这个注解的属性,序列化时将会忽略这个属性,比如address。
@Data
@NoArgsConstructor
@AllArgsConstructor
@Builder
public class Imoocer {
    private String name;

    private int age;

    @JsonIgnore
    private String address;

    @JsonProperty("rt")
    private Date registerTime;
}
如果我们想忽略多个属性可以在类上标识注解@JsonIgnoreProperties({“address”, “age”}),来指定多个属性序列化时被忽略。
@Data
@NoArgsConstructor
@AllArgsConstructor
@Builder
@JsonIgnoreProperties({"address", "age"})
public class Imoocer {
    private String name;

    private int age;

    @JsonIgnore
    private String address;

    @JsonProperty("rt")
    private Date registerTime;
}
日期格式化注解@JsonFormat,对日期属性进行格式化,否则将会返回long类型的时间戳。
@JsonFormat(pattern = "yyyy-MM-dd HH:mm:ss")
private Date registerTime;
如果有多个类和字段需要设置格式化的,我们不能每个属性上面都标注相关注解。我们在config包下,创建JacksonConfig类,首先标示这个类为@Configuration配置类,之后定义方法getObjectMapper方法标志@bean
返回ObjectMapper对象,我们只需在程序中注入ObjectMapper对象,使用objectMapper对象进行序列化和反序列化。
/**
 * Jackson的配置
 * @author wzy
 * @version 1.0
 * @date 2019/9/24 23:15
 */
@Configuration
public class JacksonConfig {
    /**
     * 自定义jackson配置
     * @return ObjectMapper
     */
    @Bean
    public ObjectMapper getObjectMapper() {
        ObjectMapper mapper = new ObjectMapper();
        //设置序列化包含的,null字段不会序列化的时候返回,不存在null的key
        mapper.setSerializationInclusion(JsonInclude.Include.NON_NULL);
        //日期的类型
        mapper.setDateFormat(new SimpleDateFormat("yyyy-MM-dd HH:mm:ss"));

        return mapper;
    }
}
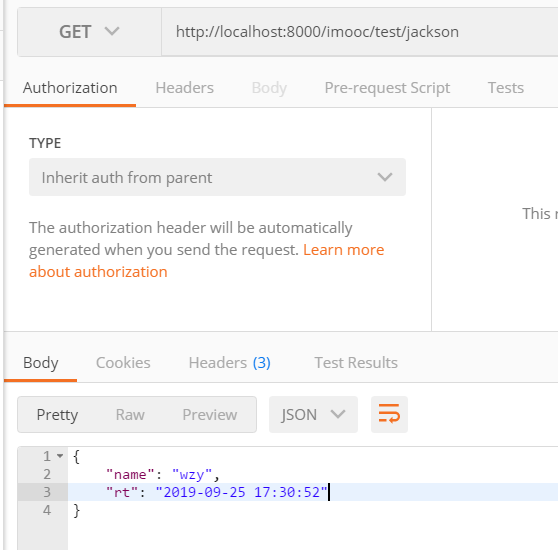
在使用ObjectMapper之前,先注释掉registerTime上面的注解,这我们就可以验证我们定义的objectMapper的作用。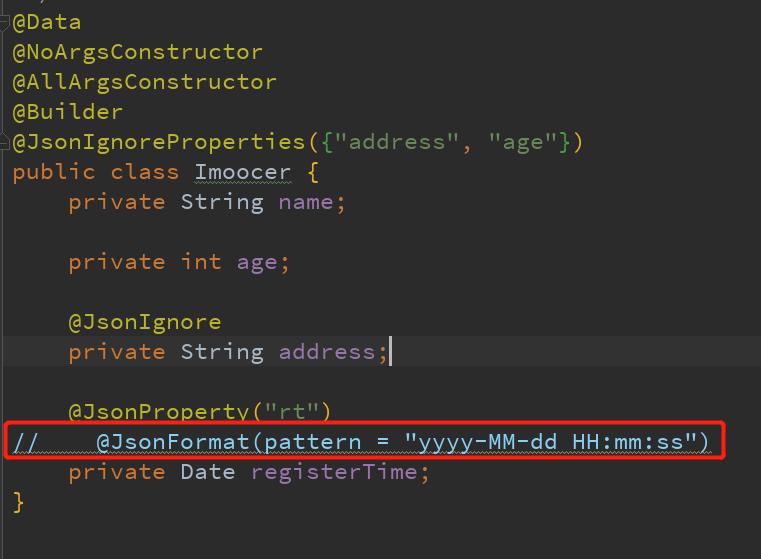
首先在TestController中注入ObjectMapper
@Autowired
private ObjectMapper mapper;
新建一个Controller方法
/**
 * 测试fastjson
 * url : http://localhost:8000/imooc/test/jackson
 * @return
 * @throws Exception
 */
@RequestMapping("/jackson")
public Imoocer jackson() throws Exception {
    Imoocer imoocer = Imoocer.builder()
            .name("wzy")
            .age(19)
            .address("hangzhou")
            .registerTime(new Date())
            .build();

    //fastJson序列化为字符串
    String jsonImoocer = mapper.writeValueAsString(imoocer);
    //打印序列化字符串
    log.info("imoocer jackson: {}", jsonImoocer);
    //反序列化字符串
    return mapper.readValue(jsonImoocer, Imoocer.class);
}
在postman中,访问地址:http://localhost:8000/imooc/test/jackson,可以看到结果,日期已经格式化。
十一、SpringBoot-Actuator监控
11.2 常用端点
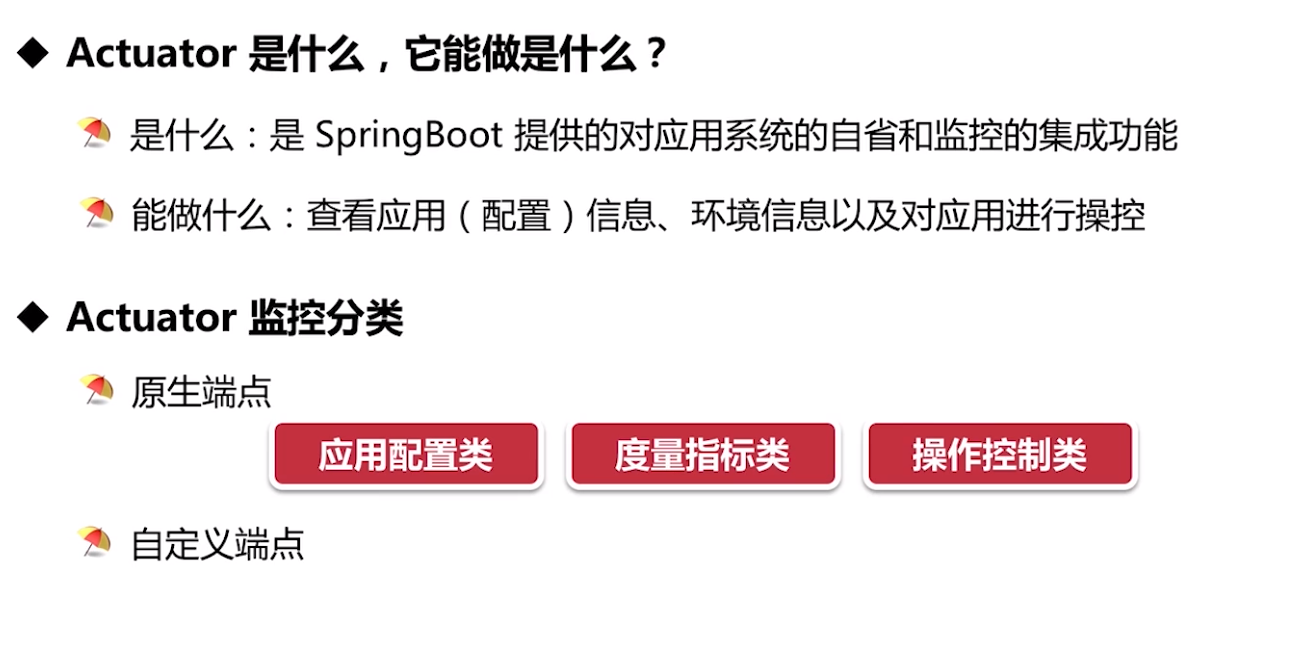
微服务的监控尤其重要,自省监控的功能,每一个监控称为一个断点。
如果想使用Actuator,首先是一个web应用,之后加入spring-boot-starter-actuator。
springboot2.x并没有打开所有的端点。
在application.yml中加入配置,开启这个断点,打开之后可以通过shutdown,来关闭程序,非常危险,一般不会开启。
management:
  endpoint:
    shutdown:
      enabled: true #最特殊的监控端点
之后我们再将其他的端点都打开
management:
  endpoint:
    shutdown:
      enabled: true #最特殊的监控端点

  endpoints:
    web:
      exposure:
        include: "*" #标示打开所有的监控点
端点的url也需要加上前缀,这里是/imooc,/imooc/actuator,下面测试在springboot2.x中自动开启的两个端点,health和info.
首先来测试health端点,可以看到程序处于启动状态,url:http://localhost:8000/imooc/actuator/health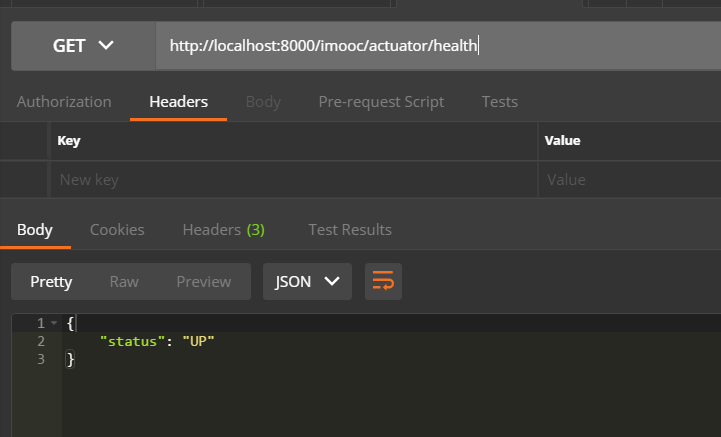
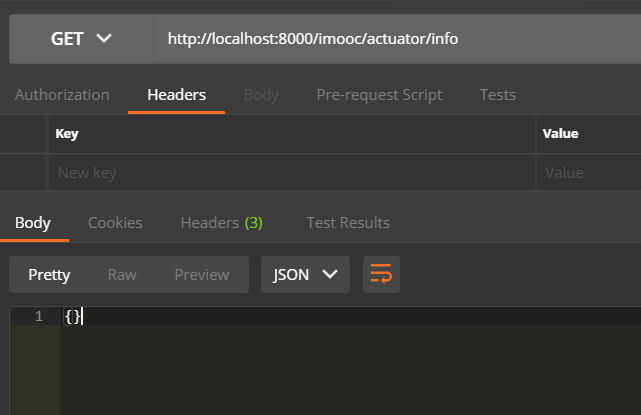
接下来测试info端点,用来返回应用程序的一些信息,这里返回了一个空的json,需要我们自行配置,返回一些我们想要的端点信息,url:http://localhost:8000/imooc/actuator/info
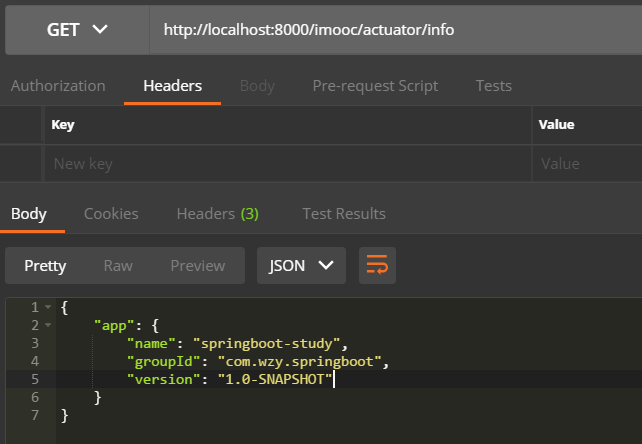
在application.yml中加入相关info的配置。
info:
  app:
    name:
      springboot-study
    groupId:
      com.wzy.springboot
    version:
      1.0-SNAPSHOT
访问info端口,可以显示出我们配置的信息。
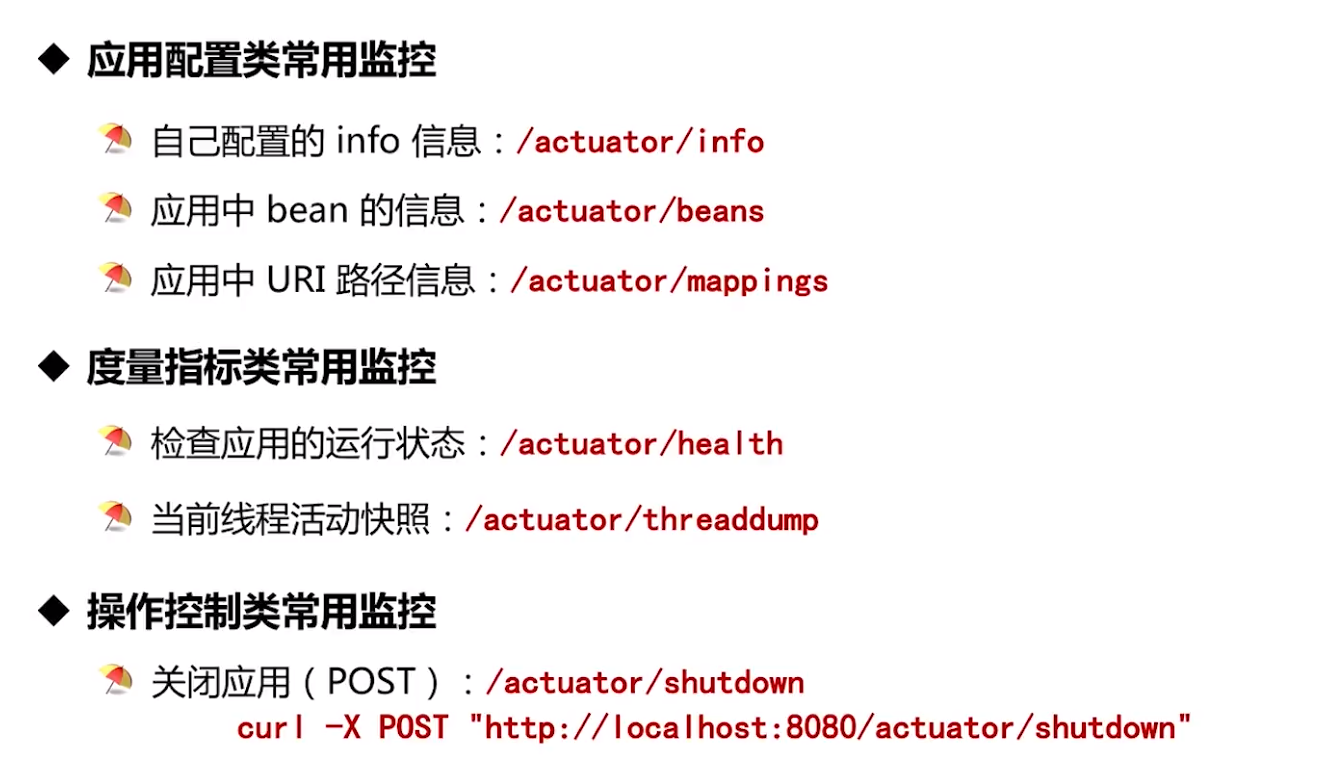
常用监控:
11.2 自定义端点
首先建立一个endpoint包,在包下面创建一个DateTimeEndPoint类来返回定义自定义端点。
DateTimeEndPoint.java 完整代码:
/**
 * 自定义事件端点
 * @author wzy
 * @version 1.0
 * @date 2019/9/25 21:46
 */
@Endpoint(id = "datetime")
public class DateTimeEndPoint {
    public String format = "yyyy-MM-dd HH:mm:ss";

    /**
     * 显示监控指标,注意不要与系统提供的端点相重复
     * /imooc/actuator/datetime
     * @return
     */
    @ReadOperation
    public Map<String, Object> info() {
        Map<String, Object> info = new HashMap<>();
        info.put("name", "wzy");
        info.put("age", "19");
        info.put("datetime", new SimpleDateFormat(format).format(new Date()));

        return info;
    }

    /**
     * 去动态更改监控指标:设置format,是一个post方法
     * @param format format
     */
    @WriteOperation
    public void setFormat(String format) {
        this.format = format;
    }
}
首先在这个类上标注@Endpoint,注解的id属性就是标志这个这个自定义端点的访问路径,如上面的自定义端点的访问路径就是:http://localhost:8000/imooc/actuator/datetime,这里要注意加上/imooc前缀和/actuator前缀,
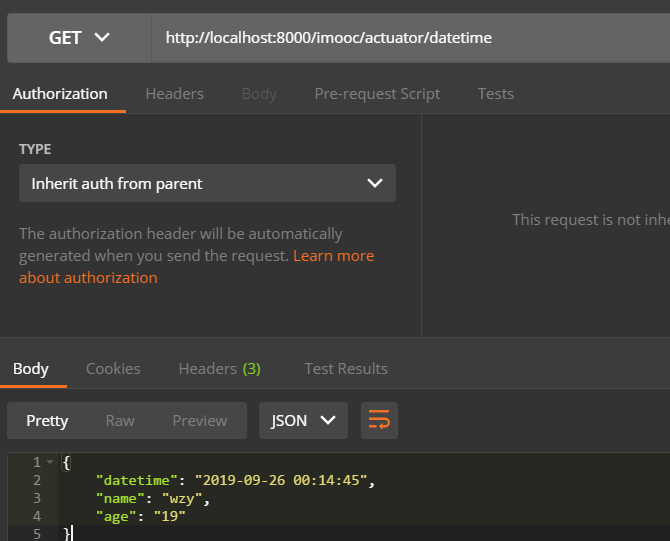
定义了两个方法,第一个info方法,@ReadOperation标志着要返回的监控指标,访问的时候是一个get请求
/**
 * 显示监控指标,注意不要与系统提供的端点相重复
 * /imooc/actuator/datetime
 * @return
 */
@ReadOperation
public Map<String, Object> info() {
    Map<String, Object> info = new HashMap<>();
    info.put("name", "wzy");
    info.put("age", "19");
    info.put("datetime", new SimpleDateFormat(format).format(new Date()));

    return info;
}
第二个方法是用来更改监控的指标,这里是用来更改格式化日期的格式,需要使用@WriteOperation进行标志,访问的时候需要是一个post请求,传递json字符串参数format以及format的值。
/**
 * 去动态更改监控指标:设置format,是一个post方法
 * @param format format
 */
@WriteOperation
public void setFormat(String format) {
    this.format = format;
}
我们定义好这个类之后,我们需要把这个类初始化一个bean注入到容器中,所以我们需要定一个配置类,在config目录下定一个DateTimeEndPointConfig类,首先使用@Configuration注解标志这个类是spring容器的组件,之后定义dateTimeEndPoint()方法,并加上@Bean,标志这个方法会返回一个bean对象,放到容器当中,其中
@ConditionalOnMissingBean表示容器中缺少这个bean的时候才会注入。
@ConditionalOnEnabledEndpoint表示当这个监控端点被开启的时候才会注入到系统中。
/**
 * 自定义端点配置类
 * @author wzy
 * @version 1.0
 * @date 2019/9/25 22:43
 */
@Configuration
public class DateTimeEndPointConfig {
    /**
     * *@ConditionalOnMissingBean: 当缺少的时候才会注入
     * *@ConditionalOnEnabledEndpoint:当这个监控端点被开启的时候才会注入到系统中
     * 注入DateTimeEndPoint
     * @return DateTimeEndPoint dateTimeEndPoint
     */
    @Bean
    @ConditionalOnMissingBean
    @ConditionalOnEnabledEndpoint
    public DateTimeEndPoint dateTimeEndPoint() {
        return new DateTimeEndPoint();
    }
}
下面我们进行测试,重新启动项目,首先我们用get请求的方式访问:http://localhost:8000/imooc/actuator/datetime
我们可以看到可以正确的返回监控指标
下面我们测试一下如何更改监控指标,我们以post请求的方式访问:http://localhost:8000/imooc/actuator/datetime
并通过json传递参数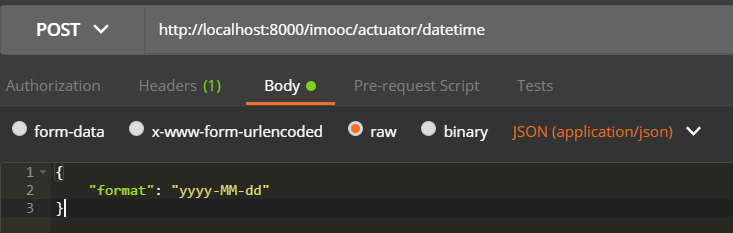
可以看到返回的HTTP状态码,是成功的
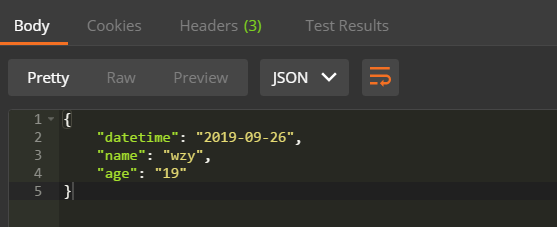
之后再重新以get方式访问:http://localhost:8000/imooc/actuator/datetime,获取监控信息,我们可以看到返回的结果,datetime格式化方式已经变为了年月日,而没有时分秒了,所以说明我们动态改变监控信息成功了。
我们可以通过自定义监控端点,去监控线程池等信息。
十二、SpringBoot自定义Starter
我们可以自己定义一个开箱即用的Starter,不需要自己去配置,只需要要将Starter依赖放到pom.xml中就可以了。
1.springboot启动的时候会去依赖的starter包中,去寻找resource目录下, 去寻找MATA-INF这个目录,在这个下面寻找spring.factory文件,然后根据文件中配置的jar包,去扫描项目所依赖的jar包,这类似于java的spi机制,
2.SpringBoot会根据Spring.factories配置去加载Autoconfigure类,自动配置类。
3.根据条件注解@Conditional这些注解的条件,进行自动配置,注入到容器中,以便于我们在其他地方使用它
自定义的starter命名:split-spring-boot-starter 官方推荐的自定义命名是这样的,是为了和官方自带的starter进行区分:spring-boot-starter-web。
首先创建一个maven工程:split-spring-boot-starter,这个starter提供里一个分割字符串的服务
在pom.xml文件中加入如下依赖:
<?xml version="1.0" encoding="UTF-8"?>
<project xmlns="http://maven.apache.org/POM/4.0.0"
         xmlns:xsi="http://www.w3.org/2001/XMLSchema-instance"
         xsi:schemaLocation="http://maven.apache.org/POM/4.0.0 http://maven.apache.org/xsd/maven-4.0.0.xsd">
    <modelVersion>4.0.0</modelVersion>

    <groupId>com.wzy.springboot</groupId>
    <artifactId>split-spring-boot-starter</artifactId>
    <version>1.0-SNAPSHOT</version>

    <parent>
        <groupId>org.springframework.boot</groupId>
        <artifactId>spring-boot-starters</artifactId>
        <version>2.1.4.RELEASE</version>
    </parent>

    <properties>
        <maven.compiler.source>1.8</maven.compiler.source>
        <maven.compiler.target>1.8</maven.compiler.target>
    </properties>

    <dependencies>
        <!--在编译时能生成springconfiguration metadata.json给编译器使用-->
        <dependency>
            <groupId>org.springframework.boot</groupId>
            <artifactId>spring-boot-configuration-processor</artifactId>
            <optional>true</optional>
        </dependency>
        <!--自动配置相关依赖-->
        <dependency>
            <groupId>org.springframework.boot</groupId>
            <artifactId>spring-boot-autoconfigure</artifactId>
        </dependency>
    </dependencies>

</project>
首先在项目中创建service包,在service包中创建接口ISplitService。
/**
 * 字符串接口分割定义
 * @author wzy
 * @version 1.0
 * @date 2019/9/26 9:32
 */
public interface ISplitService {
    /**
     * 分割字符串方法
     * @param value 被分割的字符串
     * @return 分割后的字符串集合
     */
    List<String> split(String value);

}
之后在service包下创建impl包,在impl包下创建ISplitService的实现类,这里使用的java8的语法,将分割之后的字符串转换成一个List集合。
/**
 * 字符串分割服务实现类
 * @author wzy
 * @version 1.0
 * @date 2019/9/26 9:33
 */
public class SplitServiceImpl implements ISplitService {
    @SuppressWarnings("all")
    @Override
    public List<String> split(String value) {

        return Stream.of(StringUtils.split(value, ","))
                .collect(Collectors.toList());
    }
}
之后我们在创建一个config包,在config包下编写SplitAutoConfigure配置类,首先将配置类标志为@Configuration注解声明为spring的组件,@ConditionalOnClass这个注解的含义是说,当扫描类的时候,在类路径下发现这些类才会自动装配进行来。
之后再类中创建一个starterService()方法返回一个SplitServiceImpl对象,在方法上加上bean注解,将SplitServiceImpl当做一个bean注入到spring,@ConditionalOnMissingBean注解的意思是在spring容器如果不存在这个bean才会注入,也就是 有条件注入的。
/**
 *
 * * @ConditionalOnClass当这些条件生效的时候才会出现自动注入,当类路径下面发现这个类,
 * 进行自动配置
 * @author wzy
 * @version 1.0
 * @date 2019/9/26 9:47
 */
@Configuration
@ConditionalOnClass(value = {ISplitService.class, SplitServiceImpl.class})
public class SplitAutoConfigure {

    /**
     * *@ConditionalOnMissingBean 当spring上下文不存在这个bean的时候才会配置
     * @return
     */
    @Bean
    @ConditionalOnMissingBean
    ISplitService starterService() {
        return new SplitServiceImpl();
    }
}
之后根据springboot的配置原理,我们需要在resource下创建spring.factories文件,这个文件名一定不能错,因为加载自动配置就是按照这个名称去加载,如果名称错了,那么将加载不到相关配置。
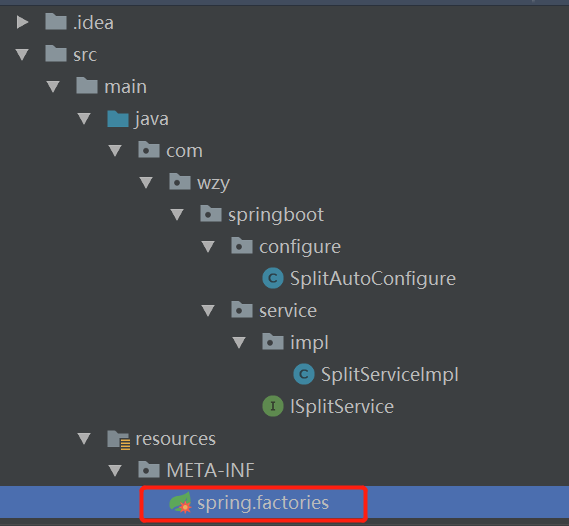
spring.factories,配置自动配置类的全路径。
org.springframework.boot.autoconfigure.EnableAutoConfiguration=com.wzy.springboot.configure.SplitAutoConfigure
之后使用mvn install命令将split-spring-boot-starter工程安装到maven仓库当中
通过springboot-study项目进行引入starter依赖
<!--自定义starter依赖-->
<dependency>
    <groupId>com.wzy.springboot</groupId>
    <artifactId>split-spring-boot-starter</artifactId>
    <version>1.0-SNAPSHOT</version>
</dependency>
编写springboot单元测试类进行测试,通过@Autowired引入splitService实体类,运行测试方法。
/**
 * 对字符串分割服务进行测试
 * @author wzy
 * @version 1.0
 * @date 2019/9/26 9:56
 */
@Slf4j
@SpringBootTest
@RunWith(SpringRunner.class)
public class SplitServiceTest {
    private String version = "2.1,2.1.4";

    @Autowired
    private ISplitService splitService;

    @Test
    public void testSplitVersion() {
        log.info("split version: {}", JSON.toJSONString(
                splitService.split(version)
        ));
    }
}
单元测试执行成功,并且日志打印了分割以后的字符串信息,说明我们starter编写是正确的。
十三、管理SpringBoot应用
开发启动应用脚本
nohup java -jar imooc-springboot-study.jar &
开发关闭应用脚本
获取进程id,根据进程id杀死进程。
pid=`ps -ef | grep imooc-springboot-study.jar | grep -v grep | awk '{print $2}'`
if [[ -z "${pid}" ]]
then
  echo application is already stopped
else
  echo kill ${pid}
  kill -9 ${pid}
fi
在这里可能会出现报错:
因为在dos/window下按一次回车键实际上输入的是“回车(CR)”和“换行(LF)”,而Linux/unix下按一次回车键只输入“换行(LF)”,所以文件在每行都会多了一个CR,所以Linux下运行时就会报错找不到命令,所以,解决问题之道,就是把dos文件格式转换为unix格式。
方法1:使用dos2unix命令转换
第一步:安装dos2unix命令,如果已经安装,跳过该步骤
centos:yum install dos2unix
第二步:转换格式
dos2unix /usr/apache-tomcat/bin/restart.sh
dos2unix: converting file /usr/apache-tomcat/bin/restart.sh to Unix format …
执行关闭应用脚本效果:

执行启动应用脚本效果:

若有收获,就点个赞吧
0 人点赞
