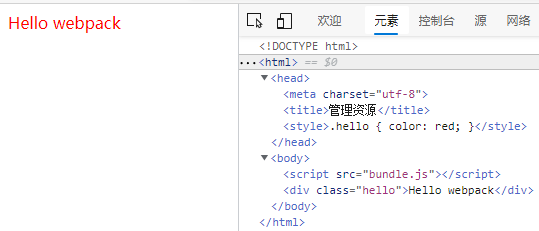
webpack可以通过 loader 或内置的 Asset Modules 引入任何其他类型的文件
准备
dist/index.html
<!DOCTYPE html><html><head><meta charset="utf-8" />- <title>起步</title>+ <title>管理资源</title></head><body>- <script src="main.js"></script>+ <script src="bundle.js"></script></body></html>
webpack.config.js
const path = require('path');module.exports = {entry: './src/index.js',output: {- filename: 'main.js',+ filename: 'bundle.js',path: path.resolve(__dirname, 'dist'),},};加载
加载CSS
添加loader
npm install --save-dev style-loader css-loader
webpack.config.js
const path = require('path');module.exports = {entry: './src/index.js',output: {filename: 'bundle.js',path: path.resolve(__dirname, 'dist'),},+ module: {+ rules: [+ {+ test: /\.css$/i,+ use: ['style-loader', 'css-loader'],+ },+ ],+ },};
Tip webpack 根据正则表达式,来确定应该查找哪些文件,并将其提供给指定的 loader。在这个示例中,所有以 .css 结尾的文件,都将被提供给 style-loader 和 css-loader。
project
webpack-demo|- package.json|- webpack.config.js|- /dist|- bundle.js|- index.html|- /src+ |- style.css|- index.js|- /node_modulesstyle/style.css.hello {color: red;}
src/index.js
import _ from 'lodash';+import './style.css';function component() {const element = document.createElement('div');// Lodash, now imported by this scriptelement.innerHTML = _.join(['Hello', 'webpack'], ' ');+ element.classList.add('hello');return element;}document.body.appendChild(component());
npm run build
加载images图像
webpack.config.js
module: {rules: [、、、{test: /\.(png|svg|jpg|jpeg|gif)$/i,type: 'asset/resource',},],},
project
|- /src+ |- icon.png
src/index
import _ from 'lodash';import './style.css';+import Icon from './icon.png';function component() {const element = document.createElement('div');// Lodash, now imported by this scriptelement.innerHTML = _.join(['Hello', 'webpack'], ' ');element.classList.add('hello');+ // 将图像添加到我们已经存在的 div 中。+ const myIcon = new Image();+ myIcon.src = Icon;+ element.appendChild(myIcon);return element;}document.body.appendChild(component());
src/style.css
.hello {color: red;+ background: url('./icon.png');}
npm run build
如果一切顺利,你现在应该看到你的 icon 图标成为了重复的背景图,以及 Hello webpack 文本旁边的 img 元素。如果检查此元素,你将看到实际的文件名已更改为 29822eaa871e8eadeaa4.png。这意味着 webpack 在 src 文件夹中找到我们的文件,并对其进行了处理!


