Cesium的打点分为两类:
- 通过Entity(实体)来打点
- 通过geometry(几何图形)来打点
在实际应用中,需要对各种点进行定制化的话,可以通过Entity中的billboard(广告牌)引入图片来进行点处理,故大多数使用Entity。本文主要介绍使用实体打点的两种方式,point和billboard。
1. 打点
首先创建一个cesium实例,并创建一个point实体和一个billboard实体:
//Map.vue<template><div id="map"></div></template><script>import "cesium/Build/Cesium/Widgets/widgets.css";import { Viewer, Cartesian3, Entity } from 'cesium';export default {mounted() {const defaultCesiumConifg = {geocoder: false, //查找位置工具homeButton: false, //返回初始位置按钮sceneModePicker: false, //视角选择器baseLayerPicker: false, //图层选择器navigationHelpButton: false, //导航帮助按钮animation: false, //动画控制器timeline: false, //时间线fullscreenButton: false, //全屏控制};const viewer = new Viewer('map', defaultCesiumConifg);viewer._cesiumWidget._creditContainer.style.display = "none"; //关闭版权声明viewer.infoBox.destroy(); //关闭实体点击是默认显示的信息盒子viewer.selectionIndicator.destroy(); //关闭实体点击时,实体的选择指示器//创建一个外圈红色,内圈白色的点viewer.entities.add(new Entity({ //此处建议使用new Entity的方式,方便编辑器进行类型推导,不使用它也会自动转化为entity类position: Cartesian3.fromDegrees(111.4, 40.4), //经纬度位置转化point: {pixelSize: 30,color: Color.WHITE,outlineColor: Color.RED,outlineWidth: 5,},}));//添加带图片类型的点viewer.entities.add(new Entity({position: Cartesian3.fromDegrees(-111.6, 40.6),billboard: {image: '/01.png', //图片路径width: 30,height: 30,}}));}}</script>
实体信息盒子和选择指示器未关闭时,显示如下:


2. 气泡弹窗
在map中添加一个div,id为popup,并在初始化好的Entity后面添加点击事件。
<template><div id="map"><div id="popup"></div></div></template><script>import {ScreenSpaceEventHandler, ScreenSpaceEventType, } from 'cesium';...//点击显示气泡const handler = new ScreenSpaceEventHandler(viewer.scene.canvas); //获取事件处理器const scene = viewer.scene;const popup = document.querySelector('#popup');popup.style.display = 'none'; //设置气泡为不可见,也方便进行变量查询let entity; //声明被点击的实体变量handler.setInputAction(event => { //注册画布点击事件const clickPoint = scene.pick(event.position); //设置拾取点,如果点击处有实体,返回拾取对象,否则返回undefinedif(clickPoint && viewer.entities.contains(clickPoint.id)) { //判断实体是否存在entity = clickPoint.id; //实体获取//气泡的显示以及位置设置popup.style.display = 'block';popup.style.left = event.position.x - 200 + 'px';popup.style.top = event.position.y -350 + 'px';}}, ScreenSpaceEventType.LEFT_CLICK);//气泡跟随实体点的移动而移动scene.postRender.addEventListener(() => { //渲染事件监听if(popup.style.display !== 'none') { //气泡已经被点击显示的时候触发//将实体的坐标系位置转化为当前窗口位置const entityPos = SceneTransforms.wgs84ToWindowCoordinates(scene, entity.position._value);popup.style.top = entityPos.y - 350 + 'px';popup.style.left = entityPos.x - 200 + 'px';}});</script><style>#popup {width: 400px;height: 300px;}</style>
实现效果如下,且随着三维球的运动,弹窗也会随之移动:
拾取到实体的对象数据结构
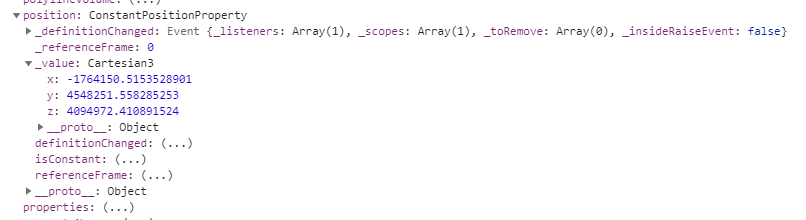
实体内position结构
参考资料:
- cesium中随entity动态变化的弹出框 https://blog.csdn.net/wc063013/article/details/86491479
- cesium API文档: https://cesium.com/docs/cesiumjs-ref-doc/index.html

若有收获,就点个赞吧
0 人点赞
