目录
1 第四天:SpringMVC+SSM整合 2
1.1 注解 2
1.1.1 什么是注解 2
1.1.2 什么时候用? 2
1.1.3 XML配置方式和注解方式差异 2
1.2 请求 3
1.2.1 基本数据类型(少量传值) 3
1.2.2 单个POJO对象 5
1.3 响应 7
1.3.1 利用Model传值 7
1.3.2 直接返回json串 8
1.4 跳转 8
1.4.1 redirect 重定向 8
1.4.2 forward 转发 9
1.5 SpringMVC乱码处理 9
1.6 SSM整合-项目结构 10
1.7 Druid阿里连接池 11
1.7.1 介绍 11
1.7.2 pom.xml 12
1.7.3 applicationContext.xml 12
1.8 配置jdbc.properties 13
1.8.1 准备数据 13
1.8.2 引入到applicationContext.xml中 13
1.9 配置log4j.properties 14
1.9.1 介绍 15
1.9.2 Pom.xml 15
1.9.3 准备数据 15
1.10 SSM整合 15
1.10.1 pom.xml 15
1.10.2 web.xml 18
1.10.3 mybatis-config.xml 19
1.10.4 applicationContext.xml 20
1.10.5 applicationContext-mybatis.xml 20
1.10.1 springmvc-config.xml 20
1.10.2 测试spring 21
1.10.3 测试springmvc 21
1.11 永和大王门店管理系统 22
1.11.1 项目背景 22
1.11.2 必备的开发软件 23
1.11.3 系统架构图 24
1.12 mysql导入导出 24
1.12.1 创建数据库 24
1.12.2 导入 24
1.12.3 导出 25
1.13 表设计 26
1.13.1 tb_door 26
1.13.2 tb_order 27
1.13.3 tb_order_detail 27
1.13.4 tb_dept 28
1.13.5 tb_user 28
第四天:SpringMVC+SSM整合
注解
什么是注解
@ 是java注解,即annotation。
可以理解为插件,是代码级别的插件,在类的方法上写:@XXX,就是在代码上插入了一个插件。
Java注解是附加在代码中的一些元信息,用于一些工具在编译、运行时进行解析和使用,起到说明、配置的功能。注解不会也不能影响代码的实际逻辑,仅仅起到辅助性的作用
要先学习java的反射机制,然后再来理解java注解
什么时候用?
我们一般用不到自定义注解,框架为我们提供了很多注解,只要在代码里写明你需要的注解就可以了。只有在自己动手写类似于Hibernate框架的时候,会用到自定义注解。这也是为什么我们一般用不到java反射,因为只有在使用自定义注解的时候,才会用到java反射,而我们平时连自定义注解都用不到。
XML配置方式和注解方式差异
Controller无需在xml中声明,加个@Controller注解即可,这样再多的Controller也不怕了。只需xml中配置一次注解驱动
原来要在xml配置bean来指明映射关系,现在只加注解@RequestMapping无需xml配置
无需返回ModelAndView对象,直接返回逻辑名(页面名称)即可
参数自动封装,自动类型转换
一句话太简洁方便了!所以现在springmvc已经成为业界主流前台开发框架。
请求
基本数据类型(少量传值)
自动转换类型,parameter中只有字符串。
形参名称必须和页面中定义的控件名称相同。
在方法的括号里直接写所要的参数,并且声明它对应的类型。
创建工程

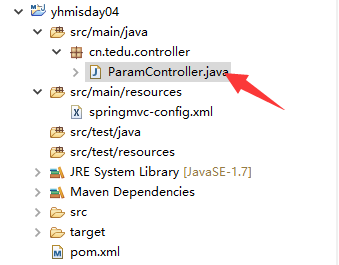
单值
package cn.tedu.controller;
import java.text.SimpleDateFormat;
import java.util.Date;
import org.springframework.beans.propertyeditors.CustomDateEditor;
import org.springframework.stereotype.Controller;
import org.springframework.web.bind.ServletRequestDataBinder;
import org.springframework.web.bind.annotation.InitBinder;
import org.springframework.web.bind.annotation.RequestMapping;
@Controller
//作用1:是springmvc中的Controller层代码
//作用2:是把这个对象ioc
public class ParamController {
//获取请求参数,基本类型<br /> @RequestMapping("abc")<br /> **public** String abc(**int** age,String name,<br /> Date birth){<br /> <br /> System._**out**_.println(age);<br /> System._**out**_.println(name);
//日期类型的参数,默认使用的是 /
//如果想用 - 必须配置下面的代码否则400
System.out.println(birth);
//指定跳转的逻辑名/页面名称
return “param”;
}
@InitBinder //日期转换设定
public void InitBinder (
ServletRequestDataBinder binder){
binder.registerCustomEditor(
java.util.Date.class,
new CustomDateEditor(new SimpleDateFormat(“yyyy-MM-dd”), true));
}
<br />}
测试
http://localhost:8060/abc?age=18&name=lisi&birth=1899-03-8
日期
日期类型2017/06/08就正确,怎么2017-06-08就出错了呢?400错误,参数类型不匹配错误。springmvc默认日期格式用**斜杠隔开。
使用@InitBinder注解,指定自定义的日期转换格式**
@InitBinder //日期转换设定
public void InitBinder (ServletRequestDataBinder binder){
binder.registerCustomEditor(
java.util.Date.class,
new CustomDateEditor(new SimpleDateFormat(“yyyy-MM-dd”), true));
}
测试:
http://localhost:8060/add?id=10&name=tony&birthday=2018-10-11
单个POJO对象
修改ParamController
package cn.tedu.controller;
import java.text.SimpleDateFormat;
import java.util.Date;
import org.springframework.beans.propertyeditors.CustomDateEditor;
import org.springframework.stereotype.Controller;
import org.springframework.web.bind.ServletRequestDataBinder;
import org.springframework.web.bind.annotation.InitBinder;
import org.springframework.web.bind.annotation.RequestMapping;
@Controller
//作用1:是springmvc中的Controller层代码
//作用2:是把这个对象ioc
public class ParamController {
//获取请求参数,基本类型<br />    @RequestMapping("abc")<br />    **public** String abc(**int** age,String name,<br />                    Date birth){<br />        <br />        System._**out**_.println(age);<br />        System._**out**_.println(name);<br />        //日期类型的参数,默认使用的是/<br />        //如果想用-  必须配置下面的代码否则400<br />        System._**out**_.println(birth);<br />        <br />        //指定跳转的逻辑名/页面名称<br />        **return** "param";<br />    }<br />    <br />    //获取请求参数,对象类型<br />    @RequestMapping("obj")<br />    **public** String ojb(**User user**){<br />        <br />//只要传入的参数名字和对象的属性名一致,框架自动完成对象封装<br />    **    System.**_**out**_**.println(****user****);**<br />        <br />        //指定跳转的逻辑名/页面名称<br />        **return** "param";<br />    }<br />    <br />    @InitBinder    //日期转换设定<br />    **public** **void** InitBinder (<br />            ServletRequestDataBinder binder){<br />        binder.registerCustomEditor(<br />        java.util.Date.**class**,<br />        **new** CustomDateEditor(**new** SimpleDateFormat("yyyy-MM-dd"), **true**));<br />    }

<br />    <br />}
创建User对象
package cn.tedu.controller;
public class User {
**private** Integer id;<br /> **private** String name;<br /> **public** Integer getId() {<br /> **return** id;<br /> }<br /> **public** **void** setId(Integer id) {<br /> **this**.id = id;<br /> }<br /> **public** String getName() {<br /> **return** name;<br /> }<br /> **public** **void** setName(String name) {<br /> **this**.name = name;<br /> }<br /> @Override<br /> **public** String toString() {<br /> **return** "User [id=" + id + ", name=" + name + "]";<br /> }<br /> <br /> <br />}
测试
http://localhost:8060/obj**?id=1&name=jack**
响应
利用Model传值
Model实际上是一个map,在网页调用时,通过视图解析器提交页面前,将map的内容设置到新产生的请求request中。
//测试利用Model做响应
@RequestMapping(“ModelTest”)
public String ModelTest(Model model){
//给页面准备数据
model.addAttribute(“name”, “永和大王”);
return “param”;
}
Jsp中通过el表达式取值${name}
测试:http://localhost:8060/ModelTest
直接返回json串
@RequestMapping("json")<br /> @ResponseBody<br /> public Door json(){<br /> Door d = new Door();<br /> d.setName("门店");<br /> d.setTel("000000");<br /> <br /> return d;<br /> }
测试:http://localhost:8060/json
{“id”:20,”name”:”王海涛”}
跳转
redirect 重定向
返回列表页面,通过内部资源视图解析器拼串
return “/person/jPersonList”;
Controller方法返回结果重定向到一个url地址:
return “redirect:list”;
redirect方式相当于“response.sendRedirect()”,转发后浏览器的地址栏变为转发后的地址,因为转发即执行了一个新的request和response。
由于新发起一个request原来的参数在转发时就不能传递到下一个url,如果要传参数可以/user/userlist.action后边加参数,如下:
/user/userlist.action?groupid=2&…
forward 转发
controller方法执行后继续执行另一个controller方法。
return “forward:list”;
forward方式相当于“request.getRequestDispatcher().forward(request,response)”,转发后浏览器地址栏还是原来的地址。转发并没有执行新的request和response,而是和转发前的请求共用一个request和response。所以转发前请求的参数在转发后仍然可以读取到。
SpringMVC乱码处理
在web.xml中加入如下代码:
SSM整合-项目结构

创建war工程,需要在webapp目录下,手动创建WEB-INF目录,并在WEB-INF目录下手动创建web.xml文件。
src/main/java下:
cn.tedu.pojo — 实体包
cn.tedu.dao — dao接口包
cn.tedu.service — service接口包、service实现类
cn.tedu.controller — controller包
src/main/resources下:
mybatis — mybatis 配置文件包
spring — spring 配置文件包
WEB-INF/pages — 页面

Druid阿里连接池
介绍
企业开发软件系统大多都需要访问数据库,而系统中最紧俏的资源或者耗时操作就莫过于创建数据库的链接和链接的销毁,为了解决这个难题,业界引入了数据库连接池。链接提前初始化好放在池中,当需要时无需创建直接从池中获取,当用完无需释放,放回池中即可。这样大量减少了复杂的链接对象的创建和销毁过程,从而提高数据库访问的效率。
常用的连接池有c3p0、bonecp等,druid作为一名后起之秀,凭借其出色的性能,也逐渐成为业界的标配。全球最快的连接池。
| 功能 | dbcp | druid | c3p0 | tomcat-jdbc | HikariCP |
|---|---|---|---|---|---|
| 是否支持PSCache | 是 | 是 | 是 | 否 | 否 |
| 监控 | jmx | jmx/log/http | jmx,log | jmx | jmx |
| 扩展性 | 弱 | 好 | 弱 | 弱 | 弱 |
| sql拦截及解析 | 无 | 支持 | 无 | 无 | 无 |
| 代码 | 简单 | 中等 | 复杂 | 简单 | 简单 |
| 更新时间 | 2015.8.6 | 2015.10.10 | 2015.12.09 | 2015.12.3 | |
| 特点 | 依赖于common-pool | 阿里开源,功能全面 | 历史久远, 代码逻辑复杂, 且不易维护 |
优化力度大,功能简单,起源于boneCP | |
| 连接池管理 | LinkedBlockingDeque | 数组 | FairBlockingQueue | threadlocal+CopyOnWriteArrayList |
总结:
1、性能方面 hikariCP > druid > tomcat-jdbc > bonecp > c3p0 。hikariCP的高性能得益于最大限度的避免锁竞争。
2、druid功能最为全面,sql拦截等功能,统计数据较为全面,具有良好的扩展性。
3、综合性能,扩展性等方面,可考虑使用druid或者hikariCP连接池。
4、可开启prepareStatement缓存,对性能会有大概20%的提升。
pom.xml
<properties><br /> <bonecp-spring.version>0.8.0.RELEASE</bonecp-spring.version><br /> <druid.version>1.1.6</druid.version><br /> </properties><br /> <!-- 连接池 --><br /><dependencies><br /> <dependency><br /> <groupId>com.alibaba</groupId><br /> <artifactId>druid</artifactId><br /> <version>${druid.version}</version><br /> </dependency><br /></dependencies>
applicationContext.xml
xmlns:aop=”http://www.springframework.org/schema/aop“ xmlns:tx=”http://www.springframework.org/schema/tx“
xmlns:xsi=”http://www.w3.org/2001/XMLSchema-instance“
xsi:schemaLocation=”http://www.springframework.org/schema/beans http://www.springframework.org/schema/beans/spring-beans-4.0.xsd
http://www.springframework.org/schema/context http://www.springframework.org/schema/context/spring-context-4.0.xsd
http://www.springframework.org/schema/aop http://www.springframework.org/schema/aop/spring-aop-4.0.xsd http://www.springframework.org/schema/tx http://www.springframework.org/schema/tx/spring-tx-4.0.xsd
http://www.springframework.org/schema/util http://www.springframework.org/schema/util/spring-util-4.0.xsd">
 ### 准备数据
db.driverClassName=com.mysql.jdbc.Driver
### 准备数据
db.driverClassName=com.mysql.jdbc.Driverdb.url=jdbc:mysql://127.0.0.1:3306/yhmisdb?characterEncoding=utf8
db.username=root
db.password=root ### 引入到applicationContext.xml中 读取数据
xmlns:aop=”http://www.springframework.org/schema/aop“ xmlns:tx=”http://www.springframework.org/schema/tx“
xmlns:xsi=”http://www.w3.org/2001/XMLSchema-instance“
xsi:schemaLocation=”http://www.springframework.org/schema/beans http://www.springframework.org/schema/beans/spring-beans-4.0.xsd
http://www.springframework.org/schema/context http://www.springframework.org/schema/context/spring-context-4.0.xsd
http://www.springframework.org/schema/aop http://www.springframework.org/schema/aop/spring-aop-4.0.xsd http://www.springframework.org/schema/tx http://www.springframework.org/schema/tx/spring-tx-4.0.xsd
http://www.springframework.org/schema/util http://www.springframework.org/schema/util/spring-util-4.0.xsd">
配置log4j.properties

介绍
Log4j(log for java),java日志。
是Apache的一个开源项目,通过使用Log4j,我们可以控制日志信息输送的目的地是控制台、文件、GUI组件,甚至是套接口服务器、NT的事件记录器、UNIX Syslog守护进程等;我们也可以控制每一条日志的输出格式;通过定义每一条日志信息的级别,我们能够更加细致地控制日志的生成过程。最令人感兴趣的就是,这些可以通过一个配置文件来灵活地进行配置,而不需要修改应用的代码。
level 是日志记录的优先级,分为OFF、FATAL、ERROR、WARN、INFO、DEBUG、ALL或者自定义的级别。
根据不同软件开发阶段,关闭日志。
DEBUG,开发阶段,BUG满天飞
ERROR,程序严重错误记录
OFF,程序稳定,关闭日志输出,out.print只能修改代码,而这个只需改变配置文件的日志输出级别即可。
Pom.xml
log4j.logger.cn.yhmis.mapper =DEBUG
log4j.appender.A1=org.apache.log4j.ConsoleAppender
log4j.appender.A1.layout=org.apache.log4j.PatternLayout
log4j.appender.A1.layout.ConversionPattern=%-d{yyyy-MM-dd HH:mm:ss,SSS} [%t] [%c]-[%p] %m%n ## SSM整合 ### 项目结构

 ### pom.xml
<dependencies><br />        <!-- 单元测试 --><br />        <dependency><br />            <groupId>junit</groupId><br />            <artifactId>junit</artifactId><br />            <version>${junit.version}</version><br />            <scope>test</scope><br />        </dependency><br />    <br />        <!-- Spring --><br />        <dependency><br />            <groupId>org.springframework</groupId><br />            <artifactId>spring-webmvc</artifactId><br />            <version>${spring.version}</version><br />        </dependency><br />        <dependency><br />            <groupId>org.springframework</groupId><br />            <artifactId>spring-jdbc</artifactId><br />            <version>${spring.version}</version><br />        </dependency><br />        <dependency><br />            <groupId>org.springframework</groupId><br />            <artifactId>spring-aspects</artifactId><br />            <version>${spring.version}</version><br />        </dependency><br />        <br />        <!-- Mybatis --><br />        <dependency><br />            <groupId>org.mybatis</groupId><br />            <artifactId>mybatis</artifactId><br />            <version>${mybatis.version}</version><br />        </dependency><br />        <dependency><br />            <groupId>org.mybatis</groupId><br />            <artifactId>mybatis-spring</artifactId><br />            <version>${mybatis.spring.version}</version><br />        </dependency><br />        <br />        <!-- MySql --><br />        <dependency><br />            <groupId>mysql</groupId><br />            <artifactId>mysql-connector-java</artifactId><br />            <version>${mysql.version}</version><br />        </dependency>

    <!-- 连接池 --><br />        <dependency><br />            <groupId>com.alibaba</groupId><br />            <artifactId>druid</artifactId><br />            <version>${druid.version}</version><br />        </dependency>

    <dependency><br />            <groupId>org.slf4j</groupId><br />            <artifactId>slf4j-log4j12</artifactId><br />            <version>${slf4j.version}</version><br />        </dependency>

    <!-- Jackson Json处理工具包 --><br />        <dependency><br />            <groupId>com.fasterxml.jackson.core</groupId><br />            <artifactId>jackson-databind</artifactId><br />            <version>${jackson.version}</version><br />        </dependency>

    <!-- JSP相关 --><br />        <dependency><br />            <groupId>jstl</groupId><br />            <artifactId>jstl</artifactId><br />            <version>${jstl.version}</version><br />        </dependency><br />        <dependency><br />            <groupId>javax.servlet</groupId><br />            <artifactId>servlet-api</artifactId><br />            <version>${servlet-api.version}</version><br />            <scope>provided</scope><br />        </dependency><br />        <dependency><br />            <groupId>javax.servlet</groupId><br />            <artifactId>jsp-api</artifactId><br />            <version>${jsp-api.version}</version><br />            <scope>provided</scope><br />        </dependency><br />    </dependencies><br />    <br />    <build><br />        <plugins><br />            <plugin><br />                <groupId>org.apache.tomcat.maven</groupId><br />                <artifactId>tomcat7-maven-plugin</artifactId><br />                <version>2.2</version><br />                <configuration><br />                    <port>8060</port><br />                    <path>/</path><br />                </configuration><br />            </plugin><br />        </plugins><br />    </build> <br /></project>
web.xml
<?xml version=“1.0” encoding=“UTF-8”?>
xsi:schemaLocation=“http://java.sun.com/xml/ns/javaee http://java.sun.com/xml/ns/javaee/web-app_2_5.xsd“
id=“yhmis” version=“2.5”>
<!-- 整合spring框架 <br />        1、加载核心配置文件<br />        2、启动监听<br />    --><br />    <context-param><br />        <param-name>contextConfigLocation</param-name><br />        <!--指定文件位置 *通配符 --><br />        <param-value>classpath:spring/applicationContext*.xml</param-value><br />    </context-param><br />    <listener><br />        <listener-class>org.springframework.web.context.ContextLoaderListener</listener-class><br />    </listener>

<!-- 整合springmvc框架 --><br />    <servlet><br />        <servlet-name>springmvc</servlet-name><br />        <servlet-class>org.springframework.web.servlet.DispatcherServlet</servlet-class><br />        <br />        <!-- 指定核心文件位置 --><br />        <init-param><br />            <param-name>contextConfigLocation</param-name><br />            <param-value>classpath:spring/springmvc-config.xml</param-value><br />        </init-param><br />    </servlet><br />    <servlet-mapping><br />        <servlet-name>springmvc</servlet-name><br />        <br />        <!-- 拦截所有请求 --><br />        <url-pattern>/</url-pattern><br />    </servlet-mapping><br />    <br />    <!-- 乱码处理filter过滤器 --><br />    <filter><br />        <filter-name>encodingFilter</filter-name><br />        <filter-class>org.springframework.web.filter.CharacterEncodingFilter</filter-class><br />    <br />        <!-- 指定编码集 --><br />        <init-param><br />            <param-name>encoding</param-name><br />            <param-value>utf8</param-value><br />        </init-param><br />    </filter><br />    <filter-mapping><br />        <filter-name>encodingFilter</filter-name><br />        <br />        <!-- 指定拦截方式 --><br />        <url-pattern>/*</url-pattern><br />    </filter-mapping><br />    <br />    <br /></web-app>
mybatis-config.xml
<?xml version=“1.0” encoding=“UTF-8” ?>
<!DOCTYPE configuration
PUBLIC “-//mybatis.org//DTD Config 3.0//EN”
“http://mybatis.org/dtd/mybatis-3-config.dtd">
applicationContext.xml
xmlns:aop=”http://www.springframework.org/schema/aop“ xmlns:tx=”http://www.springframework.org/schema/tx“
xmlns:xsi=”http://www.w3.org/2001/XMLSchema-instance“
xsi:schemaLocation=”http://www.springframework.org/schema/beans http://www.springframework.org/schema/beans/spring-beans-4.0.xsd
http://www.springframework.org/schema/context http://www.springframework.org/schema/context/spring-context-4.0.xsd
http://www.springframework.org/schema/aop http://www.springframework.org/schema/aop/spring-aop-4.0.xsd http://www.springframework.org/schema/tx http://www.springframework.org/schema/tx/spring-tx-4.0.xsd
http://www.springframework.org/schema/util http://www.springframework.org/schema/util/spring-util-4.0.xsd">
applicationContext-mybatis.xml
Spring整合mybatis
xmlns:aop=”http://www.springframework.org/schema/aop“ xmlns:tx=”http://www.springframework.org/schema/tx“
xmlns:xsi=”http://www.w3.org/2001/XMLSchema-instance“
xsi:schemaLocation=”http://www.springframework.org/schema/beans http://www.springframework.org/schema/beans/spring-beans-4.0.xsd
http://www.springframework.org/schema/context http://www.springframework.org/schema/context/spring-context-4.0.xsd
http://www.springframework.org/schema/aop http://www.springframework.org/schema/aop/spring-aop-4.0.xsd http://www.springframework.org/schema/tx http://www.springframework.org/schema/tx/spring-tx-4.0.xsd
http://www.springframework.org/schema/util http://www.springframework.org/schema/util/spring-util-4.0.xsd">
springmvc-config.xml
<?xml version=“1.0” encoding=“UTF-8”?>
xmlns:context=“http://www.springframework.org/schema/context“
xmlns:mvc=“http://www.springframework.org/schema/mvc“
xsi:schemaLocation=“http://www.springframework.org/schema/beans http://www.springframework.org/schema/beans/spring-beans.xsd
http://www.springframework.org/schema/mvc http://www.springframework.org/schema/mvc/spring-mvc-4.0.xsd
http://www.springframework.org/schema/context http://www.springframework.org/schema/context/spring-context.xsd“>
<!-- 作用1,去指定目录下扫描带有注解的类<br />        作用2,把扫描到的类交给spring去管理<br />    --><br />    <context:component-scan <br />        base-package="cn.tedu.controller"></context:component-scan>

<!-- 拼接正确的页面路径 --><br />    <bean class="org.springframework.web.servlet.view.InternalResourceViewResolver"><br />        <property name="prefix" value="/WEB-INF/pages/"></property><br />        <property name="suffix" value=".jsp"></property><br />    </bean>
测试spring
创建User实体对象

修改applicationContext.xml
测试
package cn.tedu.test;
import org.junit.Test;
import org.springframework.context.support.ClassPathXmlApplicationContext;
import cn.tedu.pojo.User;
public class TestIOC {
//测试spring框架的ioc<br /> @Test<br /> **public** **void** ioc(){<br /> //加载核心配置文件<br /> ClassPathXmlApplicationContext ac=<br /> **new** ClassPathXmlApplicationContext(<br /> "spring/applicationContext.xml");<br /> <br /> //获取bean,根据id获取<br /> User user = (User) ac.getBean("u");<br /> System._**out**_.println(user);<br /> }<br /> <br />}
测试springmvc
创建HomeController
package cn.tedu.controller;
import org.springframework.stereotype.Controller;
import org.springframework.web.bind.annotation.RequestMapping;
//交给spring容器管理对象
//springmvc中的控制层代码
@Controller
public class HomeController {
//映射url和方法关系<br /> @RequestMapping("hi")<br /> **public** String hi(){<br /> //返回hi.jsp<br /> **return** "hi";<br /> }<br />}
创建hi.jsp
<%@ page language=”java” contentType=”text/html; charset=ISO-8859-1”
pageEncoding=”ISO-8859-1”%>
<!DOCTYPE html PUBLIC “-//W3C//DTD HTML 4.01 Transitional//EN” “http://www.w3.org/TR/html4/loose.dtd">
hi ~
测试

永和大王门店管理系统
项目背景
《永和大王门店管理系统》实现顾客进店后选择购买的套餐,系统生成订单,包括:是哪个门店的,产生订单流水号,并记录下订单类型及人数和收银员是谁,及下单时间和结账时间,并记录下订单详情,顾客点了哪些食物,及支付总金额。系统打印订单小票。同时,在订单下方展示本店的二维码,方便顾客扫描自助填写税务发票信息。
必备的开发软件
PowerDesinger v15.1 数据库表设计&UML设计
mysql-5.5.27-winx64.msi mysql数据库
SQLyogEnt v8.2 数据库客户端
安装双jdk1.7 & jdk1.8 java环境
Eclipse Mars.2 Release (4.5.2) IDE 开发工具,配置jdk、tomcat
安装Tomcat Web中间件,运行web程序
系统架构图

mysql导入导出
创建数据库

导入

导出

表设计
tb_door

tb_order

tb_order_detail

tb_dept

tb_user


若有收获,就点个赞吧
0 人点赞
