目的
兼容
复用
专业标准
构建步骤
./configuremakemake install # with root
练习
code
/* hello.c: A standard "Hello, world!" program */#include <stdio.h>int main(int argc, char* argv[]) {printf("Hello, world!\n");return 0;}
手写的makefile
# Makefile: A standard Makefile for hello.call:gcc -o hello main.cclean:rm -f hello
自动完成过程
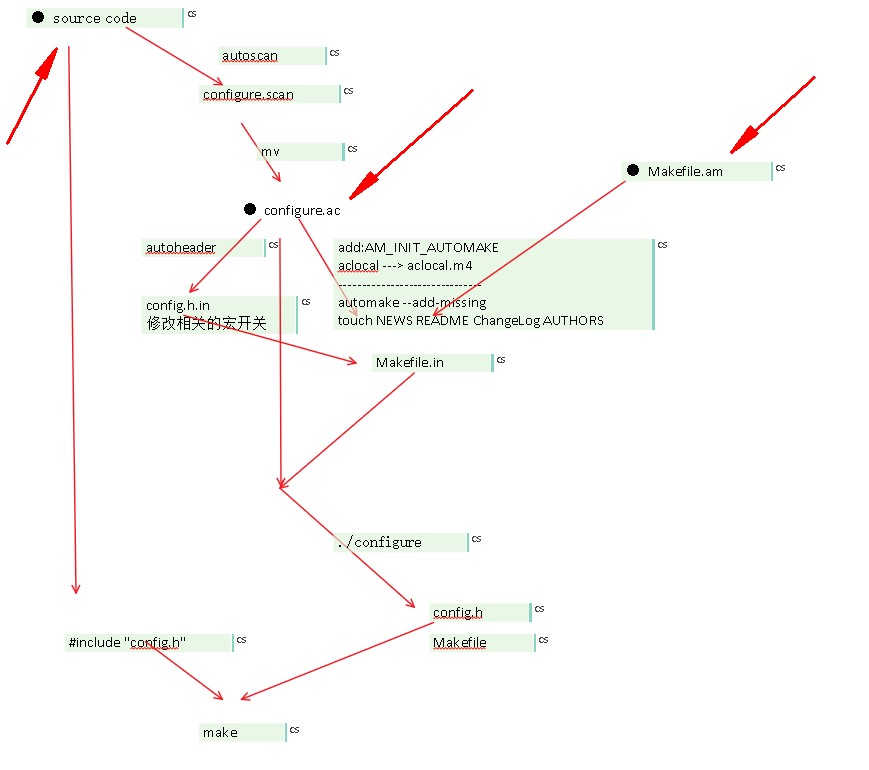
● 染指的文件1 源码2 Makefile.am3 configure.ac + AM_INIT_AUTOMAKE4 config.h.in 修改宏开关-------------------------------------------------------------------------autoscanmv configure.scan configure.acAM_INIT_AUTOMAKE --> configure.acaclocaltouch NEWS README ChangeLog AUTHORSautomake --add-missingautoheaderautoconf./configureconfig.h --> source codemake
● 如果不想出现以下错误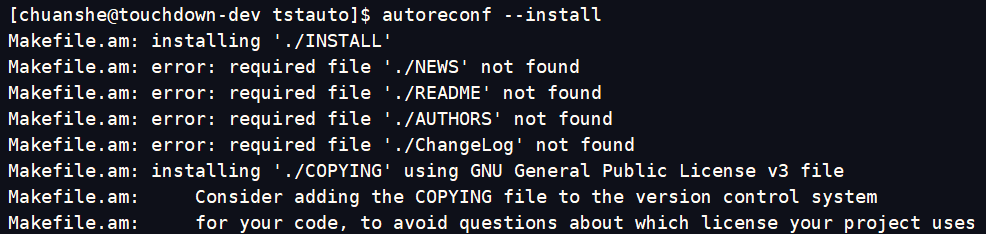
AM_INIT_AUTOMAKE([foreign color-tests dist-bzip2 parallel-tests])
一般的做法
- 采用autoreconf —install 完成编译环境的构建
- 通过提供configure.ac文件完成以下功能的触发
- 摆平文件夹required依赖 — AM_INIT_AUTOMAKE([foreign color-tests dist-bzip2 parallel-tests])
- 一些依赖库的check
- Makefile.am
- 导引输出
- 引入m4依赖 ACLOCAL_AMFLAGS = -I m4
参考
● GNU Autoconf, Automake, and Libtool:
– http://sources.redhat.com/autobook/
● The GNU Autoconf Macro archive
– http://www.gnu.org/software/ac-archive/
● Autotools Tutorial for Beginners
– http://www.cbreak.org/

若有收获,就点个赞吧
0 人点赞
