提高开发效率与完善团队开发规范
source-map
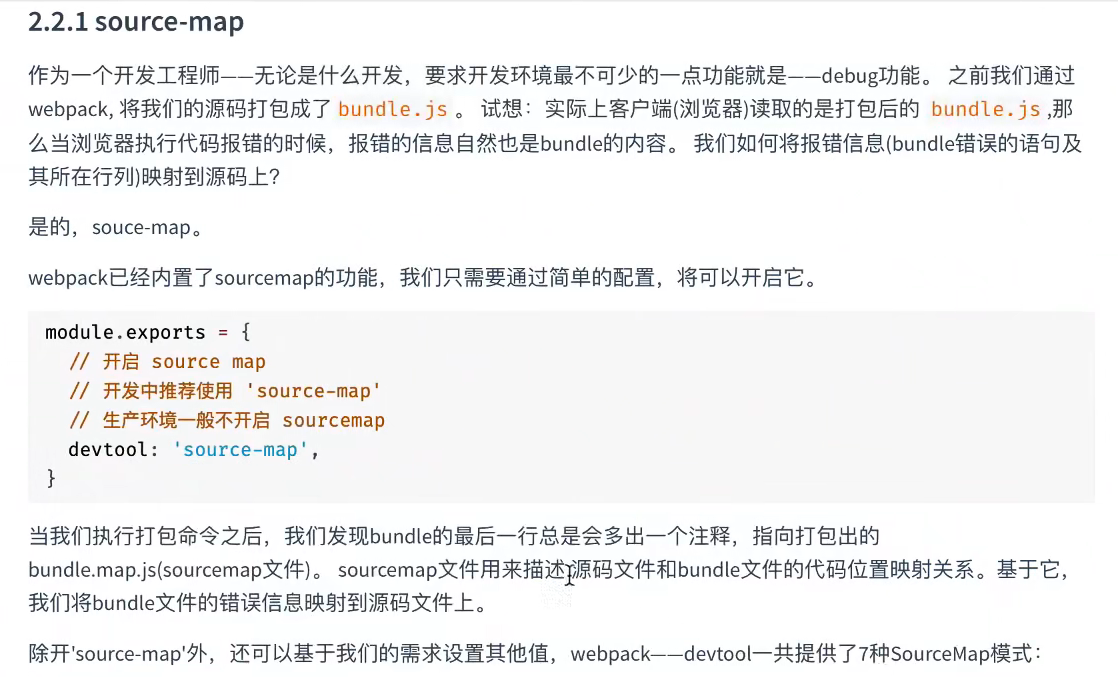
通过配置source-map将打包后文件中的报错信息映射到源文件中
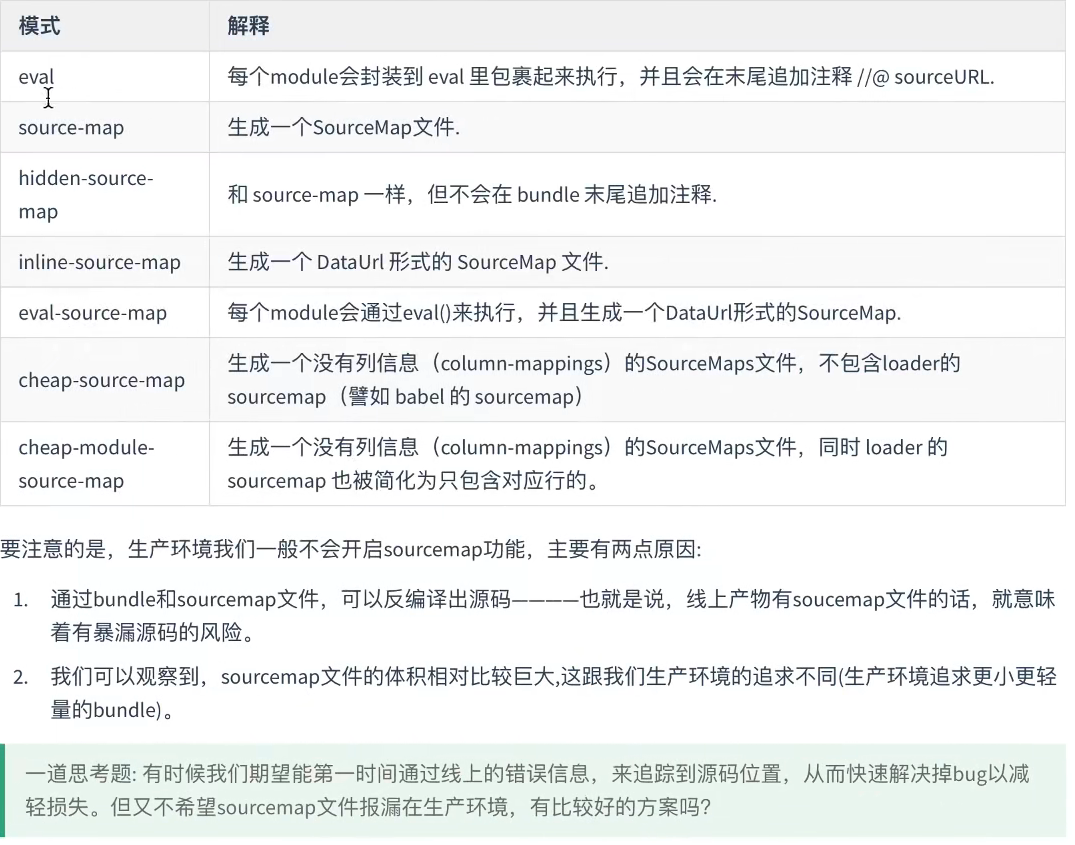
常用的7种source-map
最基本的环境配置
const HtmlWebpackPlugin = require("html-webpack-plugin");module.exports = {mode: "development",output:{// 打包时清除之前的打包内容clean:true},entry: "./app.js",plugins: [new HtmlWebpackPlugin()],// 因为HtmlWebpackPlugin,// 这时打包会生成一个index.html和main.js文件,// 其中main.js文件会被自动引入index.html文件中// 打包后运行npx webpack-dev-server --open ,会在浏览器中显示打印信息};
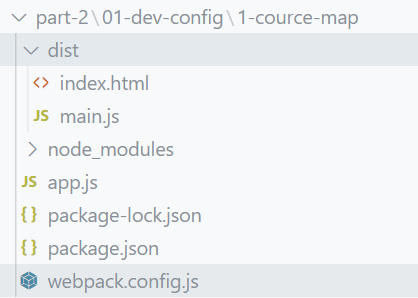
source-map在开发环境下默认使用eval,即设置devtool:eval
当devtool设置为false时,如下
const HtmlWebpackPlugin = require("html-webpack-plugin");module.exports = {mode: "development",entry: "./app.js",// devtool设置为false后再浏览器中查看到的打印信息,报错信息都将定位到打包后的main.js文件中,// 而不是源文件中// 当devtool设置为eval时,得到的结果和不设置时一样,(即默认devtool就是设置为eval)devtool:false,plugins: [new HtmlWebpackPlugin()],};

- devtool的值为source-map时,
会再打包文件中生成一个main.js.map文件,这时的文件将不会是通过eval打包,如下:
但会多一个sourceMappingURL指向main.js.map,
这时也能锁定代码再源文件中的位置
- devtool的值为hidden-source-map时,
会再打包文件中生成一个main.js.map文件,但不会再main.js文件中生成注释了(这将导致不能锁定代码了)
- devtool的值为inline-source-map时,
不会将source-map文件单独打包,但会再main.js文件中添加注释,如下:
可以锁定代码的位置
- devtool的值为eval-source-map时,
不会将source-map文件单独打包,但会再main.js文件中文件将会是通过eval打包和添加sourceURL,如下: 可以锁定代码的位置
- devtool的值为cheap-source-map时, 效果和source-map一样.
但source-map的打包文件有一点不同source-map,中的mappings会记录代码有多少行和列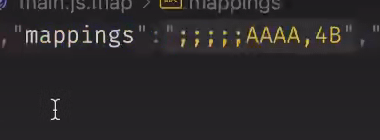
cheap-source-map的mappings只记录有多少行 
- devtool的值为cheap-module-source-map时, 效果和cheap-source-map相似.
需要安装babel,(npm install babel-loader @babel/core @babel/preset-env -D)
,但在配置babel后,使用cheap-source-map,这时的代码不会锁定.
所以开发环境中一般推荐使用cheap-module-source-map
class A {constructor() {this.str = "hello";}sayHello() {console.log(this.str);}}const a = new A();a.sayHello();
devServer
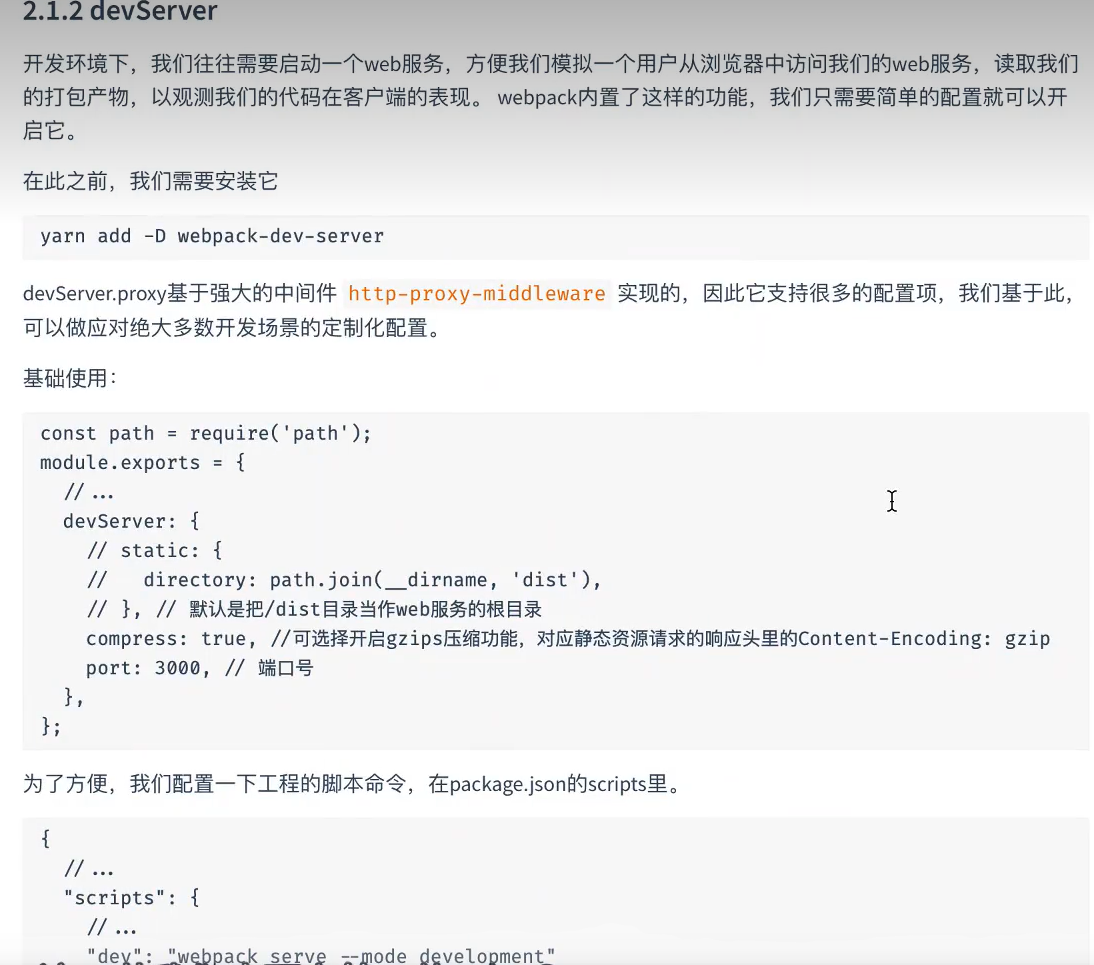
const HtmlWebpackPlugin = require("html-webpack-plugin");const path = require("path");module.exports = {mode: "development",entry: "./app.js",output: {clean: true,},//devServer: {// 指向当前项目的物理路径static: path.resolve(__dirname, "./dist"),// 保证文件从浏览器到服务器的传输过程中文件是压缩的,从而提高传输效率,如图1compress:true,// 用来配置服务的端口号port:3000},plugins: [new HtmlWebpackPlugin()],devtool: "cheap-module-source-map",};
图1:
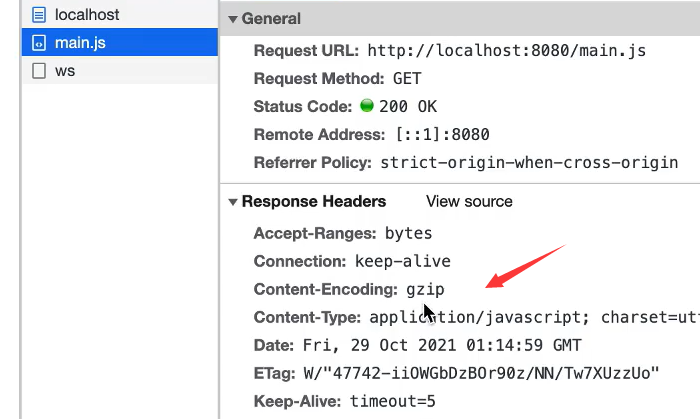
当compress不配置或配置为false时,请求头中将不会由Content-Encodeing这个配置(浏览器就不能对文件进行解压,即文件不能被压缩)
模拟添加响应头
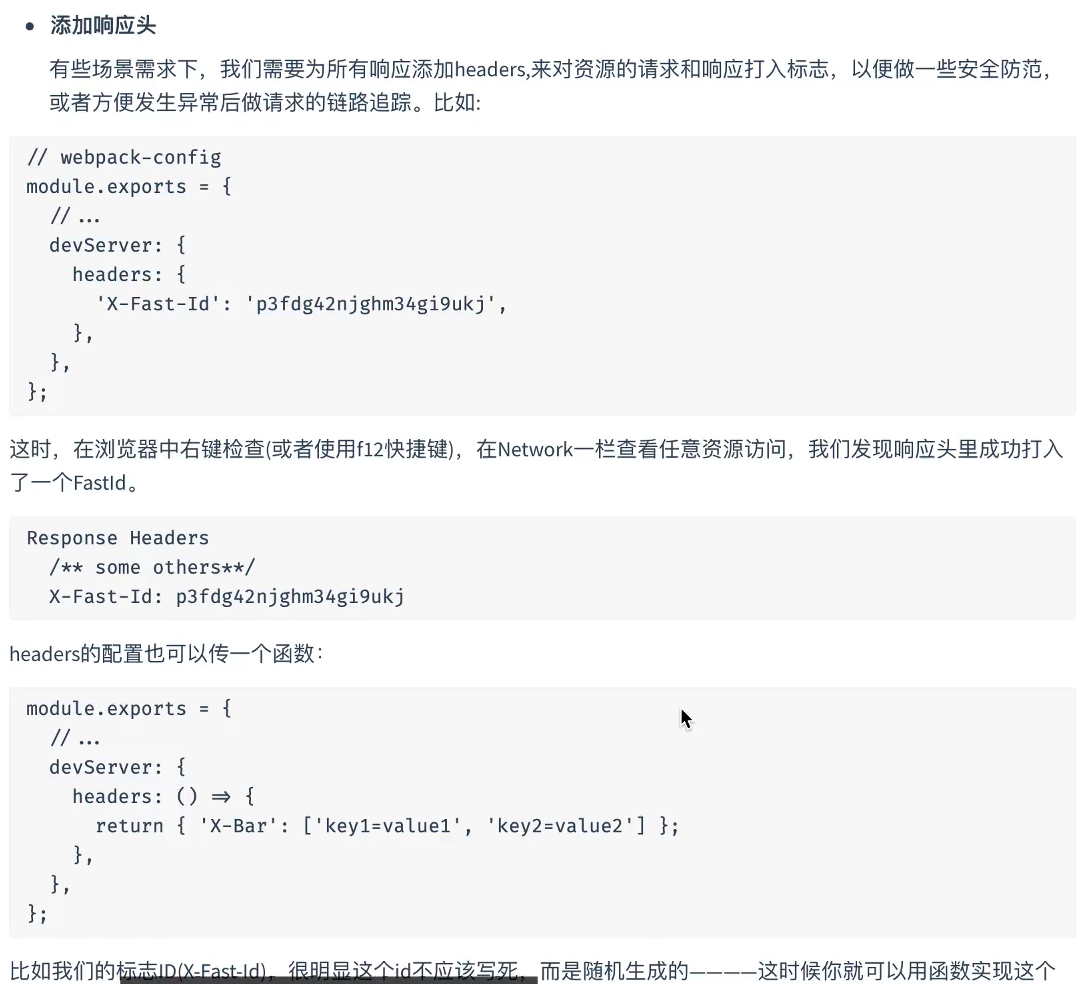
const HtmlWebpackPlugin = require("html-webpack-plugin");const path = require("path");module.exports = {mode: "development",entry: "./app.js",output: {clean: true,},//devServer: {static: path.resolve(__dirname, "./dist"),compress:true,port:3000,headers:{// 配置响应头的token信息"X-Access-Token":"asg12345"}},plugins: [new HtmlWebpackPlugin()],devtool: "cheap-module-source-map",};
开启代理
解决跨域问题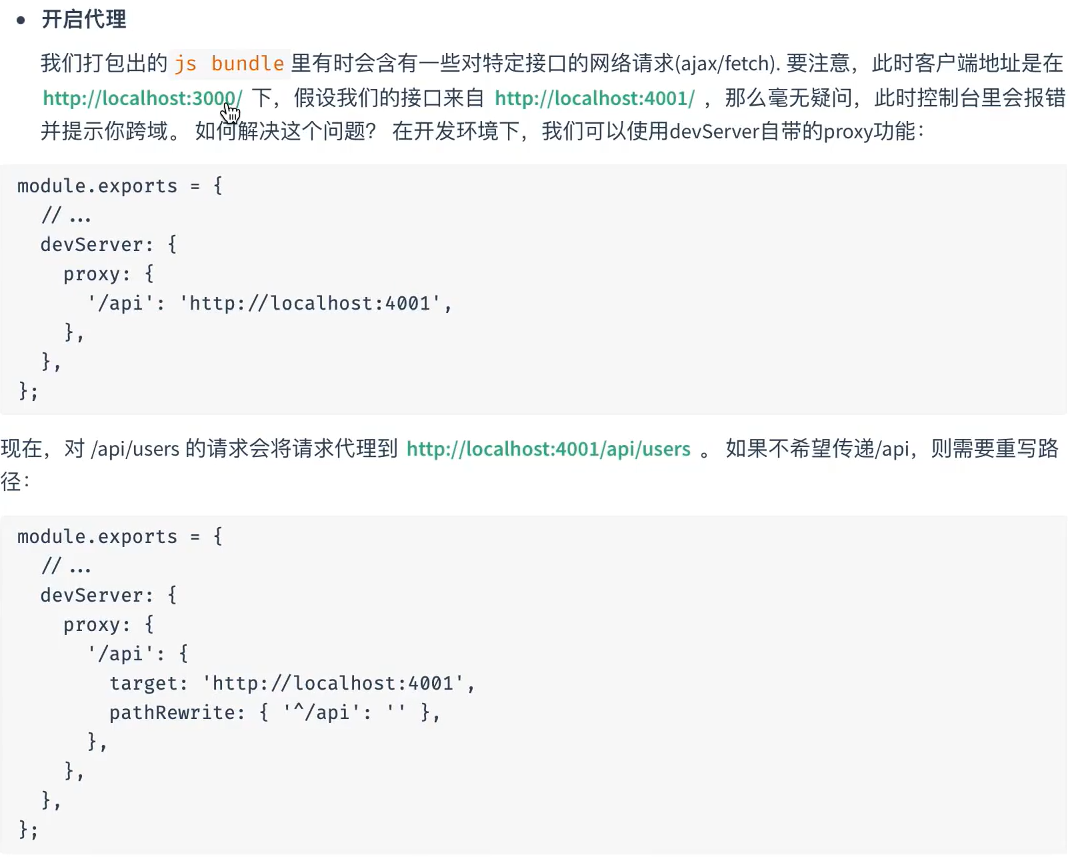
使用node创建一个服务,如下:
const http = require("http");const app = http.createServer((req, res) => {if (req.url === "/api/hello") {res.end("hello node");}});// 参数,端口,域名,回调函数app.listen(9000, "localhost", () => {console.log("localhost:9000");});
通过再server.js的父级目录下,启动终端,运行 node server 命令启动服务,
这时可以再浏览器上通过输入http://localhost:9000/api/hello,就可以访问服务器内容了.
但这里的信息不能通过前端访问到,需要配置跨域信息
通过浏览器自带的fetch请求方法请求上面的接口信息,如下:
// console.log("hello");fetch("http://localhost:9000/api/hello").then((response) => response.text()).then((result) => {console.log(result);});

重新打包,并启动服务(npx webpack ,npx webpack-dev-server —open),
这时会出现苦于问题,如下: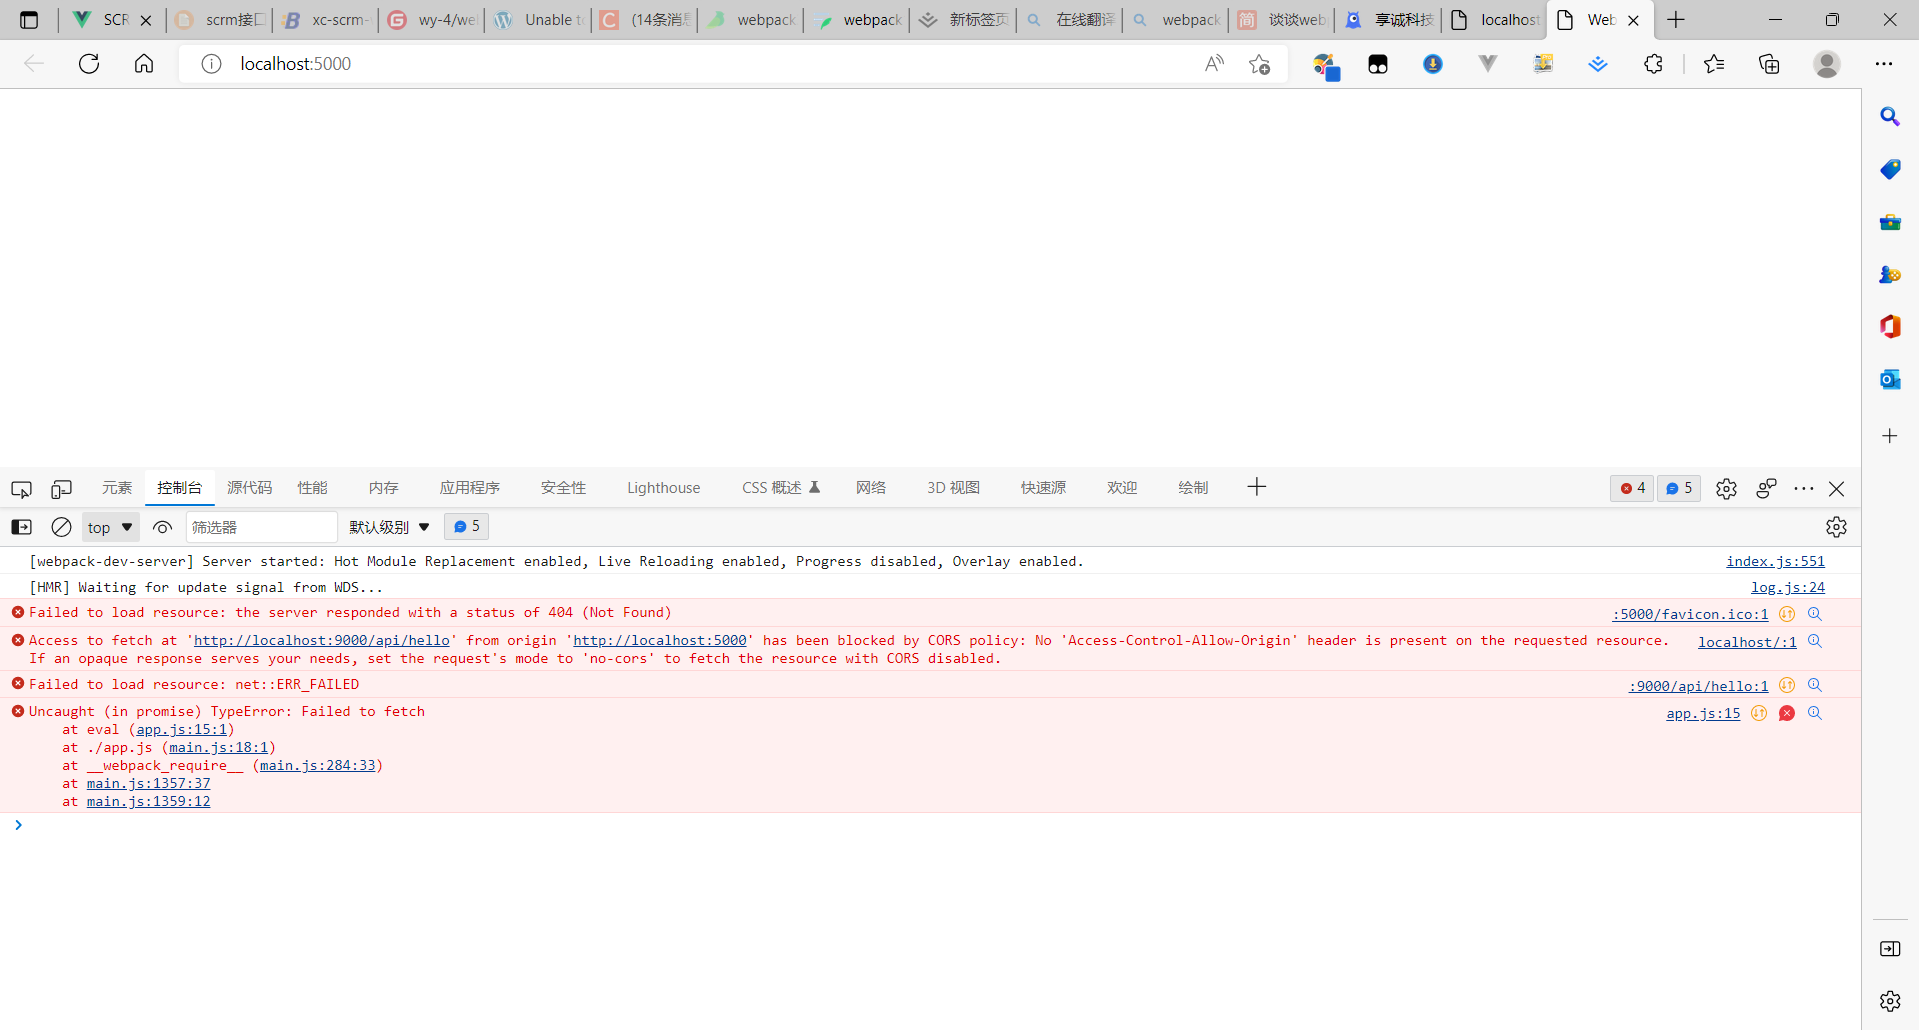
一般请求接口时,是统一配置基础路径的,所以不需要将请求路径写完
fetch("/api/hello").then((response) => response.text()).then((result) => {console.log(result);});
然后配置代理服务器,将请求的路径转移到正确的地址上,就可正常访问接口内容了,如下:
const HtmlWebpackPlugin = require("html-webpack-plugin");const path = require("path");module.exports = {mode: "development",entry: "./app.js",output: {clean: true,},//devServer: {static: path.resolve(__dirname, "./dist"),compress:true,port:3000,headers:{// 配置响应头的token信息"X-Access-Token":"asg12345"},proxy:{// 这时就会将请求以 "/api"开头的请求转移到http://localhost:9000/api/...上// 例如:请求路径:"/api/hello" ,--->http://localhost:9000/api/hello ,让请求指向http://localhost:9000"/api":"http://localhost:9000"}},plugins: [new HtmlWebpackPlugin()],devtool: "cheap-module-source-map",};
配置https
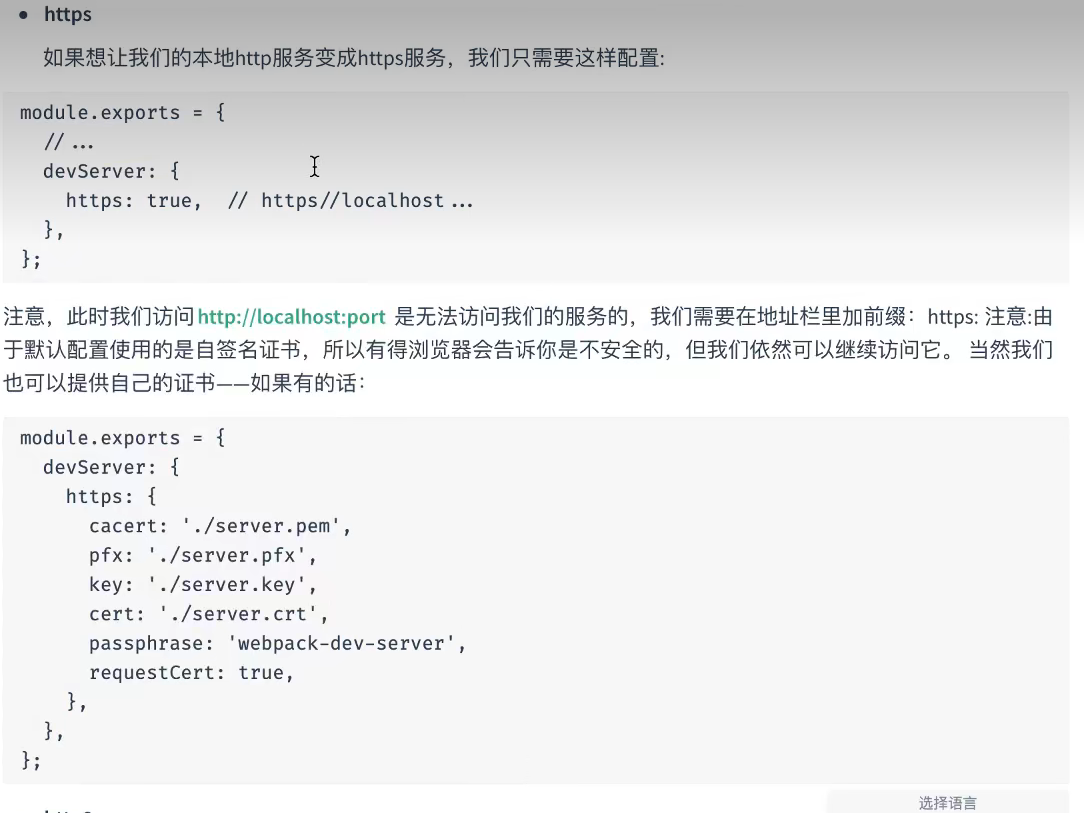
再devServer中加一个属性:https,如下:
devServer: {static: path.resolve(__dirname, "./dist"),compress: true,port: 5000,headers: {"X-Access-Token": "asg12345",},// 当配置https为true时,运行项目就需要https传输协议了。当然还需要配置签名证书https: true,proxy: {"/api": {target: "http://localhost:9000",},},},
http2
http2自带https的签名证书。
https和http2在使用默认证书时,会有提示不安全,如下:
historyApiFallback
当跳转到没有定义的页面时并不会报错,而是显示已有页面内容(跳转之前的页面内容)
因为没有这个资源,所以会报404,如下: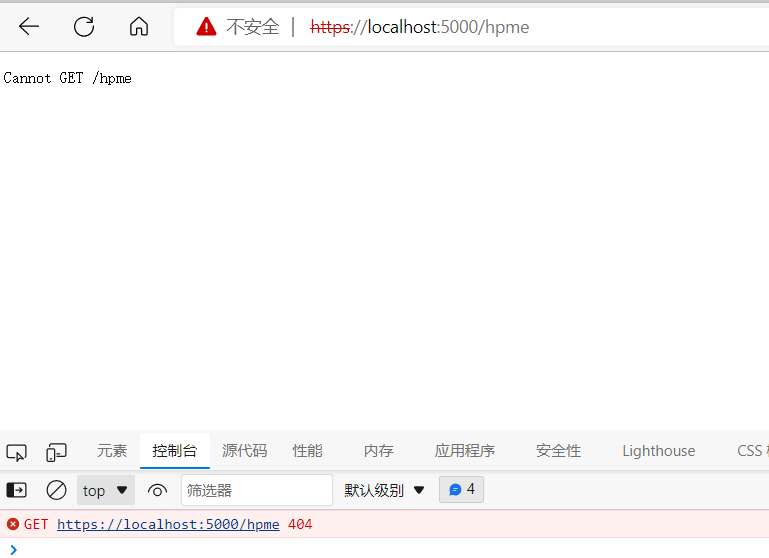
设置如下配置,可以解决这个问题:
devServer: {static: path.resolve(__dirname, "./dist"),compress: true,port: 5000,headers: {"X-Access-Token": "asg12345",},// 当配置https为true时,运行项目就需要https传输协议了。当然还需要配置签名证书https: true,historyApiFallback:true,proxy: {"/api": {target: "http://localhost:9000",},},},
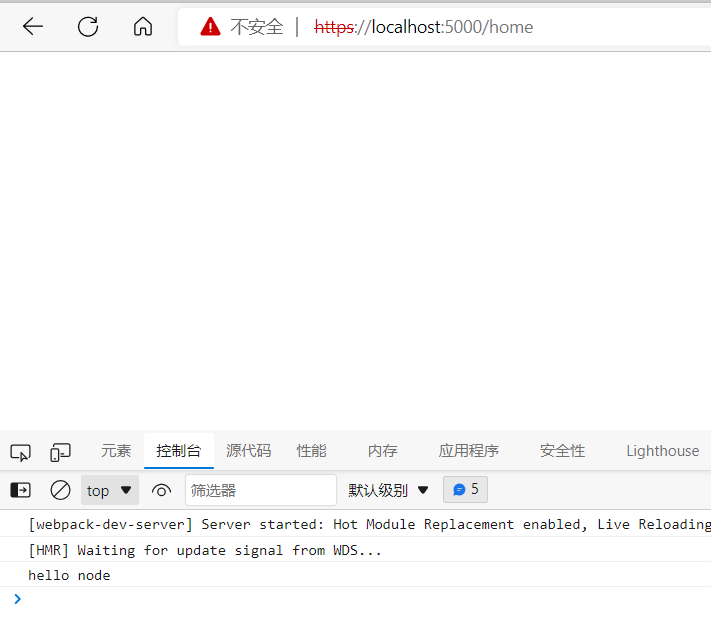
这里提示找不到main.js文件,这时因为我们配置的时绝对路径,将他配置为相对路径就可以了。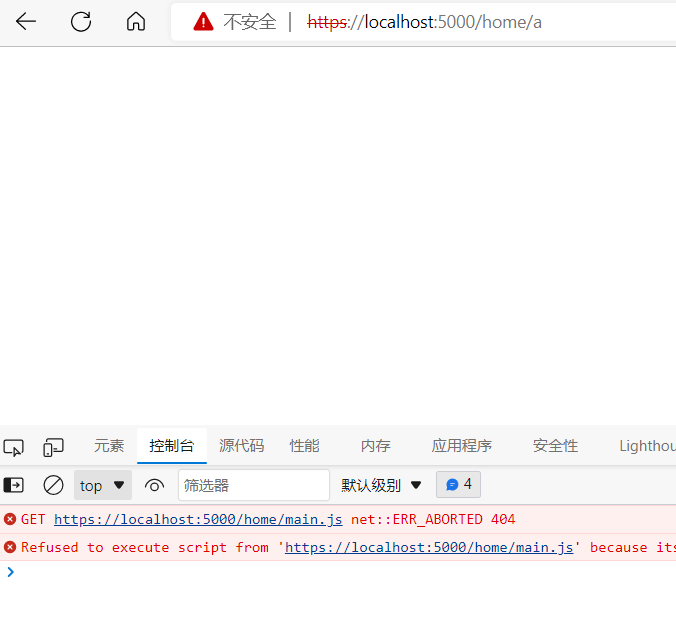 ···
···
output: {clean: true,// 配置publicPath为“/”后,资源路径就会变成相对路径publicPath: "/",},
开发服务器主机
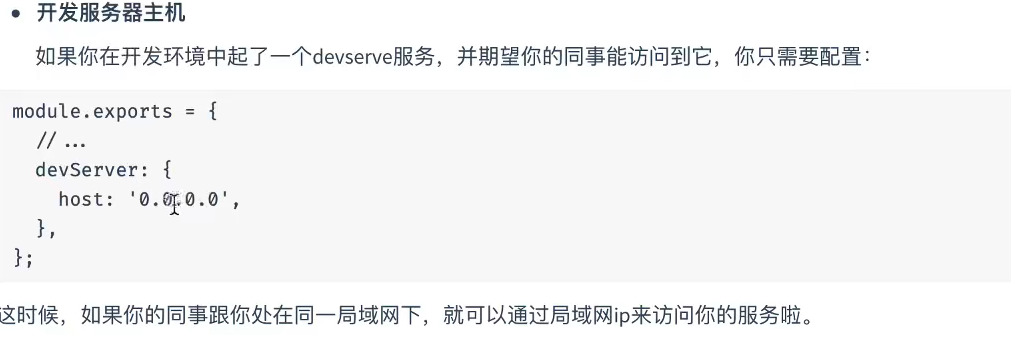
devServer: {static: path.resolve(__dirname, "./dist"),compress: true,port: 5000,headers: {"X-Access-Token": "asg12345",},// 配置后别人就可以通过ip访问这个服务了host:"0.0.0.0",https: true,historyApiFallback:true,proxy: {"/api": {target: "http://localhost:9000",},},},
模块热替换和热加载
热替换
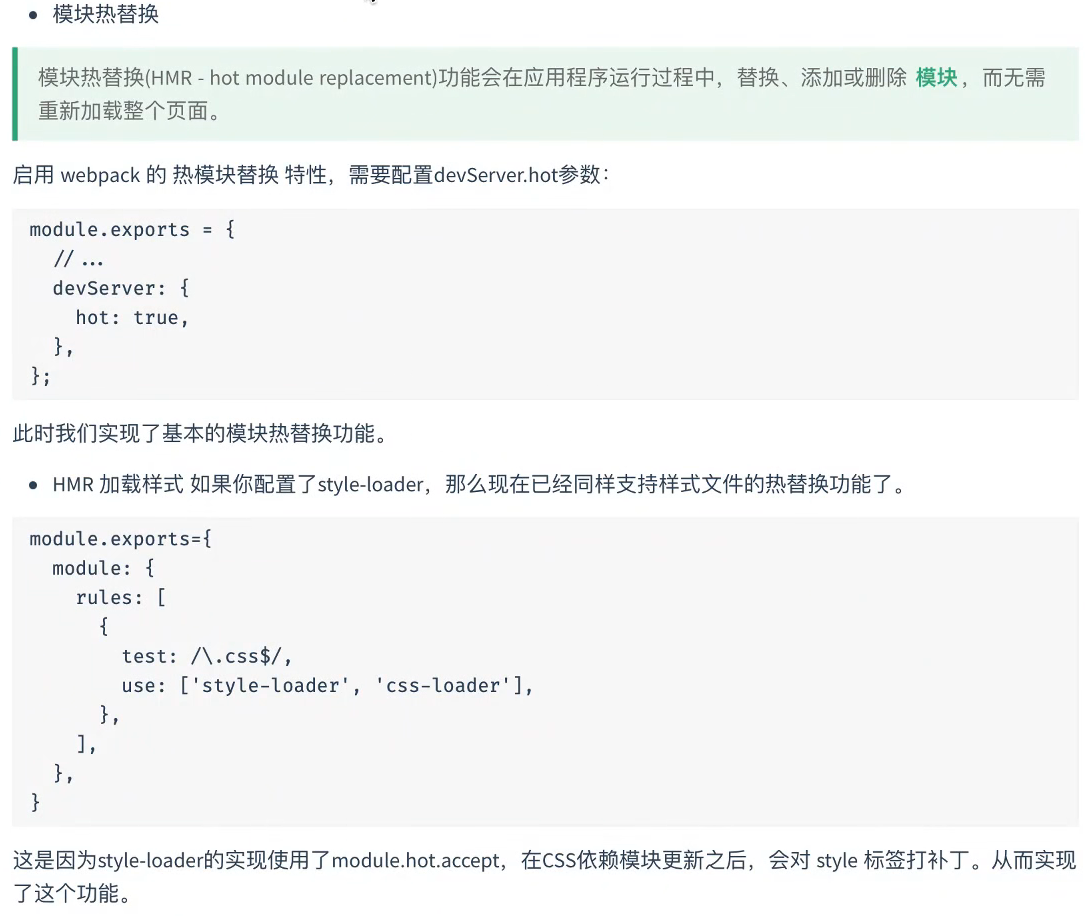
const HtmlWebpackPlugin = require("html-webpack-plugin");const path = require("path");module.exports = {mode: "development",entry: "./app.js",output: {clean: true,publicPath: "/",},devServer: {// 这个配置webpack会默认开启hot: true,static: path.resolve(__dirname, "./dist"),},plugins: [new HtmlWebpackPlugin()],};
.square{width: 60px;height: 60px;background-color: rgb(156, 150, 142);margin-bottom: 10px;}
// 导入后下面的样式才能生效import "./style.css";// 因为这里用到了样式,所以需要安装css-loader和style-loaderconst button = document.createElement("button");button.textContent = "添加";button.addEventListener("click", () => {const div = document.createElement("div");div.classList.add("square");document.body.appendChild(div);});document.body.appendChild(button);
再运行后,点击页面中的添加按钮会生成一些小方块,方块的样式就是style.css中的样式,
因为这时的 devServer:配置了热替换(hot)为true ,
所以当修改style.css中的样式时浏览器中之前添加了的方块一会随着改变,
当hot为false时,再修改style.css中的样式后,浏览器会自动刷新页面,之前添加的方块就没了,
项目下创建index.html文件,如下:
<!DOCTYPE html><html lang="en"><head><meta charset="UTF-8" /><meta http-equiv="X-UA-Compatible" content="IE=edge" /><meta name="viewport" content="width=device-width, initial-scale=1.0" /><title>Document</title></head><body><div id="box"></div></body></html>
设置模板
// 将webpack.config.js中的插件设置为如下:plugins: [new HtmlWebpackPlugin({ template: "./index.html" })],
创建inpout.js文件:
document.querySelector("#box").innerHTML = "<input type='text' value='text'>";
css不用这样配置是因为css-loader已经实现了这一功能
// 导入后下面的样式才能生效import "./style.css";//导入js文件import "./input.js";// 因为这里用到了样式,所以需要安装css-loader和style-loaderconst button = document.createElement("button");button.textContent = "添加";button.addEventListener("click", () => {const div = document.createElement("div");div.classList.add("square");document.body.appendChild(div);});document.body.appendChild(button);// 判断石佛开启热替换if (module.hot) {// 监听input.js文件的改变,实现js文件的热替换module.hot.accept("./input.js", () => {});}
热加载

liveReload也是默认为true,会在我们修改代码后帮我们自动编译。
当hot和liveReload都设置为true时,就可以灵活的调试代码。
eslint
npm i eslint -D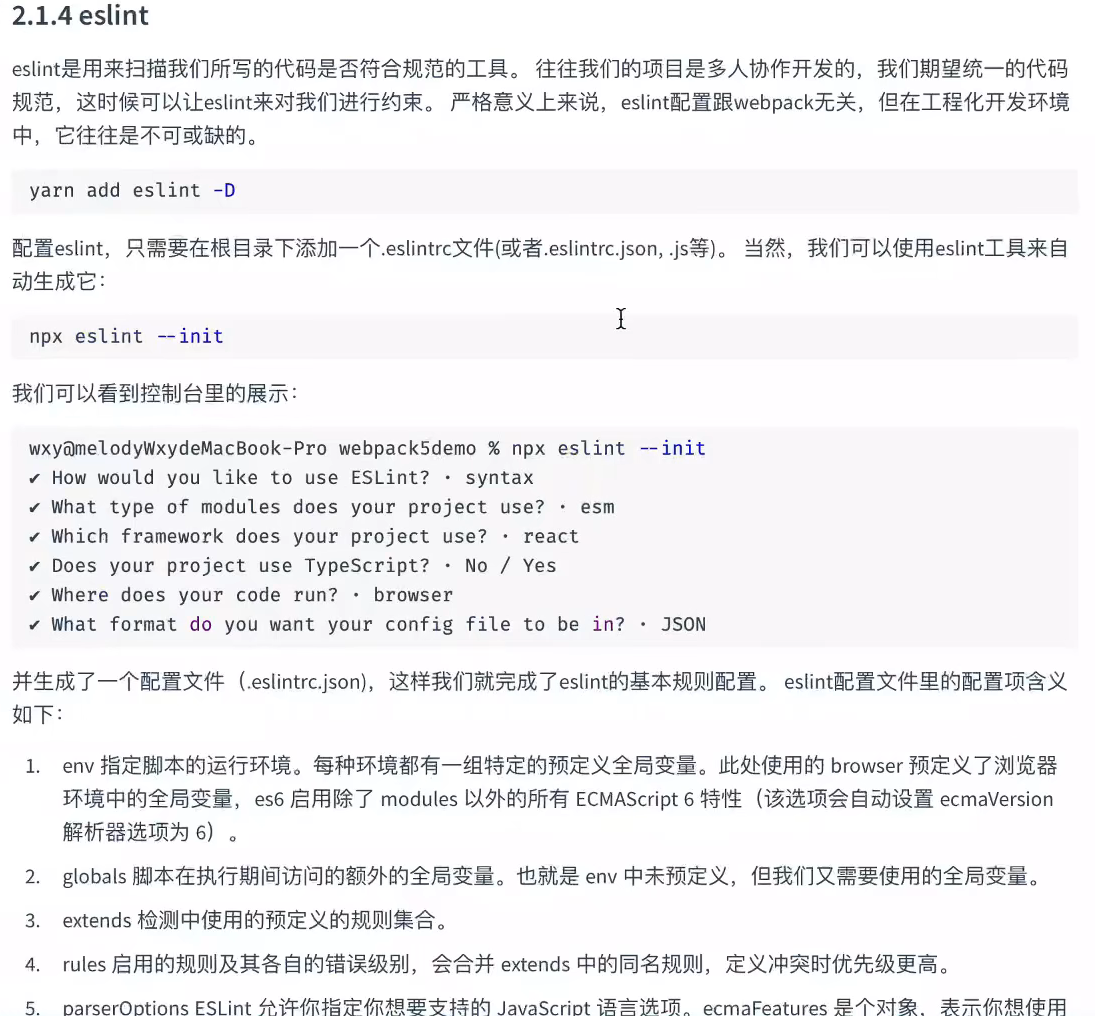 安装后,运行npx eslint —init时会出现三个选项,如下:
1.检查语法
2.检查语法,发现问题
3.检查语法,发现问题,规范代码格式
选择后,又会提示你在项目中用那种模块格式,如下:
选择第一个,
然后又文你在项目中选择那个框架,如下:
用的是什么选什么,(选择后还会有一些相关配置)。(如果不会配置)所以这里可以选择第三个
然后问在项目中使用ts吗
问项目是运行在什么地方
问在代码中如何配置代码规范
1.使用流行的代码格式
2.一问一答的方式
3.导入一个js文件
在选择第一个后,会出现4个选项,如下:
选第一个,他的代码规范比较严格
然后问将配置文件放在那个文件里面, ,
,
这里可以选择json
然后就可以输入yes执行安装了(安装airbnb)
安装完后就会生成一个eslint的配置文件,如下: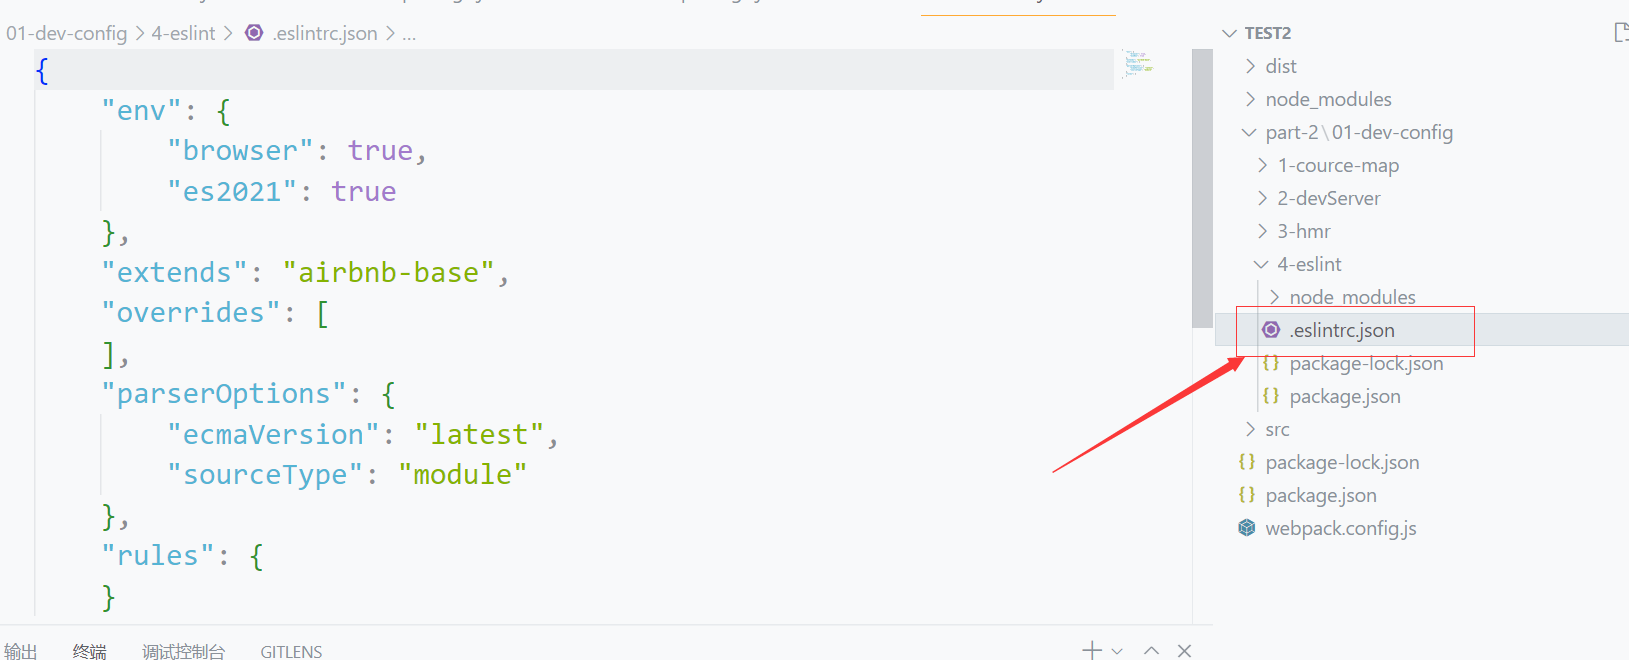
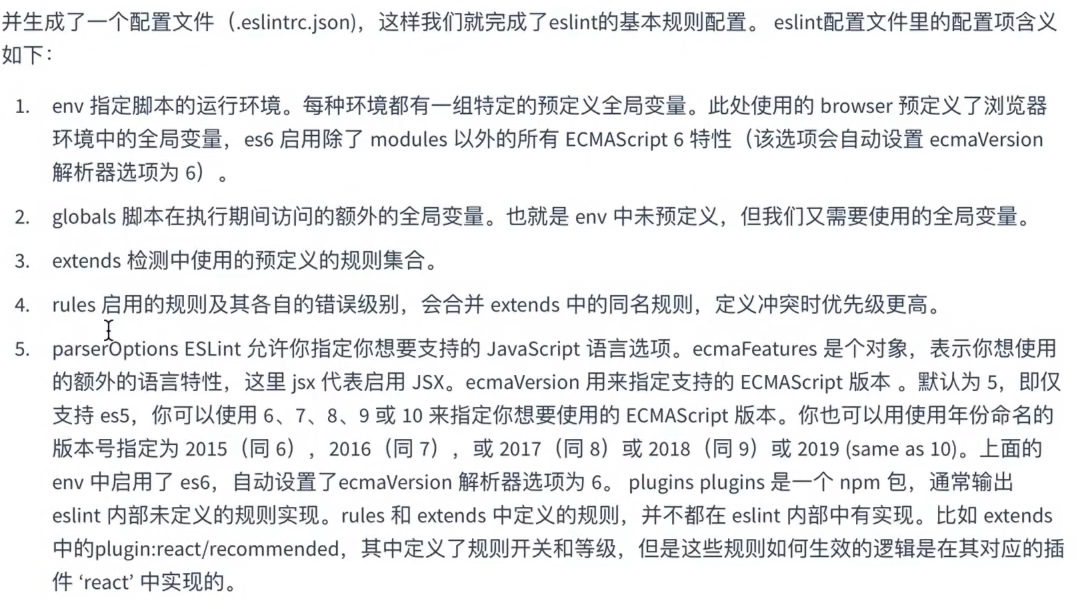
关于配置文件的详细解释
命令行检测代码
可以通过npx eslint ./src 来检测文件中的代码格式是否有问题,如下:
第一个警告,可以通过在配置文件中配置解决,
第二个错误,需要使用单引号
第三个,是回车符号问题,LF是mac风格,CRLF是windows风格,
可以通过点击vscode右下角CRLF,如下: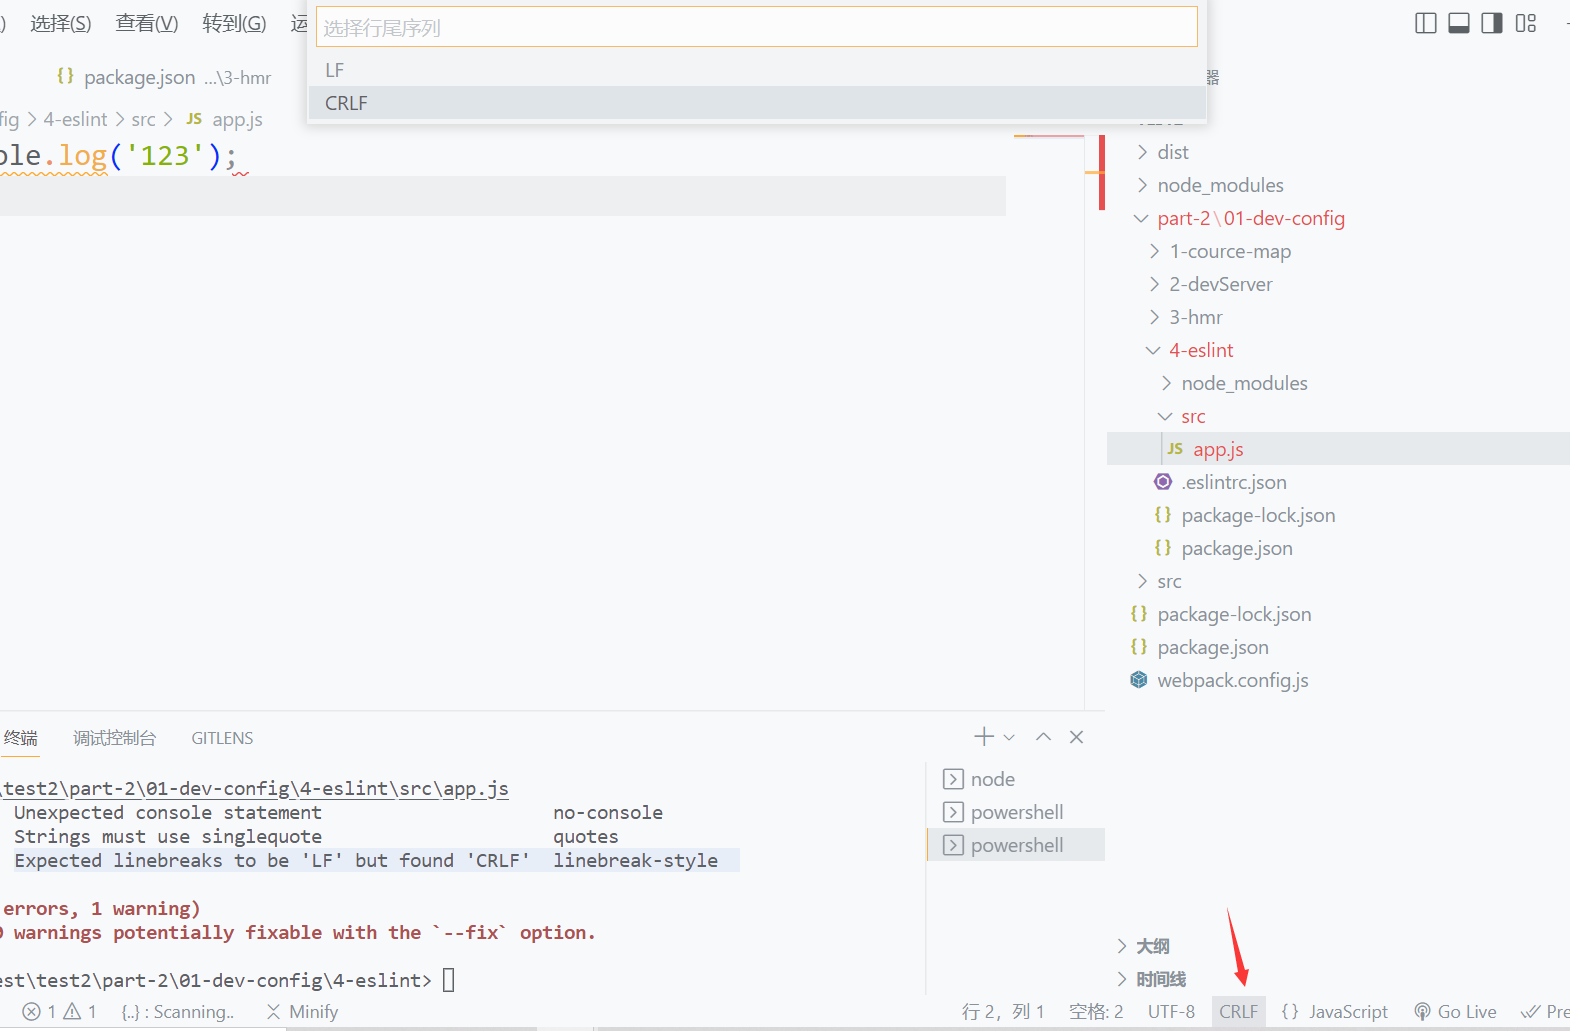
将CRLF切换为LF,
或者在eslint配置文件 .eslintrc.json文件中配置,如下:
eslint插件检测代码
vscode可以通过安装eslint插件实时监测代码格式,而不用通过命令来检测
出现问题是可以在vscode的问题中查看相关信息
webpack检测代码(整合)
一般用于不能安装eslint插件,同时又因麻烦不用命令检测代码时
需要安装babel-loader、@babel/core 和eslint-loader
npm i babel-loader @babel/core eslint-loader webpack webpack-cli webpack-dev-server html-webpack-plugin -D
const HtmlWebpackPlugin = require('html-webpack-plugin');module.exports = {mode: 'development',entry: './src/app.js',plugin: [new HtmlWebpackPlugin()],module: {rules: [{test: /\.js$/,// 先使用eslint检测代码,在使用babel编译use: ['babel-loader', 'eslint-loader'],},],},};
这时打包运行项目后,如果又错误会在终端显示出来,浏览器一会显示对应的错误。
如果想关闭浏览器上的覆盖层,可以通过配置overlay实现,如下:
const HtmlWebpackPlugin = require('html-webpack-plugin');module.exports = {mode: 'development',entry: './src/app.js',plugins: [new HtmlWebpackPlugin()],devServer: {client: {// 当overlay为false时,报错时浏览器上将不会出现覆盖层overlay:false,},},module: {rules: [{test: /\.js$/,use: ['babel-loader', 'eslint-loader'],},],},};
git-hooks与husky
chmod +x …. 命令不能在windos上面使用,要在linux上使用
但可以通过git bash运行chmod、vim这些命令,所以使用git bash可以运行下面的所有命令
在代码提交前对代码格式进行检测,可以使用husky(husky是通过git-hooks实现的)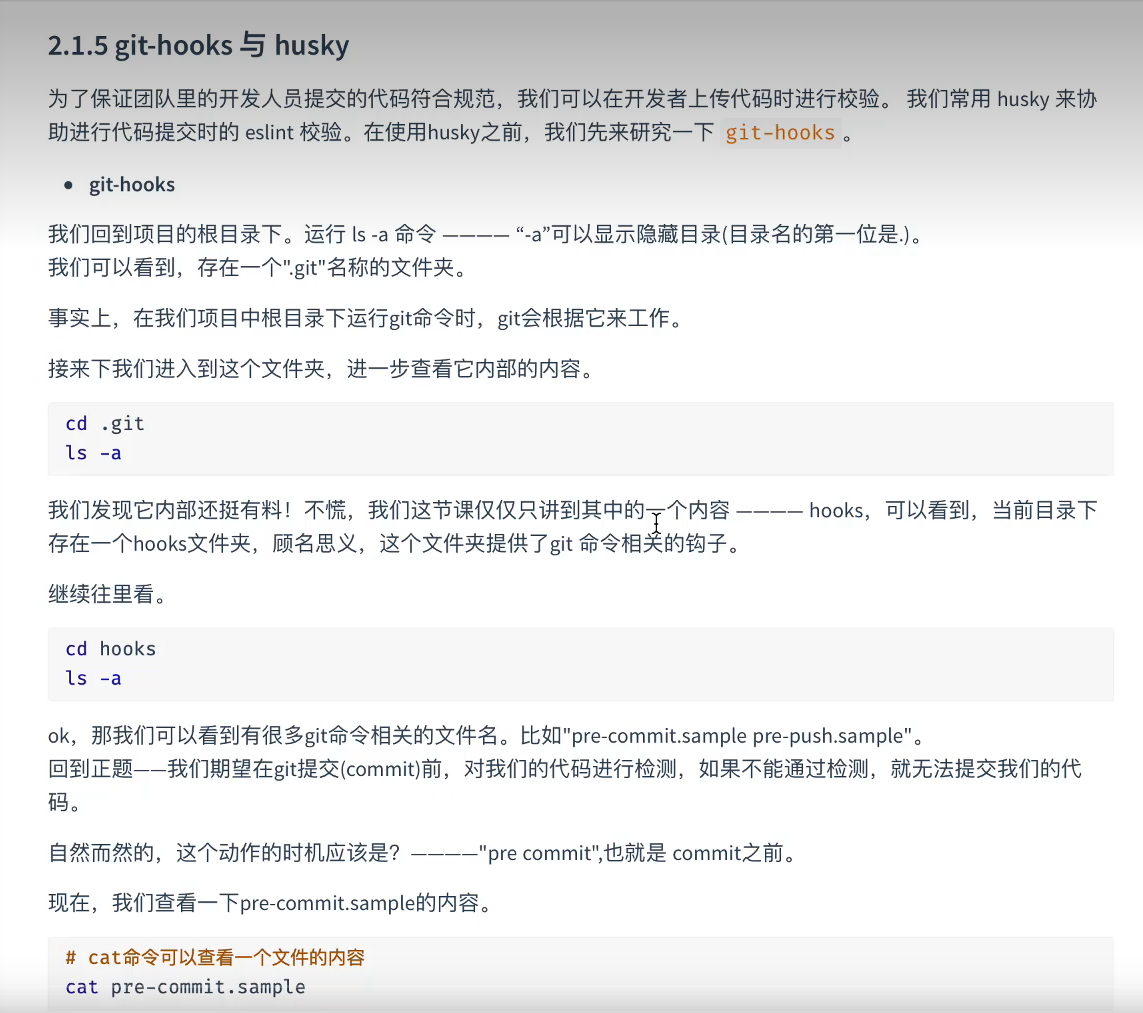
在项目目录下打开终端,输入git —version 查看是否安装git
- 通过git init 在项目中搭建一个git环境
- 通过ls -la(ls)查看项目的文件目录,或在文件夹中勾选隐藏文件选项,查看项目所有文件列表
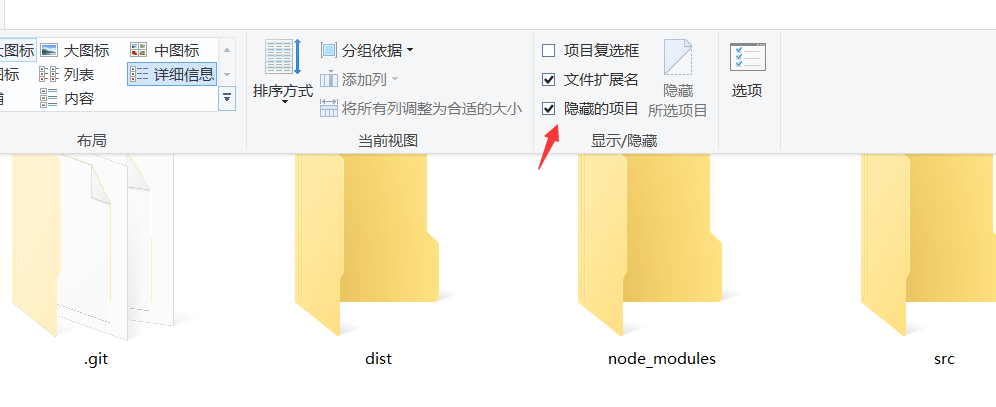
在这个列表中会出现一个.git文件
创建一个.gitignore文件,这个文件用来配置,哪些是不用提交的文件,内容如下:
**/node_modules
输入 cd .git到git文件夹里面,在输入ls查看git文件内容,如下:
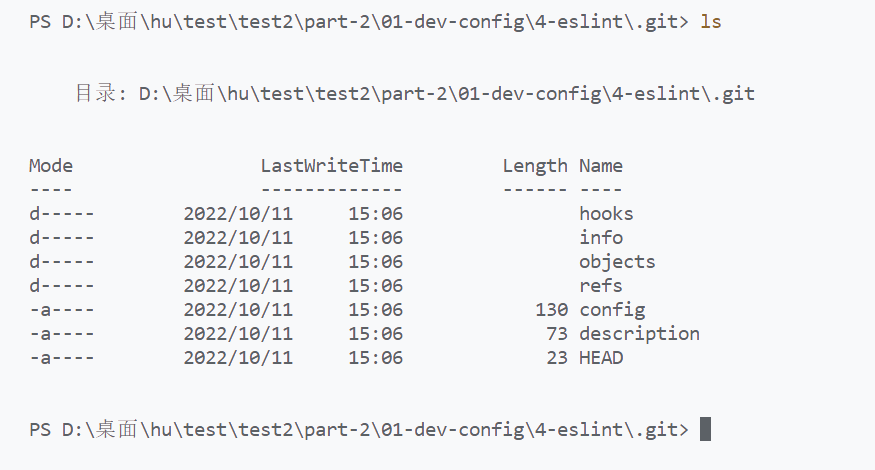
这里面有一个hooks文件
- 进入hooks文件,cd hooks,ls
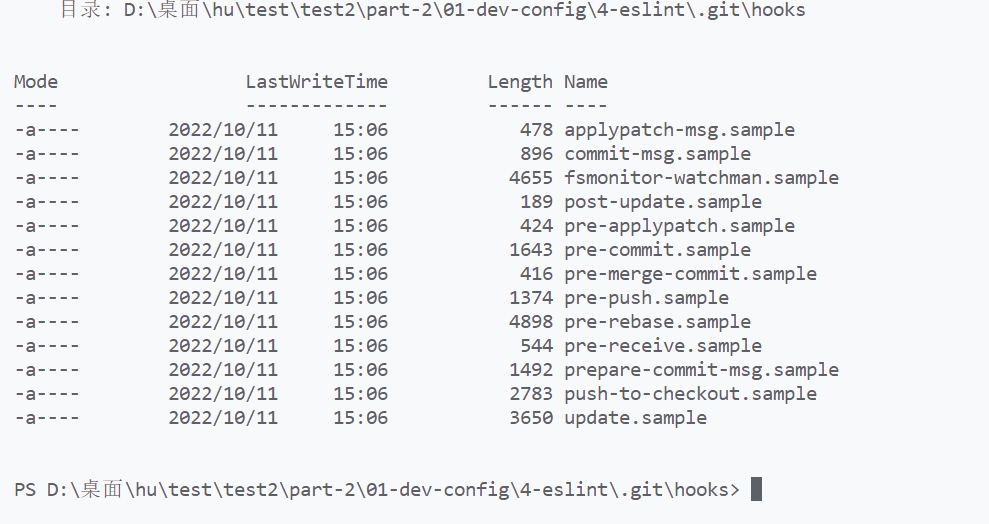
hooks中的.sample文件都会自动执行的
- 通过命令创建文件,touch pre-commit,创建后通过ls查看
- 通过vim pre-commit,可以通过终端给pre-commit文件添加内容
通过 “i”键开始输入信息,
退出:先按esc键,再输入 “:wq”,退出编辑pre-commit文件
- 回到项目的更目录4-eslint下(即连续输入两个 cd ..)
- 再上传代码时:commit时

会提示pre-commit不能用,需要到hooks目录下运行这个文件
- 再hooks文件目录下,设置pre-commit的读写权限,输入chmod +x ./pre-commit
- 输入ls ,可以看到pre-commit的权限和别的文件一样了
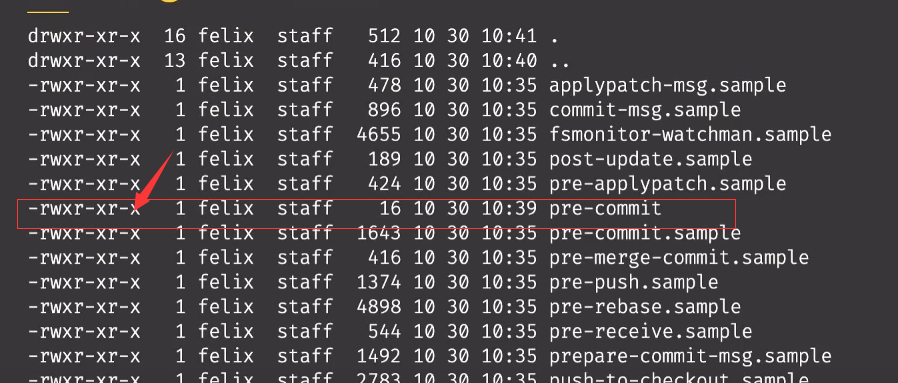
- 然后再回到项目根目录,提交代码

- 通过这种方式,运行检测代码的命令,
进入hooks目录下,输入vim pre-commit,进入pre-commit文件
再没有进入输入的模式下,点击 d d(两个d),可以删除文件内容
再按下“i”键,进入插入模式
输入npx eslint ./src(这就相当于再当前命令行中输入这个命令)
按下esc键,输入:wq 退出
- 返回项目更目录,再次执行提交代码命令
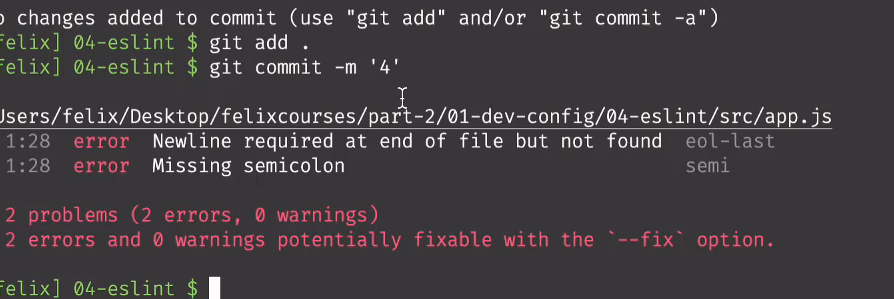
再commit将代码上传到本地仓库时,会自动执行pre-commit文件中的npx eslint ./src 命令去检测src文件下的代码是否有问题,有问题就会出现类似上面的提示。
这时只需要修改代码为正确形式,然后再次提交代码,就可以提交了,同时也在提交前检测了代码的格式。
- 因为每个人的写代码的习惯不一样,所以这样配置是有问题的,可以将配置信息放到项目的根目录解决。
- 在项目茛目录创建一个 .mygithooks文件夹,并在文件夹下面创建一个pre-commit文件
pre-commit文件内容 npx eslint ./src
- r然后设置git配置, 运行命令: git config core.hooksPath .mygithooks
.mygithooks为项目根目录下自己创建的文件(这行命令不用将.mygithooks文件的内部文件一起写上去,命令会自动读取文件信息)
配置完后,在提交时就会运行项目根目录下的.mygithooks/pre-commit文件,而不是.git/hooks文件下的pre-commit
没有任何反应就代表配置成功
- 在git文件下查看是否配置成功
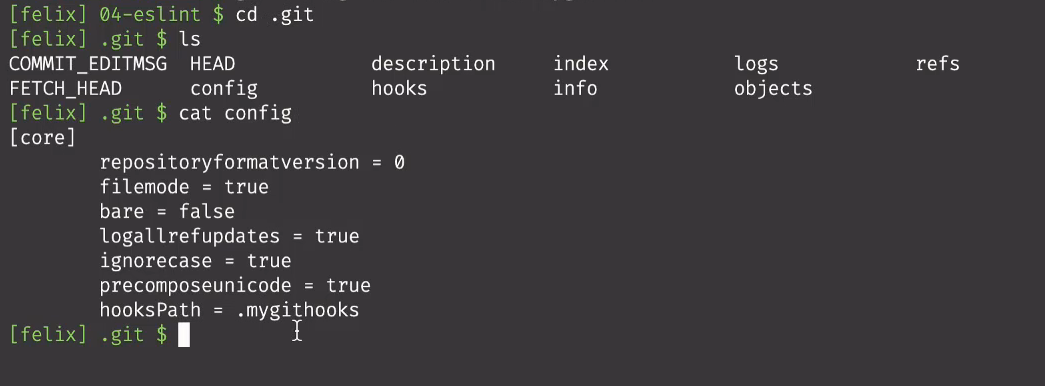
通过cat config查看信息
hooksPath的值是.mygithooks 表名已经配置成功
- 这时提交代码到仓库,还是会有一个警告提示,.mygithooks/pre-commit文件没有执行权限,如下:

在执行chmod +x .mygithooks/pre-commit 后就给文件添加上权限了,可以通过ls查看信息
- 这时提交代码,就会执行.mygithooks/pre-commit 中的信息了
以上所有都是手动的,可以通过husky自动完成以上所有操作
husky
官网
- 安装:npm i husky -D
- 执行npx husky install 使git hooks生效
配置一个脚本,他会在命令执行前自动安装husky
"scripts": {"prepare":"husky install"},
创建一个hook

或者手动在.husky(隐藏文件)中创建一个pre-commit文件,内容为npx eslint ./src
- 创建好文件后就可以上传代码实验一下

提示.husky/pre-commit文件没有执行权限
- 使用git bash打开当前项目,运行命令 : chmod +x .husky/pre-commit

通过运行命令给文件添加权限,
通过ls -la查看信息
然后进入 .husky 文件查看husky 文件内部的文件是否开启权限
- 这时提交代码,都会在commit时检测代码是否规范,不规范会有提示信息。

修改完错后,重新提交代码。
- 通过这个配置将会实现在提交前对代码进行检测
