IDEA
1.安装插件
file -> settings -> Plugins
在Marketplace里搜索:sonar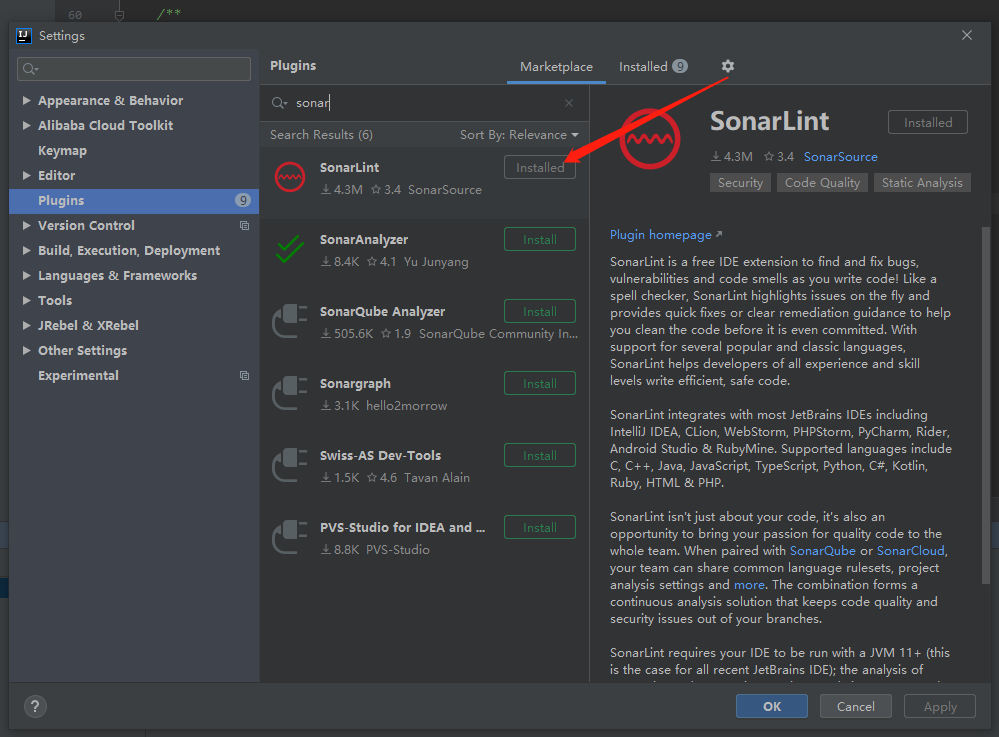
点击install安装。等待安装完成,根据需要重启 IDEA。
2. 配置SonarQube
sonarLint 原本有内置的代码检查规则。也可以用服务端规则,两者可能有细微差异,推荐使用服务端。
file -> settings
搜索sonar,在Other Settings 里找到 SonarLint General Settings
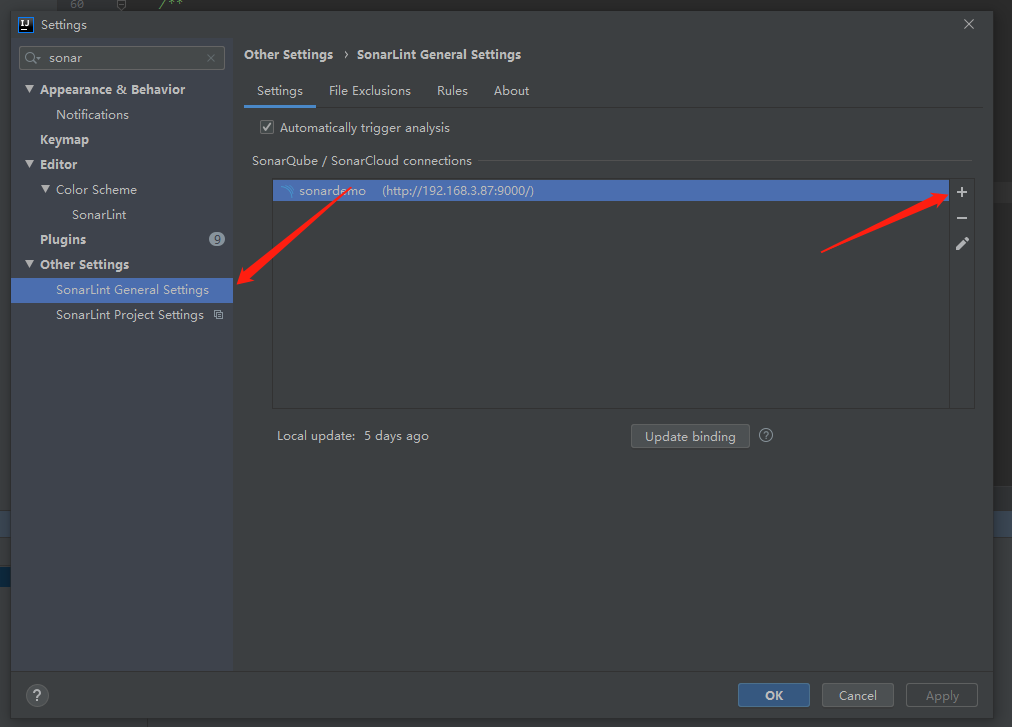
- 点击 + ,添加服务端
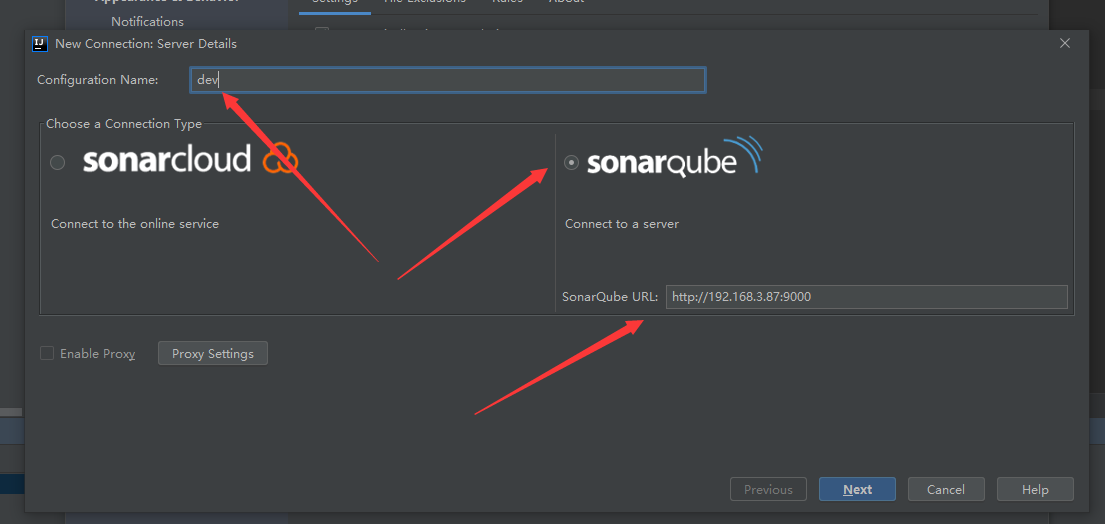
- 填写 Configuration Name:dev(可以任意填写)
- 选中 sonarqube
- 填入服务端地址 : http://192.168.3.87:9000
- 点击next,填写账号配置
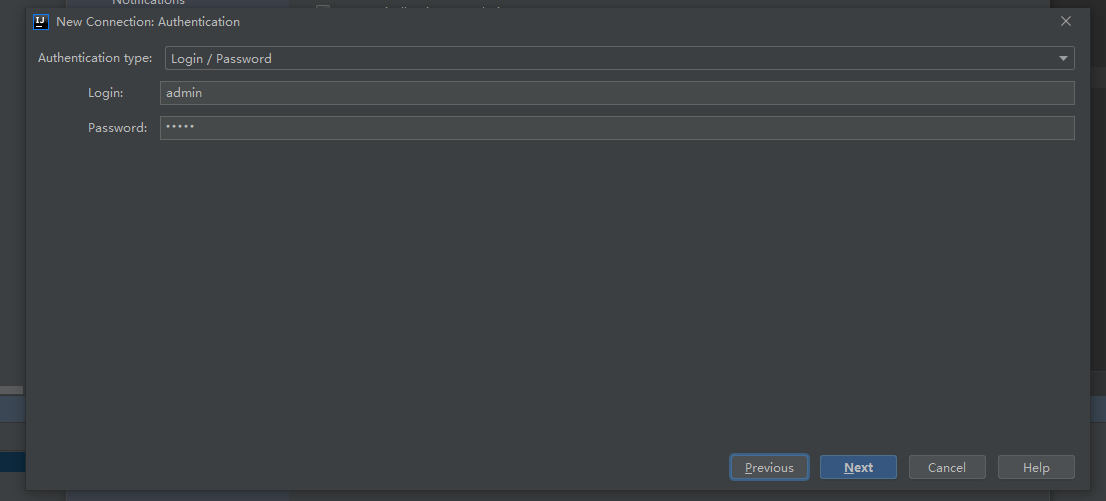
Authentication type 选择 Login/Password
账号:admin
密码:admin
- next
- finish
3. 使用sonarLint检查代码
检查正在编写的代码文件
推荐我们在写代码的时候,在工具栏找到 Sonarlint 的标签页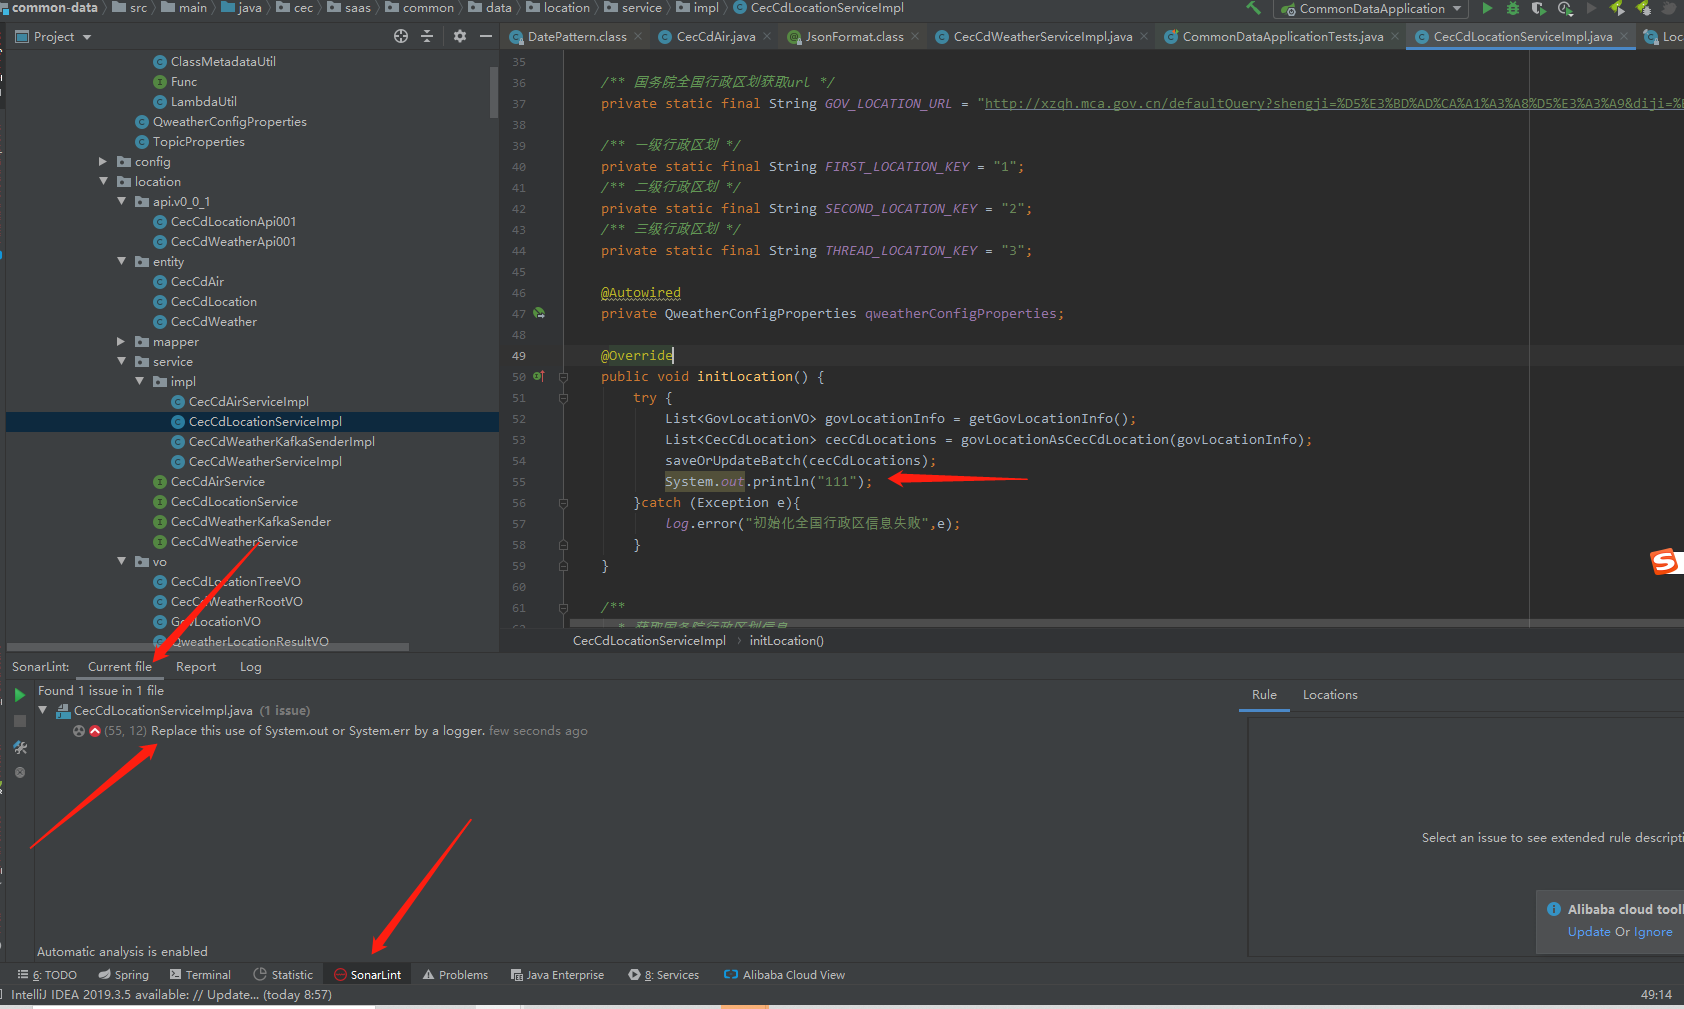
在Current file 中查看当前文件的代码问题,以便边写,边改。
检查所有代码文件
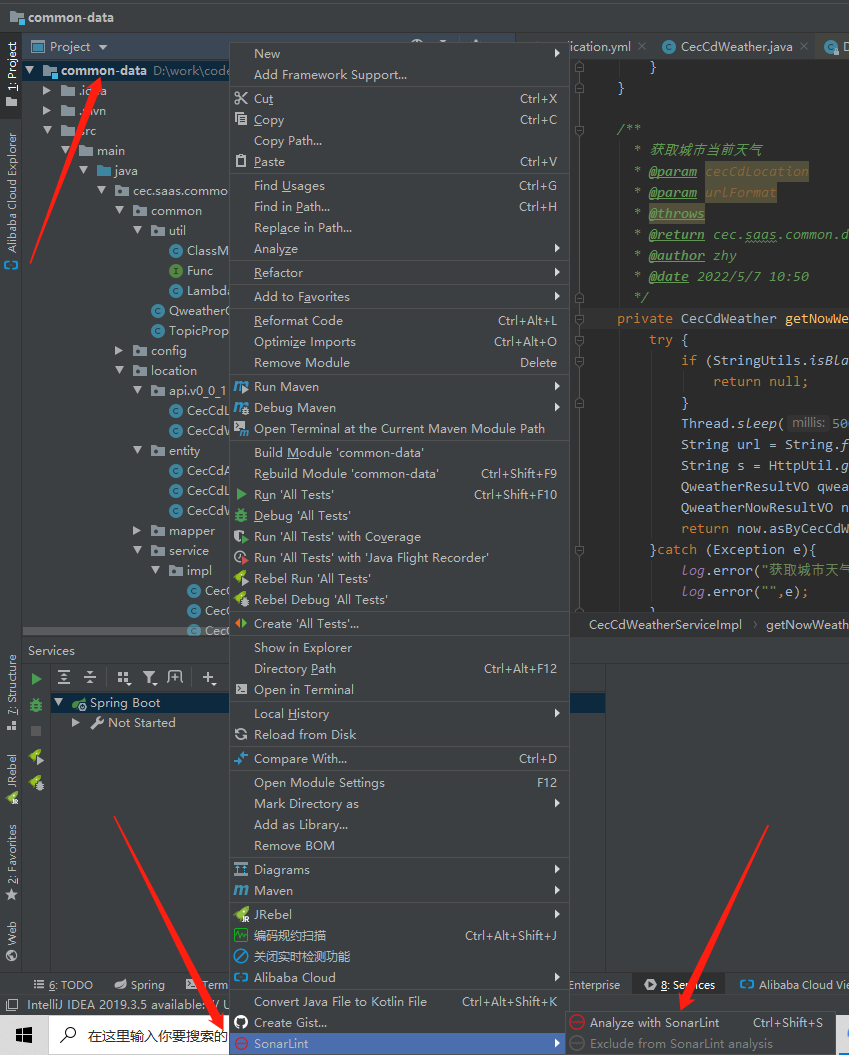
- 项目右击,找到sonarLint,点击 Analyze with Sonarlint
此时会显示正在检查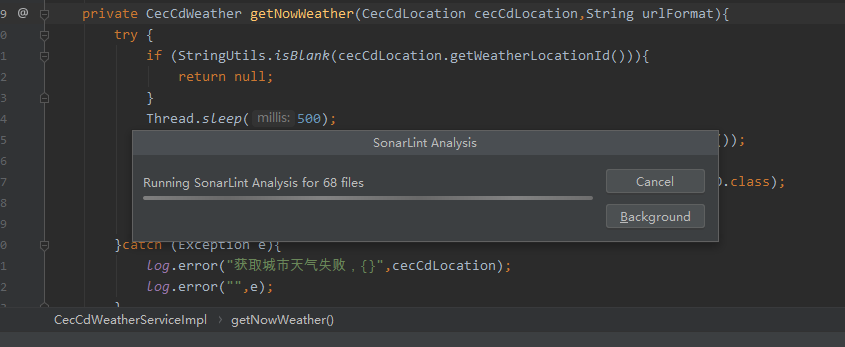
完成以后,在工具栏的Sonarlint里会显示

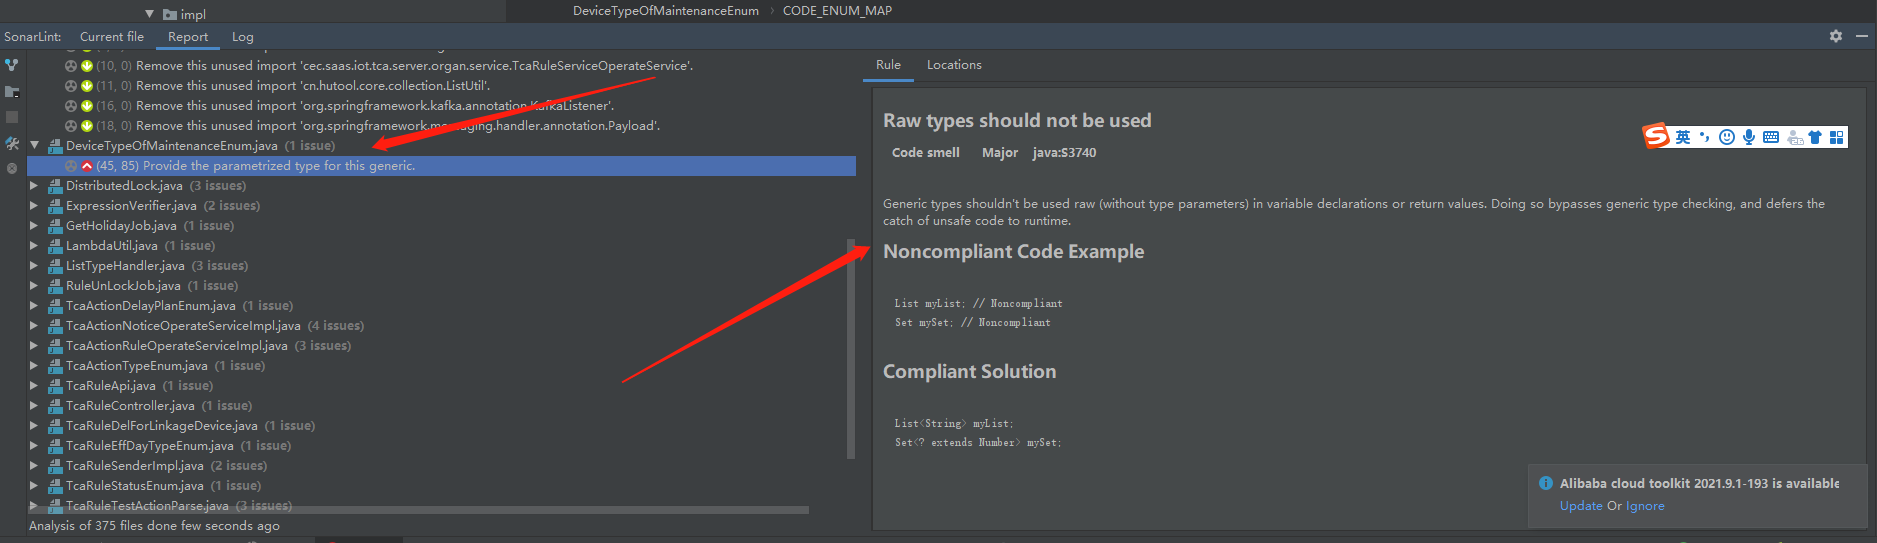
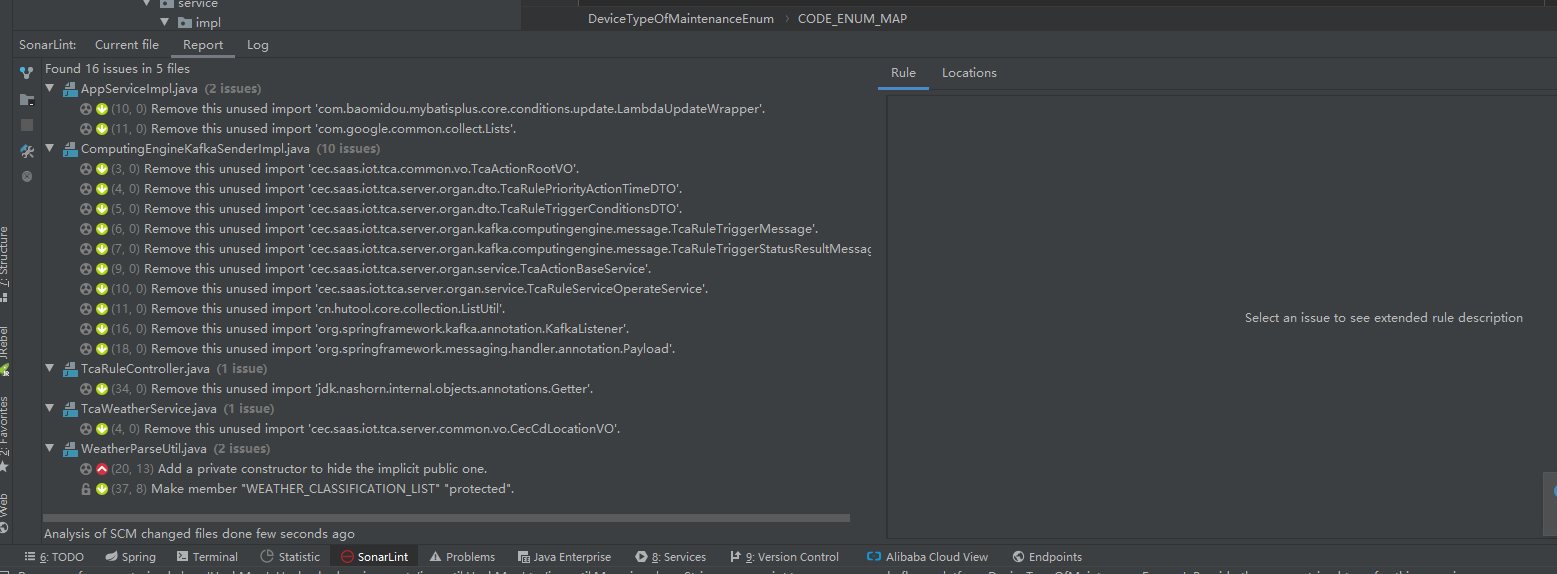
report就是有问题的代码文件
双击对应问题,可以在右边查看问题描述,以及解决方案示例
然后具体修改自己的代码
注意!检查所有代码,可能第一次点击Analyze with Sonarlint ,会不显示代码问题,需要在右键检查一次
提交时检查
- 在代码写好以后,需要提交到git时,在Commint Changes的弹窗的右边找到 Before Commit勾选中,Preform Sonarlint analysis
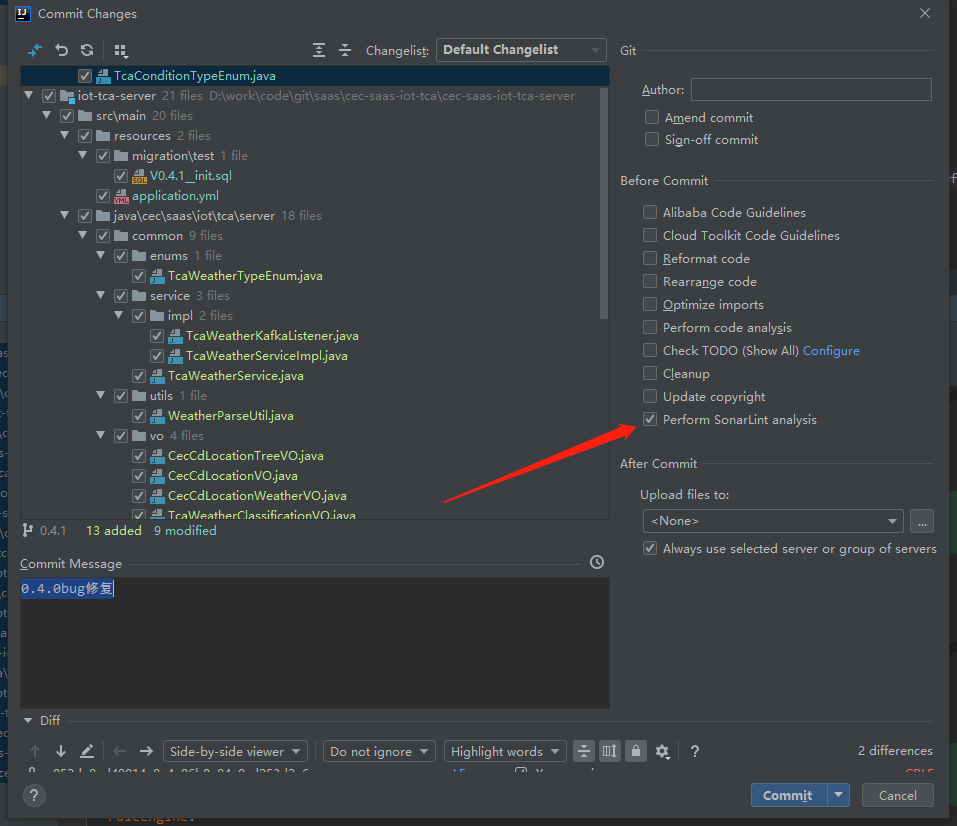
- 点击commit,会自动检查提交的代码文件
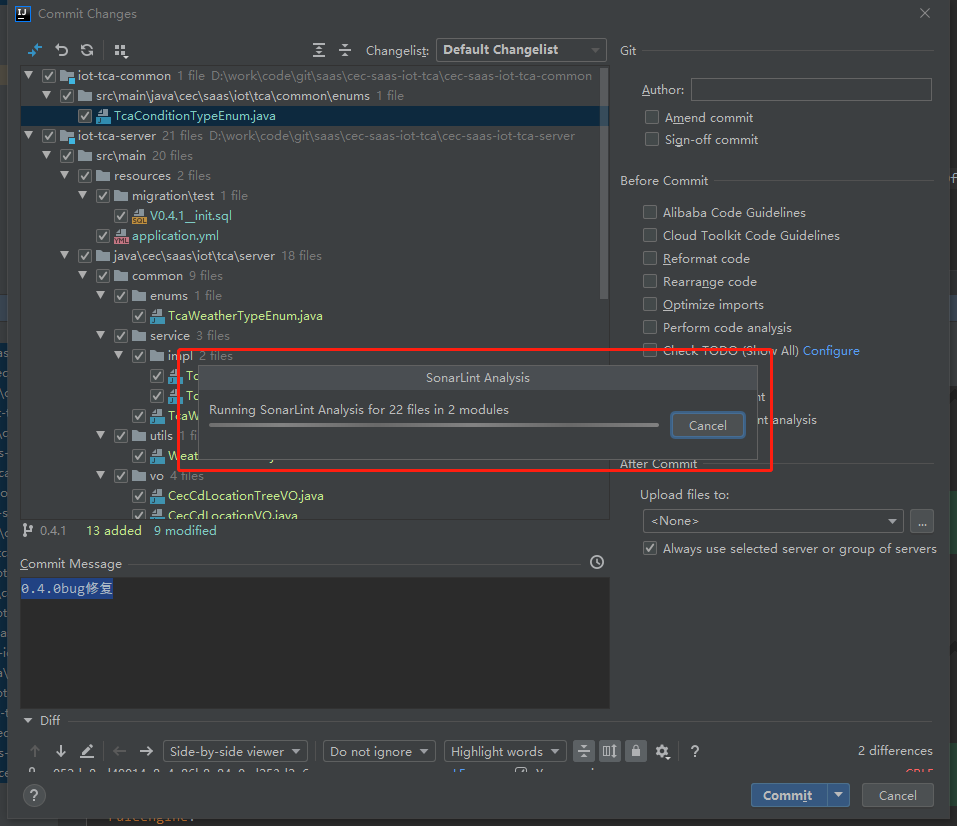
显示检查结果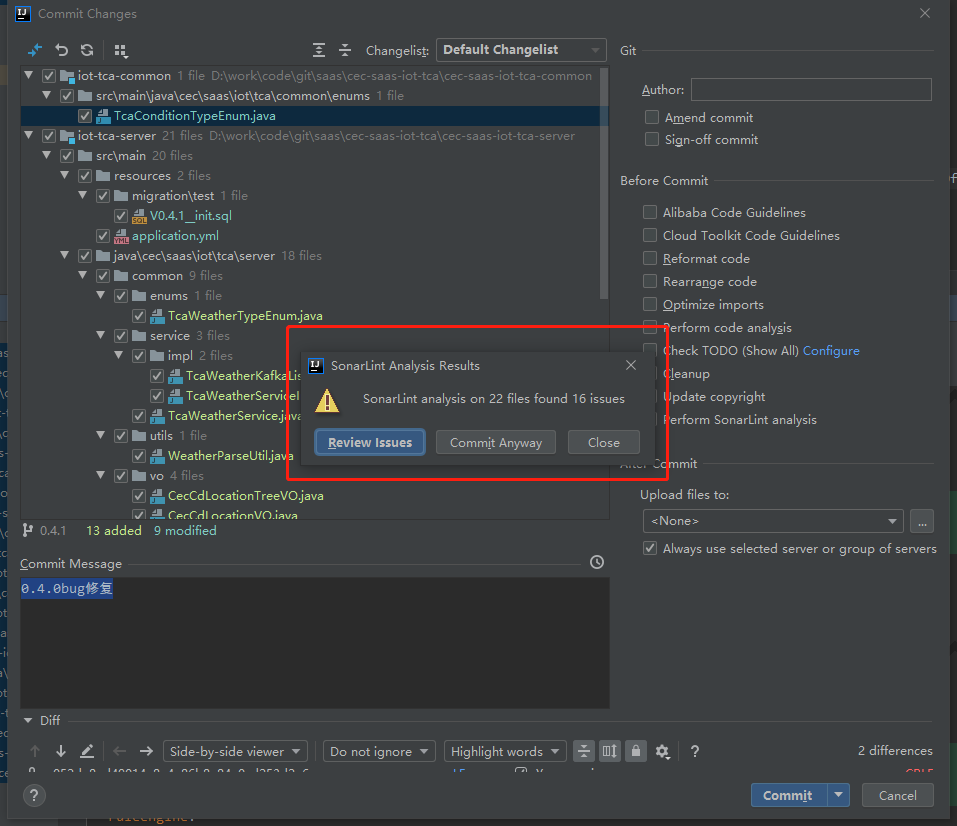
- 点击 Review Issues,检查代码存在的问题
- 问题处理完,提交代码。
关于SonarLint和阿里巴巴编码规约
两者不冲突,属于互补关系,推荐两者结合使用

若有收获,就点个赞吧
0 人点赞
