FastAPI 是一个用于构建 API 的现代、快速(高性能)的 web 框架,使用 Python 3.6+ 并基于标准的 Python 类型提示。
关键特性:
- 快速:可与 NodeJS 和 Go 比肩的极高性能(归功于 Starlette 和 Pydantic)。最快的 Python web 框架之一。
- 高效编码:提高功能开发速度约 200% 至 300%。*
- 更少 bug:减少约 40% 的人为(开发者)导致错误。*
- 智能:极佳的编辑器支持。处处皆可自动补全,减少调试时间。
- 简单:设计的易于使用和学习,阅读文档的时间更短。
- 简短:使代码重复最小化。通过不同的参数声明实现丰富功能。bug 更少。
- 健壮:生产可用级别的代码。还有自动生成的交互式文档。
- 标准化:基于(并完全兼容)API 的相关开放标准:OpenAPI (以前被称为 Swagger) 和 JSON Schema。
一 简单使用
- 下载FastAPI ```python pip install fastapi
pip install uvicorn
- 导入 FastAPI。- 创建一个 app 实例。- 编写一个**路径操作装饰器**(如 @app.get("/"))。- 编写一个**路径操作函数**(如上面的 def root(): ...)。- 运行开发服务器(如 uvicorn main:app --reload)。```pythonfrom fastapi import FastAPIapp = FastAPI()@app.get('/')def say_hello():return {'code': 200, 'message': 'hello, world!'}
在开发 API 时,你通常使用特定的 HTTP 方法去执行特定的行为。
通常使用:
- POST:创建数据。
- GET:读取数据。
- PUT:更新数据。
- DELETE:删除数据。
运行:
uvicorn main:app --reload
访问 http://127.0.0.1:8000/ ,返回数据:
{"code":200,"message":"hello, world!"}
接口文档地址
二 fastapi连接MySQL
版本信息:
python 3.8.5SQLAlchemy 1.4.27fastapi 0.70.0PyMySQL 1.0.2MySQL 5.7
目录结构使用单个应用的目录结构
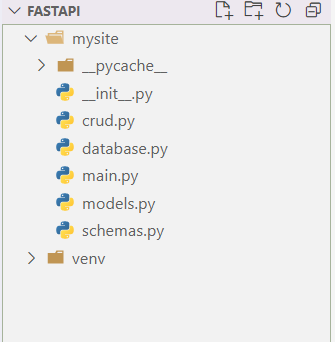
fastapi // 项目根目录-venv // 虚拟环境包-mysite // 应用目录-- __init__.py // 将文件夹变为一个Python模块-- database.py // 数据库配置-- schemas.py // 数据规范格式,继承pydantic的BaseModel-- models.py // models模型类型-- crud.py // 对数据库的操作-- main.py // 写接口
3.1 database.py
from sqlalchemy import create_enginefrom sqlalchemy.ext.declarative import declarative_basefrom sqlalchemy.orm import sessionmakerSQLALCHEMY_DATABASE_URL: str = 'mysql+pymysql://root:@localhost:3306/ehsy_data?charset=utf8'engine = create_engine(SQLALCHEMY_DATABASE_URL, pool_pre_ping=True)SessionLocal = sessionmaker(autocommit=False, autoflush=False, bind=engine)Base = declarative_base()
mysql+pymysql://{用户}:{密码}@localhost:3306/{数据库}?charset=utf83.2 models.py
```python from sqlalchemy import Column, String,Integer
from .database import Base, engine
class ProInfo(Base): tablename = ‘pro_info_2’ # 数据库表名
id = Column(Integer, primary_key=True, index=True)pro_url = Column(String(255), nullable=False)order_num = Column(String(255), nullable=False)brand_no = Column(String(255), nullable=False)show_price = Column(String(255), nullable=False)pro_unit = Column(String(255), nullable=False)
要与数据库中表的字段一一对应(如果数据库中已经创建了表)<a name="Hn0dm"></a>## 3.3 schemas.py```pythonfrom pydantic import BaseModelclass ProInfo(BaseModel):id: intpro_url: strorder_num: strbrand_no: strshow_price: strpro_unit: strclass Config:orm_mode = True# 创建产品所对应的pydantic modelsclass ProInfoCreate(ProInfo):pass
3.4 crud.py
from sqlalchemy.orm import Sessionfrom . import models, schemas# 查询前100个物料信息def get_products(db: Session, skip: int = 0, limit: int = 100):return db.query(models.ProInfo).offset(skip).limit(limit).all()def create_product(db: Session, pro: schemas.ProInfoCreate):db_pro = models.ProInfo(id=pro.id, pro_url=pro.pro_url,order_num=pro.order_num, brand_no=pro.brand_no, show_price=pro.show_price, pro_unit=pro.pro_unit)db.add(db_pro)db.commit()db.refresh(db_pro)return db_pro
3.5 main.py
from typing import Listfrom fastapi import Depends, FastAPI, HTTPExceptionfrom sqlalchemy.orm import Sessionfrom . import crud, models, schemasfrom .database import SessionLocal, engine# 创建所有的数据库模型表models.Base.metadata.create_all(bind=engine)app = FastAPI()# Dependencydef get_db():db = SessionLocal()try:yield dbfinally:db.close()# post方法创建产品信息@app.post("/products/", response_model=schemas.ProInfo)async def create_product(pro: schemas.ProInfoCreate, db: Session = Depends(get_db)):return crud.create_product(db=db, pro=pro)# get方法查询所有产品信息@app.get("/products/", response_model=List[schemas.ProInfo])async def read_products(skip: int = 0, limit: int = 100, db: Session = Depends(get_db)):products = crud.get_products(db, skip=skip, limit=limit)return products
3.6 init.py
空
3.7 启动项目
命令启动
进入fastapi目录,使用以下命令:
uvicorn mysite.main:app --reload
mysite是应用名
用get请求访问http://127.0.0.1:8000/products/ :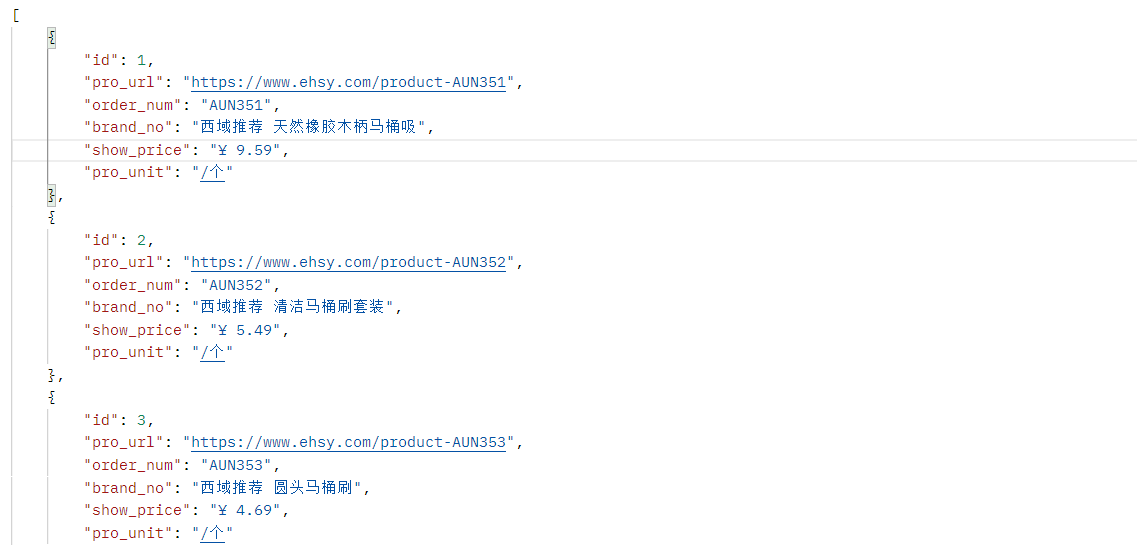
用post请求(可以使用postman)访问http://127.0.0.1:8000/products/ :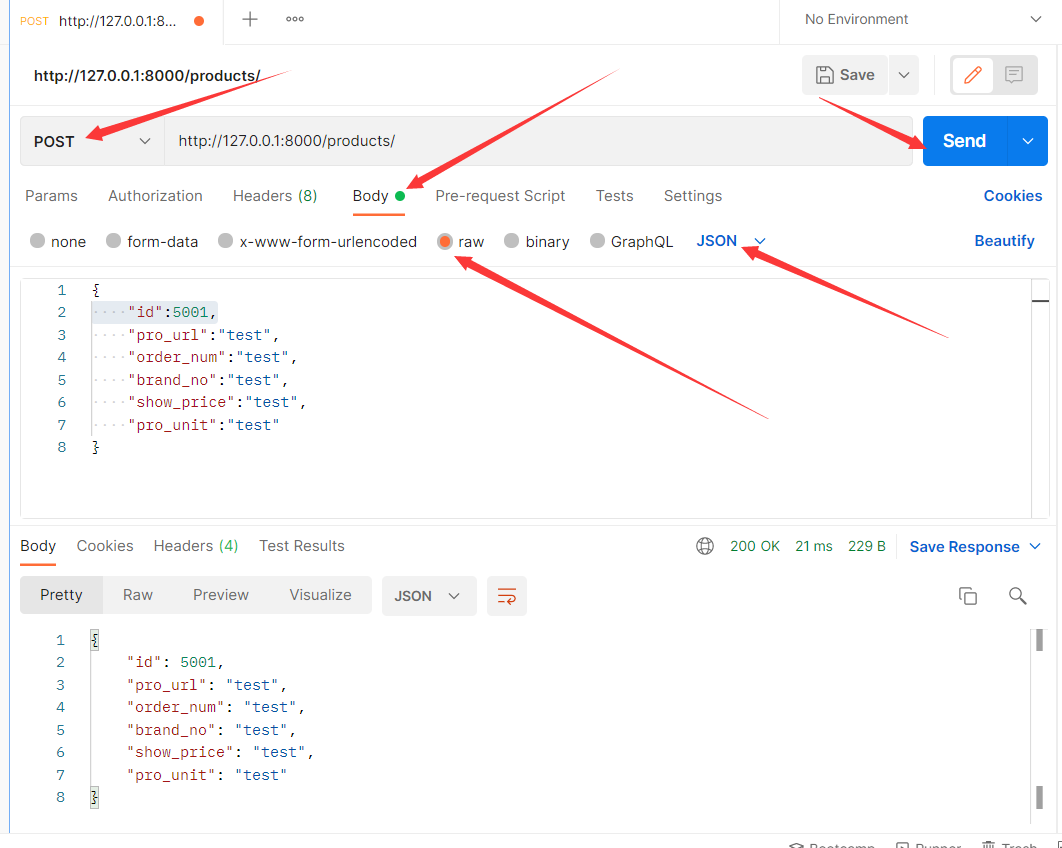
注意:
- crud.py中create_product方法添加的字段要和数据库字段一一对应
- Body携带的参数名、参数个数和crud.py中定义参数名以及个数也要一一对应,否则会出错
以上成功,可以看到数据表中已经添加产品信息: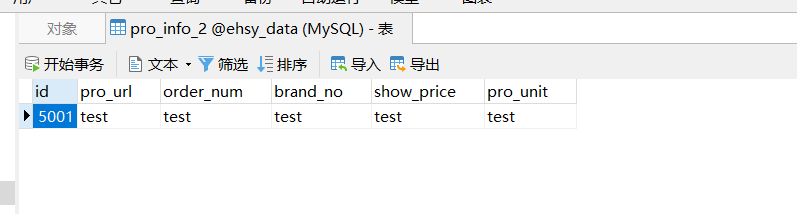
一键启动
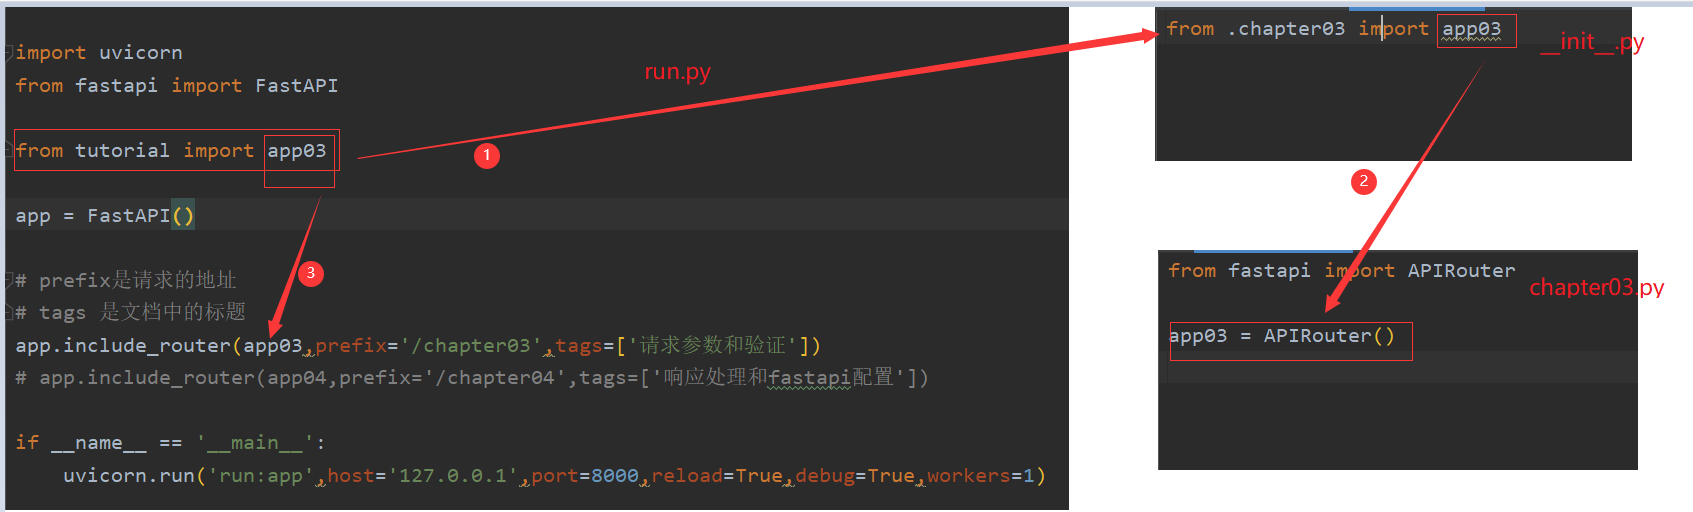
在根目录下面新建一个**run.py**作为项目主文件
import uvicornfrom fastapi import FastAPIfrom tutorial import app03app = FastAPI()# prefix是请求的地址# tags 是文档中的标题app.include_router(app03,prefix='/chapter03',tags=['请求参数和验证'])if __name__ == '__main__':uvicorn.run('run:app',host='127.0.0.1',port=8000,reload=True,debug=True,workers=1)"""run.py -> url -> /tutoral -> url -> /tutorial"""
tutorial是一个应用文件夹,里面有一个应用文件chapter03.py
**tutorial/chapter03.py**
from fastapi import APIRouterapp03 = APIRouter()
**tutorial/__init__.py**
from .chapter03 import app03

三 项目结构
是官方推荐的全栈项目生成 https://github.com/tiangolo/full-stack-fastapi-postgresql, 对我目前的需求而言,太大了;如果项目很大可以可参考项目生成的目录结构,如果是单个应用或者应用个数较少,可以参考以下目录结构 https://fastapi.tiangolo.com/zh/tutorial/bigger-applications/
3.1 单一应用目录结构
- 首先cd进入一个项目根目录文件夹中,如fastapi(最好为项目创建一个虚拟环境)
- 然后在里面创建每一个应用 ,如mysite(每一个项目中有多个应用)
每一个应用目录结构如下:
fastapi // 项目根目录-venv // 虚拟环境包-mysite // 应用目录-- __init__.py // 将文件夹变为一个Python模块-- database.py // 数据库配置-- schemas.py // 数据规范格式,继承pydantic的BaseModel-- models.py // models模型类型-- crud.py // 对数据库的操作-- main.py // 写接口
- crud.py 完成对数据库的CRUD操作
- database.py 关于数据库相关配置
- main.py fastapi路由部分
- models.py 定义表结构
- schemas.py 定义pydantic models信息,也就是schemas
3.2 多个应用目录结构(应用较少)
项目目录fastapi_project下面有两个应用student、teacher
目录结构:
fastapi_project- venv- student //「student」是一个「Python 子包」-- __init__.py // 这个文件使「student」成为一个 Python 子包-- database.py-- schemas.py-- models.py-- crud.py-- case01.py //「student」子模块,例如 import fastapi_project.student.case01- teacher-- __init__.py-- database.py-- schemas.py-- models.py-- crud.py-- case02.py- main.py //项目根目录下的main主启动文件
- 注意,case01、case02不可以是main为关键字命名,否则依赖注入时会报错
- 在student的case01.py ,配置: ```python from typing import List from fastapi import Depends, FastAPI, HTTPException from fastapi import APIRouter from sqlalchemy.orm import Session
from student import crud, models, schemas from student.database import SessionLocal,engine
student = APIRoute()
router = APIRouter(prefix=’/student’,tags=[‘学生接口’])
创建所有的数据库模型表
models.Base.metadata.create_all(bind=engine)
Dependency
def get_db(): db = SessionLocal() try: yield db finally: db.close()
“”” 以下写学生接口 “””
@router.get(“/students”, summary=”获取所有学生信息”,response_model=List[schemas.Student]) async def get_students(db:Session = Depends(get_db)): students = crud.get_students(db) return students
@router.post(‘/students’,summary = “创建学生”,response_model=schemas.Student) async def create_student(st:schemas.StudentCreate,db:Session = Depends(get_db)): return crud.create_student(db=db,st=st)
- `from fastapi import APIRouter`:导入APIRouter- `router=APIRouter()`:创建一个APIRouter实例,在此示例中,该变量被命名为 router,但你可以根据你的想法自由命名。- `router = APIRouter(prefix='/student',tags=['学生接口'])`:其中prefix指定此模块的路径为/student,tags备注文档信息- `@router.get("/students", summary="获取所有学生信息",response_model=List[schemas.Student])`:使用 APIRouter 的路径操作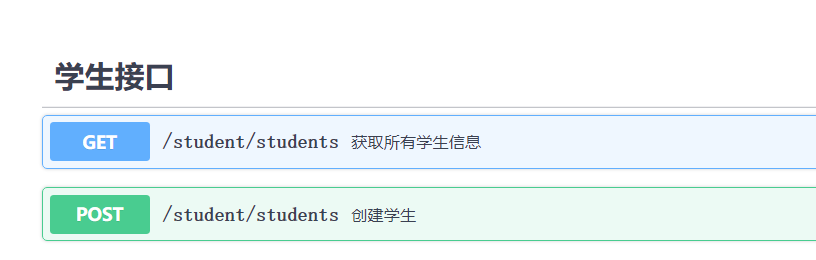2. 配置项目根目录下的main主启动文件我们将在主 FastAPI 应用中包含该 APIRouter```pythonfrom fastapi import FastAPIimport uvicorn# 引入应用from student import case01from teacher import case02app = FastAPI()# 引入应用中的路由# 直接引用应用case01里面路由-->router。访问:http://127.0.0.1:8000/students# case01.router 包含了 fastapi_project/student/case01.py 文件中的 APIRouter。app.include_router(case01.router)app.include_router(case02.router)if __name__ == '__main__':# 启动项目# reload:自动重载项目# debug:调试# workers:启动几个进程uvicorn.run('main:app', host="127.0.0.1", port=8000, reload=True, debug=True, workers=1)
from student import case01:引用项目fastapi_project下面的子包student的子模块case01.py。
注意:
我们将直接导入 student 子模块,而不是仅导入其 router 变量。这是因为我们在 teacher 子模块中也有另一个名为 router 的变量。如果我们一个接一个地导入,例如:from student import routerfrom teacher import router来自 teacher 的 router 将覆盖来自 student 中的 router,我们将无法同时使用它们。因此,为了能够在同一个文件中使用它们,我们直接导入子模块:from student import case01
app.include_router(case01.router):引用应用中的路由,case01.router 包含了 fastapi_project/student/case01.py 文件中的 APIRouter。
同理,应用teacher同样配置
启动项目直接运行run.py,然后访问:http://127.0.0.1:8000/student/students ,出现学生全部信息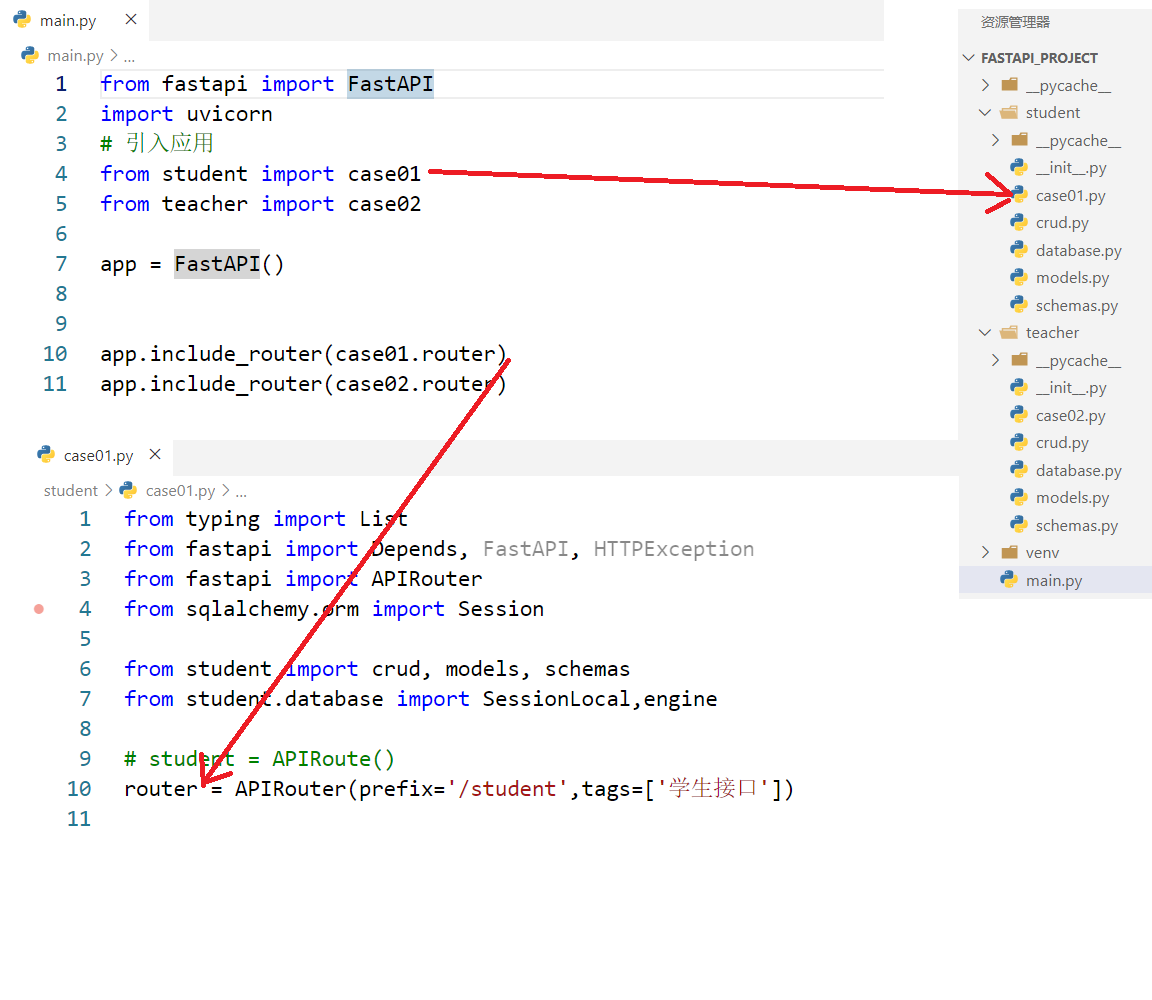
3.3 多个应用目录结构改进
将公用的部分抽取出来
从3.2中发现每个子包下面都有database.py文件,数据库配置文件都是公共的,我们可以提取出来;
同时每一个应用如case01.py、case02.py里面都使用了依赖项(作用:每个请求有一个独立的数据库会话/连接(SessionLocal)在所有请求中使用相同的会话,然后在请求完成后关闭它。),也可以将该依赖函数提取出来
# Dependencydef get_db():db = SessionLocal()try:yield dbfinally:db.close()
在fastapi_project目录下新建一个utils包,将database.py文件移入该目录下,并创建init.py
改后的目录结构:
fastapi_project- venv- student //「student」是一个「Python 子包」-- __init__.py // 这个文件使「student」成为一个 Python 子包-- schemas.py-- models.py-- crud.py-- case01.py //「student」子模块,例如 import fastapi_project.student.case01- teacher-- __init__.py-- schemas.py-- models.py-- crud.py-- case02.py- utils // 工具包-- __init__.py-- database.py //数据库配置-- dependencies.py //依赖项- main.py //项目根目录下的main主启动文件
改造student应用下导入database的方式:
case01.py 由原来的:
from student.database import SessionLocal,engine# Dependencydef get_db():db = SessionLocal()try:yield dbfinally:db.close()
变为:
from utils.database import SessionLocal,engine# Dependencyfrom utils.dependencies import get_db
models.py 由原来的:
from .database import Base, engine
变为:
from utils.database import Base, engine
注意:
- utils包下面要新建一个init.py文件
- 导入格式不要错误,如果是
from ..utils.database import SessionLocal,engine就会报错,正确的是:from utils.database import SessionLocal,engine
补充:
在"from YY import XX"这样的代码中,无论是XX还是YY,只要被python解释器视作package,就会首先调用该package的__init__.py文件。如果都是package,则调用顺序是YY,XX。另外,“from . import XXX”和“from … import XXX”中的’.‘和’…’,可以等同于linux里的shell中’.‘和’…'的作用,表示当前工作目录的package和上一级的package。
至此,项目结构改造完成,核心思想:减少代码的重复,将公用部分提取出来
示例代码

若有收获,就点个赞吧
0 人点赞
