 ">
">
VirtualBox配置Centos7.5环境
- 只需要配置到关闭SELinux和方法墙

1. 下载ISO镜像
下载地址:https://mirrors.sohu.com/centos/7.5.1804/isos/x86_64/

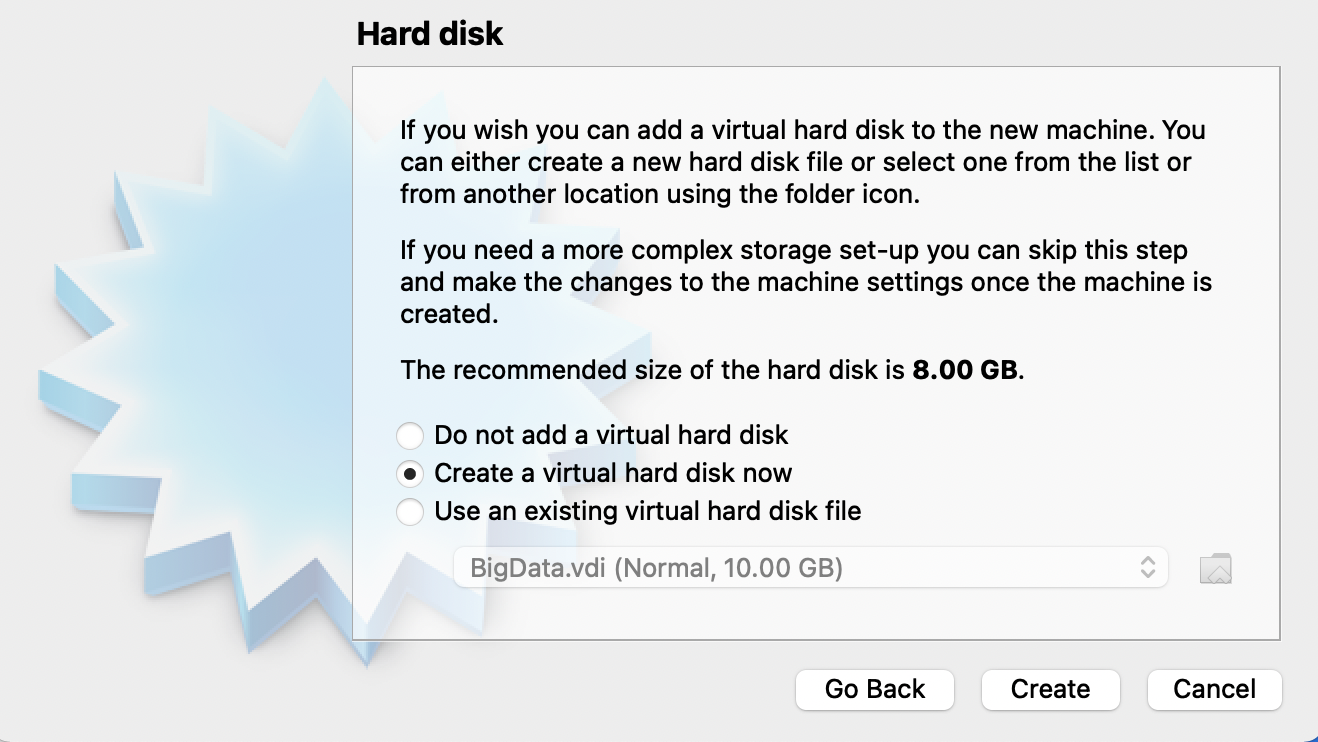
2. 配置VirtualBox
2.1 安装如图所示方式配置


2.2 设置ISO镜像


3. 屏蔽网卡命名
- 点击 Tab ,打开 kernel 启动选项后,增加 :net.ifnames=0 biosdevname=0
- 网卡名称会按eth0, eth1的规则命名
3.1 启动redis-node1,在启动界面
3.1.1 按键盘向上键后选中 Install CentOS 7

3.1.2 再按Tab键
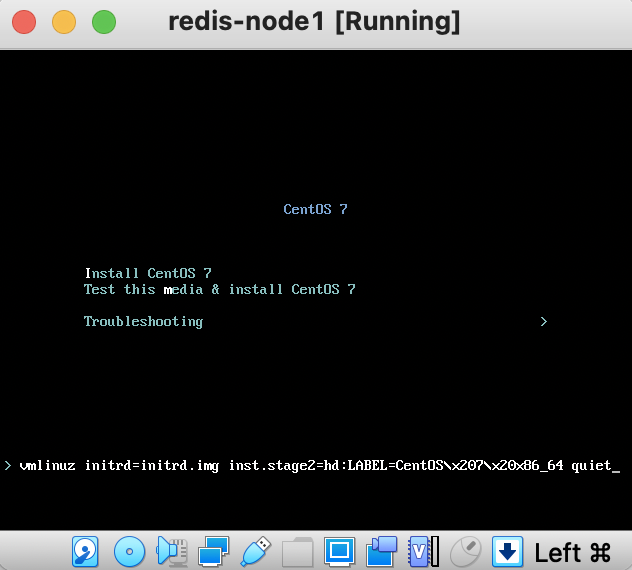
3.1.3 增加 net.ifnames=0 biosdevname=0 ,按Enter键

3.1.4 最后会跳转到这个界面

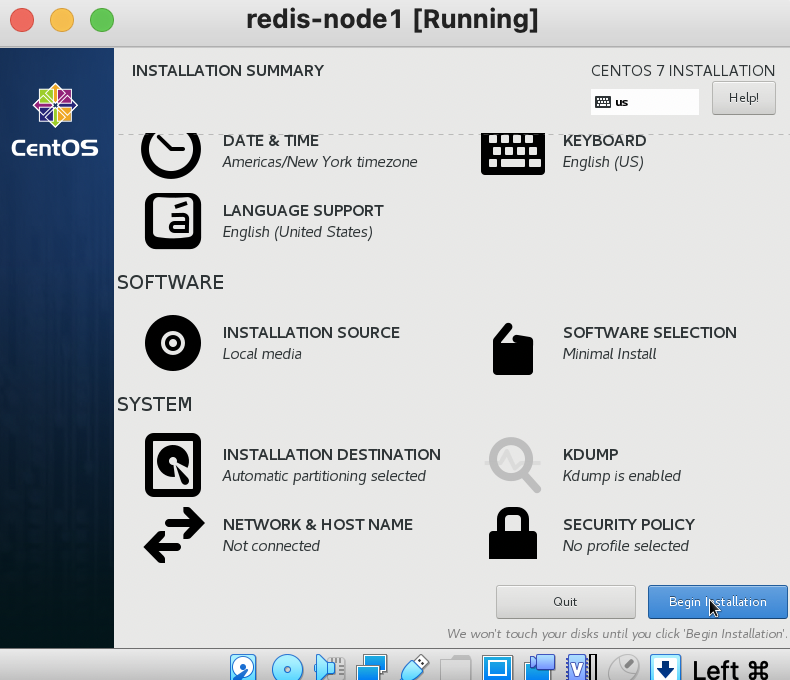
4. 最小化安装
- 选择自动磁盘分区
- 选择最小化安装
- 安装系统
4.1 按照下图配置

4.1.1 检查是否最小化按照 确保选中 Minimal Install

4.12 确认全盘格式化

4.1.3 设置root用户密码


4.1.4 等待安装

4.1.5 重启

5. 配置网络
- 设置Nat Network网段
- 设置Host Only网段
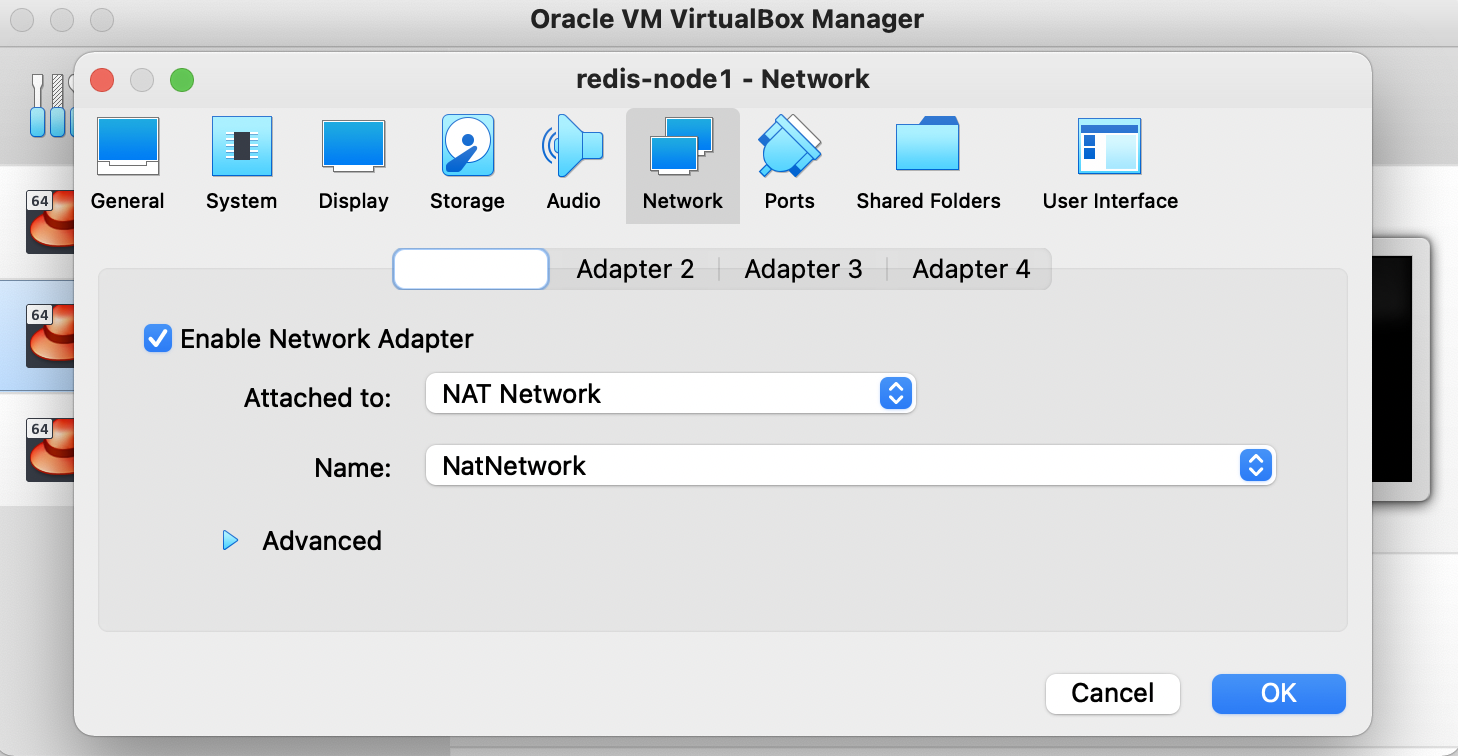
- 虚拟机添加网卡
- 编辑网卡文件,设置主机网络
5.1 配置Host-only网段
5.1.2 File - Host Network Manager,按照如图配置

5.2 配置NAT网段
5.2.1 Preferences - Network 中配置Network CIDR

5.3 配置虚拟机网卡

5.4 编辑网卡文件,设置主机网络
5.4.1 启动redis-node1,并登录root用户
5.4.2
cd /etc/sysconfig/network-scripts/
vi ifcfg-eth0
按照下图进行配置
:wq 退出,cp ifcfg-eth0 ifcfg-eth1
vi ifcfg-eth1 ,按照下图配置
5.4.3 测试网络配置
systemctl restart networkip addrcat /etc/resolv.conf
ping 我的主机 192.168.1.100

ping www.baidu.com
6. 配置主机
- 配置本主机名称
- /etc/hostname
- 配置其他主机名称解析


7. 关闭防火墙和SELinux
7.1 关闭防火墙
关闭:systemctl stop firewalld
防止自动启动:systemctl disable firewalld
7.2 关闭SELinux
配置:/etc/sysconfig/selinuxvi /etc/sysconfig/selinux
找到SELINUX,将其设置为SELINUX=disabled
8. 配置源(略)
9. 安装软件(略)

若有收获,就点个赞吧
0 人点赞
