编写C代码
#include <stdio.h>#include "ohos_init.h"#include "ohos_types.h"void Hello_World(){printf("hello world!\r\n");}APP_FEATURE_INIT(Hello_World);
- 想要使用
printf得引入#include<stdio.h> 你要调用
APP_FEATURE_INIT来启动Hello_World应用程序的话,需要添加#include "ohos_init.h"头文件编写编译构建文件
static_library("myapp"){sources = ["hello_world.c"]include_dirs = ["//utils/native/lite/include"]}
static_library中指定业务模块的编译结果,为静态文件libmyapp.a(lib(static_library里的名字).a),开发者更具实际情况编写sources中指定静态库.a所依赖的.c文件以及路径,若路径中包含"//"则表示绝对路径(此处为代码根路径),若不包含"//"则表示相对路径。include_dirs中指定sources所需要的.h文件路径。
通过官网来配置路径,打开applcations/BearPi/BearPi-HM_Nano/sample来创建
touch hello_world.c
chmod 777 hello_world.c
touch BUILD.gn
再来书写
#include <stdio.h>#include "ohos_init.h"void hello_world(void){printf("Hello World\r\n");}APP_FEATURE_INIT(hello_world);
编写模块编译构建文件BUILD.gn
在./applcations/BearPi/BearPi-HM/sample下的BUILD.gn文件中添加代码
# Copyright (c) 2020 Nanjing Xiaoxiongpai Intelligent Technology Co., Ltd.# Licensed under the Apache License, Version 2.0 (the "License");# you may not use this file except in compliance with the License.# You may obtain a copy of the License at## http://www.apache.org/licenses/LICENSE-2.0## Unless required by applicable law or agreed to in writing, software# distributed under the License is distributed on an "AS IS" BASIS,# WITHOUT WARRANTIES OR CONDITIONS OF ANY KIND, either express or implied.# See the License for the specific language governing permissions and# limitations under the License.import("//build/lite/config/component/lite_component.gni")lite_component("app") {features = [#"A1_kernal_thread:thread_example",#"A2_kernel_timer:timer_example",#"A3_kernel_event:event_example",#"A4_kernel_mutex:mutex_example",#"A5_kernel_semaphore:semaphore_example",#"A6_kernel_message:message_example",#"B1_basic_led_blink:led_example",#"B2_basic_button:button_example",#"B3_basic_pwm_led:pwm_example",#"B4_basic_adc:adc_example",#"B5_basic_i2c_nfc:i2c_example",#"B6_basic_uart:uart_example",#"C1_e53_sf1_mq2:e53_sf1_example",#"C2_e53_ia1_temp_humi_pls:e53_ia1_example",#"C3_e53_sc1_pls:e53_sc1_example",#"C4_e53_sc2_axis:e53_sc2_example",#"C5_e53_is1_infrared:e53_is1_example",#"D1_iot_wifi_ap:wifi_ap",#"D2_iot_wifi_sta_connect:wifi_sta_connect",#"D3_iot_udp_client:udp_client",#"D4_iot_tcp_server:tcp_server",#"D5_iot_mqtt:iot_mqtt",#"D6_iot_cloud_oc:oc_mqtt",#"D7_iot_cloud_onenet:onenet_mqtt",#"D8_iot_cloud_oc_smoke:cloud_oc_smoke",#"D9_iot_cloud_oc_light:cloud_oc_light",#"D10_iot_cloud_oc_manhole_cover:cloud_oc_manhole_cover",#"D11_iot_cloud_oc_infrared:cloud_oc_infrared",#"D12_iot_cloud_oc_agriculture:cloud_oc_agriculture",#"D13_iot_cloud_oc_gps:cloud_oc_gps",#添加这么一段代码"my_app:myapp"]}
如果Liunx中的hpm dist编译失败可以执行以下操作
cp gn所在目录/gn /usr/bin #在gn目录下执行
> gn --version< 1717 (2f6bc197)

ninja也是一样
出现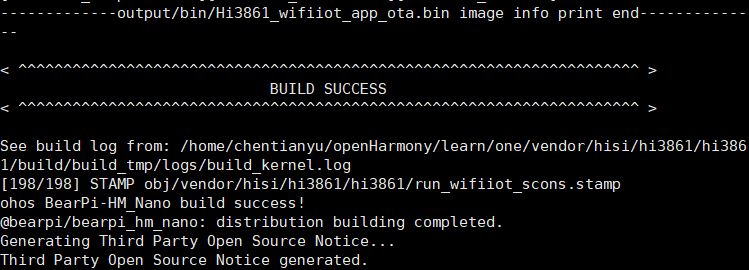
说明成功了
编译好的文件在工程目录下/out/BearPi-HM_Nano/Hi3861_wifiiot_app_allinone.bin
需要用到的工具是[HiBurn](https://v27.51cto.com/down.php?path=attach/202012/79a72ac64a22c5b5a7b450dee91ba7dc2cc3f2.zip&skey=zZL7t_Y3b7KgGleomQBsgg&stime=1654752016&type=hm&sname=HiBurn.zip)
到这一步,你无论如何都要进行映射了
映射
安装Samba
sudo apt-get install samba
sudo vim /etc/samba/smb.conf
[HarmonyOS_Code]path = #code源码路径available = yesvalid users = chentianyu #自己的用户名read only = nobrowsable = yespublic = yeswritable = yes
sudo smbpasswd -a chentianyu #chentianyu : 当前用户
错误:
正确:
sudo /etc/init.d/smbd restart

这样子就可以把文件夹映射到电脑上了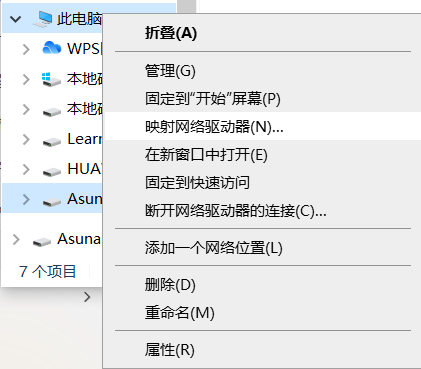
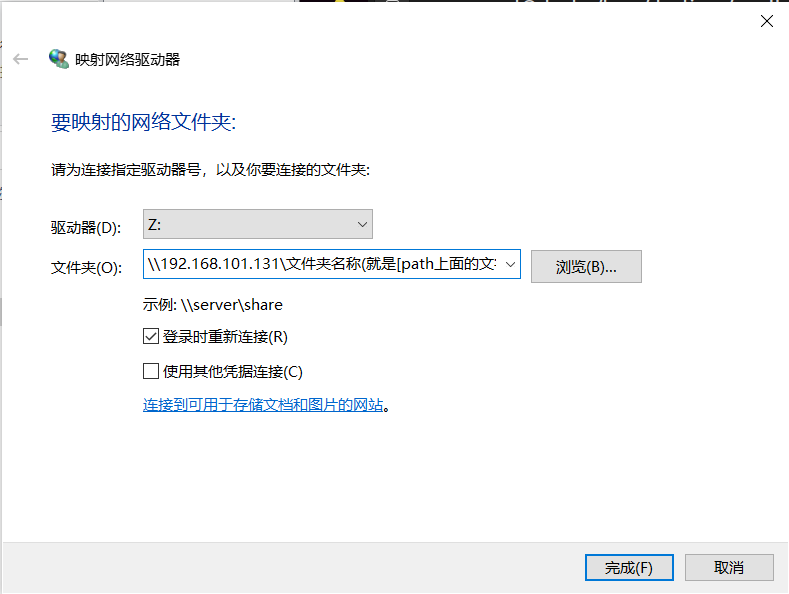
注意: 账号是你自己的用户名;密码是Samba设置的密码。**path上面的[] : [HarmonyOS_Code]**
所以这个映射文件是可以更改的
[HarmonyOS_Code]path = /home/chentianyu/openHarmony/learn #要映射的文件路径available = yesvalid users = chentianyu #自己的用户名read only = nobrowsable = yespublic = yeswritable = yes
所以这个路径是随意更改的
烧录
以下为例 : 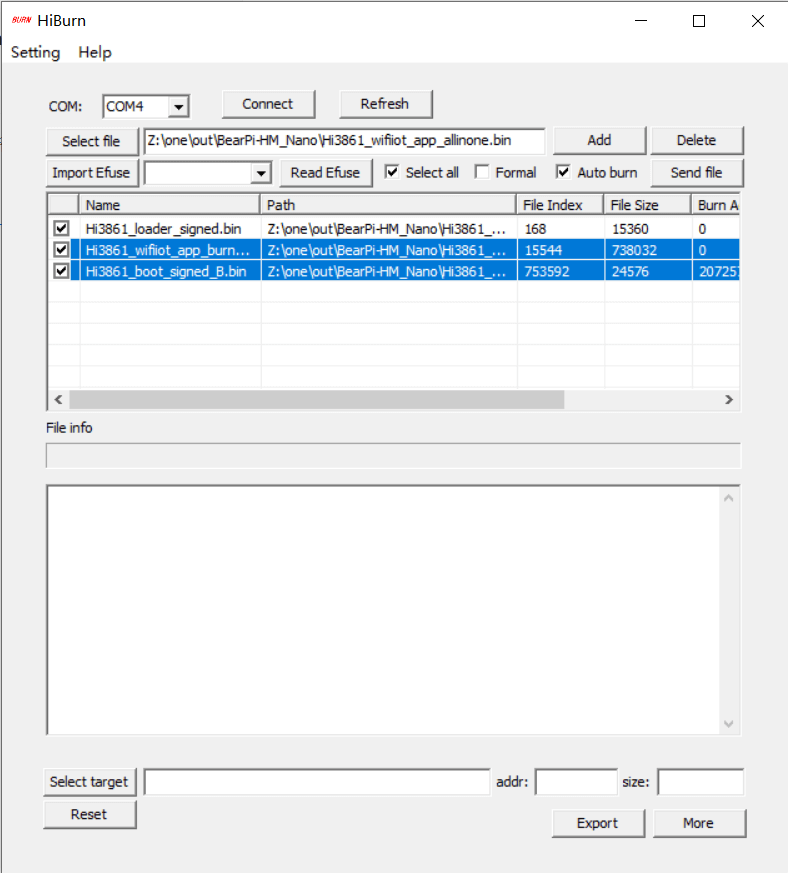
点击图上的Connect,得到下图结果 : 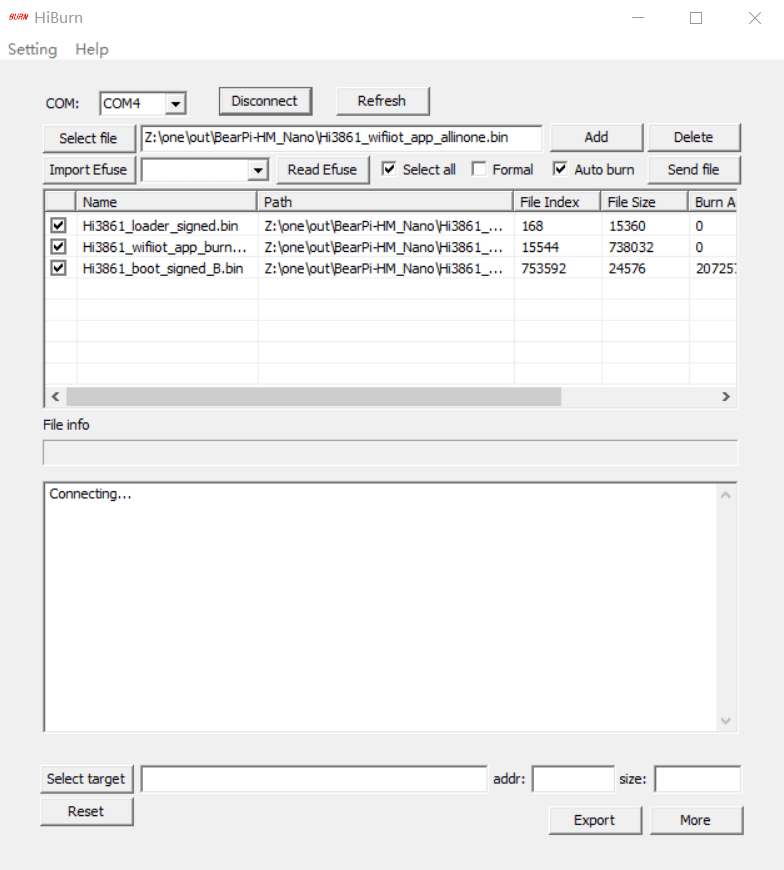
按下开发板上的复位按键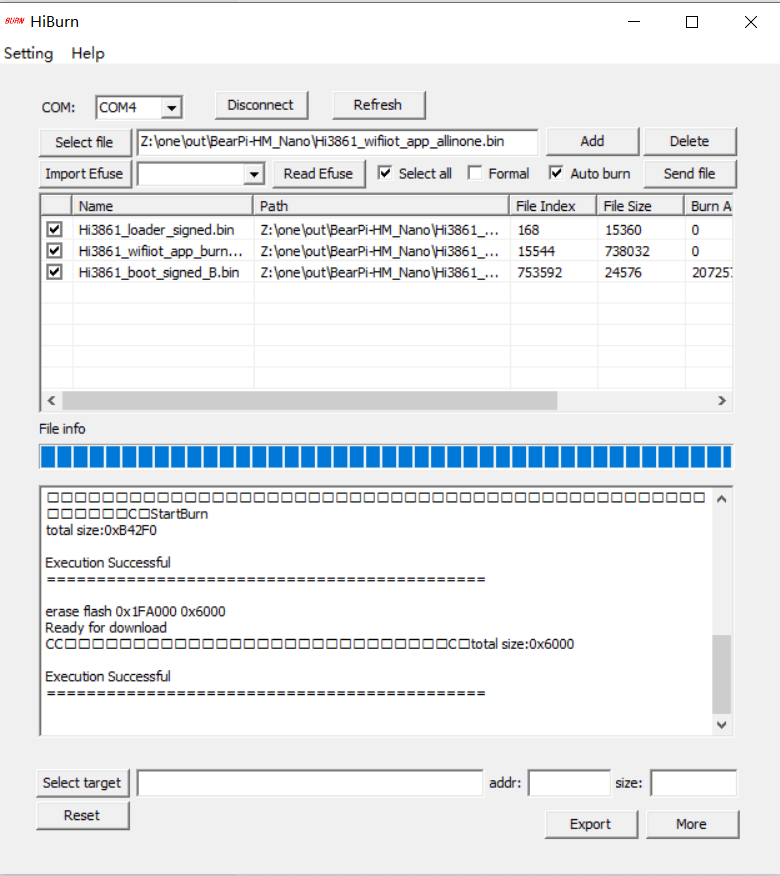
如果你不点击上图的Disconnect按键的话,只要你一按开发复位按键就会烧录,你也可以点击取消
查看结果
可以通过MobaXterm来查看串口和Linux的ssh连接(我的下载链接)
- Session : 可以使用ssh等连接Linux
- ssh: ssh连接
- Serial: 串口连接
- 选择烧录的com口
- bps:选择
115200
这时在按下开发版的复位按键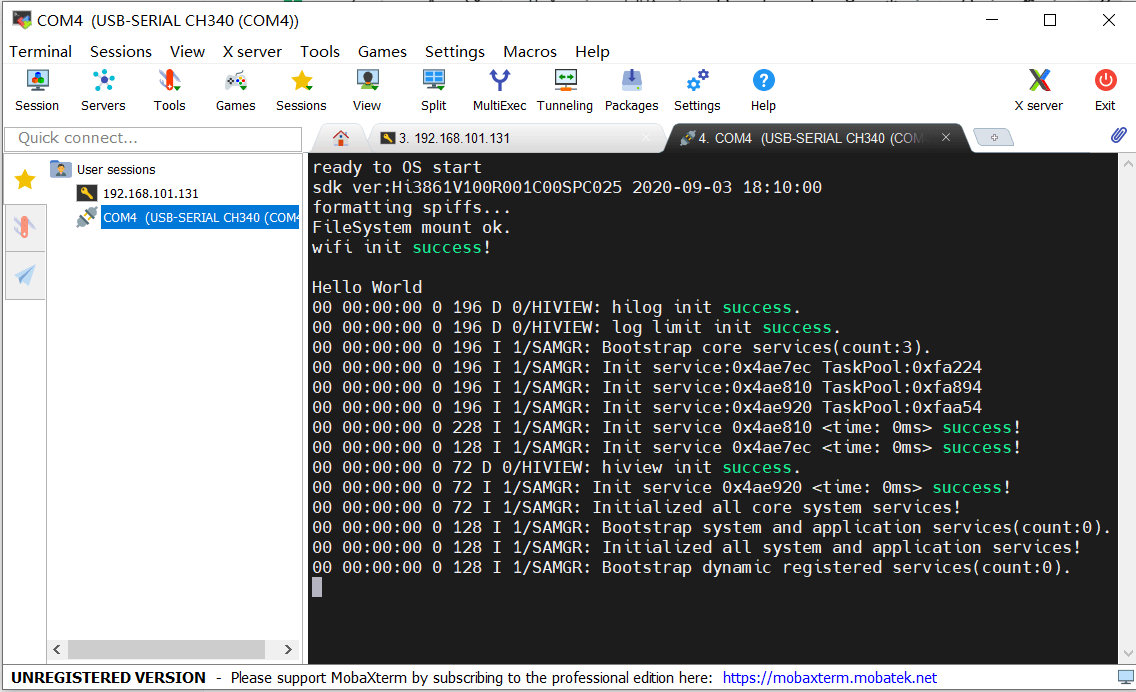

若有收获,就点个赞吧
0 人点赞
