如何读开源项目: 对着文档跑demo,对着demo看代码, 懂一点就开始试,有问题了问社区。
目标:
- 到官网查看 soul 如何接入 http 服务
- 分析 soul 源码中附带的 http 接入示例
- 总结回顾
一、从官方文档开始
打开 用户使用文档 - http用户 页面,开始整理关键要素。
1、接入说明:
- 接入前,需要先启动
soul-admin - soul 使用 divde 插件来处理 http 请求,插件在 admin 后台开启。
2、网关需要引入代理插件
网关 pom 增加依赖:
<!--if you use http proxy start this--><dependency><groupId>org.dromara</groupId><artifactId>soul-spring-boot-starter-plugin-divide</artifactId><version>${last.version}</version></dependency><dependency><groupId>org.dromara</groupId><artifactId>soul-spring-boot-starter-plugin-httpclient</artifactId><version>${last.version}</version></dependency>
重启网关使配置生效。
3、Http 服务接入网关
接入前需确保 soul-admin 已开启 divide 插件
3.1 soul-client方式接入
适用于 SpringMVC 体系用户,分为:
- spring 版本
- spring-boot 版本
两种版本依赖和配置有所差异,但在服务配置上都使用 @SoulSpringMVCClient,其用法并无差异。
3.1.1 spring 版本 SpringMVC 接入
1)被代理服务 pom.xml 引入如下依赖:
<dependency><groupId>org.dromara</groupId><artifactId>soul-client-springmvc</artifactId><version>${last.version}</version></dependency>
2)xml 中新增如下 bean 配置:
<bean id ="springMvcClientBeanPostProcessor" class ="org.dromara.soul.client.springmvc.init.SpringMvcClientBeanPostProcessor"><constructor-arg ref="soulSpringMvcConfig"/></bean><bean id="soulSpringMvcConfig" class="org.dromara.soul.client.springmvc.config.SoulSpringMvcConfig"><property name="adminUrl" value="http://localhost:9095"/><property name="port" value="你的端口"/><property name="contextPath" value="/你的contextPath"/><property name="appName" value="你的名字"/><property name="full" value="false"/></bean>
3)Controller 加上 @SoulSpringMVCClient 注解,针对其 path 属性有两种配置场景
- 该 Controller 下所有服务均需被网关代理
注解加在 Controller 类上,path 配置为/前缀路径/** - 该 Controller 下部分服务需被网关代理
类上注解的 path 配置为/前缀路径,方法上注解的 path 配置为/对应的服务路径
4)启动项目,服务接入到网关。
3.1.2 spring-boot 版本 SpringMVC 接入
1)被代理服务 pom.xml 引入如下依赖:
<dependency><groupId>org.dromara</groupId><artifactId>soul-spring-boot-starter-client-springmvc</artifactId><version>${last.version}</version></dependency>
2)yml 中增加如下配置:
soul:http:adminUrl: http://localhost:9095port: 你本项目的启动端口contextPath: /httpappName: httpfull: false
- adminUrl:soul-admin 项目的ip + 端口,注意要加http://
- port:本项目的启动端口,需要与实际启动端口一致
- contextPath:本项目在soul网关的路由前缀, 比如/order ,/product 等等,网关根据这个前缀来进行路由.
- appName:你的应用名称,不配置则默认取
spring.application.name的值- full:true 表示代表代理整个服务,false 表示代理其中某几个controller
3)Controller 加上 @SoulSpringMVCClient 注解,配置场景同 spring 版本
4)启动项目,服务接入到网关。
3.2 非 soul-client 方式接入
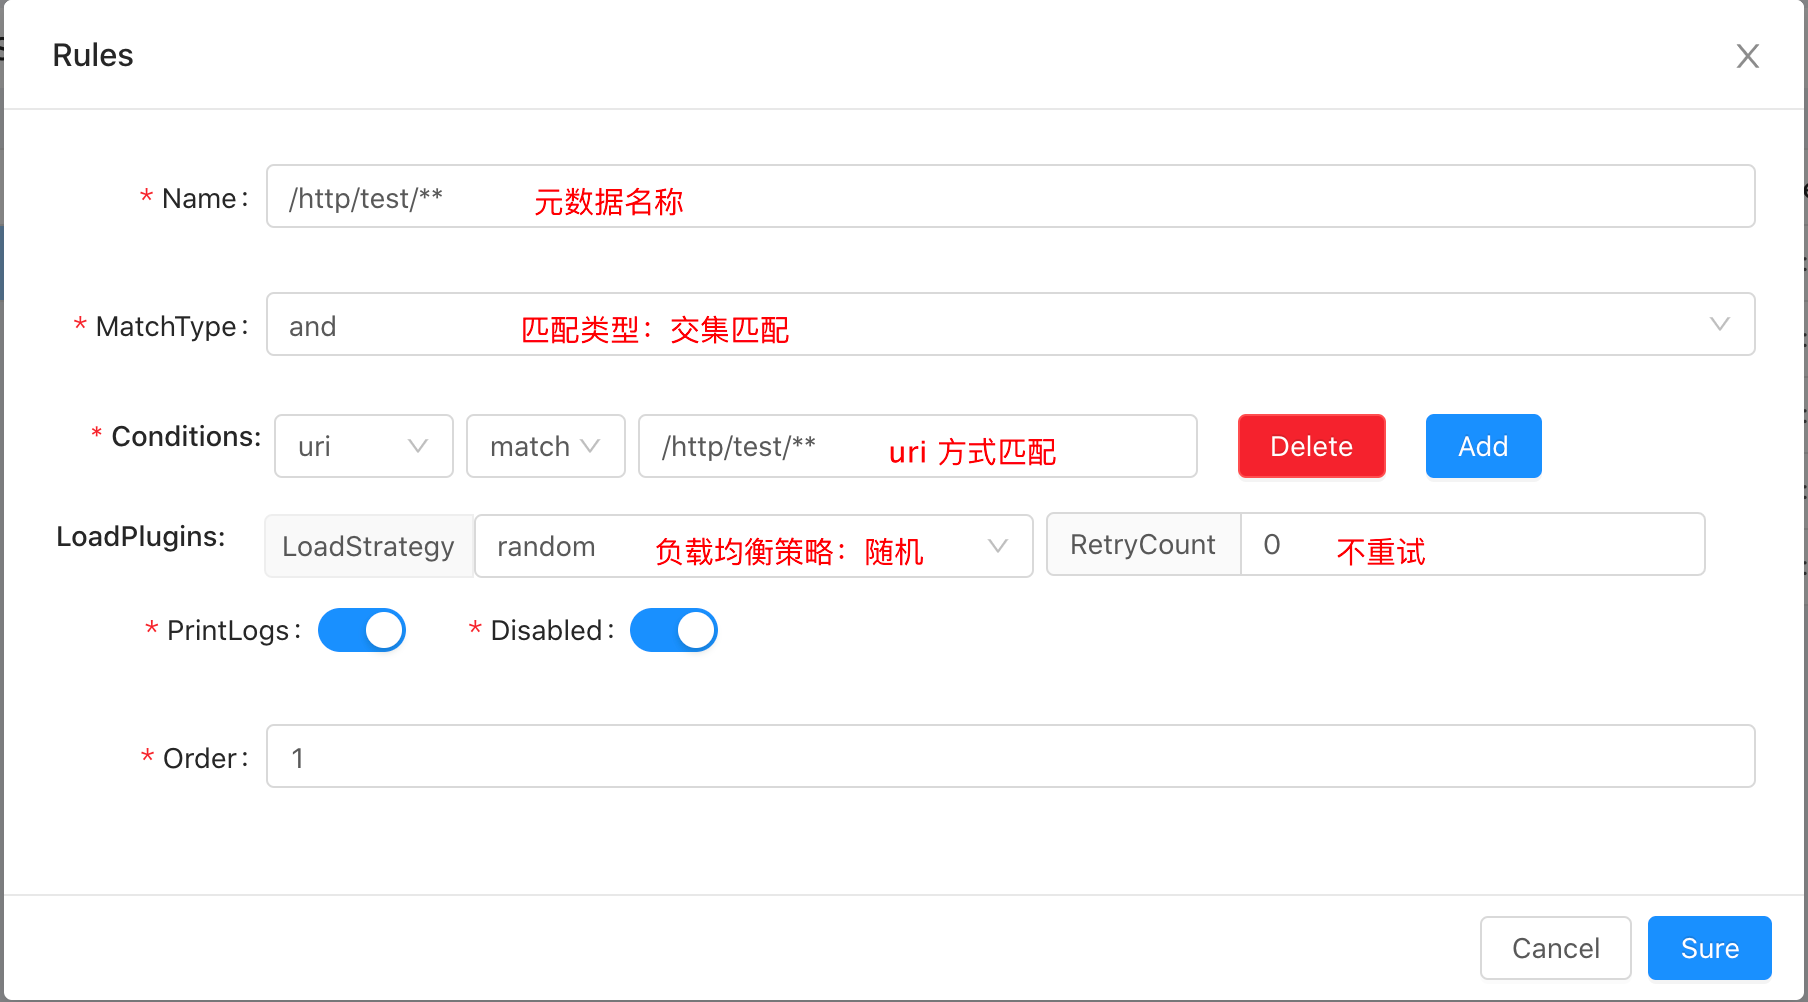
- divide 插件手动配置方式,参见 选择器规则介绍
- 自定义 http-client 方式,参见 多语言 Http 客户端开发
4、用户请求
请求方式有两点变化:
- 修改 ip + 端口
需要将 直接指向用户的请求,改为通过网关发起访问。 - 加上 context path
在 ip + 端口 后面,紧跟目标项目中配置的路由前缀
例如:
原请求 url:http://localhost:8080/test/save
现请求 url:http://localhost:9195/order/test/save
- http://localhost:9195 为网关 ip + 端口,注意默认端口为9195
- /order 为配置的 contextpath
二、官方示例分析
1、打开 soul-examples 项目
位于 soul 项目下,未集成到 soul 项目 maven 中统一管理,需要单独打开

2、定位待分析目标示例模块
待分析目标示例为 http 示例,选择并展开

3、依赖分析
打开 pom.xml,依赖关系如下:
        <!-- soul-client -->
        <dependency>
            <groupId>org.dromara</groupId>
            <artifactId>soul-spring-boot-starter-client-springmvc</artifactId>
            <version>${soul.version}</version>
        </dependency>
        <!-- webflix -->
        <dependency>
            <groupId>org.springframework.boot</groupId>
            <artifactId>spring-boot-starter-webflux</artifactId>
        </dependency>

        <dependency>
            <groupId>org.springframework.boot</groupId>
            <artifactId>spring-boot-starter</artifactId>
        </dependency>

        <dependency>
            <groupId>org.springframework.boot</groupId>
            <artifactId>spring-boot-starter-logging</artifactId>
        </dependency>

        <dependency>
            <groupId>org.springframework.boot</groupId>
            <artifactId>spring-boot-starter-test</artifactId>
            <scope>test</scope>
        </dependency>

        <dependency>
            <groupId>org.projectlombok</groupId>
            <artifactId>lombok</artifactId>
        </dependency>
很明显是 spring-boot 项目,除了官方文档中要求引入的 soul-spring-boot-starter-client-springmvc 外,还引入了 webflix
4、配置分析
打开 application.yml,配置内容如下:
# 服务信息
server:
  port: 8188
  address: 0.0.0.0

# soul-client 配置
soul:
  http:
    adminUrl: http://localhost:9095
    port: 8188
    contextPath: /http
    appName: http
    full: false

# 日志配置
logging:
  level:
    root: info
    org.springframework.boot: info
    org.apache.ibatis: info
    org.dromara.soul.test.bonuspoint: info
    org.dromara.soul.test.lottery: debug
    org.dromara.soul.test: debug
soul-client 部分的配置格式与官方文档一致,注意核对下 soul-admin 的 ip + 端口是否与实际一致。
5、Controller 分析
展开 org.dromara.soul.examples.http.controller 包,自带两个controller
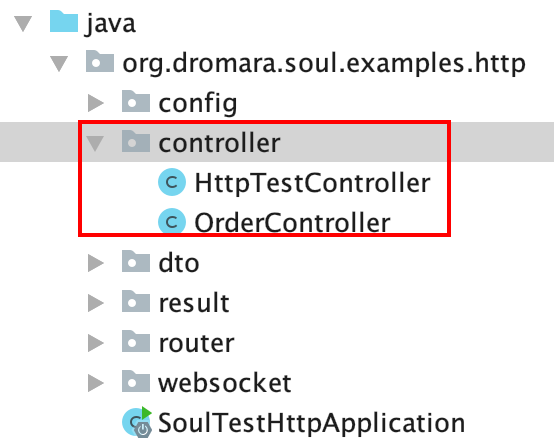
1)HttpTestController.java
/**
 * TestController.
 *
 * @author xiaoyu
 */
@RestController
@RequestMapping("/test")
@SoulSpringMvcClient(path = "/test/**")
public class HttpTestController {

    /**
     * Post user dto.
     *
     * @param userDTO the user dto
     * @return the user dto
     */
    @PostMapping("/payment")
    public UserDTO post(@RequestBody final UserDTO userDTO) {
        return userDTO;
    }

    /**
     * Find by user id string.
     *
     * @param userId the user id
     * @return the string
     */
    @GetMapping("/findByUserId")
    public UserDTO findByUserId(@RequestParam("userId") final String userId) {
        UserDTO userDTO = new UserDTO();
        userDTO.setUserId(userId);
        userDTO.setUserName("hello world");
        return userDTO;
    }

    /**
     * Gets path variable.
     *
     * @param id   the id
     * @param name the name
     * @return the path variable
     */
    @GetMapping("/path/{id}")
    public UserDTO getPathVariable(@PathVariable("id") final String id, @RequestParam("name") final String name) {
        UserDTO userDTO = new UserDTO();
        userDTO.setUserId(id);
        userDTO.setUserName("hello world");
        return userDTO;
    }


    /**
     * Test rest ful string.
     *
     * @param id the id
     * @return the string
     */
    @GetMapping("/path/{id}/name")
    public UserDTO testRestFul(@PathVariable("id") final String id) {
        UserDTO userDTO = new UserDTO();
        userDTO.setUserId(id);
        userDTO.setUserName("hello world");
        return userDTO;
    }


    /**
     * Put path variable and body string.
     *
     * @param id      the id
     * @param userDTO the user dto
     * @return the string
     */
    @PutMapping("/putPathBody/{id}")
    public UserDTO putPathVariableAndBody(@PathVariable("id") final String id, @RequestBody final UserDTO userDTO) {
        userDTO.setUserId(id);
        userDTO.setUserName("hello world");
        return userDTO;
    }

}
类上使用了 @SoulSpringMvcClient(path = "/test/**") 表示注册该 Controller 下所有服务。
注册的服务清单:
- /payment
- /findByUserId
- /path/{id}
- /path/{id}/name
- /putPathBody/{id}
都是简单的 mock 服务
2)OrderController.java
/**
 * TestController.
 *
 * @author xiaoyu
 */
@RestController
@RequestMapping("/order")
@SoulSpringMvcClient(path = "/order")
public class OrderController {

    /**
     * Save order dto.
     *
     * @param orderDTO the order dto
     * @return the order dto
     */
    @PostMapping("/save")
    @SoulSpringMvcClient(path = "/save" , desc = "Save order")
    public OrderDTO save(@RequestBody final OrderDTO orderDTO) {
        orderDTO.setName("hello world save order");
        return orderDTO;
    }

    /**
     * Find by id order dto.
     *
     * @param id the id
     * @return the order dto
     */
    @GetMapping("/findById")
    @SoulSpringMvcClient(path = "/findById", desc = "Find by id")
    public OrderDTO findById(@RequestParam("id") final String id) {
        OrderDTO orderDTO = new OrderDTO();
        orderDTO.setId(id);
        orderDTO.setName("hello world findById");
        return orderDTO;
    }

    /**
     * Gets path variable.
     *
     * @param id   the id
     * @param name the name
     * @return the path variable
     */
    @GetMapping("/path/{id}/{name}")
    @SoulSpringMvcClient(path = "/path/**")
    public OrderDTO getPathVariable(@PathVariable("id") final String id, @PathVariable("name") final String name) {
        OrderDTO orderDTO = new OrderDTO();
        orderDTO.setId(id);
        orderDTO.setName("hello world restful: " + name);
        return orderDTO;
    }

    /**
     * Test rest ful order dto.
     *
     * @param id the id
     * @return the order dto
     */
    @GetMapping("/path/{id}/name")
    @SoulSpringMvcClient(path = "/path/**/name")
    public OrderDTO testRestFul(@PathVariable("id") final String id) {
        OrderDTO orderDTO = new OrderDTO();
        orderDTO.setId(id);
        orderDTO.setName("hello world restful inline " + id);
        return orderDTO;
    }
}
类上使用了 @SoulSpringMvcClient(path = "/order"),表示该 Controller 下部分服务需要注册,配合方法上的 SoulSpringMvcClient 指定具体注册的服务。
注册的服务清单:
- /save
- /findById
- /path/{id}/{name}
- /path/{id}/name
注意到注册 GET 请求的服务时,url 中的参数需要用 ** 代替
6、启动示例模块
官方文档里提到:
需要在网关的 pom 里增加 soul-spring-boot-starter-plugin-divide 和 soul-spring-boot-starter-plugin-httpclient 依赖,并重启网关。
需要这么麻烦么?
百度查阅相关文章后,了解到 soul 本身提供的 soul-bootstrap 模块已经集成了这两个插件,所以启动 soul-admin 后,再启动 soul-bootstrap 就可以了。
接下来愉快地启动示例吧
运行 SoulTestHttpApplication.java,启动示例模块

通过控制台日志可以看到,模块启动后向网关注册了5条 http-client 元数据。
其中 HttpTestController 统一注册了1条元数据 /http/test/**,而 OrderController 则分别注册了4条元数据。
猜测元数据记录与 @SoulSpringMvcClient 注解一一对应。
登录 http://localhost:9095/#/plug/divide,在 divide 插件一栏可以看到 http 服务注册信息

点击 Modify 按钮可以查看或修改注册的元数据信息
7、http 请求 网关
此处使用 Postman 发起 http 请求,与浏览器直接发起请求等价。
1)先尝试请求原 http 服务
待访问 http 服务: /test/findByUserId,请求url:localhost:8188/test/findByUserId?userId=001

访问成功,耗时 12ms
2)再通过网关访问代理的 http 服务
网关 ip + 端口:http://localhost:9195
contextPath:/http
待访问 http 服务: /test/findByUserId
要素拼装后请求url:localhost:9195/http/test/findByUserId?userId=001
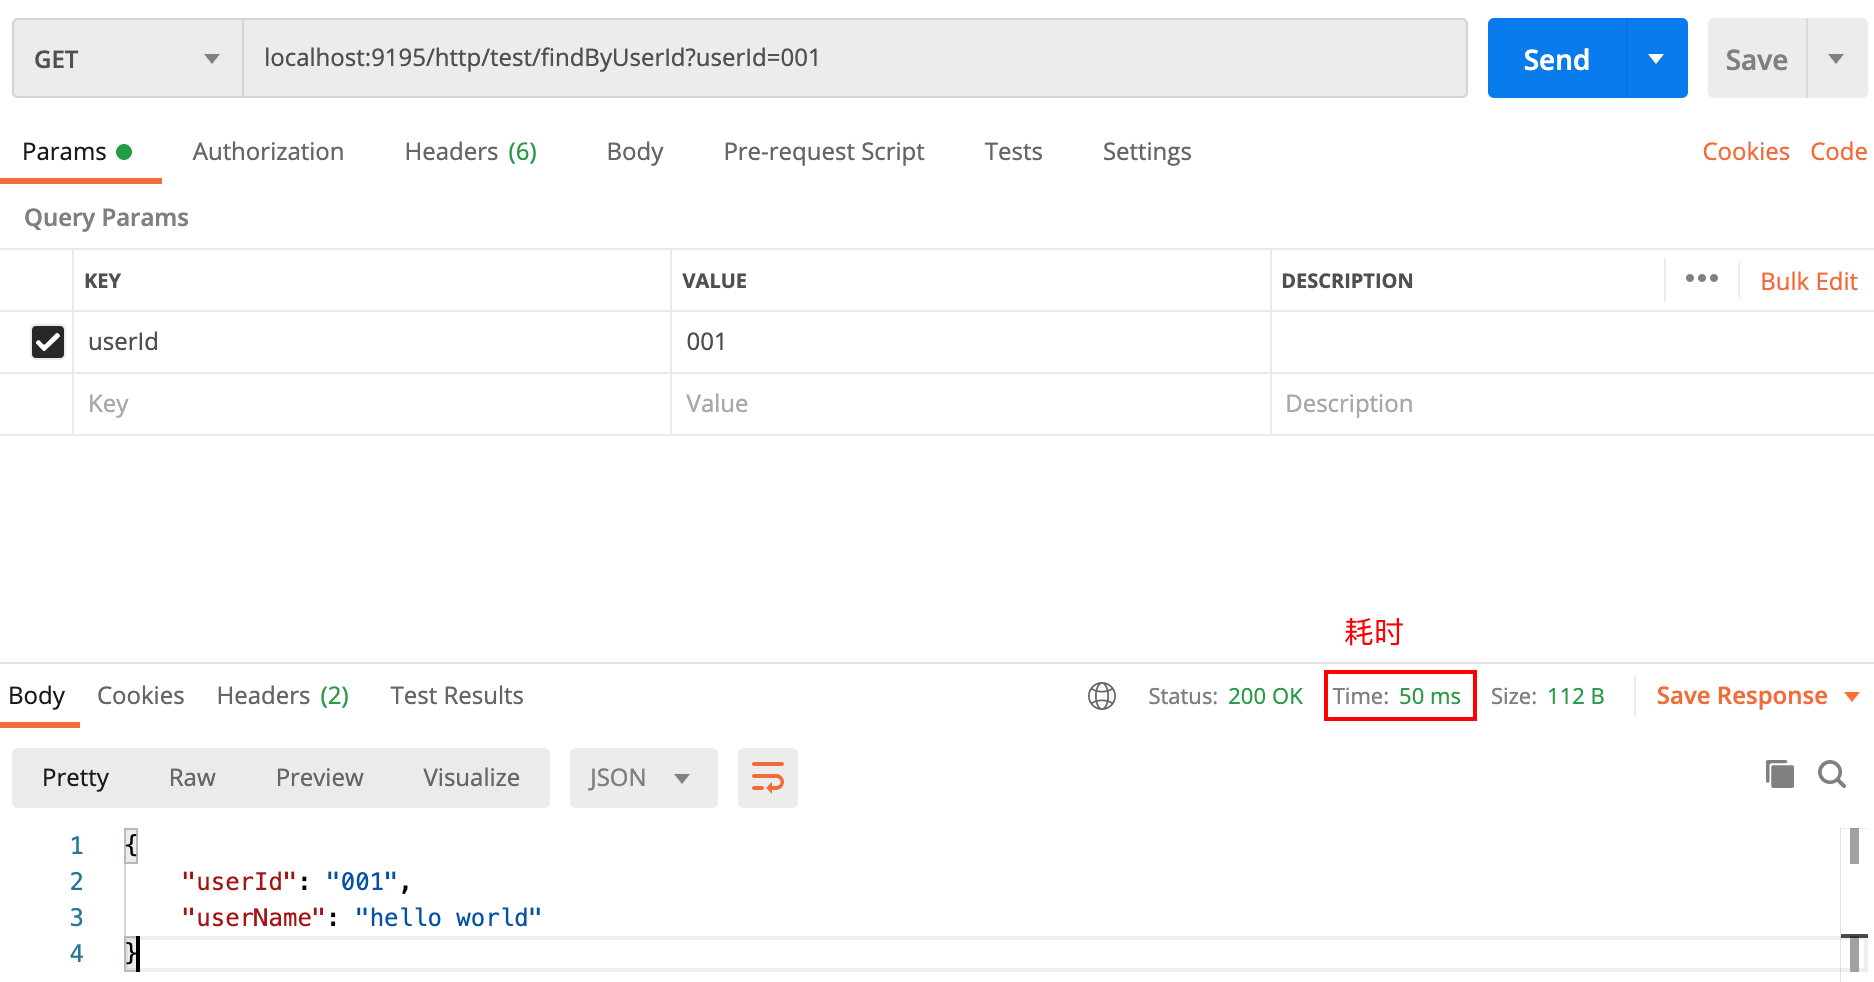
访问成功,耗时 50ms
至此,网关成功代理 http 服务,注意到网关代理服务耗时确实比原 http 服务长,毕竟多了一次路由转发,性能方面待后续压测。
三、总结
http 服务接入 soul 网关:
- 先启动
soul-admin - 网关需要引入相关代理插件并重启,若使用
soul-bootstrap则直接soul-bootstrap启动即可 - http 服务接入网关方式:
- soul-client方式,自动注册元信息
- divide 插件方式,手动配置元信息
- 自定义 http-client 方式
- 将直接指向用户的请求,改为通过网关发起访问,并加上相应的 contextPath。
参考文章

若有收获,就点个赞吧
0 人点赞
