建立一个 slug 系统
本指南将解释如何创建一个 slug 系统的职位,文章或任何内容类型。
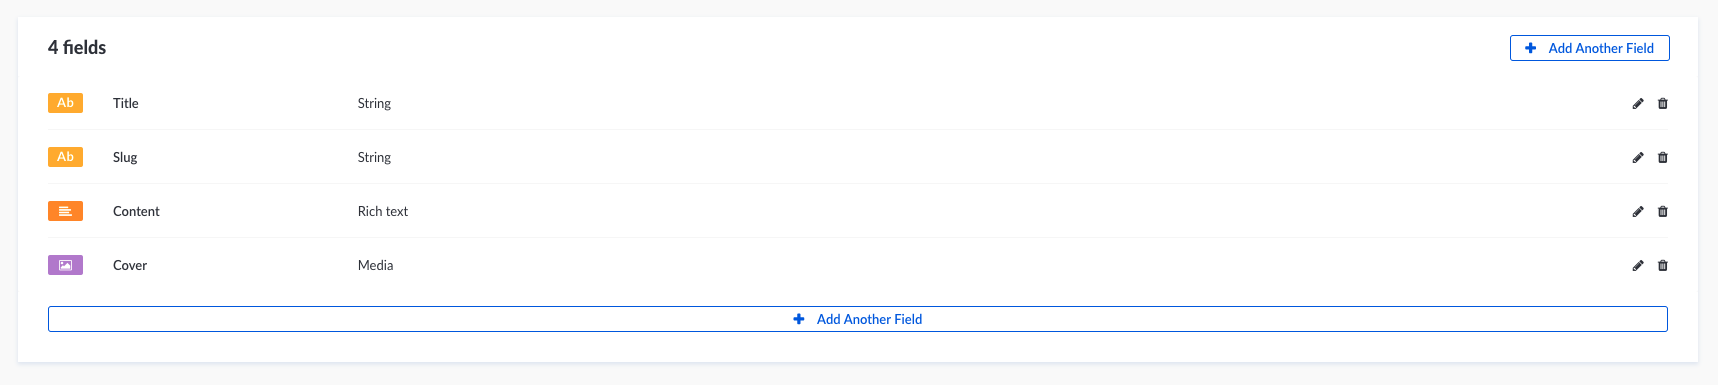
创建属性
要开始建造 slug 系统,你需要一个 string 字段作为 slug 的基础,在这个例子中我们将使用title。
您还需要另一个 string 字段,其中包含 title 的放大值,在这种情况下,我们将使用slug。
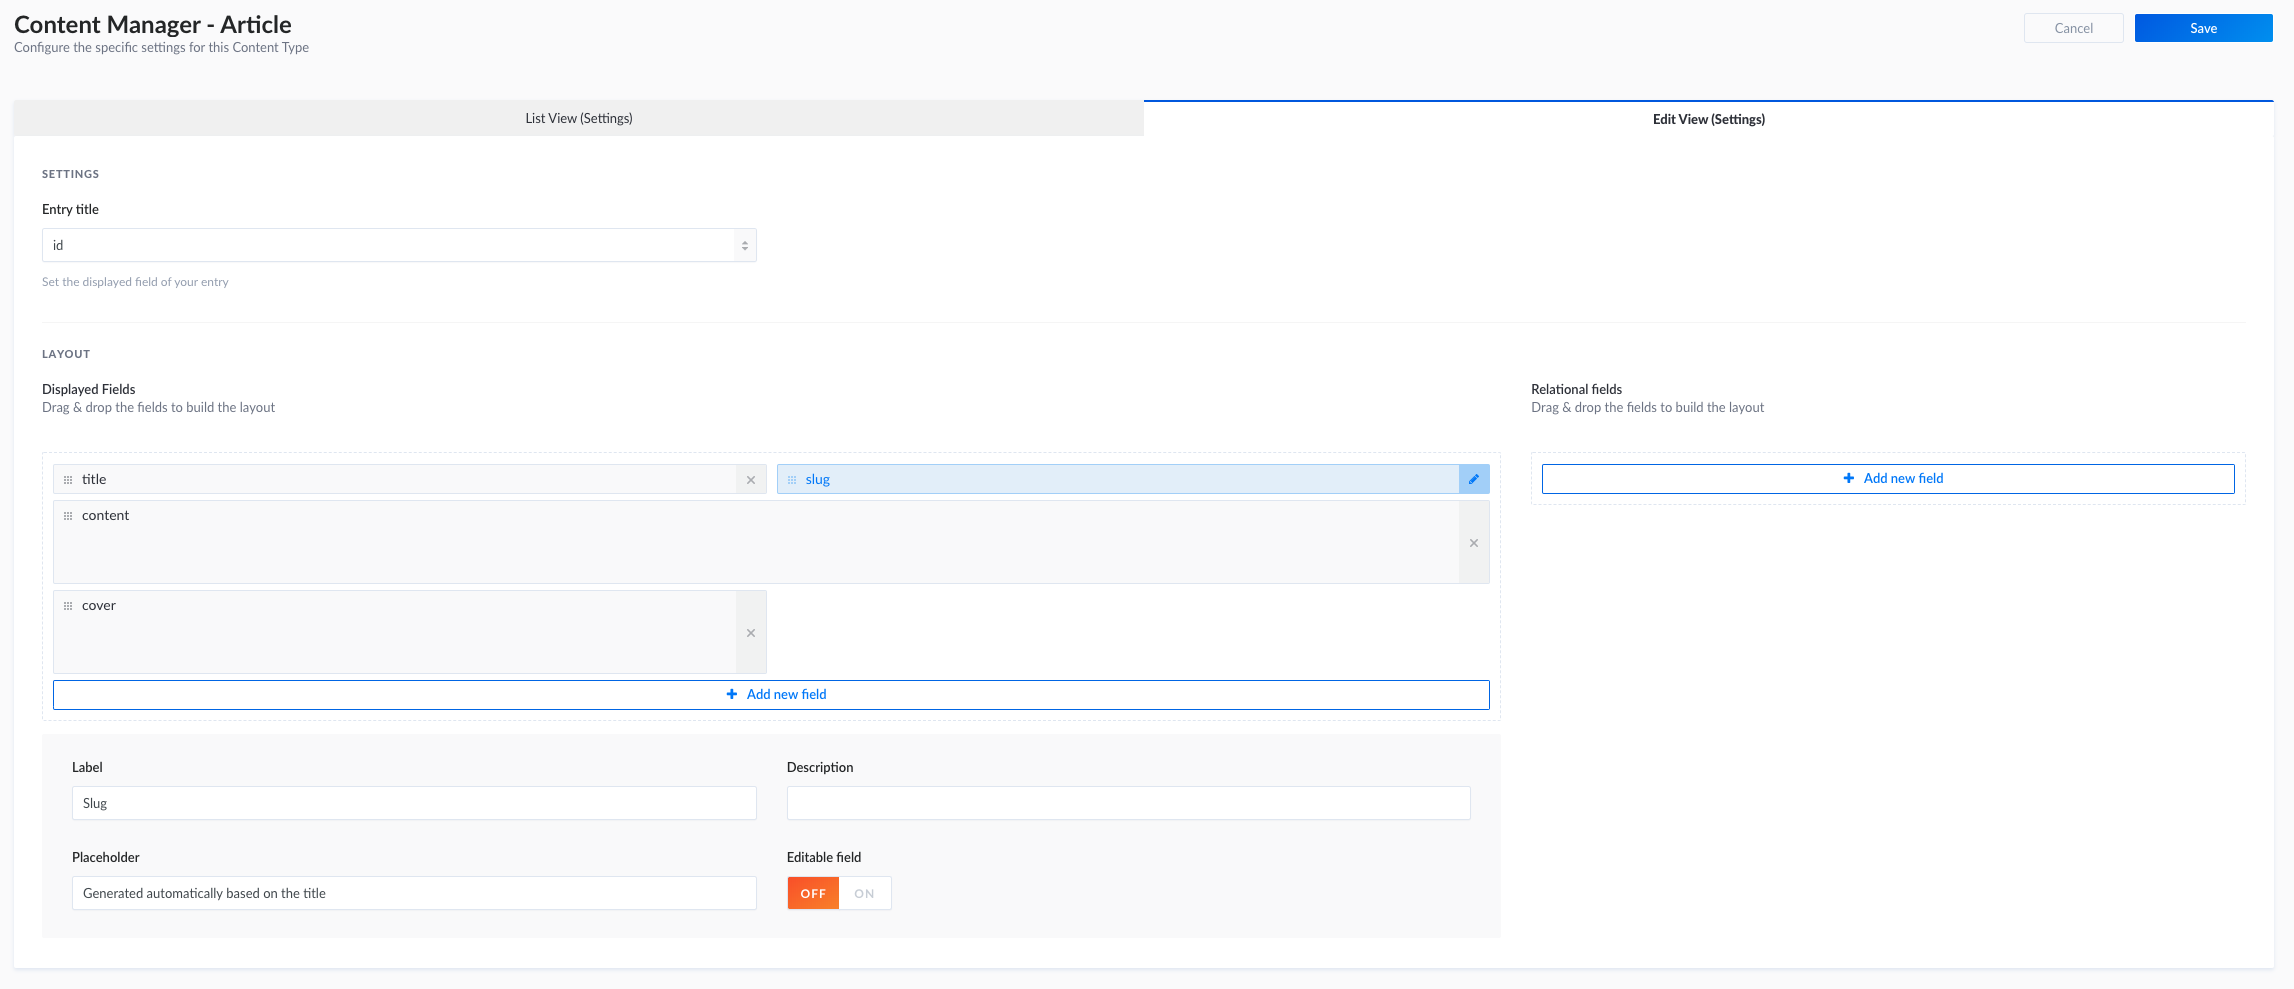
配置内容编辑器的布局
让我们配置 edit page 的布局,使其对内容编辑器更加友好。
- 点击 the Article link 在左边的菜单里.
- 然后 on the
+ Add New Article按钮 - And finally on the
Configure the layout按钮
在这里,我们将能够设置 slug 字段。
- 点击 the
slug字段 - 在页面底部, 编辑 占位符 值
Generated automatically based on the title. - 点击 OFF for Editable field option.
- 不要忘记保存你的更新.
:::: tabs
::: tab View before

:::
::: tab View after

:::
::: tab View configuration
:::
::::
自动创建/更新 slug 属性
为此,您必须在应用程序中安装 slugify 节点模块。
完成后,您必须更新文章内容类型的生命周期,以自动完成 slug 字段 。
Path — ./api/article/models/Article.js
:::: tabs
::: tab Mongoose
const slugify = require('slugify');module.exports = {lifecycles: {beforeCreate: async data => {if (data.title) {data.slug = slugify(data.title);}},beforeUpdate: async (params, data) => {if (data.title) {data.slug = slugify(data.title);}},},};
:::
::: tab Bookshelf
const slugify = require('slugify');module.exports = {/*** Triggered before user creation.*/lifecycles: {async beforeCreate(data) {if (data.title) {data.slug = slugify(data.title, { lower: true });}},async beforeUpdate(params, data) {if (data.title) {data.slug = slugify(data.title, { lower: true });}},},};
:::
::::
获取文章 slug
这样你就可以用这个 slug 取你的 Articles 了。
你可以通过这个请求 GET /articles?slug=my-article-slug 找到你的文章

若有收获,就点个赞吧
0 人点赞
