迟到很久很久的阅读系列 感谢若川大哥组织的活动,原文:https://juejin.cn/post/6997943192851054606
1.准备动手
- 继续上次的vue-next项目
- 一个vscode
- 进入项目中的script/release.js中查看本次学习的代码
2.开始调试前的准备
2.1npm钩子
第一次知道npm安装原来也是有钩子的,主要分为三部分:
- preinstall
- install
- postinstall
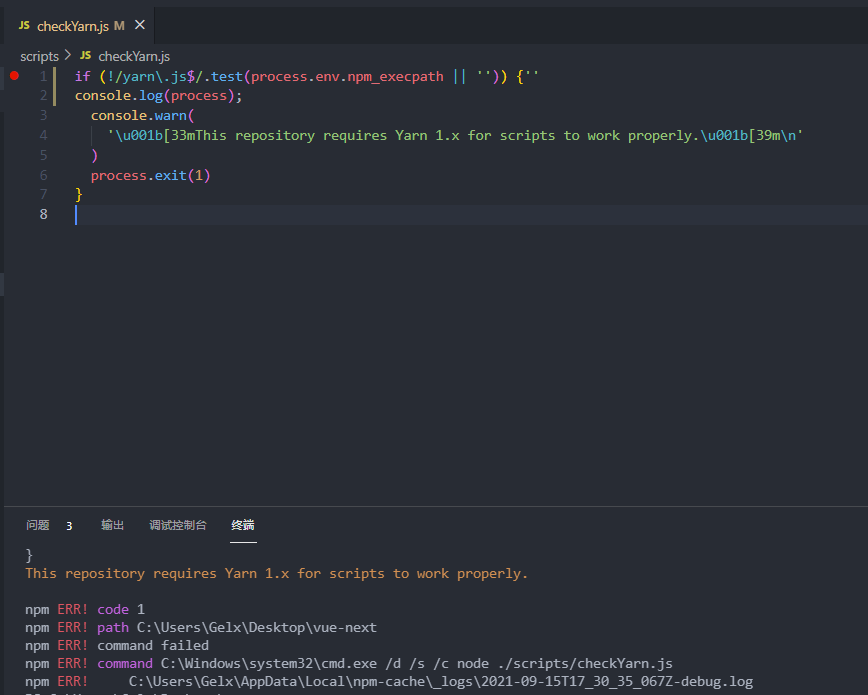
在项目中,使用了preinstall去执行script/checkYarn.js文件,这会在使用npm i安装依赖前使用正则检查是否为yarn安装,如果不是则直接终端进程并报错
2.2 几个比较有用的依赖库
2.2.1 minimist
const args = require('minimist')(process.argv.slice(2))
截取argv后的参数,并进行参数的解析(ps:单在这里看的时候我还是没看懂具体该怎么用,往后看就明白了)
2.2.2 semver
语义化版本号,用于做版本号校验的一个库
3.开始调试
3.1 基础参数声明
// 前面提到的解析参数const args = require('minimist')(process.argv.slice(2))// 获取preId以及beta版本// 对应 --preid=betaconst preId =args.preid ||(semver.prerelease(currentVersion) && semver.prerelease(currentVersion)[0])// yarn run release --dry获取dry是否为trueconst isDryRun = args.dry// 跳过测试const skipTests = args.skipTests// 跳过buildconst skipBuild = args.skipBuild// 读取项目中packages文件夹下的不是.ts结尾 且 不是.开头的文件夹const packages = fs.readdirSync(path.resolve(__dirname, '../packages')).filter(p => !p.endsWith('.ts') && !p.startsWith('.'))
3.2 基础脚本函数声明
// 执行jest命令const bin = name => path.resolve(__dirname, '../node_modules/.bin/' + name)// 执行真实运行命令const run = (bin, args, opts = {}) =>execa(bin, args, { stdio: 'inherit', ...opts })// 执行空跑命令,只console.log打印const dryRun = (bin, args, opts = {}) =>console.log(chalk.blue(`[dryrun] ${bin} ${args.join(' ')}`), opts)// 根据上面的声明决定是否需要空跑const runIfNotDry = isDryRun ? dryRun : run
3.3最重要的main发布函数
3.3.1 确认要发布的版本
// yarn run release && yarn run release 版本号// 读取版本号let targetVersion = args._[0]// 如果没有读取到,将会互动拉取现在的版本号并选择要发布的版本if (!targetVersion) {// no explicit version, offer suggestionsconst { release } = await prompt({type: 'select',name: 'release',message: 'Select release type',choices: versionIncrements.map(i => `${i} (${inc(i)})`).concat(['custom'])})// 选择其他版本if (release === 'custom') {targetVersion = (await prompt({type: 'input',name: 'version',message: 'Input custom version',initial: currentVersion})).version} else {targetVersion = release.match(/\((.*)\)/)[1]}}// 检查版本号是否符合规范if (!semver.valid(targetVersion)) {throw new Error(`invalid target version: ${targetVersion}`)}// 如果填写了要发布的版本const { yes } = await prompt({type: 'confirm',name: 'yes',message: `Releasing v${targetVersion}. Confirm?`})if (!yes) {return}
3.3.2 执行测试用例
// 调用jest执行测试用例// 这里会根据输入的命令决定是否需要执行以及执行的具体步骤step('\nRunning tests...')if (!skipTests && !isDryRun) {await run(bin('jest'), ['--clearCache'])await run('yarn', ['test', '--bail'])} else {console.log(`(skipped)`)}
3.3.3 更新所有版本号
// update all package versions and inter-dependencies// 主更新函数step('\nUpdating cross dependencies...')updateVersions(targetVersion)// 接着又通过三个函数执行更新操作// 第一个函数// 更新package.json中的版本号// 循环遍历更新所有包钟的版本号function updateVersions(version) {// 1. update root package.jsonupdatePackage(path.resolve(__dirname, '..'), version)// 2. update all packagespackages.forEach(p => updatePackage(getPkgRoot(p), version))}// 第二个函数// 执行更新package.json// 更新dependencies部分中 vue相关的依赖版本// 更新peerDependencies部分中 vue相关的依赖版本function updatePackage(pkgRoot, version) {const pkgPath = path.resolve(pkgRoot, 'package.json')const pkg = JSON.parse(fs.readFileSync(pkgPath, 'utf-8'))pkg.version = versionupdateDeps(pkg, 'dependencies', version)updateDeps(pkg, 'peerDependencies', version)fs.writeFileSync(pkgPath, JSON.stringify(pkg, null, 2) + '\n')}// 第三个函数// 这里执行vue相关依赖的更新function updateDeps(pkg, depType, version) {const deps = pkg[depType]if (!deps) returnObject.keys(deps).forEach(dep => {if (dep === 'vue' ||(dep.startsWith('@vue') && packages.includes(dep.replace(/^@vue\//, '')))) {console.log(chalk.yellow(`${pkg.name} -> ${depType} -> ${dep}@${version}`))deps[dep] = version}})}
3.3.4 打包编译所有的包
// 执行编译打包// 同样可以根据执行命令时的参数进行区分执行step('\nBuilding all packages...')if (!skipBuild && !isDryRun) {await run('yarn', ['build', '--release'])// test generated dts filesstep('\nVerifying type declarations...')await run('yarn', ['test-dts-only'])} else {console.log(`(skipped)`)}
3.3.5 生成changelog
这一部分执行了yarn changelog脚本,实际上执行的是conventional-changelog -p angular -i CHANGELOG.md -s
3.3.6 提交代码
通过git diff找到是否有文件的改动,以及是否需要提交文件
3.3.7 发布包
通过执行yarn publish进行包的发布,同时兼容了vue2.x和vue3.x版本
3.3.8 推送github
// push to GitHubstep('\nPushing to GitHub...')// 打一个tagawait runIfNotDry('git', ['tag', `v${targetVersion}`])// 推送这个tagawait runIfNotDry('git', ['push', 'origin', `refs/tags/v${targetVersion}`])// 执行git pushawait runIfNotDry('git', ['push'])
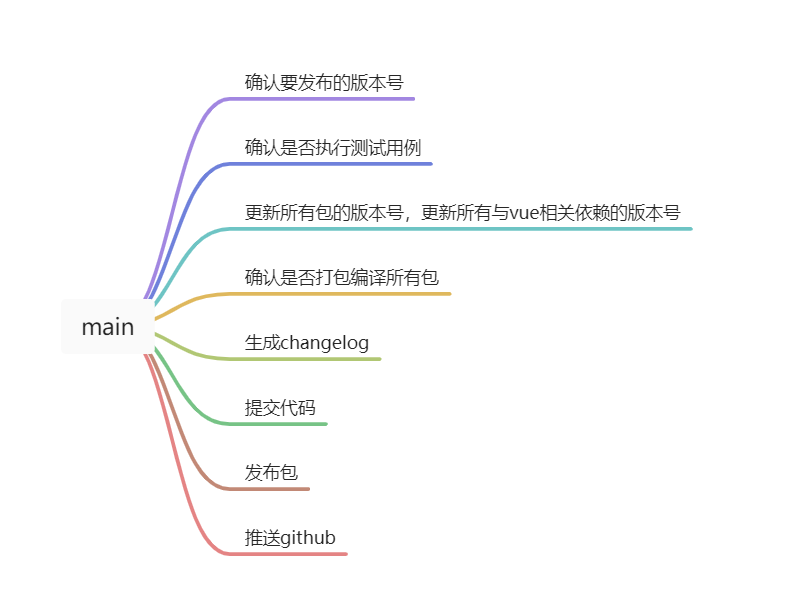
3.3.9 全流程
至此发布vue版本的流程已经全部走完,整个流程可以概括为以下这些步骤
4. 总结
- 简单粗略的了解了vue发布的全流程
- 对发布过程中关键步骤的代码进行了解读
自己在公司的项目开发中并没有过多的了解目前项目发布的流程,会在后续了解项目发布的流程后,与学习到的知识进行对比,了解是否有可优化的点

