一、安装和配置控制器节点
基础环境
在配置 OpenStack neutron 服务之前,必须创建数据库、服务凭据和 API 终结点。
1.1.创建数据库
使用数据库访问客户端以用户身份连接到数据库服务器:root
[root@controller ~]# mysql -u root -pcom.123
创建数据库:neutron
MariaDB [(none)]> CREATE DATABASE neutron;Query OK, 1 row affected (0.000 sec)
授予对数据库的适当访问权限,代之以适当的密码:neutron
- password=com.123 ``` MariaDB [(none)]> GRANT ALL PRIVILEGES ON neutron.* TO ‘neutron’@’localhost’ IDENTIFIED BY ‘Com.123’; Query OK, 0 rows affected (0.001 sec)
MariaDB [(none)]> GRANT ALL PRIVILEGES ON neutron.* TO ‘neutron’@’%’ IDENTIFIED BY ‘Com.123’; Query OK, 0 rows affected (0.001 sec)
MariaDB [(none)]> exit Bye
<a name="ulcPa"></a>### 1.2.源凭据以访问仅管理员 CLI 命令:admin
[root@controller ~]# . admin-openrc
<a name="MsC59"></a>### 1.3要创建服务凭据- 创建用户:neutron
[root@controller ~]# openstack user create —domain default —password-prompt neutron User Password: com.123 Repeat User Password: com.123 +——————————-+—————————————————+ | Field | Value | +——————————-+—————————————————+ | domain_id | default | | enabled | True | | id | a6fab4caa7df4a78885f0a3715564654 | | name | neutron | | options | {} | | password_expires_at | None | +——————————-+—————————————————+
- 将角色添加到用户:neutron
[root@controller ~]# openstack role add —project service —user neutron admin
- 创建服务实体:neutron
[root@controller ~]# openstack service create —name neutron —description “OpenStack Networking” network +——————-+—————————————————+ | Field | Value | +——————-+—————————————————+ | description | OpenStack Networking | | enabled | True | | id | 8636342fe6fb484d88bccc121542387a | | name | neutron | | type | network | +——————-+—————————————————+
<a name="Kc9Zj"></a>### 1.4.创建网络服务 API 终结点:
[root@controller ~]# openstack endpoint create —region RegionOne network public http://controller:9696 +———————+—————————————————+ | Field | Value | +———————+—————————————————+ | enabled | True | | id | b87b89d7e8cd4e42a6c676fae5df16cb | | interface | public | | region | RegionOne | | region_id | RegionOne | | service_id | 8636342fe6fb484d88bccc121542387a | | service_name | neutron | | service_type | network | | url | http://controller:9696 | +———————+—————————————————+ [root@controller ~]# openstack endpoint create —region RegionOne network internal http://controller:9696 +———————+—————————————————+ | Field | Value | +———————+—————————————————+ | enabled | True | | id | 7ee10a46babd47f0862f4d3bd2c727c4 | | interface | internal | | region | RegionOne | | region_id | RegionOne | | service_id | 8636342fe6fb484d88bccc121542387a | | service_name | neutron | | service_type | network | | url | http://controller:9696 | +———————+—————————————————+ [root@controller ~]# openstack endpoint create —region RegionOne network admin http://controller:9696 +———————+—————————————————+ | Field | Value | +———————+—————————————————+ | enabled | True | | id | 650b70b5af74421996caf45dd17d4074 | | interface | admin | | region | RegionOne | | region_id | RegionOne | | service_id | 8636342fe6fb484d88bccc121542387a | | service_name | neutron | | service_type | network | | url | http://controller:9696 | +———————+—————————————————+
<a name="xX8JT"></a>## 2.配置自助服务网络- 网络选项 1:提供商网络[https://docs.openstack.org/neutron/train/install/controller-install-option1-rdo.html](https://docs.openstack.org/neutron/train/install/controller-install-option1-rdo.html)- 网络选项 2:自助服务网络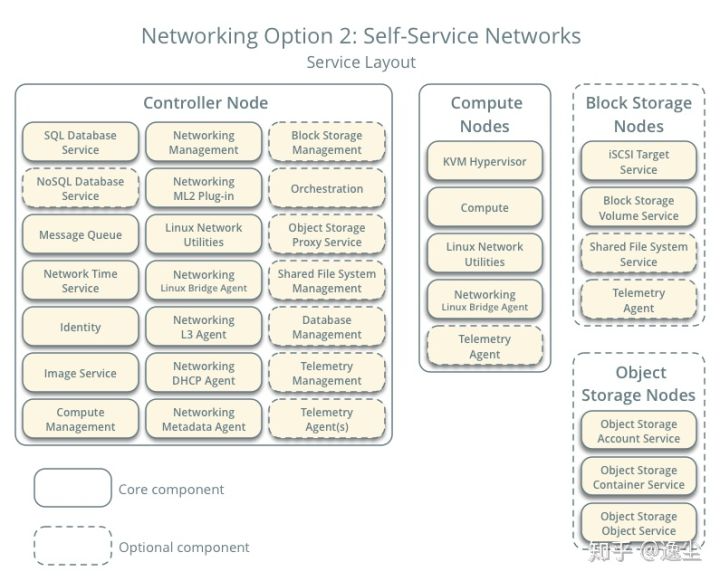<br /> [https://docs.openstack.org/neutron/train/install/controller-install-option2-rdo.html](https://docs.openstack.org/neutron/train/install/controller-install-option2-rdo.html)<br /><a name="YnFtK"></a>### 1.安装组件
[root@controller ~]# yum install openstack-neutron openstack-neutron-ml2 \
openstack-neutron-linuxbridge ebtables -y ```
2.配置服务器组件
- 编辑文件并完成以下操作:/etc/neutron/neutron.conf
- 配置数据库访问:[database]
- 启用模块化第 2 层 (ML2) 插件、路由器服务和重叠 IP 地址:[DEFAULT]
- 配置消息队列访问:[DEFAULT]
- 配置标识服务访问:[DEFAULT][keystone_authtoken]
- 配置网络以通知计算网络拓扑更改:[DEFAULT][nova]
配置锁定路径:[oslo_concurrency]
[DEFAULT]core_plugin = ml2service_plugins = routerallow_overlapping_ips = truetransport_url = rabbit://openstack:com.123@controllerauth_strategy = keystonenotify_nova_on_port_status_changes = truenotify_nova_on_port_data_changes = true[database]connection = mysql+pymysql://neutron:Com.123@controller/neutron[keystone_authtoken]www_authenticate_uri = http://controller:5000auth_url = http://controller:5000memcached_servers = controller:11211auth_type = passwordproject_domain_name = defaultuser_domain_name = defaultproject_name = serviceusername = neutronpassword = com.123[oslo_concurrency]lock_path = /var/lib/neutron/tmp
3.配置模块化第2层(ML2)插件
编辑文件并完成以下操作:/etc/neutron/plugins/ml2/ml2_conf.ini
- 启用平面、VLAN 和 VXLAN 网络:[ml2]
- 启用 VXLAN 自助服务网络:[ml2]
- Linux 网桥和第2层填充机制:[ml2]
- 启用端口安全扩展驱动程序:[ml2]
- 提供程序虚拟网络配置为平面网络:[ml2_type_flat]
为自助服务网络配置 VXLAN 网络标识符范围:[ml2_type_vxlan]
[root@controller ~]# grep -v '^#' /etc/neutron/plugins/ml2/ml2_conf.ini | grep -v '^$'[DEFAULT][ml2]type_drivers = flat,vlan,vxlantenant_network_types = vxlanmechanism_drivers = linuxbridge,l2populationextension_drivers = port_security[ml2_type_flat]flat_networks = provider[ml2_type_vxlan]vni_ranges = 1:1000[securitygroup]enable_ipset = true
4.配置Linux桥接代理
## PROVIDER_INTERFACE_NAME指的是ens32网卡,就是连接外部网络的那块网卡## OVERLAY_INTERFACE_IP_ADDRESS指的是控制节点访问外网的IP地址
Linux 桥接代理为实例构建第 2 层(桥接和交换)虚拟网络基础结构并处理安全组。
- 编辑文件并完成以下操作:/etc/neutron/plugins/ml2/linuxbridge_agent.ini
- 提供程序虚拟网络映射到提供程序物理网络接口:[linux_bridge]
- 启用 VXLAN 覆盖网络,配置处理覆盖网络的物理网络接口的 IP 地址,并启用第 2 层填充:[vxlan]
- 启用安全组并配置 Linux 桥接 iptables 防火墙驱动程序:[securitygroup]
验证以下所有值设置为:确保 Linux 操作系统内核支持网络网桥筛选器:sysctl1
[root@controller ~]# grep -v '^$' /etc/neutron/plugins/ml2/linuxbridge_agent.ini | grep -v '^#'[DEFAULT][linux_bridge]physical_interface_mappings = provider:ens33[vxlan]enable_vxlan = truelocal_ip = 10.0.0.20l2_population = true[securitygroup]enable_security_group = truefirewall_driver = neutron.agent.linux.iptables_firewall.IptablesFirewallDriver
5.配置第3层代理
第3层(L3)代理为自助服务虚拟网络提供路由和 NAT 服务。
编辑文件并完成以下操作:/etc/neutron/l3_agent.ini
[root@controller ~]# grep -v '^$' /etc/neutron/l3_agent.ini | grep -v '^#'[DEFAULT]interface_driver = linuxbridge
6.配置DHCP代理
DHCP代理为虚拟网络提供DHCP服务
编辑文件并完成以下操作:/etc/neutron/dhcp_agent.ini
配置 Linux 桥接接口驱动程序 Dnsmasq DHCP 驱动程序,并启用隔离元数据,以便提供程序网络上的实例可以通过网络访问元数据:[DEFAULT]
[root@controller ~]# grep -v '^$' /etc/neutron/dhcp_agent.ini | grep -v '^#'[DEFAULT]interface_driver = linuxbridgedhcp_driver = neutron.agent.linux.dhcp.Dnsmasqenable_isolated_metadata = true
7.修改linux系统内核网桥参数为1
[root@computer ~]# echo 'net.bridge.bridge-nf-call-iptables=1' >>/etc/sysctl.conf[root@computer ~]# echo 'net.bridge.bridge-nf-call-ip6tables=1' >>/etc/sysctl.conf[root@computer ~]# modprobe br_netfilter[root@computer ~]# sysctl -pnet.bridge.bridge-nf-call-iptables = 1net.bridge.bridge-nf-call-ip6tables = 1
3.配置元数据代理
1.编辑文件并完成以下操作:/etc/neutron/metadata_agent.ini
修改密码
[root@controller ~]# vim /etc/neutron/metadata_agent.ini[DEFAULT]nova_metadata_host = controllermetadata_proxy_shared_secret = com.123
配置元数据主机和共享密钥:[DEFAULT]
[root@controller ~]# grep -v '^$' /etc/neutron/metadata_agent.ini | grep -v '^#'[DEFAULT]nova_metadata_host = controllermetadata_proxy_shared_secret = com.123[cache]
4.将计算服务配置为使用网络服务
4.1.编辑文件并执行以下操作:/etc/nova/nova.conf
配置访问参数启用元数据代理并配置机密:[neutron]
[neutron]auth_url = http://controller:5000auth_type = passwordproject_domain_name = defaultuser_domain_name = defaultregion_name = RegionOneproject_name = serviceusername = neutronpassword = com.123service_metadata_proxy = truemetadata_proxy_shared_secret = com.123
5.完成安装
5.1.网络服务初始化脚本需要指向 ML2 插件配置文件 的符号链接。
如果此符号链接不存在,请使用以下命令创建它:/etc/neutron/plugin.ini/etc/neutron/plugins/ml2/ml2_conf.ini
[root@controller ~]# ln -s /etc/neutron/plugins/ml2/ml2_conf.ini /etc/neutron/plugin.ini
5.2.填充数据库:
[root@controller ~]# su -s /bin/sh -c "neutron-db-manage --config-file /etc/neutron/neutron.conf \> --config-file /etc/neutron/plugins/ml2/ml2_conf.ini upgrade head" neutronINFO [alembic.runtime.migration] Context impl MySQLImpl.INFO [alembic.runtime.migration] Will assume non-transactional DDL./usr/lib/python2.7/site-packages/pymysql/cursors.py:170: Warning: (1280, u"Name 'alembic_version_pkc' ignored for PRIMARY key.")result = self._query(query)正在对 neutron 运行 upgrade...INFO [alembic.runtime.migration] Context impl MySQLImpl.INFO [alembic.runtime.migration] Will assume non-transactional DDL.INFO [alembic.runtime.migration] Running upgrade -> kilo.............................................................INFO [alembic.runtime.migration] Running upgrade 7d32f979895f -> 594422d373eeINFO [alembic.runtime.migration] Running upgrade 594422d373ee -> 61663558142cINFO [alembic.runtime.migration] Running upgrade 61663558142c -> 867d39095bf4, port forwardingINFO [alembic.runtime.migration] Running upgrade 867d39095bf4 -> d72db3e25539, modify uniq port forwardingINFO [alembic.runtime.migration] Running upgrade d72db3e25539 -> cada2437bf41INFO [alembic.runtime.migration] Running upgrade cada2437bf41 -> 195176fb410d, router gateway IP QoS.............................................................INFO [alembic.runtime.migration] Running upgrade 2e0d7a8a1586 -> 5c85685d616d确定
5.3.重新启动计算 API 服务:
[root@controller ~]# systemctl restart openstack-nova-api.service
5.4.启动网络服务,并将其配置为在系统启动时启动。
[root@controller ~]# systemctl enable neutron-server.service \> neutron-linuxbridge-agent.service neutron-dhcp-agent.service \> neutron-metadata-agent.service[root@controller ~]# systemctl start neutron-server.service \> neutron-linuxbridge-agent.service neutron-dhcp-agent.service \> neutron-metadata-agent.service[root@controller ~]# systemctl enable neutron-l3-agent.service[root@controller ~]# systemctl start neutron-l3-agent.service
二、安装和配置计算节点
1.安装组件
[root@controller ~]# yum install openstack-neutron-linuxbridge ebtables ipset -y
2.配置公共组件
网络通用组件配置包括身份验证机制、消息队列和插件
- 编辑文件并完成以下操作:/etc/neutron/neutron.conf
- 在本节中,注释掉任何选项,因为计算节点不会直接访问数据库。[database]
- 配置消息队列访问:[DEFAULT]
- 配置标识服务访问:[DEFAULT][keystone_authtoken]
配置锁定路径:[oslo_concurrency]
[DEFAULT]transport_url = rabbit://openstack:com.123@controllerauth_strategy = keystone[keystone_authtoken]www_authenticate_uri = http://controller:5000auth_url = http://controller:5000memcached_servers = controller:11211auth_type = passwordproject_domain_name = defaultuser_domain_name = defaultproject_name = serviceusername = neutronpassword = com.123[oslo_concurrency]lock_path = /var/lib/neutron/tmp
3.配置自助服务网络
选择控制器节点为配置特定于它的服务的相同网络选项
- 网络选项 1:提供商网络 https://docs.openstack.org/neutron/train/install/compute-install-option1-rdo.html
网络选项 2:自助服务网络https://docs.openstack.org/neutron/train/install/compute-install-option2-rdo.html
3.1.配置Linux桥接代理
Linux桥接代理为实例构建第2层(桥接和交换)虚拟网络基础结构并处理安全组。
编辑文件并完成以下操作:/etc/neutron/plugins/ml2/linuxbridge_agent.ini
- 提供程序虚拟网络映射到提供程序物理网络接口:[linux_bridge]
启用 VXLAN 覆盖网络,配置处理覆盖网络的物理网络接口的IP地址并启用第2层填充:[vxlan]
启用安全组并配置 Linux 桥接 iptables 防火墙驱动程序:[securitygroup][root@computer ~]# grep -v '^#' /etc/neutron/plugins/ml2/linuxbridge_agent.ini | grep -v '^$'[DEFAULT][linux_bridge]physical_interface_mappings = provider:ens32[vxlan]enable_vxlan = truelocal_ip = 192.168.1.106l2_population = true[securitygroup]enable_security_group = truefirewall_driver = neutron.agent.linux.iptables_firewall.IptablesFirewallDriver
验证以下所有值设置为:确保Linux 操作系统内核支持网络网桥筛选器:sysctl1
[root@computer ~]# echo 'net.bridge.bridge-nf-call-iptables=1' >>/etc/sysctl.conf[root@computer ~]# echo 'net.bridge.bridge-nf-call-ip6tables=1' >>/etc/sysctl.conf[root@computer ~]# modprobe br_netfilter[root@computer ~]# sysctl -pnet.bridge.bridge-nf-call-iptables = 1net.bridge.bridge-nf-call-ip6tables = 1
4.将计算服务配置为使用网络服务
编辑文件并完成以下操作:/etc/nova/nova.conf
[neutron]auth_url = http://controller:5000auth_type = passwordproject_domain_name = defaultuser_domain_name = defaultregion_name = RegionOneproject_name = serviceusername = neutronpassword = com.123
4.完成安装
4.1.重新启动计算服务:
[root@controller ~]# systemctl restart openstack-nova-compute.service
4.2.启动 Linux 桥接代理并将其配置为在系统启动时启动:
[root@controller ~]# systemctl enable neutron-linuxbridge-agent.service[root@controller ~]# systemctl start neutron-linuxbridge-agent.service
三、验证
列出验证neutron网络成功的代理:
[root@controller ~]# openstack network agent list+--------------------------------------+--------------------+------------+-------------------+-------+-------+---------------------------+| ID | Agent Type | Host | Availability Zone | Alive | State | Binary |+--------------------------------------+--------------------+------------+-------------------+-------+-------+---------------------------+| 81cbd193-505e-4472-9cb9-d1ac3d3b8abc | Metadata agent | controller | None | :-) | UP | neutron-metadata-agent || 8912386e-41e3-4166-acb1-43f25327cd34 | Linux bridge agent | controller | None | :-) | UP | neutron-linuxbridge-agent || 933cd63a-a92f-44cd-94af-2e1c16d1dddb | Linux bridge agent | computer | None | :-) | UP | neutron-linuxbridge-agent || 9a4dacb2-a07f-4f7e-8d4f-02a7a973c39c | DHCP agent | controller | nova | :-) | UP | neutron-dhcp-agent || 9a7b35b8-6c8c-4f71-8fe3-40cf9bfba10c | L3 agent | controller | nova | :-) | UP | neutron-l3-agent |+--------------------------------------+--------------------+------------+-------------------+-------+-------+---------------------------+

若有收获,就点个赞吧
0 人点赞
