在 CSS 3 中,提倡使用选择器来将样式与元素直接绑定起来,这样的话,在样式表中什么样式与什么元素相匹配变得一目了然,修改起来也很方便。
属性选择器
在 CSS3 中,追加了三个属性选择器分别为:[att*=val]、[att^=val] 和 [att$=val],使得属性选择器有了通配符的概念。
[att*=val]属性选择器
如果元素使用 att 表示的属性的属性值中包含用 val 指定的字符,则该元素使用这个样式。示例如下:
<!DOCTYPE html><html lang="en"><head><meta charset="UTF-8"><meta http-equiv="X-UA-Compatible" content="IE=edge"><meta name="viewport" content="width=device-width, initial-scale=1.0"><title>Document</title><style>[id*=section1] {background-color: pink;}</style></head><body><div id="section1">示例文本1</div><div id="subsection1-1">示例文本1-1</div><div id="subsection1-2">示例文本1-2</div><div id="section2">示例文本2</div><div id="subsection2-1">示例文本2-1</div><div id="subsection2-2">示例文本2-2</div></body></html>
示例中页面中 id 为“section1”“subsection1-1”“subsection1-2”的 div 元素的背景色都变为粉红色。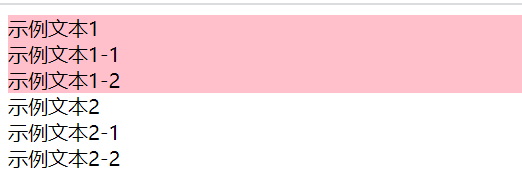
【att^=val】属性选择器
如果元素使用 att 表示的属性的属性值的开头字符为用 val 指定的字符话,则该元素使用这个样式。示例如下:
<!DOCTYPE html>
<html lang="en">
<head>
  <meta charset="UTF-8">
  <meta http-equiv="X-UA-Compatible" content="IE=edge">
  <meta name="viewport" content="width=device-width, initial-scale=1.0">
  <title>Document</title>
  <style>
    [id^=section] {
      background-color: pink;
    }
  </style>
</head>
<body>
  <div id="section1">示例文本1</div>
  <div id="subsection1-1">示例文本1-1</div>
  <div id="subsection1-2">示例文本1-2</div>
  <div id="section2">示例文本2</div>
  <div id="subsection2-1">示例文本2-1</div>
  <div id="subsection2-2">示例文本2-2</div>
</body>
</html>
该页面中 id 为“section1”“section2”的 div 元素的背景色都变为粉红色。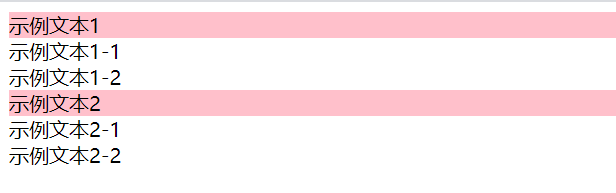
【att$=val】属性选择器
如果元素使用 att 表示的属性的属性值的结尾字符为用 val 指定的字符,则该元素使用这个样式。示例如下:
<!DOCTYPE html>
<html lang="en">
<head>
  <meta charset="UTF-8">
  <meta http-equiv="X-UA-Compatible" content="IE=edge">
  <meta name="viewport" content="width=device-width, initial-scale=1.0">
  <title>Document</title>
  <style>
    [id$=\-1] {
      background-color: pink;
    }
  </style>
</head>
<body>
  <div id="section1">示例文本1</div>
  <div id="subsection1-1">示例文本1-1</div>
  <div id="subsection1-2">示例文本1-2</div>
  <div id="section2">示例文本2</div>
  <div id="subsection2-1">示例文本2-1</div>
  <div id="subsection2-2">示例文本2-2</div>
</body>
</html>
该页面中 id 为“subsection1-1”“subsection2-1”的 div 元素的背景色都变为粉红色。需要注意该属性选择器中在指定匹配字符前必须加上“\”这个escape字符。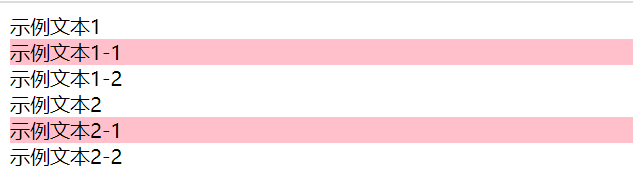
伪类选择器
在 CSS 中,除了类选择器之外,还有一种伪类选择器。不同的是,类选择器可以随便起名,而伪类选择器是 CSS 中已经定义好的选择器,不能随便起名。最常用的伪类选择器是在 a 元素上的几种选择器:
// 类选择器
p.right{
    text-align: right;
}
p.center {
    text-align: center;
}
<!DOCTYPE html>
<html lang="en">
<head>
  <meta charset="UTF-8">
  <meta http-equiv="X-UA-Compatible" content="IE=edge">
  <meta name="viewport" content="width=device-width, initial-scale=1.0">
  <title>Document</title>
  <style>
    /* 伪类选择器 */
    a:visited, a:link{
      text-decoration: none;
    }
    a:hover, a:active{
      text-decoration: underline;
    }
  </style>
</head>
<body>
  <a href="#">跳转链接</a>
</body>
</html>
伪元素选择器
伪元素选择器是指并不是针对真正的元素使用的选择器,而是针对 CSS 中已经定义好的伪元素使用的选择器。
格式如下:
选择器:伪元素 { 属性:值 }
first-line伪元素选择器
用于向某个元素中的第一行文字使用样式。
<!DOCTYPE html>
<html lang="en">
<head>
  <meta charset="UTF-8">
  <meta http-equiv="X-UA-Compatible" content="IE=edge">
  <meta name="viewport" content="width=device-width, initial-scale=1.0">
  <title>Document</title>
  <style>
    p::first-line{
      color: pink;
    }
  </style>
</head>
<body>
  <p>
    段落中的第一行。<br>
    段落中的第二行。
  </p>
</body>
</html>
使用 first-line 伪元素选择器将第一行文字设为粉红色。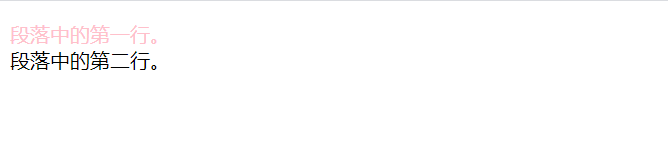
first-letter伪元素选择器
用于向某个元素中的文字的首字母(欧美文字)或第一个字(中文或日文等汉字)使用样式。
<!DOCTYPE html>
<html lang="en">
<head>
  <meta charset="UTF-8">
  <meta http-equiv="X-UA-Compatible" content="IE=edge">
  <meta name="viewport" content="width=device-width, initial-scale=1.0">
  <title>Document</title>
  <style>
    p::first-letter{
      color: pink;
    }
  </style>
</head>
<body>
  <p>This is an apple.</p>
  <p>这是一段中文文字。</p>
</body>
</html>
使用 first-letter 伪元素选择器来设置这两段文字的开头字母或文字的颜色为粉红色。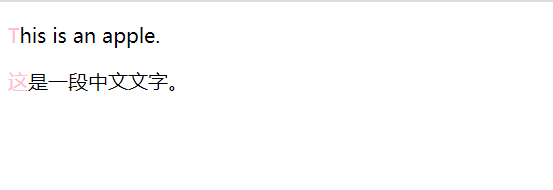
before伪元素选择器
用于在某个元素之前插入一些内容。
<!DOCTYPE html>
<html lang="en">
<head>
  <meta charset="UTF-8">
  <meta http-equiv="X-UA-Compatible" content="IE=edge">
  <meta name="viewport" content="width=device-width, initial-scale=1.0">
  <title>Document</title>
  <style>
    li::before{
      content: "*";
      color: red;
    }
  </style>
</head>
<body>
  <ul>
    <li>列表1</li>
    <li>列表2</li>
    <li>列表3</li>
  </ul>
</body>
</html>
使用 before 伪元素选择器在每个列表项目的文字的开头插入“*”字符,并将颜色设置为红色。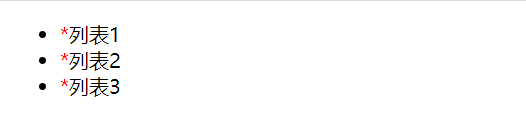
after伪元素选择器
用于在某个元素之后插入一些内容。
<!DOCTYPE html>
<html lang="en">
<head>
  <meta charset="UTF-8">
  <meta http-equiv="X-UA-Compatible" content="IE=edge">
  <meta name="viewport" content="width=device-width, initial-scale=1.0">
  <title>Document</title>
  <style>
    li::after{
      content: "*";
      color: red;
    }
  </style>
</head>
<body>
  <ul>
    <li>列表1</li>
    <li>列表2</li>
    <li>列表3</li>
  </ul>
</body>
</html>
使用after伪元素选择器在每个超链接的后面加入“*”文字,并将颜色设置为红色。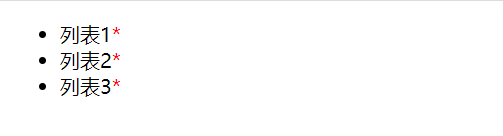
结构性伪类选择器
结构性伪类选择器的共同特征是允许开发者根据文档树中的结构来指定元素的样式。
首先看4个最基本的结构性伪类选择器:root 选择器、not 选择器、empty 选择器与 target 选择器。
root选择器
root 选择器将样式绑定到页面的根元素中。根元素是指位于文档树中最顶层结构的元素,在页面中指的是包含着整个页面的 html 部分。
<!DOCTYPE html>
<html lang="en">
<head>
  <meta charset="UTF-8">
  <meta http-equiv="X-UA-Compatible" content="IE=edge">
  <meta name="viewport" content="width=device-width, initial-scale=1.0">
  <title>Document</title>
  <style>
    :root{
      background-color:skyblue;
    }
    body{
      background-color: yellow;
    }
  </style>
</head>
<body>
  <h1>选择器概述</h1>
  <p>这是一段文本内容</p>
</body>
</html>
使用 :root 指定整个网页的背景色为天蓝色,body 背景指定为黄色。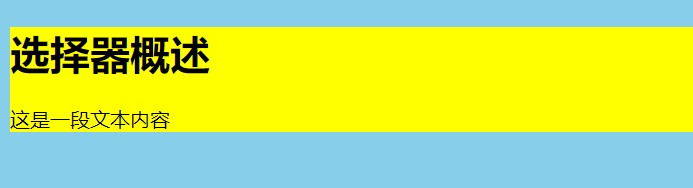
not()选择器
如果想对某个结构元素使用样式,但是想排除这个结构元素下面的子结构元素,让它不使用这个样式时,可以使用 not 选择器。
<!DOCTYPE html>
<html lang="en">
<head>
  <meta charset="UTF-8">
  <meta http-equiv="X-UA-Compatible" content="IE=edge">
  <meta name="viewport" content="width=device-width, initial-scale=1.0">
  <title>Document</title>
  <style>
    ul *:not(.text) {
      background-color:skyblue;
    }
  </style>
</head>
<body>
  <ul>
    <li class="text">文字1</li>
    <li class="text">文字2</li>
    <li>文字3</li>
  </ul>
</body>
</html>
通过 ul * 来指定 ul 下的所有 li 元素,:not 可以排除带有 class=”text” 的元素不应用这个样式。
empty选择器
使用 empty 选择器来指定当元素中内容为空白时使用的样式。
<!DOCTYPE html>
<html lang="en">
<head>
  <meta charset="UTF-8">
  <meta http-equiv="X-UA-Compatible" content="IE=edge">
  <meta name="viewport" content="width=device-width, initial-scale=1.0">
  <title>Document</title>
  <style>
    ul *:empty {
      background-color:skyblue;
    }
  </style>
</head>
<body>
  <ul>
    <li class="text"></li>
    <li class="text">文字2</li>
    <li>文字3</li>
  </ul>
</body>
</html>
当 li 中的内容为空白时,背景色为天蓝色。
target选择器
使用 target 选择器来对页面中某个 target 元素(该元素的 id 被当作页面中的超链接来使用)指定样式,该样式只在用户点击了页面中的超链接,并且跳转到 target 元素后起作用。
<!DOCTYPE html>
<html lang="en">
<head>
  <meta charset="UTF-8">
  <meta http-equiv="X-UA-Compatible" content="IE=edge">
  <meta name="viewport" content="width=device-width, initial-scale=1.0">
  <title>Document</title>
  <style>
    ul li:target{
      background-color: skyblue;
    }
  </style>
</head>
<body>
  <a href="#p2">跳转段落2</a>
  <ul>
    <li id="p1">段落1</li>
    <li id="p2">段落2</li>
    <li id="p3">段落3</li>
  </ul>
</body>
</html>
在 target 选择器中,当点击“跳转段落2”后,段落2会显示天蓝色。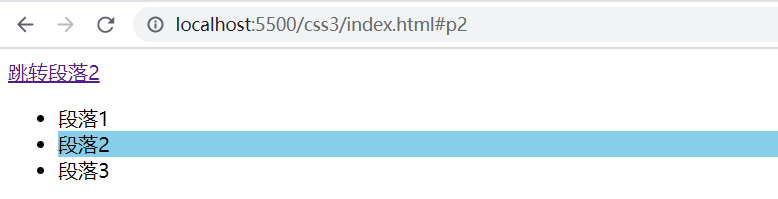
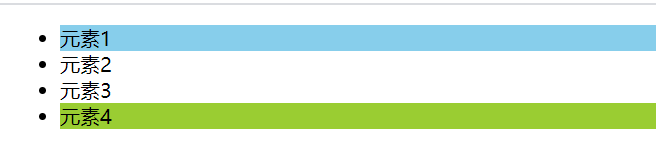
first-child、last-child选择器
first-child 用于指定父元素的第一个子元素的样式,last-child 用于指定父元素的倒数第一个子元素的样式。
<!DOCTYPE html>
<html lang="en">
<head>
  <meta charset="UTF-8">
  <meta http-equiv="X-UA-Compatible" content="IE=edge">
  <meta name="viewport" content="width=device-width, initial-scale=1.0">
  <title>Document</title>
  <style>
    li:first-child{
      background-color: skyblue;
    }
    li:last-child{
      background-color: yellowgreen;
    }
  </style>
</head>
<body>
  <ul>
    <li>元素1</li>
    <li>元素2</li>
    <li>元素3</li>
    <li>元素4</li>
  </ul>
</body>
</html>
nth-child(n)、nth-last-child(n)选择器
nth-child(n) 用于指定父元素中第 n 个序号的子元素的样式。nth-last-child 用于指定父元素中倒数第 n 个序号的子元素的样式。如“nth-child(3)”表示第三个子元素,“nth-last-child(3)”表示倒数第三个子元素。
<!DOCTYPE html>
<html lang="en">
<head>
  <meta charset="UTF-8">
  <meta http-equiv="X-UA-Compatible" content="IE=edge">
  <meta name="viewport" content="width=device-width, initial-scale=1.0">
  <title>Document</title>
  <style>
    li:nth-child(2){
      background-color: skyblue;
    }
    li:nth-last-child(2){
      background-color: yellowgreen;
    }
  </style>
</head>
<body>
  <ul>
    <li>元素1</li>
    <li>元素2</li>
    <li>元素3</li>
    <li>元素4</li>
  </ul>
</body>
</html>

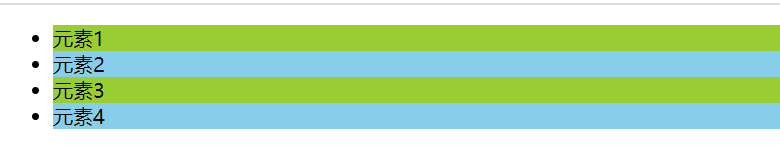
nth-child(even)、nth-child(odd)选择器
nth-child 除了可以指定第 n 个元素之外,还可以通过 odd、even 来指定父元素中的第奇数、第偶数个子元素的样式。同理 nth-last-child(odd)、nth-last-child(even) 指定的是父元素中的倒数第奇数、第偶数个子元素的样式。
<!DOCTYPE html>
<html lang="en">
<head>
  <meta charset="UTF-8">
  <meta http-equiv="X-UA-Compatible" content="IE=edge">
  <meta name="viewport" content="width=device-width, initial-scale=1.0">
  <title>Document</title>
  <style>
    li:nth-child(even) {
      background-color: skyblue;
    }
    li:nth-child(odd) {
      background-color: yellowgreen;
    }
  </style>
</head>
<body>
  <ul>
    <li>元素1</li>
    <li>元素2</li>
    <li>元素3</li>
    <li>元素4</li>
  </ul>
</body>
</html>
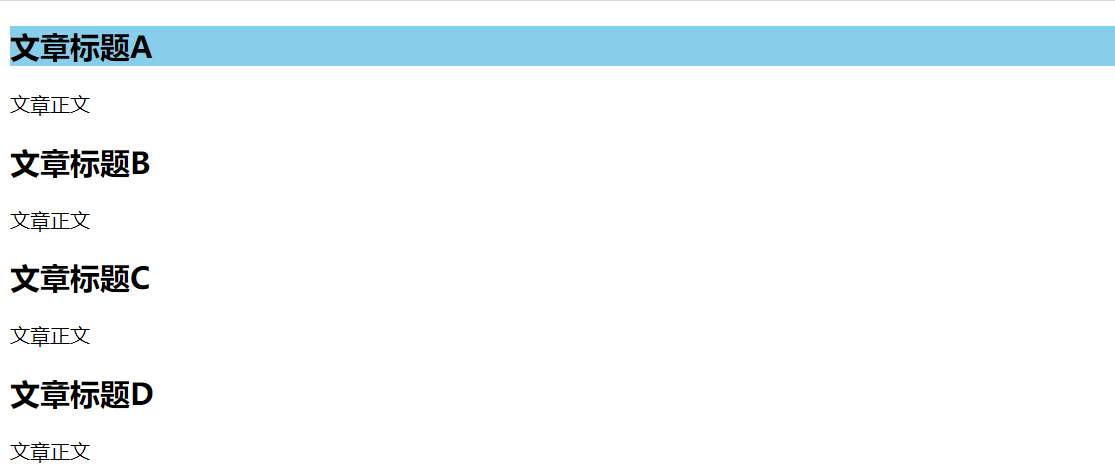
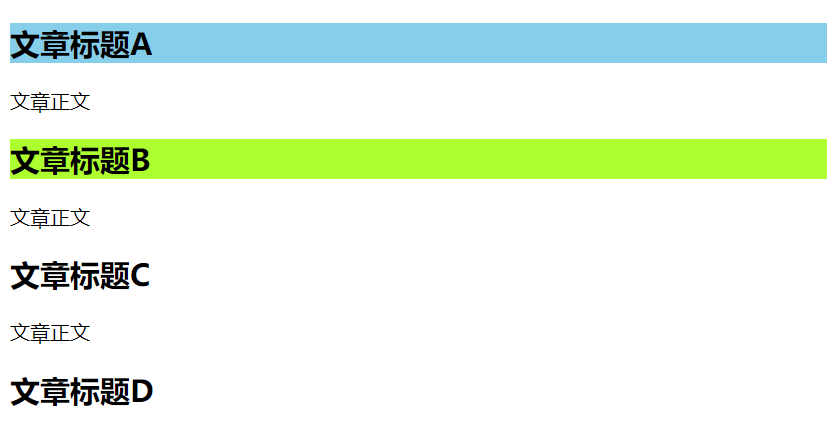
nth-of-type()、nth-last-of-type()选择器
假设我们现在有以下所示的示例页面结构,现在我们要实现 div 元素中的第一个 h2 子元素的背景颜色是天蓝色,第一个 h2 子元素的背景颜色是黄绿色。
<!DOCTYPE html>
<html lang="en">
<head>
  <meta charset="UTF-8">
  <meta http-equiv="X-UA-Compatible" content="IE=edge">
  <meta name="viewport" content="width=device-width, initial-scale=1.0">
  <title>Document</title>
</head>
<body>
  <div>
    <h2>文章标题A</h2>
    <p>文章正文</p>
    <h2>文章标题B</h2>
    <p>文章正文</p>
    <h2>文章标题C</h2>
    <p>文章正文</p>
    <h2>文章标题D</h2>
    <p>文章正文</p>
  </div>
</body>
</html>
如果我们使用前面的 h2:nth-child(1)、h2:nth-child(2) 来指定,出来的效果是第一个标题 h2 是天蓝色,但第一个标题却没有颜色,并不是我们想要的。
h2:nth-child(1) {
  background-color: skyblue;
}
h2:nth-child(2) {
  background-color: greenyellow;
}
这个问题的产生原因在于:nth-child 选择器在计算子元素时,是计算 div 父元素中的所有子元素的,而根据结构可以看出,第二个子元素是 p 元素,并不是 h2 元素,所以第二个元素 h2 并没有作用到。
这里就可以通过 nth-of-type() 来指定。CSS3 中,nth-of-type 在计算子元素时,就只会针对同类型的子元素进行计算。所以这里我们将代码修改如下,最终效果达到预期。nth-last-of-type 同理。
<!DOCTYPE html>
<html lang="en">
<head>
  <meta charset="UTF-8">
  <meta http-equiv="X-UA-Compatible" content="IE=edge">
  <meta name="viewport" content="width=device-width, initial-scale=1.0">
  <title>Document</title>
  <style>
    h2:nth-of-type(1) {
      background-color: skyblue;
    }
    h2:nth-of-type(2) {
      background-color: greenyellow;
    }
  </style>
</head>
<body>
  <div>
    <h2>文章标题A</h2>
    <p>文章正文</p>
    <h2>文章标题B</h2>
    <p>文章正文</p>
    <h2>文章标题C</h2>
    <p>文章正文</p>
    <h2>文章标题D</h2>
    <p>文章正文</p>
  </div>
</body>
</html>
循环使用样式
在下面结构中,我们可以看见该列表中前四个列表项目的背景色已设定好,其他列表项目的背景色均未设定。
<!DOCTYPE html>
<html lang="en">
<head>
  <meta charset="UTF-8">
  <meta http-equiv="X-UA-Compatible" content="IE=edge">
  <meta name="viewport" content="width=device-width, initial-scale=1.0">
  <title>Document</title>
  <style>
    li:nth-child(1) {
      background-color: greenyellow;
    }
    li:nth-child(2) {
      background-color: limegreen;
    }
    li:nth-child(3) {
      background-color: skyblue;
    }
    li:nth-child(4) {
      background-color: slateblue;
    }
  </style>
</head>
<body>
  <ul>
    <li>列表1</li>
    <li>列表2</li>
    <li>列表3</li>
    <li>列表4</li>
    <li>列表5</li>
    <li>列表6</li>
    <li>列表7</li>
    <li>列表8</li>
    <li>列表9</li>
    <li>列表10</li>
  </ul>
</body>
</html>
现在,开发者想对所有的列表项目都设定背景色,但是不采用这种一个个列表项目分别指定的方式(如果有100个列表项目的话,工作量就太大了),而是采用循环指定的方式,让剩下来的列表项目循环采用一开始已经指定好的背景色,应该怎么处理呢?
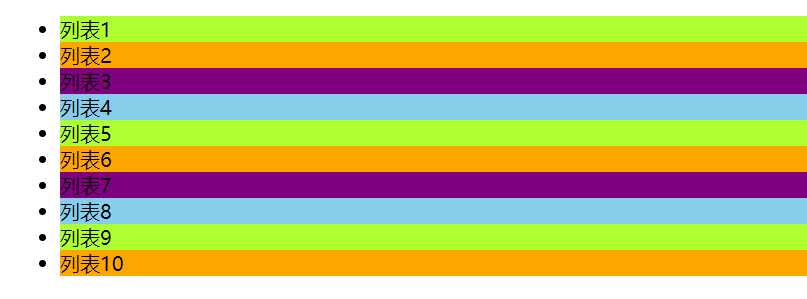
这里,仍然可以采用 nth-child() 选择器,只需在“nth-child(n)”语句处,把参数 n 改成可循环的 an+b 的形式就可以了。a 表示每次循环中共包括几种样式,b 表示指定的样式在循环中所处位置。像这里是 4 种样式为一组循环,每个位置的颜色如下所示。
li:nth-child(4n+1) {
  background-color: greenyellow;
}
li:nth-child(4n+2) {
  background-color: limegreen;
}
li:nth-child(4n+3) {
  background-color: skyblue;
}
li:nth-child(4n+4) {
  background-color: slateblue;
}
最终对比效果如下图所示。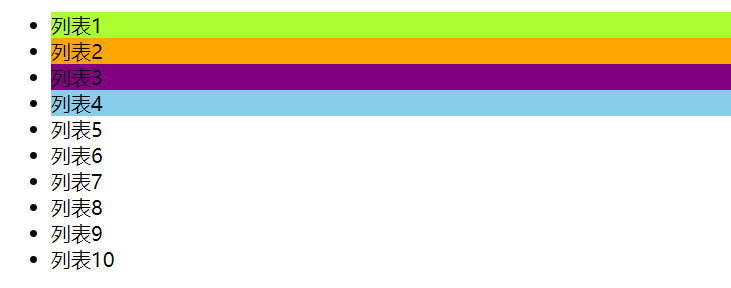
only-child选择器
采用如下所示的方法并结合运用 nth-child 选择器与 nth-last-child 选择器,可指定当某个父元素中只有一个子元素时才使用的样式。另外也可以使用 only-child 来替代使用“nth-child(1):nth-last-child(1)”的实现方法。
<!DOCTYPE html>
<html lang="en">
<head>
  <meta charset="UTF-8">
  <meta http-equiv="X-UA-Compatible" content="IE=edge">
  <meta name="viewport" content="width=device-width, initial-scale=1.0">
  <title>Document</title>
  <style>
        /* 使用nth-child(1):nth-last-child(1)方式 */
    li:nth-child(1):nth-last-child(1) {
      background-color: skyblue;
    }

        /* 使用only-child方式 */
        li:only-child {
      background-color: skyblue;
    }
  </style>
</head>
<body>
  <ul>
    <li>列表1</li>
    <li>列表2</li>
    <li>列表3</li>
    <li>列表4</li>
  </ul>
  <ul>
    <li>列表1</li>
  </ul>
</body>
</html>
两种方式的最终效果都如下所示。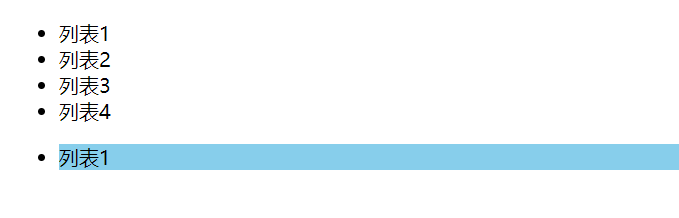
UI元素状态伪类选择器
CSS3 中除了结构性伪类选择器,还有一种 UI 元素状态伪类选择器。
这些选择器的共同特征是:指定的样式只有当元素处于某种状态下时才起作用,在默认状态下不起作用。
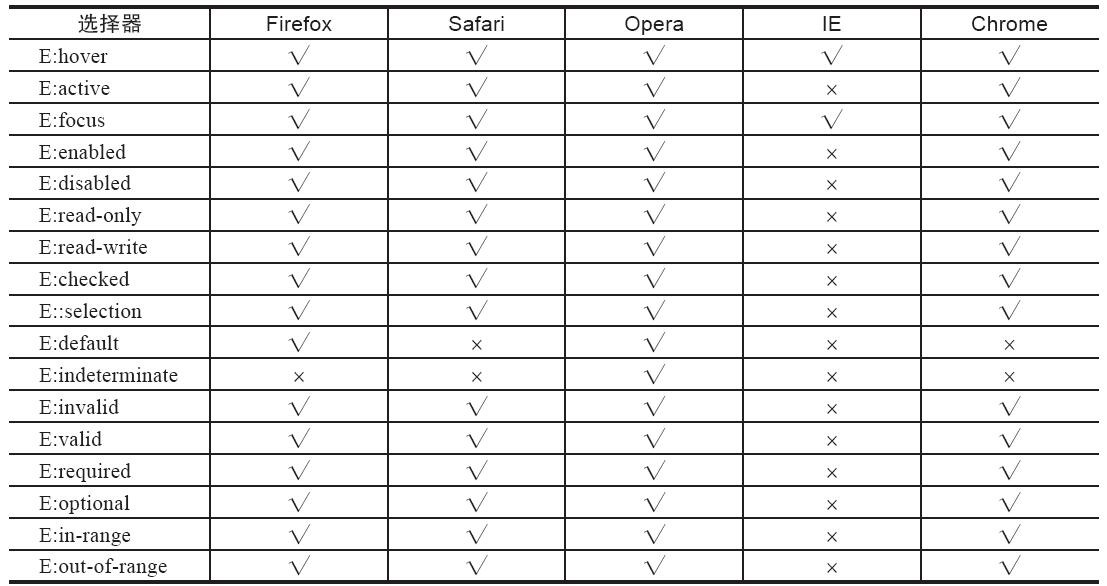
到目前为止,这17种选择器被浏览器的支持情况如表所示。
E:hover、E:active和E:focus选择器
E:hover 指定当鼠标指针移动到元素上时元素所使用的样式。
E:active 指定元素被激活(鼠标在元素上按下还没有松开)时使用的样式。
E:focus 指定元素获得光标焦点时使用的样式。
<!DOCTYPE html>
<html lang="en">
<head>
  <meta charset="UTF-8">
  <meta http-equiv="X-UA-Compatible" content="IE=edge">
  <meta name="viewport" content="width=device-width, initial-scale=1.0">
  <title>Document</title>
  <style>
    input[type="text"]:hover{
      background-color: skyblue;
    }
    input[type="text"]:focus{
      background-color: slateblue;
    }
    input[type="text"]:active{
      background-color: yellowgreen;
    }
  </style>
</head>
<body>
  <p>
    <input type="text" name="name" />
  </p>
</body>
</html>
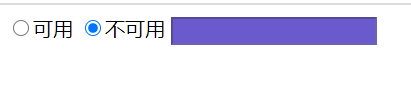
E:enabled与E:disabled选择器
E:enabled 指定当元素处于可用状态时的样式。
E:disabled 指定当元素处于不可用状态时的样式。
<!DOCTYPE html>
<html lang="en">
<head>
  <meta charset="UTF-8">
  <meta http-equiv="X-UA-Compatible" content="IE=edge">
  <meta name="viewport" content="width=device-width, initial-scale=1.0">
  <title>Document</title>
  <style>
    input[type="text"]:enabled{
      background-color: skyblue;
    }
    input[type="text"]:disabled{
      background-color: slateblue;
    }
  </style>
</head>
<body>
  <input type="radio" name="radio" id="radio1" onchange="radio_change();" />可用
  <input type="radio" name="radio" id="radio2" onchange="radio_change();" />不可用
  <input type="text" id="text1" disabled />
</body>
</html>
<script>
  function radio_change() {
    var radio = document.getElementById('radio1');
    var text = document.getElementById('text1');
    if(radio.checked) {
      text.disabled = "";
    } else {
      text.value="";
      text.disabled="disabled";
    }
  }
</script>

E:read-only与E:read-write选择器
E:read-only 指定当元素处于只读状态时的样式。
E:read-write 指定当元素处于非只读状态时的样式。
<!DOCTYPE html>
<html lang="en">
<head>
  <meta charset="UTF-8">
  <meta http-equiv="X-UA-Compatible" content="IE=edge">
  <meta name="viewport" content="width=device-width, initial-scale=1.0">
  <title>Document</title>
  <style>
    input[type="text"]:read-only{
      background-color: skyblue;
    }
    input[type="text"]:read-write{
      background-color: pink;
    }
  </style>
</head>
<body>
  <input type="text" name="name" value="非只读" />
  <input type="text" name="name" value="只读" readonly="readonly" />
</body>
</html>

E:checked、E:default和E:indeterminate选择器
E:checked 指定当表单中的 radio 单选框或 checkbox 复选框处于选取状态时的样式。
E:default 指定当页面打开时,默认处于选取状态的单选框或复选框控件的样式。当用户更改选取状态为非选取,E:default 设定的样式依然有效。
E:indeterminate 指定当页面打开时,一组单选框中没有任何一个单选框被设定为选取状态时整组单选框的样式,如果用户选取了其中任何一个单选框,则该样式被取消指定。
<!DOCTYPE html>
<html lang="en">
<head>
  <meta charset="UTF-8">
  <meta http-equiv="X-UA-Compatible" content="IE=edge">
  <meta name="viewport" content="width=device-width, initial-scale=1.0">
  <title>Document</title>
  <style>
    input[type="text"]:checked {
      border: 2px solid blue;
    }
    input[type="text"]:default {
      border: 2px solid blue;
    }
    input[type="text"]:indeterminate {
        border: 2px solid blue;
    }
  </style>
</head>
<body>
  <input type="checkbox" checked="checked">阅读</input>
  <input type="checkbox" >旅游<br>
  <input type="checkbox" >上网<br>
</body>
</html>
chrome 和 firefox 上测试没有效果,这里暂且放着。
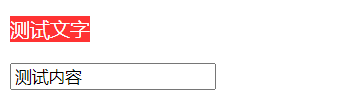
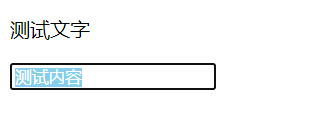
E::selection选择器
E::selection 指定当用鼠标选中元素时的样式。
<!DOCTYPE html>
<html lang="en">
<head>
  <meta charset="UTF-8">
  <meta http-equiv="X-UA-Compatible" content="IE=edge">
  <meta name="viewport" content="width=device-width, initial-scale=1.0">
  <title>Document</title>
  <style>
    p::selection{
      background-color: red;
      color: #fff;
    }
    input[type="text"]::selection{
      background-color: skyblue;
      color: #fff;
    }
  </style>
</head>
<body>
  <p>测试文字</p>
  <input type="text" value="测试内容" />
</body>
</html>
E:invalid与E:valid选择器
E:invalid 当元素内容不能校验通过元素的诸如 required、pattern 等属性所指定的规则时的格式。
E:valid 当元素内容能校验通过元素的诸如 required、pattern 等属性所指定的规则时的格式。
<!DOCTYPE html>
<html lang="en">
<head>
  <meta charset="UTF-8">
  <meta http-equiv="X-UA-Compatible" content="IE=edge">
  <meta name="viewport" content="width=device-width, initial-scale=1.0">
  <title>Document</title>
  <style>
    input[type="text"]:invalid{
     border: 1px solid red;
    }
    input[type="text"]:valid {
      background-color: skyblue;
    }
  </style>
</head>
<body>
  <input type="text" required />
</body>
</html>
不通过校验时,边框是红色,当通过验证时,背景色是天蓝色。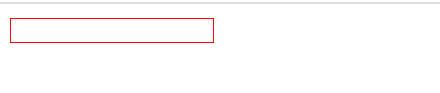

E:required与E:optional选择器
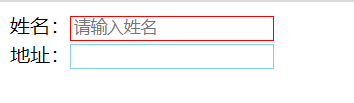
E:required 指定允许使用 required 属性,并且已经指定了 required 属性的 input 元素、select 元素以及 textarea 元素的样式。
E:optional 指定允许使用 required 属性,并且未指定 required 属性的 input 元素、select 元素以及 textarea 元素的样式。
<!DOCTYPE html>
<html lang="en">
<head>
  <meta charset="UTF-8">
  <meta http-equiv="X-UA-Compatible" content="IE=edge">
  <meta name="viewport" content="width=device-width, initial-scale=1.0">
  <title>Document</title>
  <style>
    input[type="text"]:required{
     border: 1px solid red;
    }
    input[type="text"]:optional {
      border: 1px solid skyblue;
    }
  </style>
</head>
<body>
  <!-- 支持 required 并且指定了 required -->
  姓名:<input type="text" required placeholder="请输入姓名" /><br>
  <!-- 支持 required 但没指定 required -->
  地址:<input type="text" /><br>
</body>
</html>
E:in-range与E:out-of-range选择器
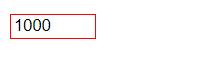
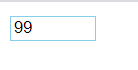
E:in-range 指定当元素的有效值被限定在一段范围之内(min, max 之间),且实际输入值在该范围内时使用的样式。
E:out-of-range 指定当元素的有效值被限定在一段范围之内(min, max 之间),但实际输入值在该范围之外时使用的样式。
<!DOCTYPE html>
<html lang="en">
<head>
  <meta charset="UTF-8">
  <meta http-equiv="X-UA-Compatible" content="IE=edge">
  <meta name="viewport" content="width=device-width, initial-scale=1.0">
  <title>Document</title>
  <style>
    input[type="text"]:in-range{
     border: 1px solid skyblue;
    }
    input[type="text"]:out-of-range {
      border: 1px solid red;
    }
  </style>
</head>
<body>
  <input type="number" min=0 max=100 />
</body>
</html>
兄弟元素选择器
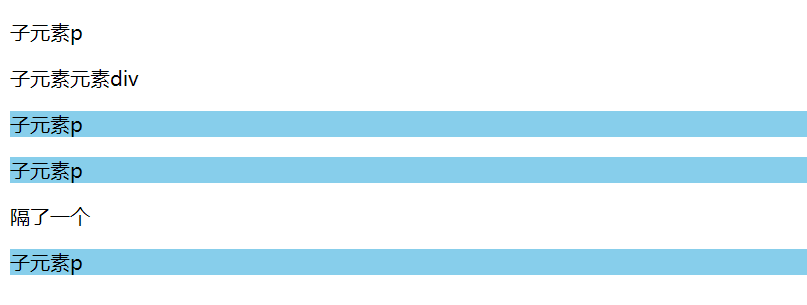
通用兄弟元素选择器
通用兄弟元素选择器,是指定位于同一个父元素之中的某个元素之后的所有其他某个种类的兄弟元素所使用的样式。 :::info 注意这里是之后的一类元素,在前面的元素不受作用。 :::
<!DOCTYPE html>
<html lang="en">
<head>
  <meta charset="UTF-8">
  <meta http-equiv="X-UA-Compatible" content="IE=edge">
  <meta name="viewport" content="width=device-width, initial-scale=1.0">
  <title>Document</title>
  <style>
    .son ~p {
      background-color: skyblue;
    }
  </style>
</head>
<body>
  <div>
    <!-- 这个元素不受作用 -->
    <p>子元素p</p>

    <div class="son">子元素元素div</div>
    <p>子元素p</p>
    <p>子元素p</p>
    <div>隔了一个</div>
    <p>子元素p</p>
  </div>
</body>
</html>
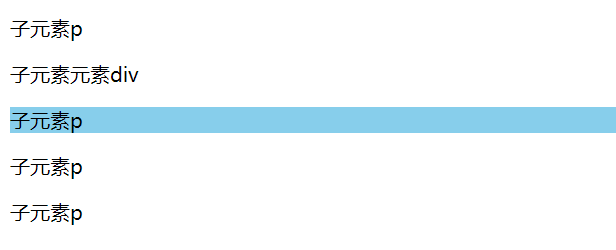
相邻兄弟元素选择器
这个与上面的类似,不过只有第一个匹配到的兄弟元素受作用。
<!DOCTYPE html>
<html lang="en">
<head>
  <meta charset="UTF-8">
  <meta http-equiv="X-UA-Compatible" content="IE=edge">
  <meta name="viewport" content="width=device-width, initial-scale=1.0">
  <title>Document</title>
  <style>
    .son +p {
      background-color: skyblue;
    }
  </style>
</head>
<body>
  <div>
    <p>子元素p</p>
    <div class="son">子元素元素div</div>
    <p>子元素p</p>
    <p>子元素p</p>
    <p>子元素p</p>
  </div>
</body>
</html>
to be continue…

若有收获,就点个赞吧
0 人点赞
