默认你已经安装了7.6.0以上版本的node
安装项目脚手架(非官方)
npm install koa-generator -g
创建项目
koa2 项目名称
安装依赖
npm install
启动服务
npm start
这一步执行完成之后打开浏览器输入http://localhost:3000/ 如果可以看到以下文字就说明搭建成功了
Hello Koa 2!
Welcome to Hello Koa 2!
安装sequelize
npm install sequelize --save
Sequelize是一个基于promise的nodejs ORM,目前支持Postgres、mysql、SQLite和Microsoft SQL Server。它具有强大的事务支持,关联关系,读取和复制等功能。
安装mysql、mysql2
npm install mysql mysql2 --save
项目需要mysql数据库的支持
配置Sequelize以连接数据库
在项目的根目录下创建一个config目录,在config目录中创建db.js文件,用于连接mysql数据库
const Sequelize = require('sequelize'); //引入sequelize/*** 实例化Sequelize* @param database, [username=null], [password=null], [options={}]*/const sequelize = new Sequelize('todolist', 'root', 'root', {host: 'localhost',dialect: 'mysql',operatorsAliases: false,dialectOptions: {//字符集charset: 'utf8mb4',collate: 'utf8mb4_unicode_ci',supportBigNumbers: true,bigNumberStrings: true,useUTC: false //是否从数据库中读取时区},pool: {max: 5,min: 0,acquire: 30000,idle: 10000},define: {timestamps: false},timezone: '+08:00' //东八时区});module.exports = {sequelize};
创建模型(Model)
在项目的根目录下创建一个schema目录,在schema目录中创建user.js,用于建立和数据表的对应关系
module.exports = function (sequelize, DataTypes) {/*** 实例化Sequelize* @param modelName, attributes, [options]* @returns {Promise<Model>}* 这个实例方法用于定义一个新Model(模型)。Model相当于数据库中的表,该对象不能通过构造函数实例化,而只能通过sequelize.define()或sequelize.import()方法创建。* 表中的字段通过第二个参数对象attributes来定义,对象中的一个属性相当于表中的一个字段。*/return sequelize.define('todolist_user', {//用户IDuser_id: {type: DataTypes.INTEGER,primaryKey: true,allowNull: true,autoIncrement: true},//用户名user_name: {type: DataTypes.STRING,allowNull: false,field: 'user_name'},// 创建时间creat_time: {type: DataTypes.DATE},// 更新时间updat_time: {type: DataTypes.DATE}}, {/*** 如果为true,则表示对应的表名和model相同,即user* 如果为fasle,mysql创建的表名称会是复数,即users* 如果指定的表名称本身就是复数,则形式不变*/freezeTableName: true});}
也可以使用 Sql语句创建表,但是schema目录下user.js文件中的表名以及对象属性一定要和数据库中的表名和字段一一对应
CREATE TABLE `todolist_user` (`user_id` INT(11) NOT NULL AUTO_INCREMENT,`user_name` VARCHAR(255) NOT NULL,`creat_time` TIMESTAMP DEFAULT CURRENT_TIMESTAMP,`updat_time` TIMESTAMP DEFAULT CURRENT_TIMESTAMP ON UPDATE CURRENT_TIMESTAMP,PRIMARY KEY (`user_id`)) ENGINE=INNODB AUTO_INCREMENT=4 DEFAULT CHARSET=utf8
数据库表结构
| Field | Type | Collation | Key | Default | Extra |
|---|---|---|---|---|---|
| user_id | int(11) | (NULL) | PRI | (NULL) | auto_increment |
| user_name | varchar(255) | utf8_general_ci | (NULL) | ||
| creat_time | timestamp | (NULL) | CURRENT_TIMESTAMP | DEFAULT_GENERATED | |
| updat_time | timestamp | (NULL) | CURRENT_TIMESTAMP | DEFAULT_GENERATED on update CURRENT_TIMESTAMP |
使用模型
在项目的根目录下创建一个modules目录,在modules目录中创建user.js文件,用来处理数据
// 引入mysql的配置文件const db = require('../config/db');// 引入sequelize对象const Sequelize = db.sequelize;// 引入数据表模型const User = Sequelize.import('../schema/user');User.sync({ force: false });class UserModel {/*** 新增用户* @param data* @returns {Promise<*>}*/static async createUser(data) {return await User.create({user_name: data.user_name, //用户名});}/*** 查询用户* @param user_id 用户ID* @returns {Promise<Model>}*/static async getUserDetail(user_id) {return await User.findOne({where: {user_id}});}}module.exports = UserModel;
创建及使用控制器
在项目的根目录下创建一个controller目录,在controller目录中创建user.js文件,用来处理业务逻辑
const UserModel = require("../modules/user");class userController {/*** 新增用户* @param ctx* @returns {Promise.<void>}*/static async create(ctx) {//接收客服端let req = ctx.request.body;if (req.user_name) {try {//新增用户const ret = await UserModel.createUser(req);//使用刚刚创建的用户ID查询用户名const data = await UserModel.getUserDetail(ret.user_id);ctx.response.status = 200;ctx.body = {code: 200,msg: '新增成功',data}} catch (err) {ctx.response.status = 412;ctx.body = {code: 412,msg: '新增失败',data: err}}} else {ctx.response.status = 416;ctx.body = {code: 200,msg: '缺少参数'}}}/*** 查询用户* @param ctx* @returns {Promise.<void>}*/static async detail(ctx) {let req = ctx.request.body;// let user_id = ctx.params.user_id;let user_id = req.user_id;if (user_id) {try {// 查询用户let data = await UserModel.getUserDetail(user_id);ctx.response.status = 200;ctx.body = {code: 200,msg: data !== null ? '查询成功' : '该用户不存在',data: data !== null ? data : { user_name: '该用户不存在' }}} catch (err) {ctx.response.status = 412;ctx.body = {code: 412,msg: '查询失败',data}}} else {ctx.response.status = 416;ctx.body = {code: 416,msg: '缺少user_id'}}}}module.exports = userController;
配置API路径
在项目的根目录下找到routes目录,在routes目录中创建user.js文件,用来定义API接口路径
const Router = require('koa-router');const UserController = require('../controllers/user');const router = new Router({prefix: '/api' //API前缀});/*** 用户接口*///新增用户router.post('/user/create', UserController.create);//查询用户router.post('/user', UserController.detail)module.exports = router
在项目的根目录下找到app.js文件,然后在该文件内引入配置好的route
const user = require('./routes/user')// routesapp.use(user.routes(), user.allowedMethods())
再次启动服务
npm start
在启动过程中如果你看到以下信息,就说明启动成功了
> todolist@0.1.0 start D:\dev\todolist> node bin/wwwkoa deprecated Support for generators will be removed in v3. See the documentation for examples of how to convert old middleware https://github.com/koajs/koa/blob/master/docs/migration.md app.js:14:5(node:246648) [SEQUELIZE0004] DeprecationWarning: A boolean value was passed to options.operatorsAliases. This is a no-op with v5 and should be removed.Ignoring invalid configuration option passed to Connection: collate. This is currently a warning, but in future versions of MySQL2, an error will be thrown if you pass an invalid configuration options to a ConnectionIgnoring invalid configuration option passed to Connection: useUTC. This is currently a warning, but in future versions of MySQL2, an error will be thrown if you pass an invalid configuration options to a ConnectionIgnoring invalid configuration option passed to Connection: collate. This is currently a warning, but in future versions of MySQL2, an error will be thrown if you pass an invalid configuration options to a ConnectionIgnoring invalid configuration option passed to Connection: useUTC. This is currently a warning, but in future versions of MySQL2, an error will be thrown if you pass an invalid configuration options to a ConnectionExecuting (default): CREATE TABLE IF NOT EXISTS `todolist_user` (`user_id` INTEGER auto_increment , `user_name` VARCHAR(255) NOT NULL, `creat_time` DATETIME, `updat_time` DATETIME, PRIMARY KEY (`user_id`)) ENGINE=InnoDB;Executing (default): SHOW INDEX FROM `todolist_user`
测试API
使用postman作为API测试工具,自行前往postman官网下载
安装好postman之后,开始进行API测试,首先打开routes目录下的user.js文件,找到以下代码,它们就是我们需要用到的API地址
prefix: '/api' //API前缀//新增用户router.post('/user/create', UserController.create);//查询用户router.post('/user', UserController.detail)
打开postman,将请求类型改为POST,在Enter request URL文本框中输入http://localhost:3000/api/user/create,然后点击Send 按钮发送请求,如下图
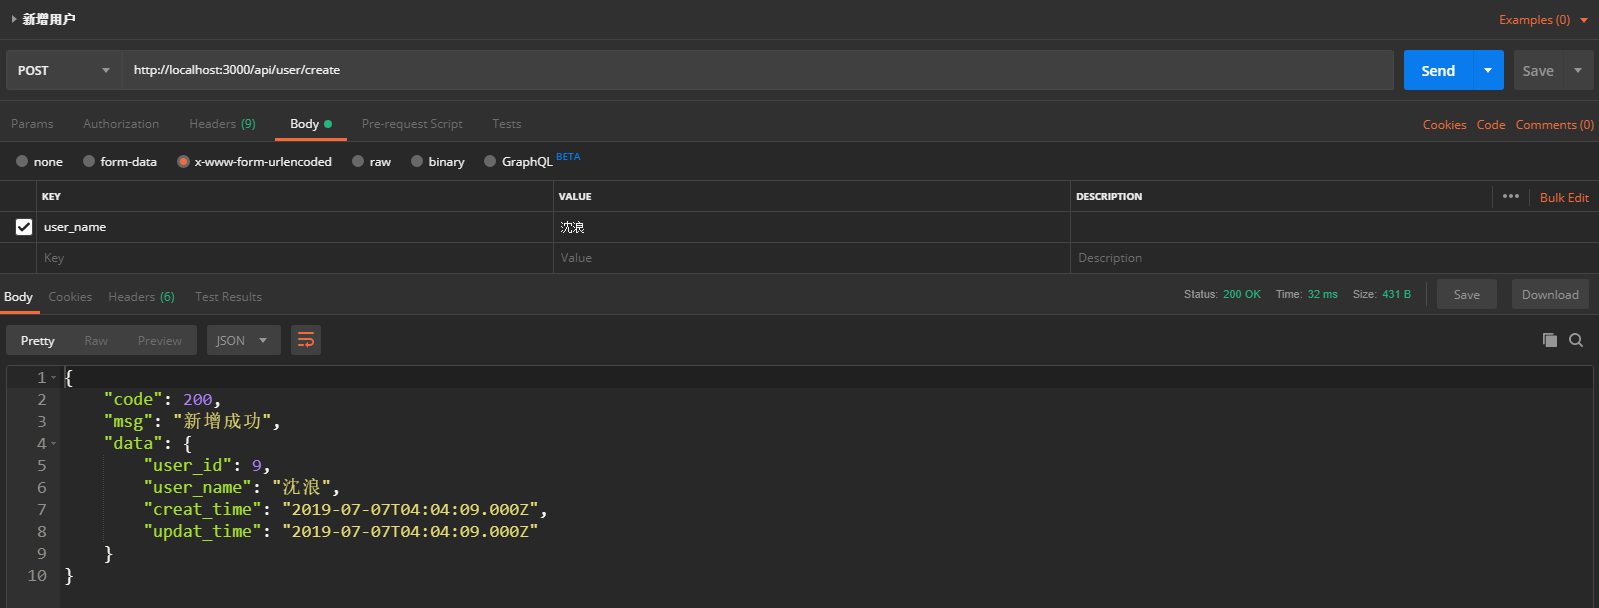
可以看到请求已经发送成功并返回了数据,查询同理不再复述
- 在数据库中查看数据是否插入
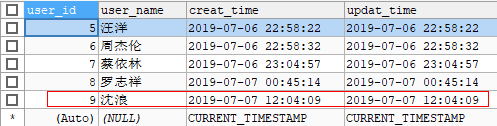
数据已经成功插入数据库
解决跨域(Cross-Origin Resource Sharing)
跨域资源共享(CORS) 是一种机制,它使用额外的 HTTP 头来告诉浏览器 让运行在一个 origin (domain) 上的Web应用被准许访问来自不同源服务器上的指定的资源。当一个资源从与该资源本身所在的服务器不同的域、协议或端口请求一个资源时,资源会发起一个跨域 HTTP 请求。
安装koa-cors
npm install koa-cors --save
在项目的根目录下找到app.js文件,然后在该文件内加入koa-cors的引用
const cors = require('koa-cors') //引入corsapp.use(cors()) //使用cors
结束
到此使用koa2编写接口的工作已经做完,koa2的使用细则请大家查看文档,下一步搭建node本地服务器
推荐

若有收获,就点个赞吧
0 人点赞
