本文大部分采用Kotlin实现(与Java实现差别不大) :::warning Spring Security OAuth 已被废弃。Spring Security 建议大家从 Spring Security OAuth 迁移到 Spring Security 上,他们有一个迁移指南以供参考。[2] :::
鉴权服务Authorization Server
依赖
<dependency><groupId>org.springframework.boot</groupId><artifactId>spring-boot-starter-oauth2-resource-server</artifactId></dependency><dependency><groupId>org.springframework.boot</groupId><artifactId>spring-boot-starter-web</artifactId></dependency><dependency><groupId>org.springframework.cloud</groupId><artifactId>spring-cloud-starter-oauth2</artifactId></dependency>
<dependencyManagement>
  <dependencies>
    <dependency>
      <groupId>org.springframework.cloud</groupId>
      <artifactId>spring-cloud-dependencies</artifactId>
      <version>Hoxton.SR1</version>
      <type>pom</type>
      <scope>import</scope>
    </dependency>
  </dependencies>
</dependencyManagement>
:::warning Spring Cloud 版本必须与 Spring Boot 版本相匹配,兼容性矩阵可以在 https://start.spring.io/actuator/info 上查阅,我用的是 Spring Cloud 2020.0.3 和 Spring Boot 5.3 ::: Client要调用Authorization Server的服务,必须要有自己的凭证(credentials)。鉴权服务器会管理这些凭证并且仅仅允许known client对其发起请求。
比如说GitHub, 你可以访问 https://github.com/settings/developers 注册一个 client,你会获得一个 client id 和 secret,这就是你的 client 凭证。用这个凭证你才能访问鉴权服务器。
与 UserDetail 类似,认证服务器有一个实体类 ClientDetail 对应 client。可以检索 client 的 Component 就是 ClientDetailsService。
与 UserDetailsService相似,Spring Security 也提供了简单的实现
InMemoryClientDetailsService(对应InMemoryUserDetailsManager)JdbcClientDetailsService(对应JdbcUserDetailsManager)
:::warning 在 JDK 8 以上的版本运行的话会有一个问题,问题出在JAXB这个包上,JAXB的作用是将XML转换为Java类,Java对象。解决办法是加一个JVM参数/** * 配置 ClientDetailsService **/ override fun configure(clients: ClientDetailsServiceConfigurer?) { // 创建InMemory实现实例 val service = InMemoryClientDetailsService() // 创建基本 ClientDetails val cd = BaseClientDetails() cd.clientId = "client" cd.clientSecret = "secret" cd.setScope(listOf("read")) cd.setAuthorizedGrantTypes(listOf("password")) // 注册到 InMemory 上 service.setClientDetailsStore(mapOf("client" to cd)) // 注册到认证服务上 clients?.withClientDetails(service) }--illegal-access=permit。 ::: 写好配置以后用 cURL 试一下
结果却是Bad credentials,怎么回事呢?curl -v -XPOST -u client:secret http://localhost:8080/oauth/token?grant_type=password&username=john&password=12345&scope=read
看cURL的日志可以发现原来 & 被 bash 理解为{ "error": "invalid_grant", "error_description": "Bad credentials" }AND符号了 ```
- Connected to localhost (::1) port 8080 (#0)
- Server auth using Basic with user ‘client’
POST /oauth/token?grant_type=password HTTP/1.1 Host: localhost:8080 Authorization: Basic Y2xpZW50OnNlY3JldA== User-Agent: curl/7.74.0 Accept: /
修改一下
```bash
curl -v -XPOST -u client:secret "http://localhost:8080/oauth/token?grant_type=password&username=john&password=12345&scope=read"
我们成功得到了access token,你可以发现默认配置下 access token 是一个 UUID。
{
"access_token": "d47bbbc5-1ec1-4b7b-a663-2b63af4f2eb4",
"token_type": "bearer",
"expires_in": 43199,
"scope": "read"
}
授权类型(Grant Type)
grant type 就是你取得 access token的方式,分为以下三种
- 密码授权password grant type
- 鉴权码授权authorization code grant type
- 用户凭证授权client credentials grant type
- 刷新码授权 refresh token grant type
鉴权码(authorization code)
访问 http://localhost:8080/oauth/authorize?response_type=code&client_id=client&scope=read
用john,12345登录成功后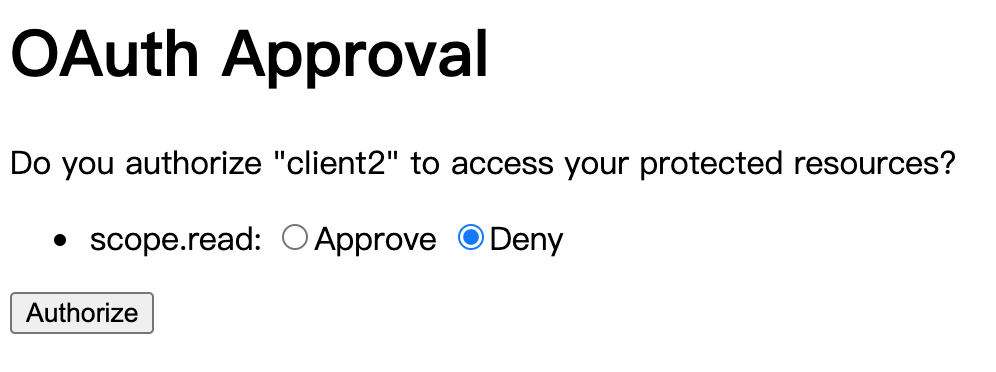
Approve 以后,会重定向到 http://localhost:9090/home?code=XV791u, 其中XV791u是授权码,因人而异。curl -v -XPOST -u client2:secret "http://localhost:8080/oauth/token?grant_type=authorization_code&scope=read&code=XV791u"{ "timestamp":"2021-07-25T04:35:48.796+00:00", "status":401, "error":"Unauthorized", "message":"Unauthorized", "path":"/oauth/token" }用户凭证授权
curl -v -XPOST -u client3:secret "http://localhost:8080/oauth/token?grant_type=client_credentials&scope=info"{ "access_token": "5691c7c1-fa6d-4f90-a44f-05f4accd9e64", "token_type": "bearer", "expires_in": 43199, "scope": "info" }刷新码授权
启用刷新码授权后,用password方式取得授权时会多一项refresh_tokencurl -v -XPOST -u client2:secret2 "http://localhost:8080/oauth/token?grant_type=password&username=john&password=12345&scope=read"{ "access_token": "040ad147-a055-4573-a5ad-c5a8938b4639", "token_type": "bearer", "refresh_token": "4e9ebdb8-6b10-4c41-83ae-e10166456de7", "expires_in": 43199, "scope": "read" }资源服务 Resource Server
用 cURL 测试鉴权服务器(127.0.1.2)。curl -v -XPOST -u client:secret "http://127.0.1.2:8080/oauth/token?grant_type=password&username=john&password=12345&scope=read"
在鉴权服务器上测试一下我们的token{ "access_token": "8ae78467-e258-4a90-94d9-56564528be5b", "token_type": "bearer", "refresh_token": "97c1f7dc-8fac-4cd3-bb46-9c454c63710b", "expires_in": 43199, "scope": "read" }curl -XPOST -u resourceserver:resourceserversecret "http://127.0.1.2:8080/oauth/check_token?token=8ae78467-e258-4a90-94d9-56564528be5b"{ "active":true, "exp":1627238328, "user_name":"john", "authorities":["read"], "client_id":"client", "scope":["read"] }依赖
<dependency>
<groupId>org.springframework.boot</groupId>
<artifactId>spring-boot-starter-oauth2-resource-server</artifactId> </dependency> <dependency>
 <groupId>org.springframework.boot</groupId>
 <artifactId>spring-boot-starter-web</artifactId>
</dependency>
<dependency>
<groupId>org.springframework.cloud</groupId>
<artifactId>spring-cloud-starter-oauth2</artifactId>
</dependency>
给资源服务器配置一下token验证URI<dependencyManagement> <dependencies> <dependency> <groupId>org.springframework.cloud</groupId> <artifactId>spring-cloud-dependencies</artifactId> <version>2020.0.3</version> <type>pom</type> <scope>import</scope> </dependency> </dependencies> </dependencyManagement>
让 cURL 拿着 Access Token 访问 Resource Serversecurity.oauth2.resource.token-info-uri=http://127.0.1.2:8080/oauth/check_token security.oauth2.client.client-id=resourceserver security.oauth2.client.client-secret=resourceserversecret
:::warningcurl -H "Authorization: bearer 8ae78467-e258-4a90-94d9-56564528be5b" "http://127.0.1.1:8080/hello"nc作为一个实用小工具可以帮你在两个机器之间通信nc -l 3333nc $IP 3333:::用 Spring Security 实现 Resource Server
上面我们介绍的是如何使用 Spring Security OAuth (已废弃)实现,实际上你用 Spring Security 也可以实现这样的功能依赖
<dependency>
 <groupId>org.springframework.boot</groupId>
 <artifactId>spring-boot-starter-oauth2-resource-server</artifactId>
</dependency>
<dependency>
 <groupId>org.springframework.security</groupId>
 <artifactId>spring-security-oauth2-resource-server</artifactId>
</dependency>
<dependency>
 <groupId>com.nimbusds</groupId>
 <artifactId>oauth2-oidc-sdk</artifactId>
 <scope>runtime</scope>
</dependency>
用 cURL 测试一下override fun configure(http: HttpSecurity?) { http!! .authorizeRequests() .anyRequest() .authenticated() .and() .oauth2ResourceServer { c -> c.opaqueToken { o -> o.introspectionUri("http://127.0.1.2:8080/oauth/check_token") o.introspectionClientCredentials("client", "secret") } } }curl -H "Authorization: bearer 8ae78467-e258-4a90-94d9-56564528be5b" "http://127.0.1.3:8080/hello"在数据库中存储Token
:::info 这种形式称为 blackboarding,资源服务直接访问数据库,而不再像鉴权服务发起请求来 check token。 :::鉴权服务
``sql CREATE TABLE IF NOT EXISTSoauth_access_token(token_idvarchar(255) NOT NULL,tokenblob,authentication_idvarchar(255) DEFAULT NULL,user_namevarchar(255) DEFAULT NULL,client_idvarchar(255) DEFAULT NULL,authenticationblob,refresh_tokenvarchar(255) DEFAULT NULL, PRIMARY KEY (token_id`) );
CREATE TABLE IF NOT EXISTS oauth_refresh_token
(
token_id varchar(255) NOT NULL,
token blob,
authentication blob,
PRIMARY KEY (token_id)
);
用 cURL 测试一下
```bash
curl -v -XPOST -u client:secret "http://127.0.1.2:8080/oauth/token?grant_type=password&username=john&password=12345&scope=read"
{
    "access_token":"00e10683-a896-4a98-a9ec-5775c3ed1e6c",
    "token_type":"bearer",
    "refresh_token":"debd7db1-9ac4-41ce-b60b-1210e74f7c3b",
    "expires_in":43199,
    "scope":"read"
}
表 oauth_access_token中会多一条 access token 的记录,oauth_refresh_token中会多一条 refresh token的记录。
资源服务
用 cURL 测试一下
curl -H "Authorization:Bearer 00e10683-a896-4a98-a9ec-5775c3ed1e6c" "http://127.0.1.1:8080/hello"
可以发现这种方式就不需要额外的 check_token 端点了。
以密码学方式(AES)
用 cURL 测试一下
curl -v -XPOST -u client:secret "http://127.0.1.2:8080/oauth/token?grant_type=password&username=john&password=12345&scope=read"
{
  "access_token":"eyJhbGciOiJIUzI1NiIsInR5cCI6IkpXVCJ9.eyJleHAiOjE2MjcyNTA2NjEsInVzZXJfbmFtZSI6ImpvaG4iLCJhdXRob3JpdGllcyI6WyJyZWFkIl0sImp0aSI6ImMxNjc0NDA5LTczOTgtNGE0Ny04ODFiLWU2MjAyYWUzN2Y0ZiIsImNsaWVudF9pZCI6ImNsaWVudCIsInNjb3BlIjpbInJlYWQiXX0.JWwBGqtdNS-MCkF9LGykL6mKLAeqhqkUyTzh2lSPMo0",
  "token_type":"bearer",
  "refresh_token":"eyJhbGciOiJIUzI1NiIsInR5cCI6IkpXVCJ9.eyJ1c2VyX25hbWUiOiJqb2huIiwic2NvcGUiOlsicmVhZCJdLCJhdGkiOiJjMTY3NDQwOS03Mzk4LTRhNDctODgxYi1lNjIwMmFlMzdmNGYiLCJleHAiOjE2Mjk3OTk0NjEsImF1dGhvcml0aWVzIjpbInJlYWQiXSwianRpIjoiMjAyMTQyNzktODk4Yy00YTVmLTgwYmYtYTA2MTYxYWFjY2RiIiwiY2xpZW50X2lkIjoiY2xpZW50In0.RaIhPVht1LYXIAuvmrzN6YB9BsK6-IZ2I8rh9Wt1rHo",
  "expires_in":43199,
  "scope":"read",
  "jti":"c1674409-7398-4a47-881b-e6202ae37f4f"
}
用 cURL 测试一下
curl -H "Authorization:Bearer eyJhbGciOiJIUzI1NiIsInR5cCI6IkpXVCJ9.eyJleHAiOjE2MjcyNjM3NTYsInVzZXJfbmFtZSI6ImpvaG4iLCJhdXRob3JpdGllcyI6WyJyZWFkIl0sImp0aSI6IjViNjgwMTE0LTNkMzYtNDM1OC1iNmEyLWYyOGMyZTczZTQzYSIsImNsaWVudF9pZCI6ImNsaWVudCIsInNjb3BlIjpbInJlYWQiXX0.mKZpj1nraoRdQd78t-dk4o_xUxdBilQE3JKMth3zEtc" "http://127.0.1.1:8080/hello"
:::warning
注意 jwt.key 需满足条件长度大于32,转换为字节数组后,长度才能大于256
:::
注意到 access_token 用 . 分割可以分为三部分,第一和第二部分可以 base 64 解码为
{"alg":"HS256","typ":"JWT"}
{
    "exp": 1627263756,
    "user_name": "john",
    "authorities": [
        "read"
    ],
    "jti": "5b680114-3d36-4358-b6a2-f28c2e73e43a",
    "client_id": "client",
    "scope": [
        "read"
    ]
}
第三部分是签名
override fun configure(http: HttpSecurity?) {
    http!!
        .authorizeRequests()
        .anyRequest()
        .authenticated()
        .and()
        .oauth2ResourceServer {
            it.jwt { j ->
                j.decoder(jwtDecoder())
            }
        }
}

@Bean
fun jwtDecoder(): JwtDecoder {
    val key = jwtProperties.key.toByteArray()
    val originalKey = SecretKeySpec(key, 0, key.size, "AES")
    return NimbusJwtDecoder.withSecretKey(originalKey).build()
}
非对称加密方式
# 创建密钥对
keytool -genkeypair -alias ssia -keyalg RSA -keypass ssia123 -keystore ssia.jks -storepass ssia123
# 测试一下密钥对,并取出公钥
keytool -list -rfc --keystore ssia.jks | openssl x509 -inform pem -pubkey
用 cURL 测试一下鉴权服务
curl -v -XPOST -u client:secret "http://127.0.1.2:8080/oauth/token?grant_type=password&username=john&password=12345&scope=read"
{
    "access_token": "eyJhbGciOiJSUzI1NiIsInR5cCI6IkpXVCJ9.eyJleHAiOjE2MjcyNjY2NDAsInVzZXJfbmFtZSI6ImpvaG4iLCJhdXRob3JpdGllcyI6WyJyZWFkIl0sImp0aSI6IjQ1ZTY1ZWExLWY5MWEtNGYzYi05MmNmLTJlMzMzM2QxYTZkYiIsImNsaWVudF9pZCI6ImNsaWVudCIsInNjb3BlIjpbInJlYWQiXX0.UMW81s2ELX7ZjKMCT083MpKkF3RvIvoUUedbs1YBqoRL0-gjdMrV-UlVlhTIQfs2YzwtWJosl4nl7QdG9cdVk07GBQH3eV4apQgzI4LjiIuXQDTR9tkP_JeZJZskGNXWiUZMtnt__EKfBQClZxB2T14VI46xIybHIB98aSQyyqVstojj5IDA6w3thAr456K44kQuQu8bR1ven4RsxjEbMyWiP3KK-5_-A_z68ESu2BfYffhk_GzxI1BAOMAfgAt00jJeKGC4DTk-EFLEwd8LpWKWtaks2ueXm-77_qSTEd5eMQiHahqusAexzK-Tvw3BcTOTo2DrXK9PrNOUtUGCDQ",
    "token_type": "bearer",
    "refresh_token": "eyJhbGciOiJSUzI1NiIsInR5cCI6IkpXVCJ9.eyJ1c2VyX25hbWUiOiJqb2huIiwic2NvcGUiOlsicmVhZCJdLCJhdGkiOiI0NWU2NWVhMS1mOTFhLTRmM2ItOTJjZi0yZTMzMzNkMWE2ZGIiLCJleHAiOjE2Mjk4MTU0NDAsImF1dGhvcml0aWVzIjpbInJlYWQiXSwianRpIjoiNTQ1YThiMzQtZmYyMC00NTUyLWJjMzAtYmFiNDRjNDMyNzc3IiwiY2xpZW50X2lkIjoiY2xpZW50In0.Y7Ok_Cj65QmP9d56m4awTGOKFXH7ujs5xYUseN_fbb9PecDrvoQkYDif1Y0d6zaa355Cu3tR_X33TIWBoN9ke6NQ8rHEIFccMMK1-5EG5AAdTo8CdAYCCIyw3lvYALEADYjejJqbqxuMk-vlftKoBKUNLxyY3MKu9RheuwfyrZOp9XT7xvUBetMWigcO8Ofput-_r_NMlKndiVf_3NtC4yoJFWvY2CNEcT1Z9R8Ur9p42ezVeUu4djB7NAbE3lQFi6Sn3Sof2k2qUOW3c6DZMcmhK17q1q7Do1H4F_UtPM583kBJLBKbu0stLuhF3tQvnxqwLbgvqvws7Ww1W_6Ljw",
    "expires_in": 43199,
    "scope": "read",
    "jti": "45e65ea1-f91a-4f3b-92cf-2e3333d1a6db"
}
jti是每个 JWT 的一个唯一编码
测试一下
curl -H "Authorization:Bearer eyJhbGciOiJSUzI1NiIsInR5cCI6IkpXVCJ9.eyJleHAiOjE2MjcyNjY2NDAsInVzZXJfbmFtZSI6ImpvaG4iLCJhdXRob3JpdGllcyI6WyJyZWFkIl0sImp0aSI6IjQ1ZTY1ZWExLWY5MWEtNGYzYi05MmNmLTJlMzMzM2QxYTZkYiIsImNsaWVudF9pZCI6ImNsaWVudCIsInNjb3BlIjpbInJlYWQiXX0.UMW81s2ELX7ZjKMCT083MpKkF3RvIvoUUedbs1YBqoRL0-gjdMrV-UlVlhTIQfs2YzwtWJosl4nl7QdG9cdVk07GBQH3eV4apQgzI4LjiIuXQDTR9tkP_JeZJZskGNXWiUZMtnt__EKfBQClZxB2T14VI46xIybHIB98aSQyyqVstojj5IDA6w3thAr456K44kQuQu8bR1ven4RsxjEbMyWiP3KK-5_-A_z68ESu2BfYffhk_GzxI1BAOMAfgAt00jJeKGC4DTk-EFLEwd8LpWKWtaks2ueXm-77_qSTEd5eMQiHahqusAexzK-Tvw3BcTOTo2DrXK9PrNOUtUGCDQ" http://127.0.1.1:8080/hello
用 Spring Security 的原生写法是这样的
@Bean
fun jwtDecoder(): JwtDecoder {
    val instance = KeyFactory.getInstance("RSA")
    val key = Base64.getDecoder().decode(publicKey)
    val x509 = X509EncodedKeySpec(key)
    val pubKey = instance.generatePublic(x509)
    return NimbusJwtDecoder.withPublicKey(pubKey as RSAPublicKey?).build()
}
:::warning
publicKey: 直接写 base64 编码的公钥,不要 ---- 开头
:::
鉴权服务有额外的端点用来获取公钥
curl -u resourceserver:resourceserversecret http://127.0.1.2:8080/oauth/token_key
override fun configure(security: AuthorizationServerSecurityConfigurer) {
    security.checkTokenAccess("isAuthenticated()")
        .tokenKeyAccess("isAuthenticated()")
}
{
  "alg":"SHA256withRSA",
  "value":"-----BEGIN PUBLIC KEY-----\nMIIBIjANBgkqhkiG9w0BAQEFAAOCAQ8AMIIBCgKCAQEAnlTEgzZ2wojtgFP71olPnf1fFehUG5jJX7+EEfZsgkQiFt0/fx8vwlzjbaQzA8xH12b57nMZbsYJLxsXjL/TY0Z3Nq9fkET7yjQQKEHRWgFM/3PmgnsgzQG8cJ//ELOvzw0pBx4qeTm8GuIThnzq0r31nk7xXejCxfDNFObITk9d1P0L+1bhEV1KTdNUO5nTxAtguZjJhfG+ICnOwhURpBcFQynumQ7oh6gpn38gco8YzBf1QFrG3VKjKpFvGAnvZj2NGM72+A7mdQU6ULfZ7s90+ElJrMXVqdq9mYd2vPcUuXwmh5NyM93G6gn9Un5xyag/3atE5WTox5K/BVSV4wIDAQAB\n-----END PUBLIC KEY-----"
}
参考文献
[1]: WebSecurityConfig.java - Spring Security in Action https://github.com/havinhphu188/spring-security-in-action-source/blob/master/ssia-ch13-ex1/src/main/java/com/laurentiuspilca/ssia/config/WebSecurityConfig.java
[2]: OAuth 2.0 Migration Guide - Spring Security https://github.com/spring-projects/spring-security/wiki/OAuth-2.0-Migration-Guide

若有收获,就点个赞吧
0 人点赞
