环境准备
采用thingsboard-rrelease-3.2版本进行编译
jdk:openjdk11 (下载地址 http://jdk.java.net/archive/)
nodejs:v16.13.0
yarn: 1.22.18
安装方式:
npm install -g yarn --registry=https://registry.npm.taobao.org配置源yarn config set registry https://registry.npm.taobao.org -gyarn config set sass_binary_site http://cdn.npm.taobao.org/dist/node-sass -g
git: 不限制
编译环境步骤
下载thingsboard
通过idea下载thingsboard程序
github : https://github.com/thingsboard/thingsboard.git
gitee: https://gitee.com/mirrors/ThingsBoard.git
确认项目编译jdk版本
此处可用根据 根目录下pom.xml中的 maven-compiler-plugin 指定的jdk版本来调整自己本地编译环境的版本。
注: 3.0版本以及以前版本使用的为jdk1.8版本;3.0版本以后使用的为jdk11版本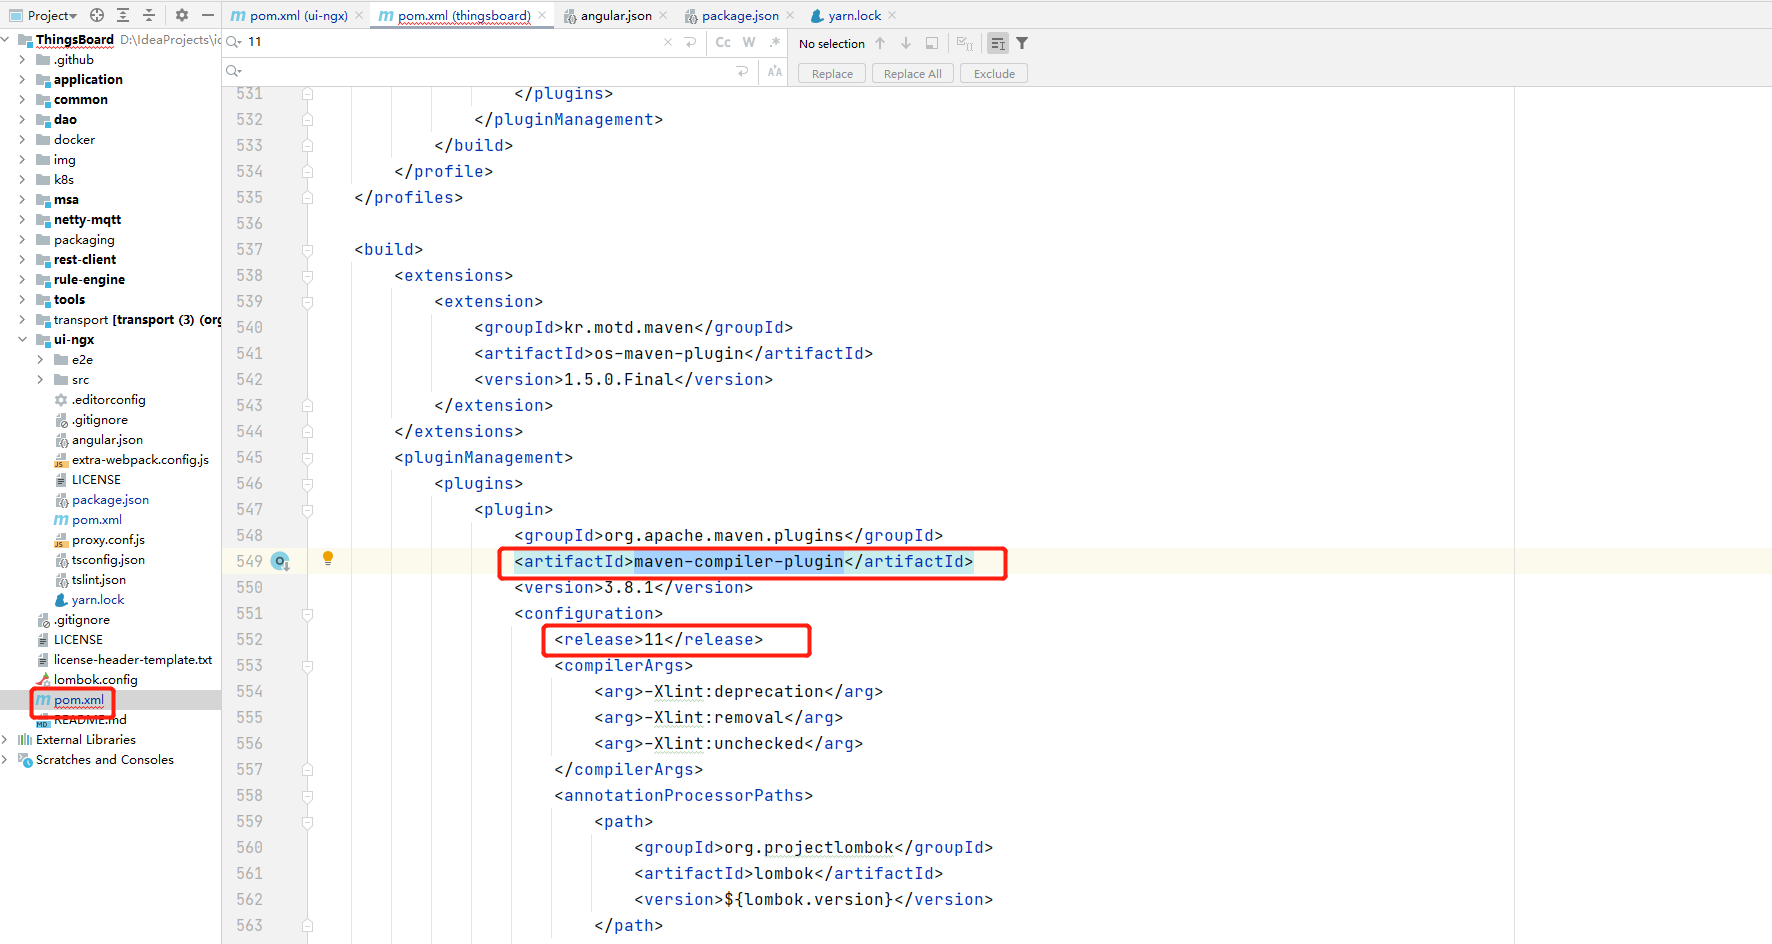
确认好jdk版本后,需要确认idea编译时jdk版本
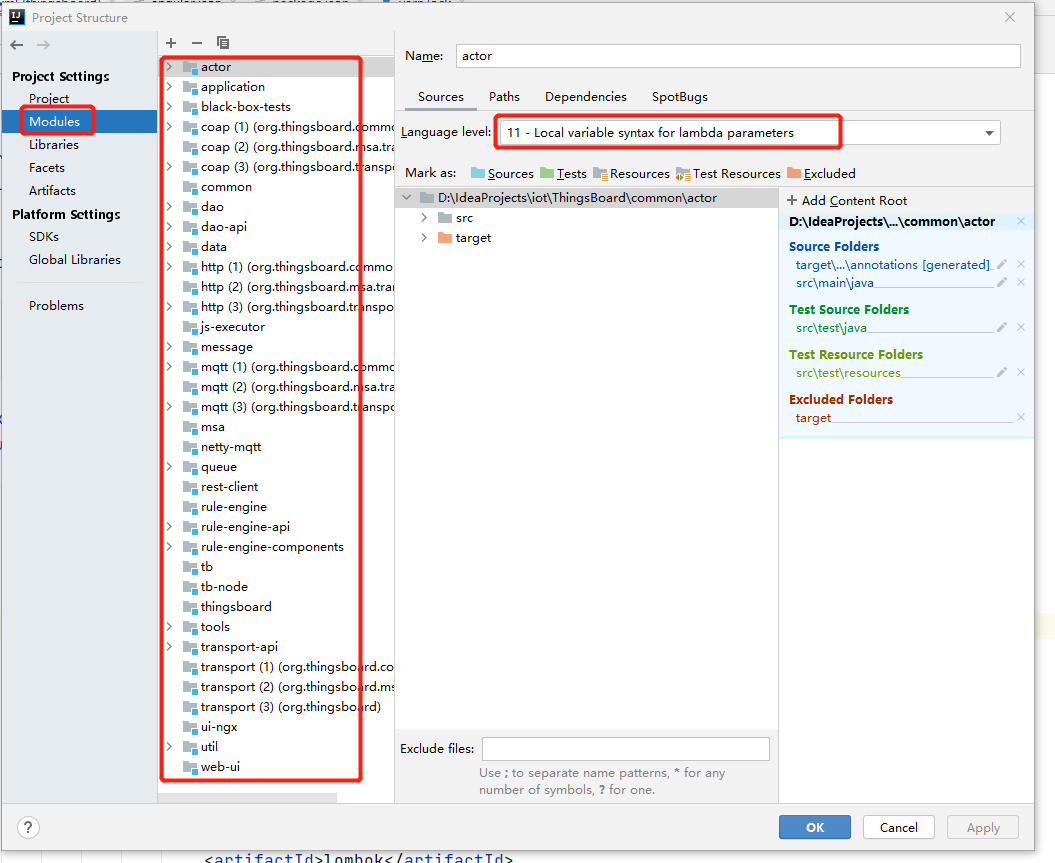
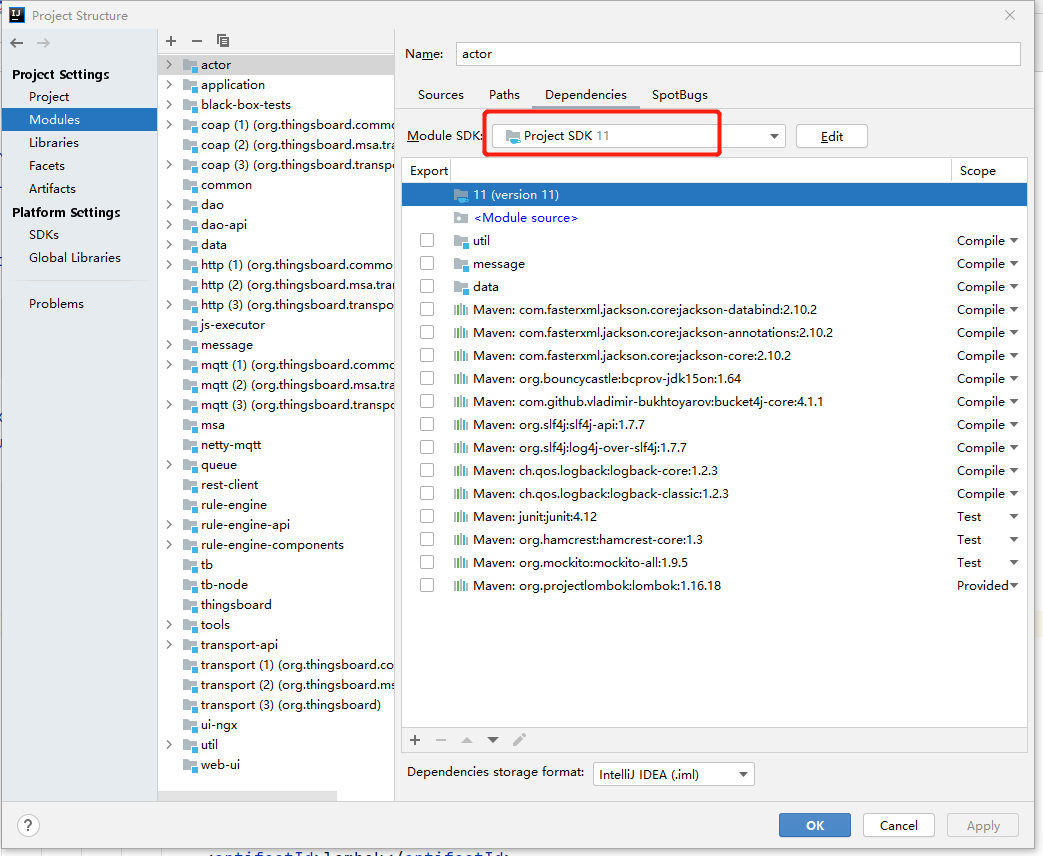
最好每个项目都确认下jdk的版本
取消license的验证
在根目录 pom.xml 中注释掉 license-maven-plugin 插件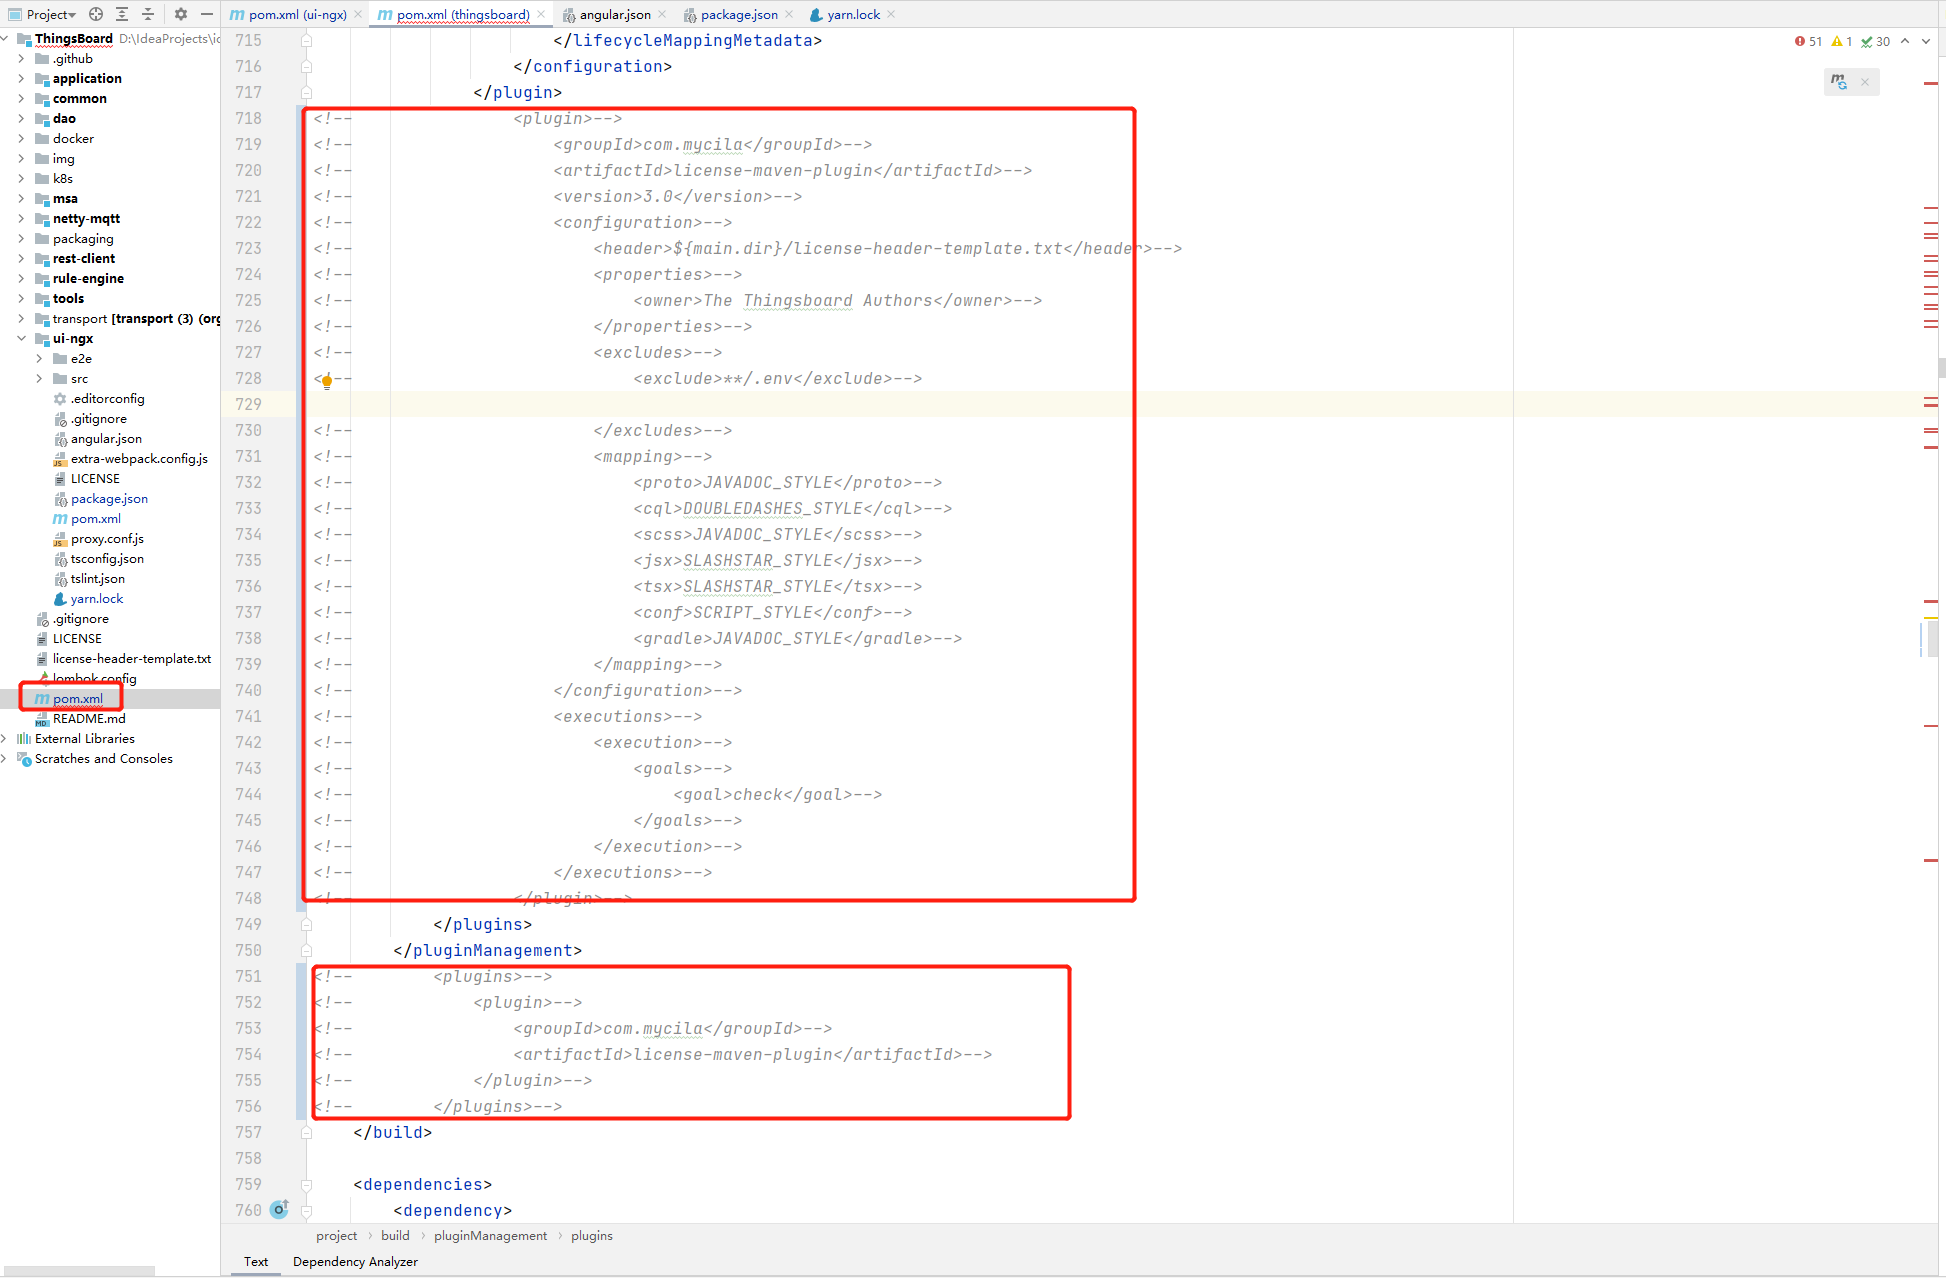
更换 frontend-maven-plugin 为 exec-maven-plugin
这里网上好多人都说是修改 frontend-maven-plugin 中配置的 nodeVersion ,yarnVersion为自己本地的nodejs 和 yarn版本一样就能可用,但是我本地修改后依然无法编译,并且windows会弹出
对话框
原因:
由于在编译的时候 frontend-maven-plugin 会根据配置的nodeversion ,yarnversion版本去下载nodejs,,然后使用这个nodejs去编译 ui-ngx这个项目,但是它下载的nodejs都是32位的,而我操作系统是64位的,所以总是报错,这个我改变策略使用 exec-maven-plugin 插件,exec-maven-plugin可用指导maven在编译ui-ngx时使用本地已经安装的nodejs , yarn避免了以上问。
解决方式:
在ui-ngx 中的pom.xml 中首先注释掉 frontend-maven-plugin 插件;
注意:这里包括 build 和 profiles 两个节点中的 frontend-maven-plugin 配置
然后引入 exec-maven-plugin 插件
<!--Copyright © 2016-2021 The Thingsboard AuthorsLicensed under the Apache License, Version 2.0 (the "License");you may not use this file except in compliance with the License.You may obtain a copy of the License athttp://www.apache.org/licenses/LICENSE-2.0Unless required by applicable law or agreed to in writing, softwaredistributed under the License is distributed on an "AS IS" BASIS,WITHOUT WARRANTIES OR CONDITIONS OF ANY KIND, either express or implied.See the License for the specific language governing permissions andlimitations under the License.--><project xmlns="http://maven.apache.org/POM/4.0.0" xmlns:xsi="http://www.w3.org/2001/XMLSchema-instance"xsi:schemaLocation="http://maven.apache.org/POM/4.0.0 http://maven.apache.org/xsd/maven-4.0.0.xsd"><modelVersion>4.0.0</modelVersion><parent><groupId>org.thingsboard</groupId><version>3.2.2</version><artifactId>thingsboard</artifactId></parent><groupId>org.thingsboard</groupId><artifactId>ui-ngx</artifactId><packaging>jar</packaging><name>ThingsBoard Server UI</name><url>https://thingsboard.io</url><properties><project.build.sourceEncoding>UTF-8</project.build.sourceEncoding><main.dir>${basedir}/..</main.dir></properties><build><resources><resource><directory>${project.build.directory}/generated-resources</directory></resource></resources><plugins><!-- 修改使用 exec-maven-plugin 插件编译前端项目 start --><plugin><groupId>org.codehaus.mojo</groupId><artifactId>exec-maven-plugin</artifactId><version>1.6.0</version><executions><execution><id>exec-npm-install</id><phase>prepare-package</phase><goals><goal>exec</goal></goals><configuration><executable>yarn</executable><arguments><argument>install</argument></arguments><workingDirectory>${basedir}</workingDirectory></configuration></execution><execution><id>exec-npm-run-build</id><phase>prepare-package</phase><goals><goal>exec</goal></goals><configuration><executable>yarn</executable><arguments><argument>run</argument><argument>build:prod</argument></arguments><workingDirectory>${basedir}</workingDirectory></configuration></execution><execution><id>exec-npm-run-start</id><phase>prepare-package</phase><goals><goal>exec</goal></goals><configuration><executable>yarn</executable><arguments><argument>run</argument><argument>start</argument></arguments><workingDirectory>${basedir}</workingDirectory></configuration></execution></executions></plugin><!-- 修改使用 exec-maven-plugin 插件编译前端项目 end --></plugins></build><profiles><!-- 修改使用 exec-maven-plugin 插件编译前端项目 start --><!--考虑到window 和linux环境 npm命令格式的问题,使用maven的profile实现动态指定命令--><profile><id>window</id><properties><npm>npm.cmd</npm></properties><activation><activeByDefault>true</activeByDefault></activation></profile><profile><id>linux</id><properties><npm>npm</npm></properties></profile><!-- 修改使用 exec-maven-plugin 插件编译前端项目 end --></profiles></project>
更换 github组件引用
由于在ui-ngx/package.json中有3个组件时要到github中去下载的,但是国内访问github不方便,因此需要将github上面的组件修改到 gitee上。
涉及的组件分别为:
flot : 修改后地址 https://gitee.com/freedom2015/flot.git
flot.curvedlines : 修改后地址 https://gitee.com/bingmaxx/CurvedLines.git
ngx-flowchart: 修改后地址 https://gitee.com/bingmaxx/ngx-flowchart.git
修改后,如图: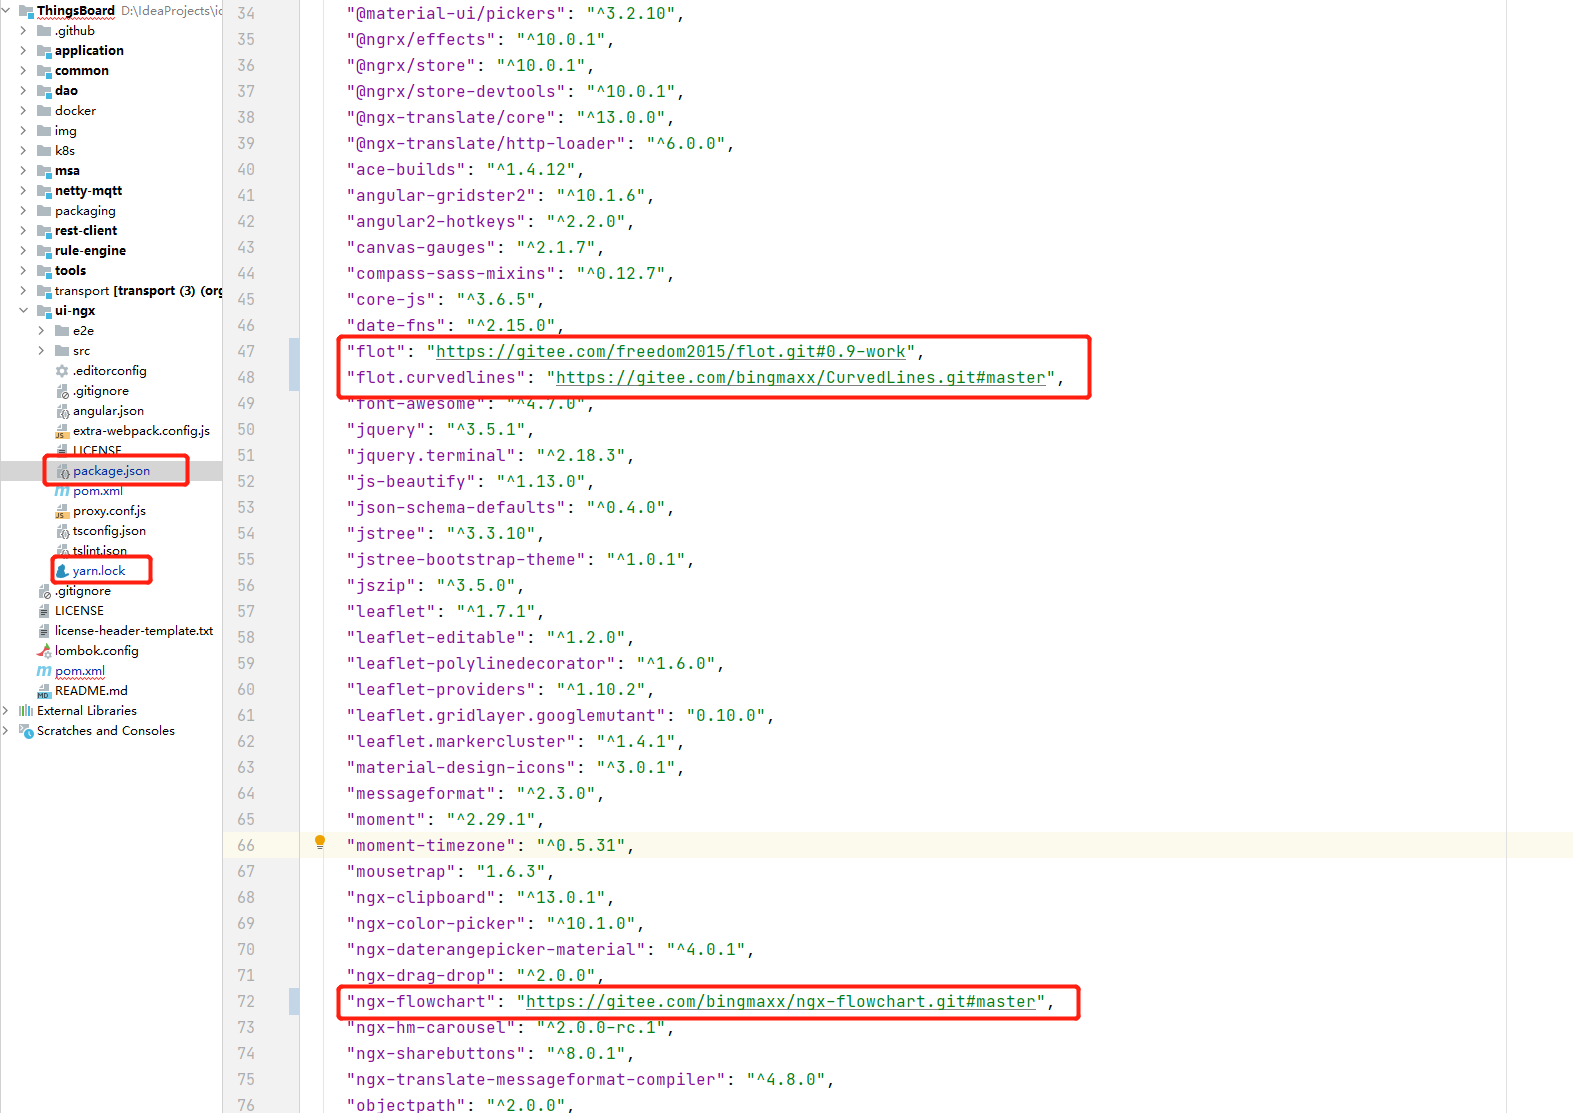
这里对应的将 yarn.lock 文件中这三个组件的地址也修改掉
在maven的setting.xml中增加国内镜像地址
在maven的setting.xml中的mirrors 节点中增加如下内容
<mirror><id>mirrorId</id><mirrorOf>repositoryId</mirrorOf><name>Human Readable Name for this Mirror.</name><url>http://my.repository.com/repo/path</url></mirror><mirror><id>mirror</id><mirrorOf>central,jcenter,!rdc-releases,!rdc-snapshots</mirrorOf><name>mirror</name><url>https://maven.aliyun.com/nexus/content/groups/public</url></mirror><mirror><id>gradle-plugin</id><mirrorOf>gradle-plugin</mirrorOf><name>gradle-plugin</name><url>https://maven.aliyun.com/repository/gradle-plugin</url></mirror>
开始编译
这里由于我本地有多个jdk版本,因此我采用了在idea中配置编译指令的方式确保jdk版本
配置方式:
配置后指令后在右侧maven栏中双击启动指令,即可开始编译
在编译窗口中开始会显示使用的jdk版本
确认无误基本编译就能完成
在编译过程中在执行
“node —max_old_space_size=8048 ./node_modules/@angular/cli/bin/ng serve —host 0.0.0.0 —open” 指令时可能会出现
[error] Error: spawn EPERM
。。。。。。
这样的错误这里需要删除掉ui-ngx目录中node_modules 这个目录然后重新开始编译,多搞几次 它就过了我也没搞明白什么问题
至此,编译完成后浏览器会自动开启登录界面
http://localhost:4200/login
这样编译环境完成,后续就是要开始准备开发环境了
开发环境搭建
搭建kafka单机环境
搭建时
zookeeper 选择3.5.9 版本
kafka 选择2.8 版本
由于thingsboard中使用的 curator-recipes:4.2.0对zookeeper版本有要求
搭建postgresql数据库
安装timescal插件
初始化数据库
修改数据库连接地址
修改thingsboard.yml配置文件中数据库连接地址,redis地址,kafka地址
复制初始化脚本
将dao/src/main/resources中的sql 目录复制到 application/src/main/data 目录中
启动application程序
启动程序 application/src/main/java/org/thingsboard/server/ThingsboardInstallApplication.java类
在执行该类时在启动参数中加入 install.load_demo=true 可在初始化完成后加载测试用数据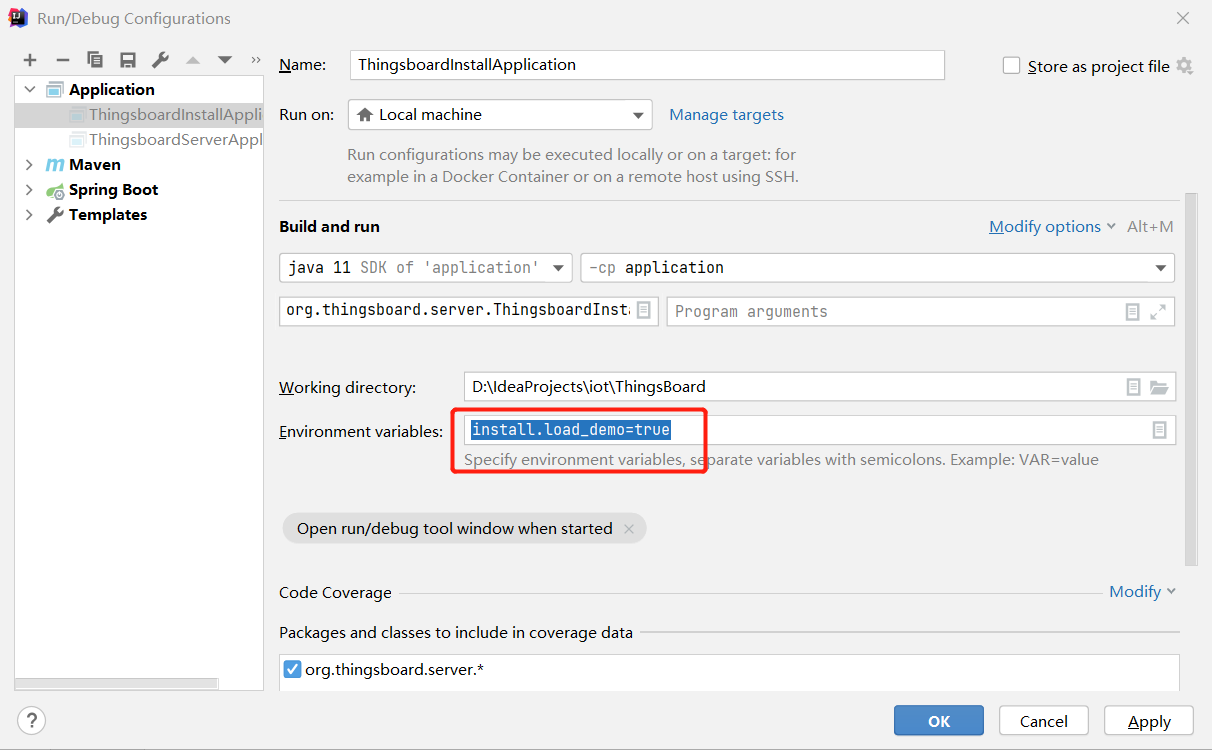
检查数据库
数据库中已经出现表
启动application项目
启动程序application/src/main/java/org/thingsboard/server/ThingsboardServerApplication.java
参考自:
本地开发环境搭建: https://www.jianshu.com/p/8e8458699aa4

若有收获,就点个赞吧
0 人点赞
