本篇文章讲述从零搭建React中后台项目框架模板,方便快速进行具体项目开发。包括Webpack4.0配置及打包优化、React全家桶使用(React + React-router + Axios + Mobx + Antd)、ESLint等项目开发规范等。
——————2020-12-10 更新记录———————
github源码 v2.0.0版本更新:
- 升级项目中全部依赖库版本,主要包括:react17、antd4、webpack5…
- 增加 commitlint 规范git提交;
- 增加 husky + lint-staged + Prettier 规范代码提交校验;
- 优化 eslint + prettier 规范项目代码风格;
- …
需要查看文章对应之前代码,可切换至v1.0.0查看。
——————2020-12-10 更新记录———————
涉及的技术栈均采用当前最新版本的语法:
- 使用Webpack5.0构建项目(不使用
create-react-app、umi等脚手架); - 使用Babel7配置转换ES6、React、Mobx等语法;
- React版本V17.0.1,全部采用函数化 Hooks特性开发项目组件;
- 采用React-router5 工具 配置项目路由;
- 采用Mobx5 + Hooks实现项目数据状态管理;
- 封装Axios库实现与后台http请求交互;
- UI库采用流行的Ant-design4.0组件库;
- 完整项目实现及模块结构拆分;
作者:nowThen
链接:https://juejin.cn/post/6844904035099623437
来源:掘金
著作权归作者所有。商业转载请联系作者获得授权,非商业转载请注明出处。
项目页面截图:
前言
一般React开发,可以使用Facebook提供的 create-react-app 来创建。create-react-app 足够简单易用,从学习 React 的角度来看非常合适。但严格说来,如果要开发一款大型的应用,需要做到更精细、更灵活的配置,只用 create-react-app 并不合适,有规模点的公司都会考虑搭建自己公司级的脚手架工具和框架模板。而基础就是基于webpack从零精细化构建。
企业级React开发也可以采用蚂蚁金服的Umi(一个可插拔的企业级 react 应用框架),可以使用相关的全套全家桶连贯快捷开发,优点还在于大厂出品,经历众多大项目的考验,稳定性和可维护性得到极大的保障。但是增加了不少学习成本,项目的粒度可控性不高,也比较受限。
在构建公司级全套项目架构上可以从Umi、[Ant Design Pro](https://pro.ant.design/)等上获取不少极有价值的参考。
本项目从零搭建React应用模板,一来方便自己快速构建实际应用;二来重点在于梳理各技术栈最新知识点。希望也对看到的人有所帮助。
项目说明
本项目为React中后台项目框架模板,方便快速进行具体项目开发。包括Webpack4.0配置及打包优化、React全家桶使用(React + React-router + Axios + Mobx + Antd)、ESLint等项目开发规范等。
项目Git地址:https://github.com/now1then/react-web-pro;
在线演示地址:
文章链接-语雀:https://www.yuque.com/nowthen/longroad/exeuw7;
目录结构:
├── build // webpack配置│ ├── webpack.common.js // webpack通用配置│ ├── webpack.dev.js // webpack开发环境配置│ └── webpack.prod.js // webpack生产环境配置├── dist // 打包输出目录├── public // 项目公开目录├── src // src开发目录│ ├── assets // 静态资源│ ├── components // 公共组件│ ├── layouts // 页面布局组件│ ├── modules // 公共业务模块│ ├── pages // 具体业务页面│ ├── routers // 项目路由配置│ ├── services // axios服务等相关│ ├── stores // 全局公共 mobx store│ ├── styles // 存放公共样式│ ├── utils // 工具库/通用函数│ ├── index.html // 入口html页面│ └── main.js // 项目入口文件├── .babelrc // babel配置├── .editorconfig // 项目格式配置├── .eslintrc.js // ESLint配置├── .gitignore // git 忽略配置├── .postcssrc.js // postcss配置├── package.json // 依赖包配置└── README.md // 项目说明
项目构建
文章中使用 Yarn 管理安装包,若未安装Yarn,替换成 Npm 对应命令即可。
初始化项目
初始化package.json
yarn init
安装webpack
yarn add -D webpack webpack-cli webpack-merge
项目中使用的Webpack版本是^4.41.2,Webpack4.0 打包构建做了很多默认的优化配置,不少配置项无需配置或更改。
比如:针对开发模式的加快打包速度,合并chunk; 针对生产模式的代码压缩,减少打包体积等。
// 一部分默认配置optimization: {removeAvailableModules: true, // 删除已解决的chunk (默认 true)removeEmptyChunks: true, // 删除空的chunks (默认 true)mergeDuplicateChunks: true // 合并重复的chunk (默认 true)}// 针对生产环境默认配置optimization: {sideEffects:true, //配合tree shakingsplitChunks: {...}, //拆包namedModules: false, // namedChunks:false 不启用chunk命名,默认自增idminimize: true, // 代码压缩}
根据开发环境/生产环境 区分webpack配置非常有必要,可以加快开发环境的打包速度,有时候遇到开发环境打包过慢,可以排查下是否配置有误(比如开发环境开启了代码压缩等)。
项目中配合webpack-merge根据开发环境/生产环境进行拆分配置: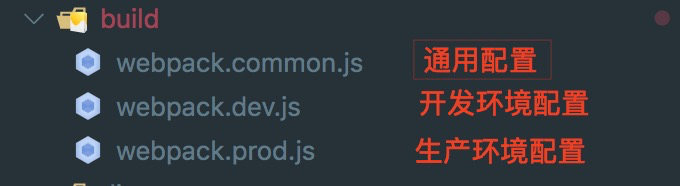
Webpack4.0发布已经很长时间了,相信基本上项目都已迁移至4.0,在这里就不多赘述了。
配置Html模板
安装:
yarn add -D html-webpack-plugin
配置:
const srcDir = path.join(__dirname, "../src");plugins: [new HtmlWebpackPlugin({template: `${srcDir}/index.html`})]
配置本地服务及热更新
安装:
yarn add -D webpack-dev-server clean-webpack-plugin
开发环境利用webpack-dev-server搭建本地 web server,并启用模块热更新(HMR)。
为方便开发调试,转发代理请求(本例中配合axios封装 转发接口到easy-mock在线平台)
配置:
mode: "development", // 开发模式devServer: { // 本地服务配置port: 9000,hot: true,open: false,historyApiFallback: true,compress: true,proxy: { // 代理"/testapi": {target:"https://www.easy-mock.com/mock/5dff0acd5b188e66c6e07329/react-template",changeOrigin: true,secure: false,pathRewrite: { "^/testapi": "" }}}},plugins: [new webpack.NamedModulesPlugin(),new webpack.HotModuleReplacementPlugin()],
配置Babel
安装:
yarn add -D babel-loader @babel/core @babel/plugin-transform-runtime@babel/preset-env @babel/preset-react babel-plugin-import@babel/plugin-proposal-class-properties @babel/plugin-proposal-decorators
Webpack中Babel配置,是比较重要的一环。关系着ES6语法、React jsx、Mobx等语法经过打包后能否正常运行。
其中:
@babel/preset-react转换React jsx语法;@babel/plugin-proposal-class-properties转换 Class语法;@babel/plugin-proposal-decorators转换 Mobx 等更高级的语法;babel-plugin-import配合实现React组件的按需加载;
这里需要注意Babel7.0 相较于Babel6.0的区别。
配置:
module: {rules: [{test: /\.(js|jsx)$/,include: [srcDir],use: ["babel-loader?cacheDirectory=true"]},]}
.babelrc 文件配置
{"presets": ["@babel/preset-env","@babel/preset-react"],"plugins": ["@babel/transform-runtime",["@babel/plugin-proposal-decorators",{"legacy": true}],["@babel/plugin-proposal-class-properties", { "loose": true }],["import",{"libraryName": "antd","libraryDirectory": "es","style": "css" // `style: true` 会加载 less 文件}]]}
处理Less样式和图片等资源
安装:
yarn add -D less less-loader style-loader css-loader url-loadermini-css-extract-plugin postcss-loader autoprefixer
其中:
less-loader、style-loader、css-loader处理加载less、css文件;postcss-loader、autoprefixer处理css样式浏览器前缀兼容;url-loader处理图片、字体文件等资源;mini-css-extract-plugin分离css成单独的文件;
配置:
const MiniCssExtractPlugin = require("mini-css-extract-plugin");...module: {rules: [{test: /\.less$/,use: [devMode ? "style-loader" : MiniCssExtractPlugin.loader,"css-loader","postcss-loader","less-loader"]},{test: /\.css$/,use: [devMode ? "style-loader" : MiniCssExtractPlugin.loader,"css-loader","postcss-loader"]},{test: /\.(png|jpe?g|gif|svg)(\?.*)?$/,use: ["url-loader"],include: [srcDir]},{test: /\.(mp4|webm|ogg|mp3|wav|flac|aac)(\?.*)?$/,use: ["url-loader"],include: [srcDir]},{test: /\.(woff2?|eot|ttf|otf)(\?.*)?$/,use: ["url-loader"],include: [srcDir]}]},plugins: [new MiniCssExtractPlugin({filename: "[name].[contenthash:8].css",chunkFilename: "chunk/[id].[contenthash:8].css"}),],
配置postcss .postcssrc.js文件
// .postcssrc.jsmodule.exports = {plugins: {autoprefixer: {}}};// package.json中配置兼容浏览器"browserslist": ["> 1%","last 2 versions","not ie <= 10"]
利用happypack 多线程打包
安装:
yarn add -D happypack
配置:
const os = require("os");const HappyPack = require("happypack");const happyThreadPool = HappyPack.ThreadPool({ size: os.cpus().length });module: {rules: [{test: /\.(js|jsx)$/,include: [srcDir],exclude: /(node_modules|bower_components)/,use: ["happypack/loader?id=happybabel"]},]},plugins: [//开启 happypack 的线程池new HappyPack({id: "happybabel",loaders: ["babel-loader?cacheDirectory=true"],threadPool: happyThreadPool,cache: true,verbose: true}),]
生产环境 拆分模块
根据实际项目情况拆分模块,配合异步加载,防止单个文件过大。
optimization: {runtimeChunk: {name: "manifest"},splitChunks: {chunks: "all", //默认只作用于异步模块,为`all`时对所有模块生效,`initial`对同步模块有效cacheGroups: {dll: {test: /[\\/]node_modules[\\/](react|react-dom|react-dom-router|babel-polyfill|mobx|mobx-react|mobx-react-dom|antd|@ant-design)/,minChunks: 1,priority: 2,name: "dll"},codeMirror: {test: /[\\/]node_modules[\\/](react-codemirror|codemirror)/,minChunks: 1,priority: 2,name: "codemirror"},vendors: {test: /[\\/]node_modules[\\/]/,minChunks: 1,priority: 1,name: "vendors"}}}}
其他配置
引入 ESLint 与 Prettier 配合,规范化团队项目代码开发,统一代码风格。
yarn add -D prettier babel-eslint eslint eslint-loader eslint-config-airbnbeslint-config-prettier eslint-plugin-babel eslint-plugin-import eslint-plugin-jsx-a11y eslint-plugin-react
(细节待补充)
具体配置详见**/build目录**下 项目代码。
npm scripts
package.json 文件
{..."scripts": {"start": "webpack-dev-server --color --inline --progress --config build/webpack.dev.js", //"build": "NODE_ENV=production webpack --progress --config ./build/webpack.prod.js","build:report": "NODE_ENV=production webpack --progress --config ./build/webpack.prod.js","build:watch": "NODE_ENV=production webpack --progress --config ./build/webpack.prod.js"},...}
命令行运行:
// 命令行执行// 运行开发环境;yarn start// 生产环境打包压缩;yarn build// 图形化分析打包文件大小;yarn build:report// 方便排查生产环境打包后文件的错误信息(文件source map);yarn build:watch
其中build:report、build:watch 能够实现功能,是在build/webpack.prod.js中有如下代码:
// 方便排查生产环境打包后文件的错误信息(文件source map)if (process.env.npm_lifecycle_event == "build:watch") {config = merge(config, {devtool: "cheap-source-map"});}// 图形化分析打包文件大小if (process.env.npm_lifecycle_event === "build:report") {const BundleAnalyzerPlugin = require("webpack-bundle-analyzer").BundleAnalyzerPlugin;config.plugins.push(new BundleAnalyzerPlugin());}
项目代码架构
实际开发用到的依赖包安装:
yarn add react react-dom react-router-dom mobx mobx-react mobx-react-routeraxios antd moment
我们在写具体代码之前要做的第一个决定就是,目录结构怎么构建?要把这些组件放在哪里?
目录结构
根据个人习惯及经验,项目目录构建如下图所示:
├── build // webpack配置│ ├── webpack.common.js // webpack通用配置│ ├── webpack.dev.js // webpack开发环境配置│ └── webpack.prod.js // webpack生产环境配置├── dist // 打包输出目录├── public // 项目公开目录├── src // src开发目录│ ├── assets // 静态资源│ ├── components // 公共组件│ ├── layouts // 页面布局组件│ ├── modules // 公共业务模块│ ├── pages // 具体业务页面│ ├── routers // 项目路由配置│ ├── services // axios服务等相关│ ├── stores // 全局公共 mobx store│ ├── styles // 存放公共样式│ ├── utils // 工具库/通用函数│ ├── index.html // 入口html页面│ └── main.js // 项目入口文件├── .babelrc // babel配置├── .editorconfig // 项目格式配置├── .eslintrc.js // ESLint配置├── .gitignore // git 忽略配置├── .postcssrc.js // postcss配置├── package.json // 依赖包配置└── README.md // 项目说明
页面模块目录结构,比如FormDemo页面结构:
├── FormDemo // 表单演示 页面│ ├── index.js // 页面入口文件│ ├── newModal.js // 弹窗组件│ ├── searchForm.js // 搜索表单 模块组件│ ├── store.js // 本页面使用的 mobx store 数据│ └── style.less // 页面样式
函数化Hooks
Hook 是 React 16.8 的新增特性。它可以让你在不编写 class 的情况下使用 state 以及其他的 React 特性。
当前React版本已更新到16.12,Hooks 完全应该成为 React 使用的主流。本项目中将完全拥抱Hook,一般不再用 class 来实现组件。
**
以下为部分实现代码(可暂忽略mobx的使用):
import React, { useState, useEffect, useContext } from 'react';import { observer } from 'mobx-react';import { Button } from 'antd';import Store from './store';import './style.less';const HomePage = () => {// useContext 订阅mobx数据const pageStore = useContext(Store);// useState state状态const [num, setNum] = useState(0);// useEffect副作用useEffect(() => {pageStore.qryTableDate();}, []);return (<div className="page-home page-content"><h2>{pageStore.pageTitle}</h2><div><span>num值:{num}</span><Button type="primary" size="small" style={{ marginLeft: 10 }}onClick={() => setNum(num + 1)}>+1</Button></div></div>);};export default observer(HomePage);
Router路由配置
项目是单页应用,路由配置一般分为约定式动态路由和集中配置式路由。
在 React 的世界里,直接采用成熟的react-router工具管理页面路由。我们现在说到react-router,基本上都是在说 react-router 的第4版之后的版本,当前的最新版本已经更新到5.1.x了。
当前react-router支持动态路由,完全用React组件来实现路由,在渲染过程中动态设置路由规则,匹配命中规则加载对应页面组件。
本项目采用集中配置式路由(方便路由鉴权、从服务端接口获取菜单路由配置等),同时兼顾方便地设置侧边菜单栏。 当然为简单起见,项目中读取本地静态菜单配置,也暂未引入路由鉴权。
静态路由配置 src/routes/config.js:
import React, { lazy } from "react";import BasicLayout from "@/layouts/BasicLayout";import BlankLayout from "@/layouts/BlankLayout";const config = [{path: "/",component: BlankLayout, // 空白页布局childRoutes: [ // 子菜单路由{path: "/login", // 路由路径name: "登录页", // 菜单名称 (不设置,则不展示在菜单栏中)icon: "setting", // 菜单图标component: lazy(() => import("@/pages/Login")) // 懒加载 路由组件},// login等没有菜单导航栏等基本布局的页面, 要放在基本布局BasicLayout之前。{path: "/",component: BasicLayout, // 基本布局框架childRoutes: [{path: "/welcome",name: "欢迎页",icon: "smile",component: lazy(() => import("@/pages/Welcome"))},{... /* 其他 */},{ path: "/", exact: true, redirect: "/welcome" },{ path: "*", exact: true, redirect: "/exception/404" }]}]}];export default config;
上面是静态路由的一部分配置,
注意:<Router>中会用<Switch>包裹,会匹配命中的第一个。"/login"等没有菜单导航栏等基本布局的页面, 要放在基本布局BasicLayout之前。
利用<Suspense>和React.lazy()实现页面组件懒加载。
路由组件渲染 src/routes/AppRouter.js:
import React, { lazy, Suspense } from "react";import LoadingPage from "@/components/LoadingPage";import {HashRouter as Router,Route,Switch,Redirect} from "react-router-dom";import config from "./config";const renderRoutes = routes => {if (!Array.isArray(routes)) {return null;}return (<Switch>{routes.map((route, index) => {if (route.redirect) {return (<Redirectkey={route.path || index}exact={route.exact}strict={route.strict}from={route.path}to={route.redirect}/>);}return (<Routekey={route.path || index}path={route.path}exact={route.exact}strict={route.strict}render={() => {const renderChildRoutes = renderRoutes(route.childRoutes);if (route.component) {return (<Suspense fallback={<LoadingPage />}><route.component route={route}>{renderChildRoutes}</route.component></Suspense>);}return renderChildRoutes;}}/>);})}</Switch>);};const AppRouter = () => {return <Router>{renderRoutes(config)}</Router>;};export default AppRouter;
路由 hooks语法
react-router-dom 也已经支持 hooks语法,获取路由信息或路由跳转,可以使用新的hooks 函数:
[useHistory](https://reacttraining.com/react-router/core/api/Hooks/usehistory):获取历史路由,回退、跳转等操作;useLocation:查看当前路由信息;[useParams](https://reacttraining.com/react-router/core/api/Hooks/useparams):读取路由附带的params参数信息;[useRouteMatch](https://reacttraining.com/react-router/core/api/Hooks/useroutematch):匹配当前路由;
只要包裹在
代码演示:
import { useHistory } from "react-router-dom";function HomeButton() {const history = useHistory();function onClick() {history.push("/home");}return (<button type="button" onClick={onClick}>跳转Home页</button>);}
结合mobx管理数据状态
项目中是否使用状态管理工具或使用何种管理工具,依据实际项目情况而定。
本项目使用自己比较熟悉的Mobx,Mobx是一个功能强大,上手非常容易的状态管理工具。
为了使用简洁及管理方便,在组织上,分为全局公共数据状态和页面数据状态。
公用数据状态存放在/src/stores目录下;页面几数据存放于对应页面目录下。
在实现上,利用mobx + useContext Hook特性 实现函数式组件的状态管理。
具体在于利用React的createdContext构建包含Mobx 的context上下文;函数式组件中使用useContext Hook 订阅Mobx数据变化。
页面级store.js代码:
import { createContext } from "react";import { observable, action, computed } from "mobx";import request from "@/services/newRequest";class HomeStore {@observable tableData = [];@observable pageTitle = "Home主页";@observable loading = false;@action.bound setData(data = {}) {Object.entries(data).forEach(item => {this[item[0]] = item[1];});}// 列表数据@action.boundasync qryTableDate(page = 1, size = 10) {this.loading = true;const res = await request({url: "/list",method: "post",data: { page, size }});if (res.success) {const resData = res.data || {};console.log(resData);}this.loading = false;}}export default createContext(new HomeStore());
页面组件 代码:
import React, { useContext } from "react";import { observer } from "mobx-react";import Store from "./store";import "./style.less";const HomePage = () => {const pageStore = useContext(Store);return (<div className="page-home page-content">home页面<h2>{pageStore.pageTitle}</h2></div>);};export default observer(HomePage);
以上为部分演示代码,具体业务实现可以查看项目代码。
Axios Http请求封装
Axios请求封装,具体代码见/src/services/newRequest.js
思路详见本人之前的另一篇文章(忽略外部组件即可):「漫漫长路-Axios封装」
UI组件及页面布局
UI组件使用优秀的Ant Design 组件库,注意使用 babel-plugin-import 配置实现组件的按需加载。
本项目的内部页面布局采用Antd上经典的布局方式:
页面布局需要合理拆分模块,左侧菜单导航栏根据静态菜单渲染。实际完整代码详见项目,以下为BasicLayout组件:
import React from "react";import { Layout } from "antd";import SiderMenu from "../SiderMenu";import MainHeader from "../MainHeader";import MainFooter from "../MainFooter";import "./style.less";const BasicLayout = ({ route, children }) => {return (<Layout className="main-layout">{/* 左侧菜单导航 */}<SiderMenu routes={route.childRoutes} /><Layout className="main-layout-right">{/* 顶部展示布局 */}<MainHeader></MainHeader><Layout.Content className="main-layout-content">{/* 实际页面布局 */}{children}{/* <MainFooter></MainFooter> */}</Layout.Content></Layout></Layout>);};export default BasicLayout;
对于登录页等页面无需套在上面的基本布局之类,需要单独处理(菜单配置在BasicLayout配置之前)。
待完善项:
- 完善
ESLint+ prettier规范化团队代码风格; - 引入TypeScript及配置;
- 根据实际场景提取公共模块、组件;
最后
书写不易,觉得还不错、有帮助的童鞋,欢迎多多star;

若有收获,就点个赞吧
0 人点赞
