第一步:换源
换源!换源!换源!
(简单粗暴地理解就是去国外网站下载东西太慢了,国内的镜像站把要去国外网站下载的东西搬到国内,然后我们去国内下载,就快很多了)
备份:mv /etc/apt/sources.list /etc/apt/sources.list.backup
编辑sources.list文件:vim /etc/apt/sources.list
往里边写入国内的源:(由于使用的华为云学生机ubuntu18.04,arm架构,注意要用ubuntu-ports/bionic,bionic表示是18.04)
deb https://mirrors.ustc.edu.cn/ubuntu-ports/ bionic main restricted universe multiversedeb-src https://mirrors.ustc.edu.cn/ubuntu-ports/ bionic main restricted universe multiversedeb https://mirrors.ustc.edu.cn/ubuntu-ports/ bionic-updates main restricted universe multiversedeb-src https://mirrors.ustc.edu.cn/ubuntu-ports/ bionic-updates main restricted universe multiversedeb https://mirrors.ustc.edu.cn/ubuntu-ports/ bionic-backports main restricted universe multiversedeb-src https://mirrors.ustc.edu.cn/ubuntu-ports/ bionic-backports main restricted universe multiversedeb https://mirrors.ustc.edu.cn/ubuntu-ports/ bionic-security main restricted universe multiversedeb-src https://mirrors.ustc.edu.cn/ubuntu-ports/ bionic-security main restricted universe multiversedeb https://mirrors.ustc.edu.cn/ubuntu-ports/ bionic-proposed main restricted universe multiversedeb-src https://mirrors.ustc.edu.cn/ubuntu-ports/ bionic-proposed main restricted universe multiverse
更新源:apt update
这里出现了一个问题:有别的进程在进行apt操作,锁住了这个文件,所以没法更新
解决:”ps aux | grep apt“查看哪些进程在进行apt操作,然后kill这些进程,使用kill -9 pid命令,-9表示进程无论如何都要退出。
然后再次执行apt update,就可以了 。
第二步:安装nginx
安装nginx:apt install nginx
启动nginx:systemctl start nginx
使用浏览器输入服务器ip,看到一下页面,说明nginx安装成功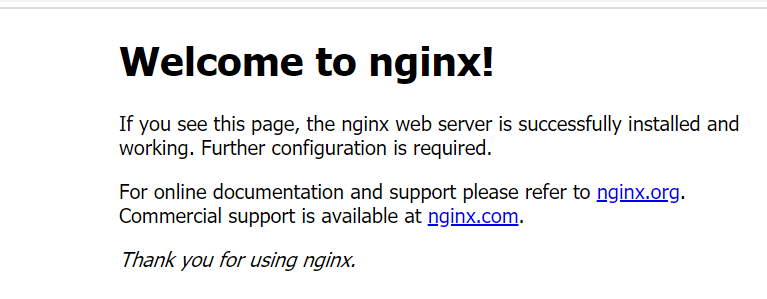
第三步:安装mySQL
apt install mysql-server mysql-client
第四步:安装PHP
安装PHP7.2:apt install php7.2 php7.2-fpm php7.2-mysql
(这里装了三个东西,php、php-fpm、php-mysql,简单粗暴地理解就是php-fpm用来把php与nginx关联起来,php-mysql用来把php与mysql关联起来)
第五步:配置Nginx解析PHP
修改默认的配置文件:vim /etc/nginx/sites-available/default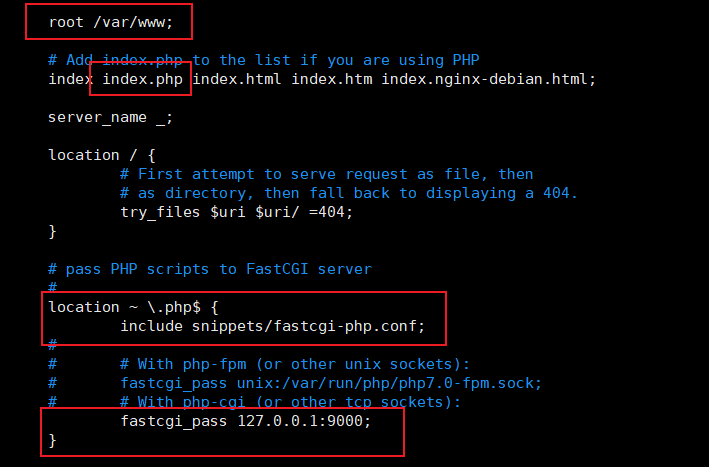
(查看snippets/fastcgi-php.conf可以知道这个配置文件的功能为为nginx与php通信做一些参数以及检查通信条件等准备,fastcgi_pass 127.0.0.1:9000表示把请求发送到本机的9000端口,fastcgi为一个协议,php与nginx通信使用的协议)
重启nginx:systemctl restart nginx
修改php相关配置文件:vim /etc/php/7.2/fpm/pool.d/www.conf
(修改php相关文件让php监听本机9000端口,所以nginx向9000端口发送请求之后会被php接收)
重启php-fpm:systemctl restart php7.2-fpm
往/var/www中写入info.php文件,文件内容如下: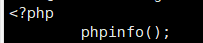
然后浏览器访问ip/info.php,看到一下页面,说明配置成功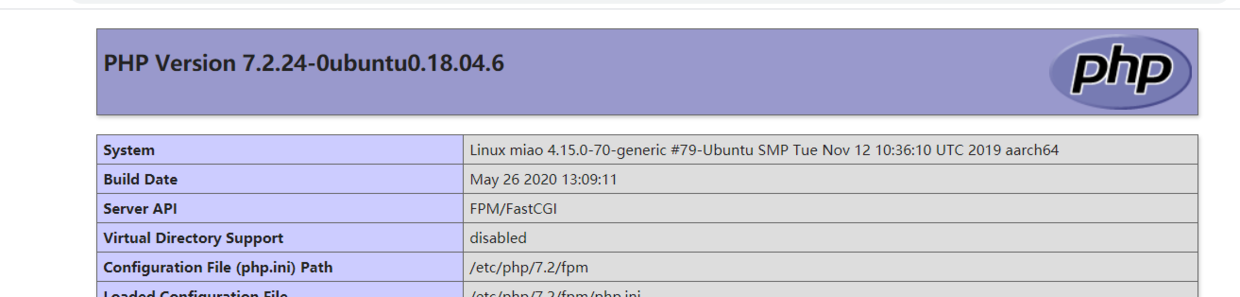
第六步:配置laravel环境
安装composer:(composer是php的一个包管理器)php -r "copy('https://install.phpcomposer.com/installer', 'composer-setup.php');"
(-r表示run后面的命令,下载安装脚本composer-setup.php到当前目录)php composer-setup.php
(安装composer)php -r "unlink('composer-setup.php');"
(删除安装脚本)
查看当前文件夹可以发现多了一个composer.phar文件,这个文件为composer的执行命令文件,然后将composer.phar文件移动到/usr/local/bin/目录下,并改名为composer(即将composer安装到系统环境变量path路径下,就可以在任意路径下执行composer命令了):mv composer.phar /usr/local/bin/composer
修改composer的镜像源(配置全局生效):composer config -g repo.packagist composer [https://mirrors.aliyun.com/composer/](https://mirrors.aliyun.com/composer/)
使用composer在/var/www/目录下创建laravel项目:cd /var/wwwcomposer create-project laravel/laravel laravelTest
出现了下面问题: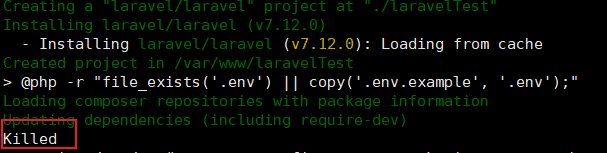
解决:内存不足,添加swap分区:
使用dd命令,来创建大小为2G的文件swapfile:dd if=/dev/zero of=/swapfile bs=1M count=2048
(if为input_file,of为output_file,bs为block_size,count为块的数目)
格式化交换文件: mkswap /swapfile
启动交换文件:swapon /swapfile
删除刚刚下载的laravelTest,重新下载,出现下面问题:
缺少相关扩展,安装:apt install php-mbstring
删掉刚刚下载的laravelTest然后重新下载,缺少了另一个扩展: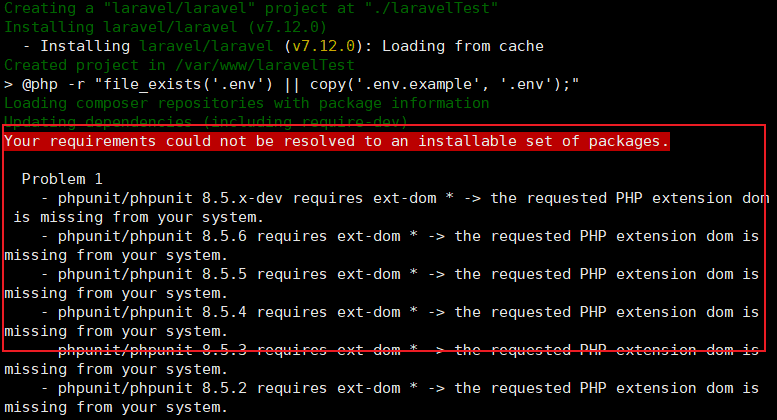
安装:apt install php-xml
删掉刚刚下载的laravelTest,重新下载,可终于好了。
接着配置nginx 虚拟主机
打开配置文件要放的位置:cd /etc/nginx/sites-available/
先复制默认的配置文件:cp default laravelTest.conf
(前边第五步已配置nginx解析php)
编辑laravelTest项目配置文件:vim laravelTest.conf
(把监听端口改为8080,访问的根改为laraverTest项目的入口)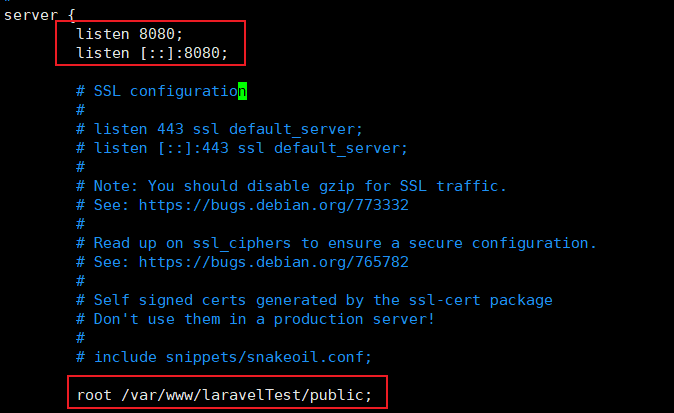
增加配置文件的软链接:ln -s /etc/nginx/sites-available/laravelTest.conf /etc/nginx/sites-enabled/laravelTest.conf
(因为nginx.conf中include的是/etc/nginx/sites-enabled/目录下的文件,所以真正起作用的是该目录下的文件,但是配置文件放在/etc/nginx/sites-available/目录下,所以需要建立软链接,如果某个配置文件不需要了,直接断开它的软链接就可以了)
重启nginx:systemctl restart nginx
访问ip:8080,出现以下问题: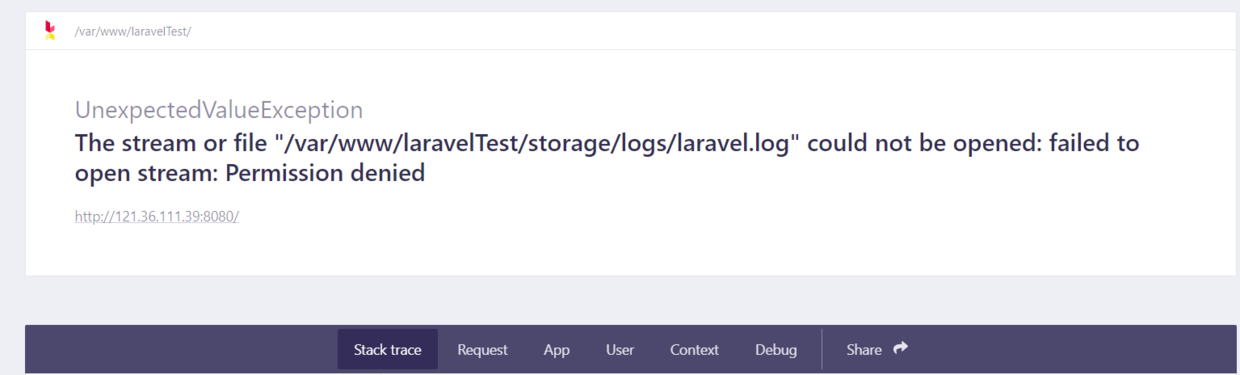
可以看到为某个文件权限不够,修改该文件的权限:chmod -R 777 /var/www/laravelTest/storage,再次访问ip:8080,出现以下页面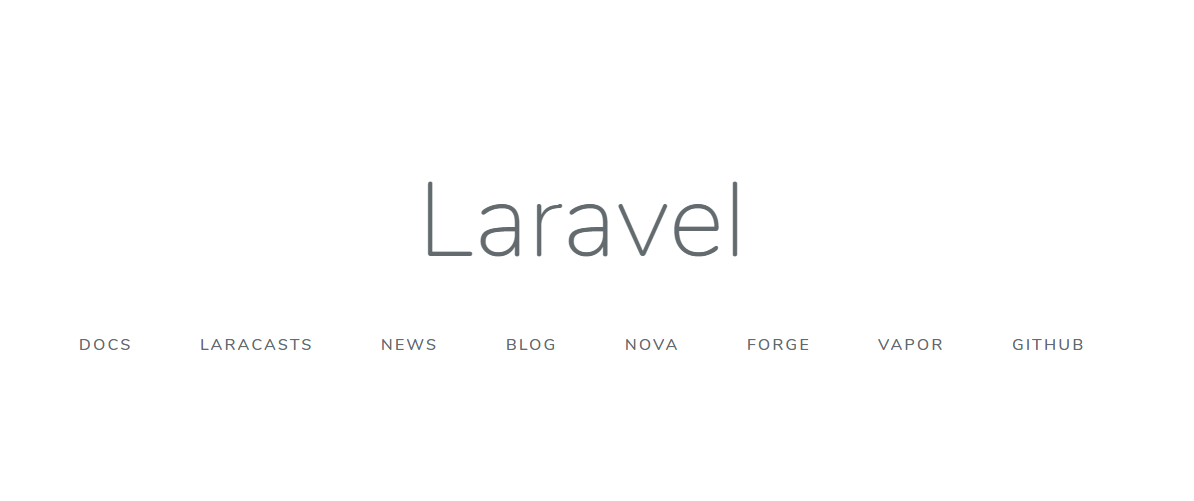
恩可以了!

若有收获,就点个赞吧
0 人点赞
